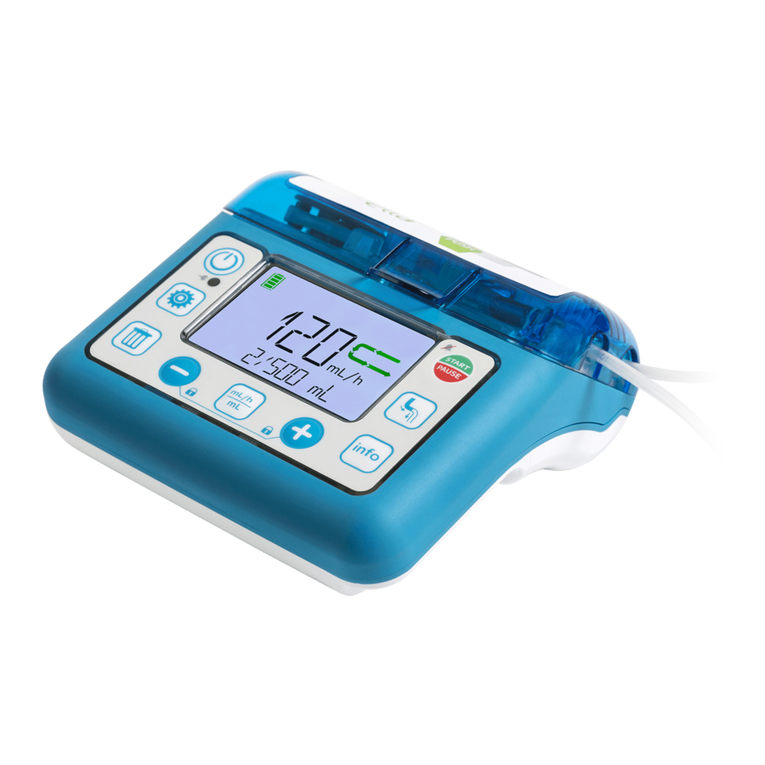
Compat Ella User manual

2
5 1.
3.
5.
2.
4.
Axium Mtech S.A.
Allée de la Petite Prairie 4, 1260 Nyon, Switzerland
® Unless stated otherwise, all trademarks are owned by Axium MTech S.A. or used with permission.
www.compat.com
02MAR2020
12367032
12272020
P001T080_00
AT
BE
Nestlé Österreich GmbH
Nestlé Health Science
Wiedner Gürtel 9, A
1100 Wien
SA Nestlé Belgilux NV
Rue de Birminghamstraat 221
Bruxelles 1070 Brussel
Belgique
CH
DE
Nestlé Suisse S.A.
Nestlé Health Science
Entre-Deux-Villes, P.O. Box 352
1800 Vevey
Suisse
Infoline: 0848 000 303
ES
Nestlé Health Science
(Deutschland) GmbH
60523 Frankfurt
Deutschland
Nestlé España, S.A.
Carrer Clara Campoamor, n° 2
08950 Esplugues de Llobregat
Barcelona
España
FR
IT
Nestlé Health Science France
7, Boulevard Pierre Carle
77186 Noisiel
France
NL
Nestlé Italiana S.p.A.
Via del Mulino n. 6
20090 Assago (MI)
Italia
Num. Verde: 800-434434
SE
Nestlé Nederland b.v.
Vestiging Oosterhout,
Hoevestein 36G
4903 SC Oosterhout
Nederland
Tel: 0800-637 85 34
ecneicShtlaeHéltseN
Nestlé Sverige AB
250 07 Helsingborg
Sverige
Tel: 020-780020
Enteral feeding pump
EN
EN English Instructions for Use Page
Language index Loading the Cassette

3
C
A
B
E
D
G
H
I
F
J
J
K
M
N
O
L
P
QR
R
L
LS
T
U
V
K
Q
4
Pump and Accessory Overview AC Adapter Pole Clamp Administration Set

3
C
A
B
E
D
G
H
I
F
J
J
K
M
N
O
L
P
QR
R
L
LS
T
U
V
K
Q
4
Pump and Accessory Overview AC Adapter Pole Clamp Administration Set

Table of Contents
1. Introduction --------------------------------------------------------------- 6
1.1 Intended Use -------------------------------------------------------------- 6
1.2 Support --------------------------------------------------------------------- 6
2. Safety Information ------------------------------------------------------- 6
2.1 Warnings and Precautions ---------------------------------------------- 6
2.2 Contraindications --------------------------------------------------------- 7
2.3 General complications associated with enteral tube feeding ----- 8
2.4
Specific precautions related to the compatible sets and nutrition
----
8
3. System Overview--------------------------------------------------------- 9
3.1 Pump (see pages 4-3) ---------------------------------------------------- 9
3.2 Administration Set (see page 4) ---------------------------------------- 9
3.3 Button Function ----------------------------------------------------------- 9
3.4 Display --------------------------------------------------------------------- 10
3.5 Battery --------------------------------------------------------------------- 11
4. Pump Mode Overview (Continuous vs. Interval) ------------------- 12
4.1 Continuous Mode: Menu Overview ------------------------------------- 13
4.2 Interval Mode: Menu Overview ----------------------------------------- 13
5. Clear Nutritional Therapy Settings and Delivery Information---14
6. Pump Setup --------------------------------------------------------------- 14
6.1 Connect to the AC power adapter -------------------------------------- 14
6.2 Use with a pole clamp --------------------------------------------------- 14
6.3 Power On and Off --------------------------------------------------------- 15
6.4 Inserting the Administration Set --------------------------------------- 15
6.5 Filling the Administration Set (Priming) ------------------------------ 16
7. Quick Start Guides ------------------------------------------------------- 17
7.1 Continuous Mode Feeding ---------------------------------------------- 17
7.2 Interval Mode Feeding --------------------------------------------------- 17
8. Feeding in Continuous Mode------------------------------------------- 18
9. Feeding in Interval Mode ----------------------------------------------- 19
10. Pausing a Nutritional Therapy----------------------------------------- 21
11. Delivery Information ---------------------------------------------------- 22
11.1 View/Clear Delivery Information in Continuous Mode -------------- 22
11.2 Rolling -30day Volume History ----------------------------------------- 22
11.3 View/Clear Delivery Information in Interval Mode ------------------- 23
12. User Settings ------------------------------------------------------------- 24
12.1 Alarm level, Backlight, Autodim,
End of Nutritional Therapy Alarm -------------------------------------- 24
12.2 Changing the Language ------------------------------------------------- 25
13. Locking and Unlocking the Keypad ----------------------------------- 25
14. Advanced Settings ------------------------------------------------------- 26
15. Alarms & Troubleshooting --------------------------------------------- 27
15.1 Alarm Handling ----------------------------------------------------------- 27
15.2 Alarm Overview and Troubleshooting --------------------------------- 28
16. Cleaning & Disinfection ------------------------------------------------- 30
17. Maintenance -------------------------------------------------------------- 31
18. Accessories --------------------------------------------------------------- 31
19. Limited Warranty -------------------------------------------------------- 32
20. List of Symbols ----------------------------------------------------------- 32
21. 6SHFLȌFDWLRQV ------------------------------------------------------------- 33
22. Recycling and Disposal-------------------------------------------------- 34
®Pump
EN
5
C
M
Y
CM
MY
CY
CMY
K

1. Introduction
Compat Ella®is a small, lightweight and portable rotary peristaltic pump used to deliver programmed amounts of enteral tube feed at selectable delivery rates to
the gastrointestinal system. The pump should be used only after proper training regarding care, use and maintenance of the Compat Ella®pump and accessories.
1.1 Intended Use
The Compat Ella®enteral feeding pump is intended to be used for the delivery of enteral tube feed and hydration at controlled rates to the gastrointestinal
system. It is intended for use with adult and pediatric patients requiring enteral feeding and hydration in hospital, nursing home and home care environments.
1.2 Support
If you need help with the Compat Ella®pump, please contact your sales representative or go to www.compat.com.
2. Safety Information
Read the entire Manual before operating the Compat Ella®pump.
Read the entire administration set IFU (Instructions for Use) before installing an administration set in the Compat Ella®pump.
Warning: Describes a hazard or unsafe practice that if not avoided can result in severe bodily injury, death or property damage.
Precaution: Describes a hazard or unsafe practice that if not avoided can result in minor bodily injury or mainly property damage.
Note: Describes something that is more important than the rest of the text.
2.1 Warnings and Precautions
Warnings:
• Not for intravenous use. For enteral use only.
• If pump is damaged or altered, do not use it.
• Make sure power cord plug is completely dry before and during use.
• Do not attempt to attach the “country specific” AC adapter to AC power without it attached to the AC adapter body.
• Do not use in the presence of flammable anesthetics or other flammable gases (including enriched oxygen environments), near flammable fluids or objects,
or in the presence of oxidizing agents.
• During pump start up, confirm all the screen segments are visible. If any are missing or if the screen is not readable, do not use the pump.
• When turning the pump on, if you do not hear the tones, do not use the pump.
• Use only prescribed enteral tube feed supplied by a qualified healthcare professional and hydration fluids such as water, tea.
• Use only Compat Ella®administration sets.
• Inspect the Compat Ella®administration set. Do not use if damaged or altered.
EN
ѳ
C
M
Y
CM
MY
CY
CMY
K

• Always ensure appropriate, timely and regular patient monitoring, especially if an interruption of the tube feeding delivery may lead to a patient hazard.
• Replace the Compat Ella®administration set every 24 hours to maintain delivery accuracy and help prevent the growth of potential harmful contamination.
• Give particular attention to the risk of strangulation with cables and sets.
• Do not program Rate and Volume combinations that exceed 24 hours.
• Do not submerge the pump in water.
• Do not use in a dishwasher.
•To avoid electrical shock, never clean while the pump is on or plugged in.
• Do not autoclave.
• The use of harsh cleaners/disinfectants and isopropyl alcohol may damage the pump housing.
• Do not disassemble the pump, remove the labels or modify the device.
Precautions:
• Do not use in strong magnetic fields. e.g. MRI (Magnetic Resonance Imaging) environments.
• Ensure that the administration set is not connected to a patient when priming.
• Verify that the administration set is correctly installed, is connected to the nutrition container and is ready to prime.
• When programming a new therapy, make sure to clear the VOLUME GIVEN THIS THERAPY parameter.
• After starting a therapy, verify all therapy parameters (including rate, dose, and volume given this therapy).
• The battery capacity is an estimate. If you are unsure that enough capacity remains for your intended use, connect to the AC power until recharged.
• The advanced settings should only be adjusted by a qualified healthcare professional.
2.2 Contraindications
The Compat Ella®Pump should not be used:
• If enteral feeding is contraindicated;
• For the administration of intravenous infusions.
• With sets other than “Compat Ella®” administration sets
• If intestinal obstruction
• If ileus (Inability of the intestine to contract normally/ move waste out of the body)
• If high output small bowel fistula
• If high doses positive inotropic agents
• Enteral feeding can be given in the presence of gut obstruction or when there is a high output small bowel enterocutaneous fistula
• If enterocutaneous fistula
EN
Ɠ
C
M
Y
CM
MY
CY
CMY
K

2.3 General complications associated with enteral tube feeding
Mechanical complications
• Tube obstruction
• Primary malposition
• Perforation of the intestinal tract
• Secondary displacement of the feeding tube
• Knotting of the tube
• Accidental tube removal
• Breakage and leakage of the tube Leakage and
bleeding from insertion site
• Erosion, ulceration and necrosis of skin and mucosa
• Intestinal obstruction (ileus)
• Hemorrhage
• Inadvertent IV infusion of enteral diet
Infectious complications
• Infection at the tube insertion site
• Aspiration pneumonia
• Nasopharyngeal and ear infections
• Peritonitis
• Infective diarrhea
Metabolic complications
• Electrolyte disturbances
• Hyper- and hypoglycemia
• Vitamin and trace element deficiency
• Tube feeding syndrome (“Refeeding syndrome”)
2.4 Specific precautions related to the compatible sets and nutrition
Due to the diversity of nutritional solutions used, which have a wide range of characteristics (i.e. density, viscosity, quantity of dissolved gasses, rheology,
particles, temperature, individualized nutrition preparation), in certain circumstances the performance of the pump may be limited, due to occlusion of the
feeding set or tube. In all circumstances such an incident will be detected by the Compat Ella®pump and will trigger an occlusion alarm.
We recommend only using the Compat Ella®pump with timely and regular patient monitoring, especially in sensitive patient population where an interruption of
the nutrition delivery may lead to a patient hazard.
Therefore, when Compat Ella®pumps are used to feed patients who require a constant supply of nutrition (for whom the disruption of food supply can lead
to critical situations), it is necessary to only use commercially available enteral nutritional solutions prepared as described by the manufacturer, use of com-
patible sets and appropriate and regular monitoring food administration.
EN
Ѵ
C
M
Y
CM
MY
CY
CMY
K

3. System Overview
3.1 Pump (see pages 3-4)
A
Pump door
B
Door latch
C
Pump rotor
D
Keypad
E
AC power status light
F
Colour display
G
Upstream pressure sensor
H
Downstream pressure sensor
I
Air sensor
J
Rubber foot pad
K
AC power connection
L
Pole clamp fitting
M
Rear pump label with Quick Start Guide
N
Loudspeaker
O
Serial number label
P
Legal manufacturer label
Q
AC power adapter
R
Pole clamp
3.2 Administration Set (see page 4)
S
ENPlus connector
U
ENFit®Medication port
T
Cassette
V
ENFit® Distal end
Note: Different versions of the administration sets are available. To obtain further information please contact your sales representative or go to
www.compat.com.
3.3 Button Function
The pump always retains in memory the on-screen settings and values when scrolling from one screen to the next, as well as when the pump is turned off.
Button Primary Function Secondary Function
Turn pump on or off (hold 2 seconds (2”))
Start / Pause pump Snooze alarm
Auto-prime (hold 2 seconds (2"))
Press again to stop auto-prime early
Scroll through rate, volume and interval programming Switch between continuous and Interval modes
(hold 5 seconds (5”))
Decrease and increase values (hold: accelerates speed) Lock and unlock keypad (press both buttons together)
EN
Ɣ
C
M
Y
CM
MY
CY
CMY
K

Clear the on-screen value to default or 0 Reset all program values to default and clear recent feed
history (hold button 3 seconds (3”))
Scroll through recent feed history Access last rolling 30-day Volume History
(hold button 2 seconds (2”))
Scroll through pump settings Change language (See section 12.2)
Precaution: Ensure that the administration set is not connected to a patient when priming.
3.4 Display
Warning: During pump start up, confirm all the screen segments shown in the diagram hereafter are visible. If any are missing or if the screen is not
readable, do not use the pump.
Screen Layout
The Compat Ella®pump features a colour display with alphanumeric characters, symbols and a backlight.
1
Battery charge level
2
Plugged into AC power
3
Keypad locked
4
Interval mode activated
5
Tube feed container empty / Air In Line
6
Alarm indicator
7
Run icon with occlusion indicators: the arrow segments light sequentially when the pump
is running.
8
Main info line: displays alpha numerical values for programming and alarms.
9
Main info label: mL, h, or mL/h.
10
Text message line: provides miscellaneous info on pump status, programming and alarms.
Note: The backlight of the display turns off 10 seconds after the last key is pressed unless the pump is plugged into the AC power and the Autodim feature
is deactivated.
1
10
87
9
2 3 4 5 6
EN
Ǝƍ
C
M
Y
CM
MY
CY
CMY
K

Colour Screen Overview
The pump screen uses different colours to help distinguish pump status and on-screen information.
12O
SET RATE
12O
1OO/5OO mL NO FLOW IN
THIS THERAPY
5O
VOLUME GIVEN
3
BEEP LEVEL
Programming information:
black characters
Normal operating conditions:
green icons with black
characters
Alarms:
red characters and icons
Information:
blue characters
Settings:
green characters
Note: When the backlight is dimmed, all on-screen information is shown in black.
Default / Run Screen Overview
When the pump is running normally, the following screen will be shown:
1. The sequentially-appearing green arrows show that the pump is currently running a programmed nutritional therapy.
2. The 120 mL/h shows the rate the pump is running in mL/h.
3. The 100/500 mL shows that 100 mL has been given out of the 500 mL programmed volume. If /CONT is displayed,
this means no volume limit has been set and the pump will run continuously until the tube feed runs out.
4. The battery is fully charged and is plugged into the AC power.
Note: Compat Ella®only pumps fluid a little at a time. Normal function is to pump fluid for a while, then stop pumping fluid and then start pumping fluid
again. This means that you will not hear the motor running all the time. The sequentially-appearing green arrows are continually shown, which
means that the pump is functioning correctly.
3.5 Battery
First Use: Plug in the pump and fully charge the battery for a minimum of 6 hours before using the pump on battery power only.
This will maximize the charge and life of the battery.
Battery capacity: 24 hours at 125 mL/h.
Recharge: approximately 6 hours from fully depleted to fully charged.
12O
1OO/5OO mL
EN
ƎƎ
C
M
Y
CM
MY
CY
CMY
K

Battery Charge Indicators
Battery Fully Charged
Battery Partially Charged
Pump on External Power
Battery Charging
Precaution: The battery capacity is an estimate. If you are unsure that enough capacity remains for your intended use, connect to the AC power until
recharged.
4. Pump Mode Overview (Continuous vs. Interval)
The Compat Ella®portable enteral feeding pump has two operational modes: Continuous and Interval.
Continuous Mode
Continuous mode is used to deliver tube feed at defined rates, with or without a volume limit.
Interval Mode
Interval mode allows a defined bolus to be delivered multiple times during the day at programmed intervals, with or without a total volume limit. An Interval
is the time from the start of one bolus to the start of the next bolus.
Switch Between Continuous and Interval Modes
Button Direction / Result
5”
To change between operating modes, press and hold for 5 seconds (5”).
A specific icon shows that Interval mode is activated.
A message will appear confirming activation or de-activation.
ACTIVATED
INTERVAL MODE
Note: A qualified healthcare professional must enable the use of the interval mode. (See advanced settings)
EN
ƎƏ
C
M
Y
CM
MY
CY
CMY
K

4.1 Continuous Mode: Menu Overview
Press to scroll through SET RATE and SET VOLUME.
Pressing again cycles back to SET RATE
Button Device Display Function
SET RATE
The delivery speed in mL / h at which the
pump will run.
• Rate may be set from 1-600 mL / h in
1 mL / h increments.
• Default value 0 mL /h
SET VOLUME
The volume of tube feed to be given, in
mL.
• Volume may be set from 1-4000 mL in
1 mL increments.
• Default value: CONT*
SET RATE Return to SET RATE screen
Note:
• Both RATE and VOLUME must be set / reviewed if either one is
changed or the pump has just been turned on. Only then can the pump
be started.
*Continuous: no feeding volume has been set. The pump will run
continuously until the formula runs out.
4.2 Interval Mode: Menu Overview
Press to scroll through SET RATE and SET BOLUS, SET INTERVAL
and SET TOTAL VOLUME. Pressing again cycles back to SET RATE
Button Device Display Function
SET
RATE
The delivery speed in mL/h at which the
pump will run.
• Rate may be set from 1-600 mL/h in
1 mL/h increments.
• Default: 0 mL/h
SET
BOLUS
The bolus volume of tube feed to be
given before each interval pause, in mL.
• Bolus volumes may be set from 1-2000
mL in 1mL increments.
• Default: 0 mL
SET
INTERVAL
The interval between start of one bolus
and start of the next bolus.
• Interval may be set from 00:15-12:00 h
in 15-minute increments. The minimum
interval possible may be greater than
00:15 depending on rate and bolus val-
ues entered in previous steps.
• Default: 00:15 h
SET
TOTAL
VOLUME
The total volume in mL to be given
during the entire nutritional therapy.
• Total volume may be set from 1-4000
mL in 1mL increments.
• Default value: CONT*
SET
RATE Return to SET RATE screen
EN
ƎƐ
C
M
Y
CM
MY
CY
CMY
K

Note: RATE, BOLUS, INTERVAL and TOTAL VOLUME must all be set / reviewed if either one is changed or the pump has just been turned on.
Only then can the nutritional therapy be started.
5. Clear Nutritional Therapy Settings and Delivery Information
Button Direction / Result
3”
Hold down for 3 seconds (3”) to clear all nutritional therapy settings.
• Nutritional therapy values cleared to default: RATE, VOLUME, BOLUS, INTERVAL, TOTAL VOLUME
• Volume history values cleared to default: VOLUME GIVEN THIS THERAPY, CUMULATIVE VOLUME
• The pump displays a THERAPY RESET confirmation message.
Note: This does not affect any other pump settings (such as alarm level, backlight etc.), language or rolling 30-day volume history.
6. Pump Setup
6.1 Connect to the AC power adapter
See pump and accessories overview (page 4)
The AC power adapter is delivered with multiple country-specific adapters. To change the country specific adapter, press the button on the AC power adapter
and rotate country specific adapter to release it. Install the new country specific adapter and rotate until you hear a click.
Warning: Do not attempt to attach the “country specific” AC adapter to AC power without it attached to the AC power adapter body.
6.2 Use with a pole clamp
See pump and accessories overview (page 4)
EN
ƎƑ
C
M
Y
CM
MY
CY
CMY
K

6.3 Power On and Off
Button Direction / Result
2”
Power On
Press and hold for 2 seconds (2”) to power on. You should hear 3 tones. The pump will first display all screen segments
briefly. Ensure that all the segments are visible. The pump will then perform a diagnostic and, if successful, will display
SELF CHECK OK.
Power Off
Press and hold 2 seconds (2”) to power off. You should hear 3 tones as the pump shuts down.
Note: All nutritional therapy parameters, volume history and user settings are retained in the pump’s memory for re-use when
the pump is next turned on.
Warning: When turning the pump on, if you do not hear the tones or do not see all the screen segments, do not use the pump. Contact your sales representa-
tive or an approved service provider.
Power Status Light
Solid green = Pump is plugged into the AC power.
6.4 Inserting the Administration Set
Warnings:
• Use only Compat Ella®administration sets.
• Inspect the Compat Ella®administration set. Do not use if damaged or altered.
• Replace the Compat Ella®administration set every 24 hours to maintain delivery accuracy and help prevent the growth of potential harmful contamination.
Loading the Cassette
See sequence on page 2 to load set into the pump.
Fig. 1: open door by lifting the thumb tab
Fig. 2, 3: wrap cassette loop around rotor. Note the arrow which shows correct orientation
Fig. 4, 5: using your thumb, slide the cassette to the right to clip the cassette in the pump
Fig. 6: close the door by pressing on the “PUSH” symbol.
Note: Compat Ella®Administration Sets are equipped with a patented Auto-Anti-Free-Flow (AAFF) mechanism, which is always active when needed.
The AAFF mechanism is only released when the cassette is inserted in the pump and the door is closed.
EN
Ǝƒ
C
M
Y
CM
MY
CY
CMY
K

EN
6.5 Filling the Administration Set (Priming)
Priming fills the administration set with tube feed.
Precautions:
• Before priming, always verify that the administration set is not connected to the patient.
• Verify that the administration set is correctly installed, is connected to the nutrition container and is ready to prime.
Auto-prime
Auto-prime should always be used if possible.
Button Direction / Result
2”
Press and hold for 2 seconds (2”) to prime automatically.
While priming, the pump displays the run icon together with a PRIMING message.
You may stop auto-prime at any time by pressing again.
Notes:
• The pump is programmed to automatically deliver a pre-set volume of tube feeding to prime the tubing.
• Once the pre-set volume of tube feeding has been given, the pump stops automatically and displays END OF PRIMING.
• When prime is complete, the tubing should be checked to ensure that the tubing is completely filled. If additional priming is required, the auto-prime can be
repeated.
• The air detection alarm is disabled during priming.
Manual Prime
If the auto-prime function is unwanted, manual priming can be performed.
Gently pinch the tubing on the cassette as shown and hold this position
until all air is removed from tubing. If needed, gently squeeze and tilt
container at the same time to assist fluid flow. If fluid does not flow, the
pinch pressure may be too strong.
Note:
• It is important to only gently pinch the tubing above the symbol to
avoid damaging the Auto-Anti-Free-Flow mechanism located under-
neath. Use only the flat, soft part of your finger. Do not use fingernails
as this may puncture the tubing.
• High viscosity feeds may not flow effectively using the manual priming
method and should be primed using the pump auto-prime function
EN
Ɛѵ
C
M
Y
CM
MY
CY
CMY
K

7. Quick Start Guides
7.1 Continuous Mode Feeding
Step Button Function
1
2”
Turn the pump on
2Review the VOLUME GIVEN THIS THERAPY
3Clear the VOLUME GIVEN THIS THERAPY
4
2”
Prime the administration set
5Use and to SET RATE
1 – 600 mL/h
6Use and to SET VOLUME
1 – 4000 mL / CONT*
7Start the nutritional therapy
*Continuous: no feeding volume has been set. The pump will run
continuously until the formula runs out.
Precautions:
• When programming a new therapy, make sure to clear the VOLUME
GIVEN THIS THERAPY parameter.
• After starting a therapy, verify all therapy parameters (including rate,
dose, and volume given this therapy).
7.2 Interval Mode Feeding
Step Button Function
1
2”
Turn the pump on
2Review the VOLUME GIVEN THIS THERAPY
3Clear the VOLUME GIVEN THIS THERAPY
4
2”
Prime the administration set
5Use and to SET RATE
1 – 600 mL/h
6Use and to SET BOLUS
1 – 2000 mL
7Use and to SET INTERVAL
0:15 h – 12:00 h
8Use and to SET TOTAL VOLUME
to be given 1 – 4000 mL /CONT*
9Start the nutritional therapy
EN
ƎƓ
C
M
Y
CM
MY
CY
CMY
K

EN
8. Feeding in Continuous Mode
Continuous mode is used to deliver tube feed at defined rates, with or without a volume limit.
Step Button Function Instruction
1
2”
Turn the pump on
The most recent nutritional therapy settings are always saved in memory. When pow-
er is turned on, the display shows the last programmed flow rate and volume and the
actual volume given.
Load the administration set in the pump
2Review the volume given
this therapy Press and review the VOLUME GIVEN THIS THERAPY.
3Clear the volume given
this therapy
If desired, press to clear the VOLUME GIVEN THIS THERAPY.
Note: This should always be done when starting a new nutritional therapy.
4
2”
Prime the administration
set
• Hold 2 seconds (2”) to activate auto-prime. The pump will fill the administration set
with a predetermined volume.
• Press again to stop priming at any time.
Note: Do not prime when connected to the patient’s feeding tube.
5Set the rate
Press to access the SET RATE screen and use and to define the rate of
tube feed delivery.
• The rate may be set from 1-600 mL/h in 1 mL/h increments.
Note: Press to reset value.
6Set the volume
Press to scroll to the SET VOLUME screen and use and to define the amount
of tube feed to be delivered.
• Feeding with a dose limit: The value may be set from 1-4000 mL in 1 mL increments.
• Continuous feeding without volume limit: Set the value to CONT (Continuous), the
pump will run continuously until the nutrition container is empty.
Note: Press to reset value.
EN
ƎѴ
C
M
Y
CM
MY
CY
CMY
K

EN
Ensure nutritional therapy settings correspond to the nutritional therapy prescribed.
Connect the administration set to the patient’s feeding tube.
7 Start the nutritional therapy Press to run the nutritional therapy. The pump will automatically run the
nutritional therapy and display the progress.
Precautions:
• When programming a new therapy, make sure to clear the VOLUME GIVEN THIS THERAPY parameter.
• After starting a therapy, verify all therapy parameters (including rate, dose, and volume given this therapy).
Notes:
• Holding or changes values rapidly:
• When setting rate, the value will pause at 1, 50, 125, 250, 600 mL/h.
• Total Volume will also pause at 1, 125, 250, 500, 750, 1000, 1250, 1500, 2000 and 4000 mL.
• When at maximum value, pressing again will go to the minimum value and vice versa e.g. rate from 600 mL/h to 1 mL/h.
• The pump will sound the alarm when a programmed volume is completely given or the nutrition container runs out. The END OF THERAPY alarm may
be temporarily deactivated (see 12.).
• Patients sensitive to nutrition delivery should be monitored closely at all times.
9. Feeding in Interval Mode
Interval mode is used to deliver multiple bolus volumes at regular intervals, at defined rates, with or without a volume limit.
Step Button Function Instruction
1
2”
Turn the pump on
The most recent nutritional therapy settings are always saved in memory. When power
is turned on, the display shows the last programmed flow rate and volume and the
actual volume given.
Load the administration set in the pump
2Review the volume given
this therapy Press and review the VOLUME GIVEN THIS THERAPY.
3Clear the volume given
this therapy
If desired, press to clear the VOLUME GIVEN THIS THERAPY.
Note: This should always be done when starting a new nutritional therapy.
EN
ƎƔ
C
M
Y
CM
MY
CY
CMY
K

4
2”
Prime the administration
set
• Hold 2 seconds (2”) to activate auto-prime. The pump will fill the administration set
with a predetermined volume.
• Press again to stop priming at any time.
Note: Do not prime when connected to the patient’s feeding tube.
5Set the rate
Press to access the SET RATE screen and use and to define the rate of tube
feed delivery.
• Rate may be set from 1-600 mL/h in 1 mL/h increments.
Note: Press to reset value.
6Set the bolus volume
Press to scroll the SET BOLUS screen and use and to define the bolus
volume or the amount of tube feed to be given multiple times.
• Bolus may be set from 1-2000 mL in 1 mL increments
Note: Press to reset value.
7Set the interval
Press to scroll the SET INTERVAL screen and use and to define the time
from the start of one bolus to the start of the next bolus.
• Interval may be set from 00:15-12:00 h in 15-minutes increments.
• The minimum interval possible may be greater than 00:15 depending on rate and
bolus values entered in previous steps.
Note: Press to reset value.
8Set the total volume
Press to scroll the SET TOT VOLUME screen and use and to define the
total amount of tube feed to be given if desired.
• Feeding with a Dose Limit: The value may be set from 1 bolus programmed in step
6 to 4000 mL in 1 mL increments. The pump will run multiple bolus until the Total
Volume limit has been reached.
• Feeding without Dose Limit: Set the value to CONT (CONTINUOUS), the pump will
run multiple bolus until the nutrition container is empty.
Note: Press to reset value.
Ensure nutritional therapy settings correspond to the nutritional therapy prescribed.
Connect the administration set to the patient’s feeding tube.
9Start the Nutritional
Therapy
Press to run the nutritional therapy. The pump will automatically run the nutritional
therapy and display the progress.
EN
Əƍ
C
M
Y
CM
MY
CY
CMY
K
Other manuals for Ella
3
Table of contents
Other Compat Water Pump manuals
Popular Water Pump manuals by other brands

PYD Electrobombas
PYD Electrobombas V Series Operating and maintenance manual

Idex
Idex HALE FYR-PAK Operating and maintenance manual

EINHELL
EINHELL GE-GP 1246 N FS Original operating instructions

Grundfos
Grundfos SL1 Series Installation and operating instructions

Gardner Denver
Gardner Denver Elmo Rietschle V-VC 202 manual

STA-RITE
STA-RITE DURA-JET 5DJAFB-0001 owner's manual