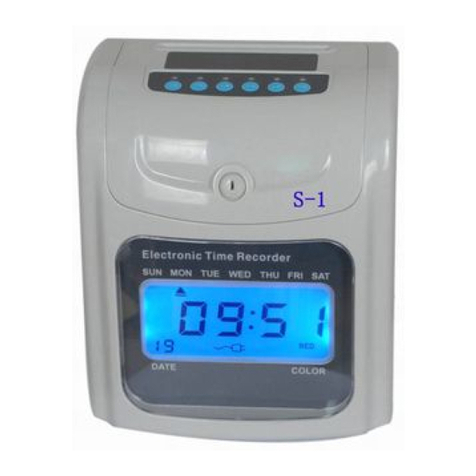
Computime S-210 User manual

Computime S-210
Electronic Time Recorder
Instruction Manual

CONTENTS
1. Introduction 3
1.1 Package content 4
1.2 Parts identification 4
1.3 Setting select ke 5
2. Function options 6
2.1 Quick codes’ selection 6
2.2 Detail codes’ selection 6
3. Be read for setting 7
4. Function setting 8
4.1 - 4.5 Setting of ear, month, date, hour, minute 8
4.6 Setting the regular time signal 8
4.7 Setting the date changing time 9
4.8 Setting the shifting time 9
4.9 Setting the 2 colors printing time 10
4.10 Setting the extension time signal 10
4.11 Adjusting printing position 10
4.12 Detecting front/back of time cards 10
4.13 Setting the Monthl , Weekl pa period ending da 11
4.14 Setting the S/W solstice start (month and da ) 12
4.15 Setting the S/W solstice start (hour and minute) 12
4.16 Setting the S/W solstice end (month and da ) 12
4.17 Setting the S/W solstice end (hour and minute) 12
5. All reset 13
6. Trouble shooting 13
7. Replacing ribbon cartridge 14
8. Cautions 14
9. Specifications 15
10. Error Code 15
- 2
-

1. Introduction
In order to operate our time recorder accuratel and efficientl with a longer
product life, please read this manual thoroughl .
Models
Functions
LCD
nalogue
LCD Display
*
Clock
Face
*
Two color printing
*
*
Time Signal
*
*
Perpetual calendar
*
*
Back up battery
*
*
uto In-Out adjustment
*
*
External Signal Unit
*
*
Data memory backup
during
power
failure
*
*
Check time card's front or back
automatically. if insert the
wrong side, will quit by the
machine.
*
*
- 3
-

1.1 Package Contents
Unpack the time recorder and check its contents to ensure that the time
recorder unit and all accessories as shown below are included.
Time Recorder Instruction Manual ke
1.2 Parts identification
(a) Keypad
( )LCD on the top
- 4 -

1.3 Setting select ke
+
to increase the set value b 1
-
to decrease the set value b 1
Enter to save the set value & enter the next step
Back to backspace the set value
Clear to cancel the set value
Program switch Normal/ Programming
Batter Batter On/Off
Reset Reset
- 5
-

2. Function options
The function options will be started b unlocking and removing the lid from
the time recorder with the program switch to right side. Here are total 37 pcs
function codes, which are from “00, 01, 02…” to “ 37” , different code is for
different setting. In the case, press“Enter” to select the codes forward or
press “Back” to select backward for functions setting expected and, press
“+” to increase the value as well as press “-” to decrease the value.
2.1 Quick codes’ selection:
00-04---Setting the time (Year, Month, Date, Hour, Minute)
05-11---Setting the regular time signal
12-------Setting the da changing time
13-18---Setting the shifting time
19-24---Setting the 2-color printing
25-30---Setting the extension time signal
31-------Printing position adjustment (up/down)
32-------Detecting front/back of card
33-------Setting the Monthl ,Weekl pa period ending da
34-------Setting the S/W solstice start(month and da )
35-------Setting the S/W solstice start(hour and minute)
36-------Setting the S/W solstice end(month and da )
37-------Setting the S/W solstice end(hour and minute)
2.2 Detail codes’ selection:
Code
Functions
00
Setting the Year
01
Setting the Month
02
Setting the Date
03
Setting the Hour
04
Setting the Minute
- 6 -

05
Setting the Duration of time signal(Seconds)
06
Setting the time of 1
st
group of ringing
07
Setting the time of 2
nd
group of ringing
08
Setting the time of 3
rd
group of ringing
09
Setting the time of 4
th
group of ringing
10
Setting the time of 5
th
group of ringing
11
Setting the time of 6
th
group of ring
12
Setting the date changing time
13
Setting the time of shifting to 1
st
column
14
Setting the time of shifting to 2
nd
column
15
Setting the time of shifting to 3
rd
column
16
Setting the time of shifting to 4
th
column
17
Setting the time of shifting to 5
th
column
18
Setting the time of shifting to 6
th
column
19
Setting the time of 1
st
group of changing color(Red)
20
Setting the time of 2
nd
group of changing color(Black)
21
Setting the time of 3
rd
group of changing color(Red)
22
Setting the time of 4
th
group of changing color(Black)
23
Setting the time of 5
th
group of changing color(Red)
24
Setting the time of 6
th
group of changing color(Black)
25
Setting the time of 7
th
group of ringing
26
Setting the time of 8
th
group of ringing
27
Setting the time of 9
th
group of ringing
28
Setting the time of 10
th
group of ringing
29
Setting the time of 11
th
group of ringing
30
Setting the time of 12
th
group of ringing
31
Adjusting Printing position (up/down)
32
Detecting front/back of card
33
Setting the Monthl ,Weekl pa period ending da
34
Setting the S/W solstice start(month and da )
35
Setting the S/W solstice start(hour and minute)
- 7
-

Be
rea
dy
f
or
sett
ing
36
Setting the S/W solstice end(month and da )
37
Setting the S/W solstice end(hour and minute)
3.
1. Power Suppl
(1) Stable power source are highl recommended.
(2) Please check the correct voltage & power cord before uses.
2.
Top
Cover
Remove the top cover prior to set program or change the ribbon case
Open the Top Cover b using the ke provided and remove the top cover.
4. Function Setting
After removing the lid from the time recorder,
turn the program switch to right side to enter setting condition. Press “Enter” to
select the codes forward or press “Back” to select backward for functions
setting expected and, press “+” to increase the value or press “-” to decrease
the value and, press “Enter” to save the set value and start the next setting.
4
.1
Sett
ing
t
he
Year
Turn the program switch to right side, the Codes will begin
from “00”
(00 displa on the left corner indicates the program Code),
The digital displa reads 2006 indicates ear 2006,The ear
“06” flashes on the right of the digital displa , press the +
or – button to set the ear. Press Enter to register the setting.
4.2 Setting the Month
Press Enter or Back to enter the program Code 01,
press + or – button to set the month. Press Enter again to
register the setting value.
- 8
-

4.3 Setting the date
Press Enter or Back to enter the program Code 02,
press + or – button to set the da . Press Enter again to
register the setting value.
4.4 Setting the Hour
Press Enter or Back to enter the program Code 03,
Press + or – button to set the Hour. Press Enter again to
register the setting value.
4.5 Setting the Minute
Press Enter or Back to enter the program Code 04,
press + or – button to set the Minute. Press Enter again
to register the setting value.
4.6 Setting the regular time signal (0-99Seconds)
Press Enter or Back to enter the program Code 05,
Press + or – button to set time signal duration and the initial value (10
seconds) will appear.
The duration can be set from 0~99 seconds,
Press Enter again to register the setting value and enter code
06 so as to setting the time of 1
st
ringing
Press + or – button to set the Hour.
Press Enter again to register the setting value.
Press + or – button to set the Minute.
Press Enter again to register the setting value.
Doing the same as above to enter code 07, 08, 09, 10, 11
and complete the setting of 2
nd
, 3
rd
, 4
th
,5
th
, 6
th
ring times.
4.7 Setting the Date Change time
Press Enter or Back to enter the program Code 12,
- 9
-

p
r
e
s
s
+
or
–
butt
o
n
to
s
et
the
Hou
r
.
P
r
e
s
s
E
nt
e
r
ag
a
i
n to
r
eg
i
s
t
e
r the
s
ett
i
n
g
value.
press
+
or – button to set the Minute. Press Enter again to
register the setting value.
Note: The default is 00:00, the da and printing line will change to the next at
the time.
4.8 Setting the shifting time
Press Enter or Back to enter the program Code 13,
Press + or – button to set the Hour.
Press Enter again to register the setting value.
Press + or – button to set the Minute.
Press Enter again to register the setting value.
Doing the same as above to enter code 14, 15, 16, 17, 18
and complete the setting of 2
nd
, 3
rd
, 4
th
,5
th
, 6
th
shifting
times. The format below is for reference:
Print Column
1
2
3
4
5
6
Function
A.M. IN
A.M. OUT
P.M. IN
P.M.OUT
O.T. IN
O.T. OUT
4.9 Setting the 2-color printing
Press Enter or Back to enter the program Code 19,
Press + or – button to set the Hour.
Press Enter again to register the setting value.
Press + or – button to set the Minute.
Press Enter again to register the setting value.
Doing the same as above to enter code 20, 21, 22, 23, 24 and complete the
setting of 2
nd
, 3
rd
, 4
th
,5
th
, 6
th
change color times if necessar .
- 10
-

4
.
1
1
A
d
j
u
s
t
ing
prin
t
ing
po
s
i
t
ion
E
nte
r
+
E
nte
r
4.10 Setting the extension time signal
Press Enter or Back to enter the program Code 25,
Press + or – button to set the Hour.
Press Enter again to register the setting value.
Press + or – button to set the Minute.
Press Enter again to register the setting value, the 7
th
extension ringing time is set.
Doing the same as above to enter code 26, 27, 28, 29, 30 and complete the
setting of 8
th
, 9
th
, 10
th
, 11
th
, 12
th
extension ringing times.
Press
Press
Press
(Up/Down)
or Back to enter the program code 31,
or – button to set the printing position <0~5>
again to register the setting value.
Higher value, printing moves upward, lower value,
printing moves downward.
4.12 Detecting front/ ack of cards
Press Enter or Back to enter the program code 32.
Press + or – button to select the flashing value “0000” or “0001”,
“0000” is for closing this function, “0001” is for starting this function.
Press Enter again to register the setting value.
*The detection function operates only when you use specific time cards
(monthly pay cards) with front/ ack detection cut-out.
4.13 Setting the Monthly,Weekly pay period ending day
Press Enter or Back to enter the program code 33.
Press + or – button to set the card t pe
Press Enter again to register the setting value
Card T pe Functions
- 11
-

00
Month pa time card
01
Weekl pa time card
4.13a Setting the Monthly pay period end day
When the
card t pe is set to 00,the first row on the 1~15 row card surface is
automaticall as blank row. theset value is from 00 to 31
4.13 Setting the Weekly pay period end day
Press Enter or Back to enter the program code 33
Press + or – button to set the card t pe to 01
Press Enter again to register the setting value
Press + or – button to set the Weekl pa period end da ,
The set value is from 0 to 6,means Sunda to Saturda
Press
Enter again to register the setting value.
4.14 Setting the S/W solstice start (month and day)
Press Enter or Back to enter the program code 34,
press + or – button to set the start month.
Press Enter again to register the setting value.
press + or – button to set the start date.
Press Enter again to register the setting value.
4.15 Setting the S/W solstice start (hour and minute)
Press Enter or Back to enter the program code35,
press + or – button to set the start hour.
Press Enter again to register the setting value.
press + or – button to set the start minute.
Press Enter again to register the setting value.
- 12
-

4.16 Setting the S/W solstice end (month and day)
Press Enter or Back to enter the program code 36,
press + or – button to set the end month.
Press Enter again to register the setting value.
Press + or – button to set the end date.
Press Enter again to register the setting value.
4.14 Setting the S/W solstice end (hour and minute)
Press Enter or Back to enter the program code 37,
press + or – button to set the end hour.
Press Enter again to register the setting value.
press + or – button to set the end minute.
Press Enter again to register the setting value.
5. All Reset
Press “Reset” ke to re-start the whole machine.
Press + & Clear & Mode (Ke 1, 5, 6) all together to restore the default
value. including Date, Time, Time Signal, Color Change, Printing Position.
6. Trou le Shooting
◎
Press RESET button to re-start the program when it is not properl work.
Trou le
Causes
Corrective Measures
The time
recorder
does not
accept time
card
1. Power failure
2. The time card is
damaged
3. The power cord is
disconnected.
4. Cards were inserted or
pulled out b force.
1. Wait until power suppl is
restored
2. Change a new time card
3. Insert the power plug firml into
the power outlet.
4. Pull the power plug out of the
power outlet, then insert again.
- 13
-

The clock is
slow (or fast)
1. Mistakes in setting the
clock.
2. Power failure
Set it correctl .
Light printing
1. The ribbon cartridge is
not set correctl .
2. The cartridge has been
used for long time.
1.
Set it correctl .
2.
Change a new cartridge.
The printing
position is
wrong
1. Incorrect setting of da
change.
2. Improper use of the
time recorder.
1. Set it correctl .
2. Make sure to insert the card in
the card slot and remove it
properl .
The date is
incorrect
Mistakes in setting the date
Set it correctl .
Imperfect
printing
Improper use of the time
recorder
Make sure to insert card in the
middle of card slot and remove then
properl .
7. Replacing Ri on Cartridge
1. Open the top cover, press Column 4 to move the ribbon cartridge to center.
2. As shown in the figure below, pull the ribbon holders towards ou and,
holding them stead in the position, use the handle to take out the
cartridge.
3. Correctl insert a new cartridge between the ribbon guide and the printer
head.
Push the cartridge head until it clicks into place. Turn the knob clockwise to
fasten the ribbon.
- 14
-

Power Suppl
DC13V 1.5A
Input
(Refer to the indication on the label of
each
machine)
Power Consumption
Standb :2W / Work:10W
Dimensions
Approx. 193 x 244 x 123 mm ( L x W x H )
Weight
2.4
Kgs
-30
℃
~40
℃
Usage Environment
10%RH~80%RH
Time Card Sizes
85 x 188 x 0.35 mm ( W x L x H )
Ribbon Cartridge
RN-16(D)
8. Cautions
1. To avoid fire or electric shock, please do not expose this machine to rain or
excessive condensed moisture.
2. Do not expose to direct sunlight, strong heat source or dust area.
9. Specifications
10. Error Code
Once the E1E1, E2E2, shown on LCD display, please contact your
dealer from whom you purchased the time recorder.
E1E1--Wrong position of Up & Down
E2E2--Wrong position of left & right
It is recommended to use genuine manufacturer time recorder ribbons.
Usage of non genuine or compatible ribbons may damage your printer and
void your warranty.
- 15
-

- 16
-
Table of contents
Other Computime Clock manuals