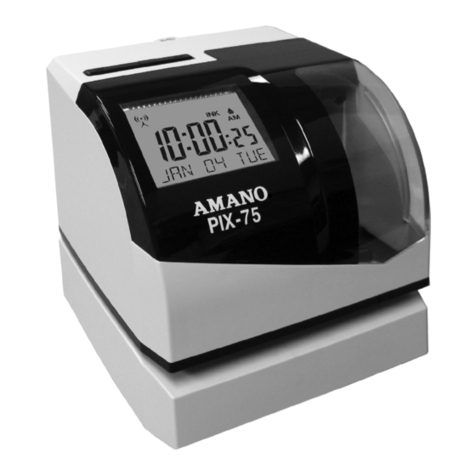
Amano MTX-30F Original operating instructions

MTX-30F PUSH INSTALLATION & OPERATION GUIDE

Thank You….
For purchasing another fine product from Amano Cincinnati, Inc.
Proprietary Notice
This document contains proprietary information and such information may not be reproduced in
whole or part without the written permission from Amano Cincinnati, Inc. 140 Harrison Ave.,
Roseland, New Jersey 07068.
Amano Cincinnati, Inc. reserves the right to make equipment changes and improvements,
which may not be reflected in this document. Portions of this document may have been
updated to include the latest hardware or firmware version, if applicable.
To ensure safe use of this terminal, be sure to thoroughly read this manual in its entirety before
any attempt is made to operate the equipment.After you have finished reading this manual, be
sure to store it in a safe place for further reference.
For more information about Amano’s complete line of products, visit our web site at:
www.amano.com
For on line help please visit our Knowledge base link at:
http://tkb.amano.com/phpkb/
Note:This equipment has been tested and found to comply with the limits for a Class
A digital device, pursuant to part 15 of the FCC Rules. These limits are designed to
provide reasonable protection against harmful interference when the equipment is
operated in a commercial environment. This equipment generates uses and can radiate
radio frequency energy and, if not installed and used in accordance with the instruction
manual, may cause harmful interference to radio communications. Operation of this
equipment in a residential area is likely to cause harmful interference in which case the
user will be required to correct the interference at his own expense.

MTX-30F Push Installation & Operation Guide
CONTENTS
MTX-30F PUSH INTRODUCTION………………………………………………5
What’s In the Box
BASIC INSTALLATION FOR TIME GUARDIAN MTX-30F PUSH…….……6 - 9
Wall Mounting
Installation
Understanding the MTX-30F Push Front Panel
STARTUP……………………………………………………………….…...........10
MTX-30F Push Startup Screen (Power On)
Normal Punch IN/OUT Display
OPERATION………………………………………………………………………11 -12
Daily MTX-30F Push Use
Punching with a Fingerprint (FP)
Punching with a Proximity Card (Prox.)
Punching with a Password (Pwd)
Punching with a Fingerprint (FP) OR Password (Pwd)
Punching with a Fingerprint (FP) AND Password (Pwd)
View Previous Punch at the Terminal (F3)
ENROLLING USERS…………………………………………………………….13
USER MANAGEMENT…………………………………………………………..14 -15
How to Enroll a New User
All Users
Display Style
USER ROLE……………………………………………………………………....16

MTX-30F Push Installation & Operation Guide
COMMUNICATION……………………………………………………………….17
Ethernet
Wireless Network
PERSONALIZE……………………………………………………………………18
Voice
DATA MANAGEMENT …………………………………………………............19 -20
Delete Data
Backup Data
Restore Data
MORE OPTIONS………………………………………………………..……......21
AUTOTEST…………………………………………………………………..…....22 -24
Test All
Test LCD
Test Voice
Test Keyboard
Test Fingerprint
Test Clock RTC
SYSTEM INFORMATION…………………………………………………….….25 -26
Device Capacity
Device Info
Firmware Info
SPECIFICATIONS……………………………………………………………......27

MTX-30F Push Introduction
The MTX-30F Push is a sophisticated data collection terminal for use directly with Amano Time
Guardian to provide a complete PC or cloud based time and attendance solution for small
business.
The MTX-30F Push terminal with Amano Time Guardian provides a system that automatically
calculates and accumulates hours worked based on the company's payroll policies. This
system separates the hours worked into regular and overtime pay categories and displays
them at the terminal (if enabled).
When using the fingerprint terminal, a user must enroll their fingerprint in the fingerprint
template database. The MTX-30F Push Fingerprint terminal will record the user’s fingerprint
template, encrypt it, and store the data. When a user presents their finger for verification, a
new template is captured and compared to the pre-enrolled fingerprint in the database. If there
is a match, the user will be accepted by the MTX-30F Push Fingerprint terminal.
The MTX-30F Push Fingerprint terminal also provides re-punch protection at the terminal when
the "Recheck Min” feature is set. Multiple punches within the setting time frame will be verified
but not recorded at the terminal in flash memory.
Note: Additional module may be required.
Your MTX-30F Push terminal package should include the following:
•Fingerprint Data Collection Terminal
•100-240 V AC Power Adapter
•6 foot Cat 5 cable
•Mounting Bracket
•Plate and hardware
•One Prox ID card
What’s In the Box
MTX-30F Push Installation & Operation Guide Page 5

MTX-30F Push Installation & Operation Guide Page 6
Wall Mounting
Warning! Before selecting a mounting location for your MTX-30F Push Terminal, you
must consider the following:
The mounting surface and hardware must be able to support the unit’s weight, 1.35
lbs. (0.61kg).
The area must be within the specified operating temperature & humidity range (see
Specifications on page 27).
The MTX-30F Push Fingerprint terminal should be mounted in an environment
that avoids the following conditions:
X Heat Source –Direct Sunlight and Humidity
X Rain Water
X Strong Vibration and Shock
X Dust, Corrosive Gas, Steam and Salt Damage
Close proximity to a wall outlet (6 ft.)
If using Ethernet, close proximity to an Ethernet connection (6 ft.) or if connecting via
WiFi check the location for a good signal.
Amano recommends the following wall mounting procedure:
1. Set the MTX-30F Push terminal face up on a flat surface to avoid scratches on display.
2. Using the mounting bracket as a guide, mark the location of the upper and lower
mounting holes on the wall. It is recommended to mount the terminal 49.2” from the
floor to the bottom of the bracket. *Adjust for staff height as necessary.
Note: Pay attention to the orientation. The back plate should only be mounted one-way as it is
keyed to fit into the back of the fingerprint reader.
Mounting Bracket
Basic Installation for Time Guardian MTX-30F Push
Back of Terminal
TOP
BOTTOM

MTX-30F Push Installation & Operation Guide Page 7
3. Install anchors at the marks and attach the mounting bracket to the wall.
4. Feed power and communication wires through the knockout in the bottom of the
mounting bracket.
5. Install the four screws attaching the metal back plate to the mounting bracket. Make sure
the two metal tabs are on top.
6. Plug in power connector and Ethernet cable (if using Ethernet) into the terminal. Also
connect signal wiring if applicable.
7. Slide the terminal onto the two tabs located at the top of the back plate. Secure
the reader to the back plate by inserting and tightening the screw located at the
bottom of the unit.
Your terminal is now mounted to the wall and ready to connect the power supply to the
outlet.

MTX-30F Push Installation & Operation Guide Page 8
The front panel of the MTX-30F Push terminal contains the following controls:
•LED Indicator: During normal standby operation (power on), the Green LED will flash
once per second. When a user successfully verifies the Green LED will stay solid for
three seconds. If a user fails to verify, the Red LED will stay on for three seconds.
Note: If the fingerprint reader does not follow the standard LED operational parameters,
please consult support.
•Speaker: Provides audible voice verification of operations, i.e., "Thank you", "Incorrect
Password", "Access Denied", "Invalid Id", "Please try again", etc.
•TFT Display Screen: Displays time, date, day, and operational information.
•Fingerprint Sensor: Enrolls (creates) template and verifies fingerprint.
•Proximity Senor: Proximity card must be presented approximately 1 inch in front of the
reader to punch.
•Keypad: Used to input User ID, password, and perform menu operations.
•USB Port: Insert USB to download software, copy over passwords, etc.
•Reset Button: Clear all current settings and go back to all factory default settings.
Front View Side View
USB Port
Reset Button
TFT Display Screen
Fingerprint
Sensor
LED Indicator
Keypad Speaker
Understanding the MTX-30F Push Terminal Front Panel
Front/Side Panel Features
Proximity Card
Sensor

MTX-30F Push Installation & Operation Guide Page 9
M/┘–Menu, OK
Power ON/OFF & space back.
Modify current item value.
- to scroll down or up for menu operations.
F3 –View Previous Punch
ESC –to perform exit, cancel, ignore when using the Menus.
Keypad Functionality
Power On/Off
Left Arrow Right Arrow
Menu and OK
Up & Down
Arrows
Prev. Punch
Numeric Keypad
Escape

MTX-30F Push Installation & Operation Guide Page 10
Startup
MTX-30F Push Startup AMANO Screen (Power On)
Once the terminal is wall mounted and the communication connections have been made,
connect the terminal to AC power and proceed on to setup and enroll users.
To start-up, perform the following: Ensure theAC Power Adapter is connected to the MTX-
30F Push terminal and plugged into an outlet. The MTX-30F Push terminal will display the
splash screen, perform a diagnostic check, and then display the Welcome screen.
Note: The time and date can be set with the terminal keypad, or downloaded to the terminal from the
host PC or cloud utilizing Time Guardian software. The information such as date, time, daylight saving
time (DST), Fingerprint templates, and hours worked sent from Time Guardian software will have
precedence over existing similar information. That is to say Time Guardian software will act as the
master/source.
Upon power up, the Green LED indicator will blink once every second to signify the terminal
is operating properly.
All normal time and attendance functions (validation for punch in/out) must be performed from
the Welcome screen.
Press the power On/Off button to shut down the MTX-30F Push Fingerprint terminal and
display "halting system….Shutdown 2 secs, 1sec". The MTX-30F Push terminal will retain all
templates and transactions while the power is off.
Normal Punch IN/OUT Display
The system is ready to use after the MTX-30F Push terminal and the host PC with Time
Guardian software or cloud based software are connected and setup. Upon user
recognition at the terminal, the terminal will display his/her name - the first 8 characters of
the first and last name combined, followed by the User ID and validation status.
If View Hours is enabled: The terminal will display the "As of" date followed by the current
pay period hours worked for the user that just punched.
Note: The current pay period information is transferred from Time Guardian to the terminal
during a download and can be retained at the terminal for up to 14 days between
downloads.
MTX-30F Push Installation & Operation Guide Page 11
Operation
Daily MTX-30F Push Use
The following "Daily Use" section assumes the MTX-30F Push Fingerprint terminal has been set
up with enrolled users and system options have been defined. Please see Enrolling Users on
page 13 and the other sections for enrollment details, etc.
From the Welcome screen place your enrolled Finger in the sensor window.
Upon verification, the Green LED will momentarily stay on; the screen will briefly display your
User ID, Name and the confirmation "Verified" with the voice prompt "Thank you".
Note: The name, assignments, and current pay period information can be downloaded from Time
Guardian to the MTX-30F Push. An invalid finger entry will flash the error message, "FP Verify fail “.
The Red LED will momentarily stay on.
Punching with a Fingerprint (FP)
Punching with a Proximity Card
From the Welcome screen place your proximity card in front of the reader.
Upon verification, the Green LED will momentarily stay on; the screen will briefly display your
User ID, Name and the confirmation "Verified" with the voice prompt "Thank you“.
Note: The name, assignments, and current pay period information can be downloaded from Time
Guardian to the MTX-30F Push. An invalid finger entry will flash the error message, "FP Verify fail “.
The Red LED will momentarily stay on.
Punching with a Password (Pwd)
From the Welcome screen enter your User ID using the keypad and press OK to confirm.
Input your password and then press OK.
Note: An invalid password entry will flash the error message, "Error Pwd.", and the voice prompt,
"Incorrect password". The Red LED will stay on until the correct password is entered or the
password entry times out and the terminal returns to the Welcome screen. If the user does not have
a password they will be prompted to “Place Finger”.

MTX-30F Push Installation & Operation Guide Page 12
From the Welcome screen either place your finger on the sensor OR enter your assigned
User ID using the keypad.
Follow the on screen prompt to remove finger OR input your password.
Upon verification, the screen will display your Name, User ID, and the confirmation "Verified“,
with the voice prompt "Thank you" followed by the momentary display of your hours worked
for the active pay period.
Note: The advantage of being enrolled as a user with a fingerprint template and password is that you
can use either method to punch. This provides an automatic backup should you encounter any
problems with fingerprint validation. Therefore, the first method used and accepted is the only method
you need to validate a punch.
Punching with a Fingerprint (FP) or Password (Pwd)
Punching with a Fingerprint (FP) and Password (Pwd)
From the Welcome screen either place your finger on the sensor OR enter your assigned User
ID using the keypad.
Follow the on screen prompt to Please Input Password and OK then Please Press Finger
(if User ID and Password was used).
Upon verification, the screen will display your Name, User ID, and the confirmation "Verified"
with the voice prompt "Thank you" followed by the momentary display of your hours worked for
the active pay period.
If View Hours is enable: The display will momentarily show the "As of" date followed by the
current pay period hours worked for the user that just punched in.
Note: When Recheck Min is set, if an employee punches more than once within the time setting
[usually 1 – 2 mins.], the voice prompt will be "Punch accepted…thank you" and no pay period
hours will be displayed.
View Previous Punch at the Terminal –F3
Press the F3 key to view Previous Punch. The terminal will ask for Badge No. or Fingerprint.
Select Date and press Ok to display previous punches.
Note: Previous punches are reset (cleared) every time the clock is polled.
MTX-30F Push Installation & Operation Guide Page 13
Enrolling Users
Three Ways to Enroll
After installing the MTX-30F Push Fingerprint terminal and powering
on, you may begin enrolling users. If this is the first enrollment in a
new or empty clock system, everyone will be able to enroll.
However, if there are any users with privileges already setup in the
system, you will have to be enrolled by a user with privileges. The
MTX-30F Push Fingerprint reader provides the following three
methods for enrollment:
•Fingerprint
•Password
•Proximity Card
Note: Use care when enrolling users at the terminal as the ESC
button can alter the entry functions during some operations.
There are three types of users:
•Normal User
•Registrar
•SuperAdmin

MTX-30F Push Installation & Operation Guide Page 14
User Management
How to Enroll a User
1. Press the Menu button to display the Main Menu.
2. Using the arrows highlight the User Mgt. icon and then press OK.
3. Select New User and press OK.
4. Enter User ID # using the keypad and then press the down arrow.
5. Scroll down until Verification Mode is highlighted then press OK.
6. Use the arrows to highlight “Fingerprint only” and then press OK.
7. Use the down arrow to highlight “Fingerprint” and then press OK.
8. Select the finger to be enrolled by using the arrows and then press OK.
9. Follow the on screen instructions from the terminal until your Finger has been verified. The
Terminal will show a green check mark to let you know this has been completed.
Confirmation of Finger Verification
To confirm that you have successfully enrolled your Finger use the back arrow to revert back to
the Welcome screen using the ESC button.
From the Welcome screen place your enrolled finger on the fingerprint scanner. Once the
verification is complete you will hear the terminal say “Thank You”.

MTX-30F Push Installation & Operation Guide Page 15
All Users
Display Style
1. Select All Users.
2. Press to select “All Users” - Here you can Edit the user information.
If you would like to delete all users select “Delete” and the user will be deleted.
Select your desired Display Style from the following:
•Single line
•Multiple line
•Mixed line

MTX-30F Push Installation & Operation Guide Page 16
User Role
User Role
1. Press the Menu button to display the Main Menu.
2. Using the arrows highlight the User Role icon and then press OK.
3. Click on Registrar –From here you can select rights from the following options:
•User Mgt.
•Comm.
•System
•Personalize
•Data Mgt.
•USB Manager
•Attendance Search
•Short Message
•Labor 1-6
•Autotest
•System Info

MTX-30F Push Installation & Operation Guide Page 17
Communication
Ethernet
1. Press the Menu button to display the Main Menu.
2. Using the arrows highlight the COMM. icon and
then press OK.
3. Highlight your preferred method of communication
and then press OK.
You can modify the IP address. if
necessary, however, it cannot be the same
as that of the PC IP address.
Wireless Network
1. Click on Wireless Network
2. When you select the wireless network option
the following window will appear in which as a
default Wi-Fi would be ON.
3. After highlighting your WiFi network press OK.
4. Enter numeric password and then press OK to
connect to WiFi or choose “Upload WiFi
Password”. (USB with password must be
inserted prior to clicking on the Wireless
Network option.

MTX-30F Push Installation & Operation Guide Page 18
Voice
Select Voice.
Voice prompt: This parameter defines whether to
play voice prompts during the operation of the
MTX-30F Push terminal or not. Select ON to
enable the voice prompt, and select OFF to mute.
Keyboard prompt: This parameter defines
whether to generate a beep sound in response to
every keyboard touch or not. Select ON to enable
the beep sound, and select OFF to mute.
NOTE: Use the OK button to toggle between
ON/OFF.
Personalize
1. Press the Menu button to display the Main Menu.
2. Using the arrows highlight the Personalize icon and then press OK.
3. Highlight User Interface and then press OK. Here you can Personalize settings such as
Wallpaper, Language, Lock Power Key, Menu Screen Timeout(s), Idle Time to Slide Show(s),
Slide Show Interval(s), Idle Time to Sleep(m), and Main Screen Style

MTX-30F Push Installation & Operation Guide Page 19
Data Management
1. Press the Menu button to display the Main Menu.
2. Using the arrows highlight the Data Mgt. icon and then press OK.
Backup Data
1. Highlight Backup Data and press OK.
2. Next click on (Option 1) Backup to Device
3. Select the content you want to backup.
(business data and/or system data)
4. Select Backup Start
(Option 2) Backup to USB disk -This will
enable Backup to a USB Disk in a fashion
similar to the operations performed to “Backup
to Device”.
If the USB is not properly inserted the screen
will read “Error – Failed to Read USB Disk”. If
this happens change the USB or try to reinsert it
properly.

MTX-30F Push Installation & Operation Guide Page 20
Restore Data
1. Highlight Restore Data and press OK.
2. Click on Restore from Device and select
the local configuration items to be restored,
and then save the selected items. (You can
select the content you want to restore.)
3. If you choose “Restore from USB Disk” the
operations are similar to those performed to
“Restore from Device”.
If the USB is not properly inserted the screen
will read “Error – Failed to Read USB Disk”. If
this happens change the USB or try to reinsert it
properly.
Table of contents
Other Amano Clock manuals

Amano
Amano PIX-25 Operating instructions

Amano
Amano MICRODER MR-7000 Series User manual

Amano
Amano PIX-3000x Series User manual

Amano
Amano TS-3000i User manual

Amano
Amano MJR-8500 SERIES User manual

Amano
Amano EX3500N User manual

Amano
Amano BX-1600 Quick start guide

Amano
Amano PIX-3000x Series User manual

Amano
Amano BX-1500 User manual

Amano
Amano PIX-21 User manual

Amano
Amano PIX-15 User manual

Amano
Amano Amano TCX 21 User manual

Amano
Amano MX-300 User manual

Amano
Amano PIX-10 User manual

Amano
Amano PIX-55 User manual

Amano
Amano EX-3500 User manual

Amano
Amano PIX-25 User manual

Amano
Amano 4700 Series User manual

Amano
Amano PIX-3000x Series Guide

Amano
Amano TCX-22 User manual