ZX85
CD/MP3/MP4/DVD
Disc
Player
Compatibtewitttstandardsize:CO~_MP3t
MP4
and.DVO
discs
(4.75"
or
12cm).
The
ZX85
is
designed
to
read
standard
DVD,
MP3,
MP4,
CD,
CD-R,
CD-RW,
JPEG-CD
Disc.
Because
of
variations
in
recording
methods
some
discs
may
not
play
on
this
unit.
This
unit
will
play
region
1
DVD's
(USA
and
Canada).
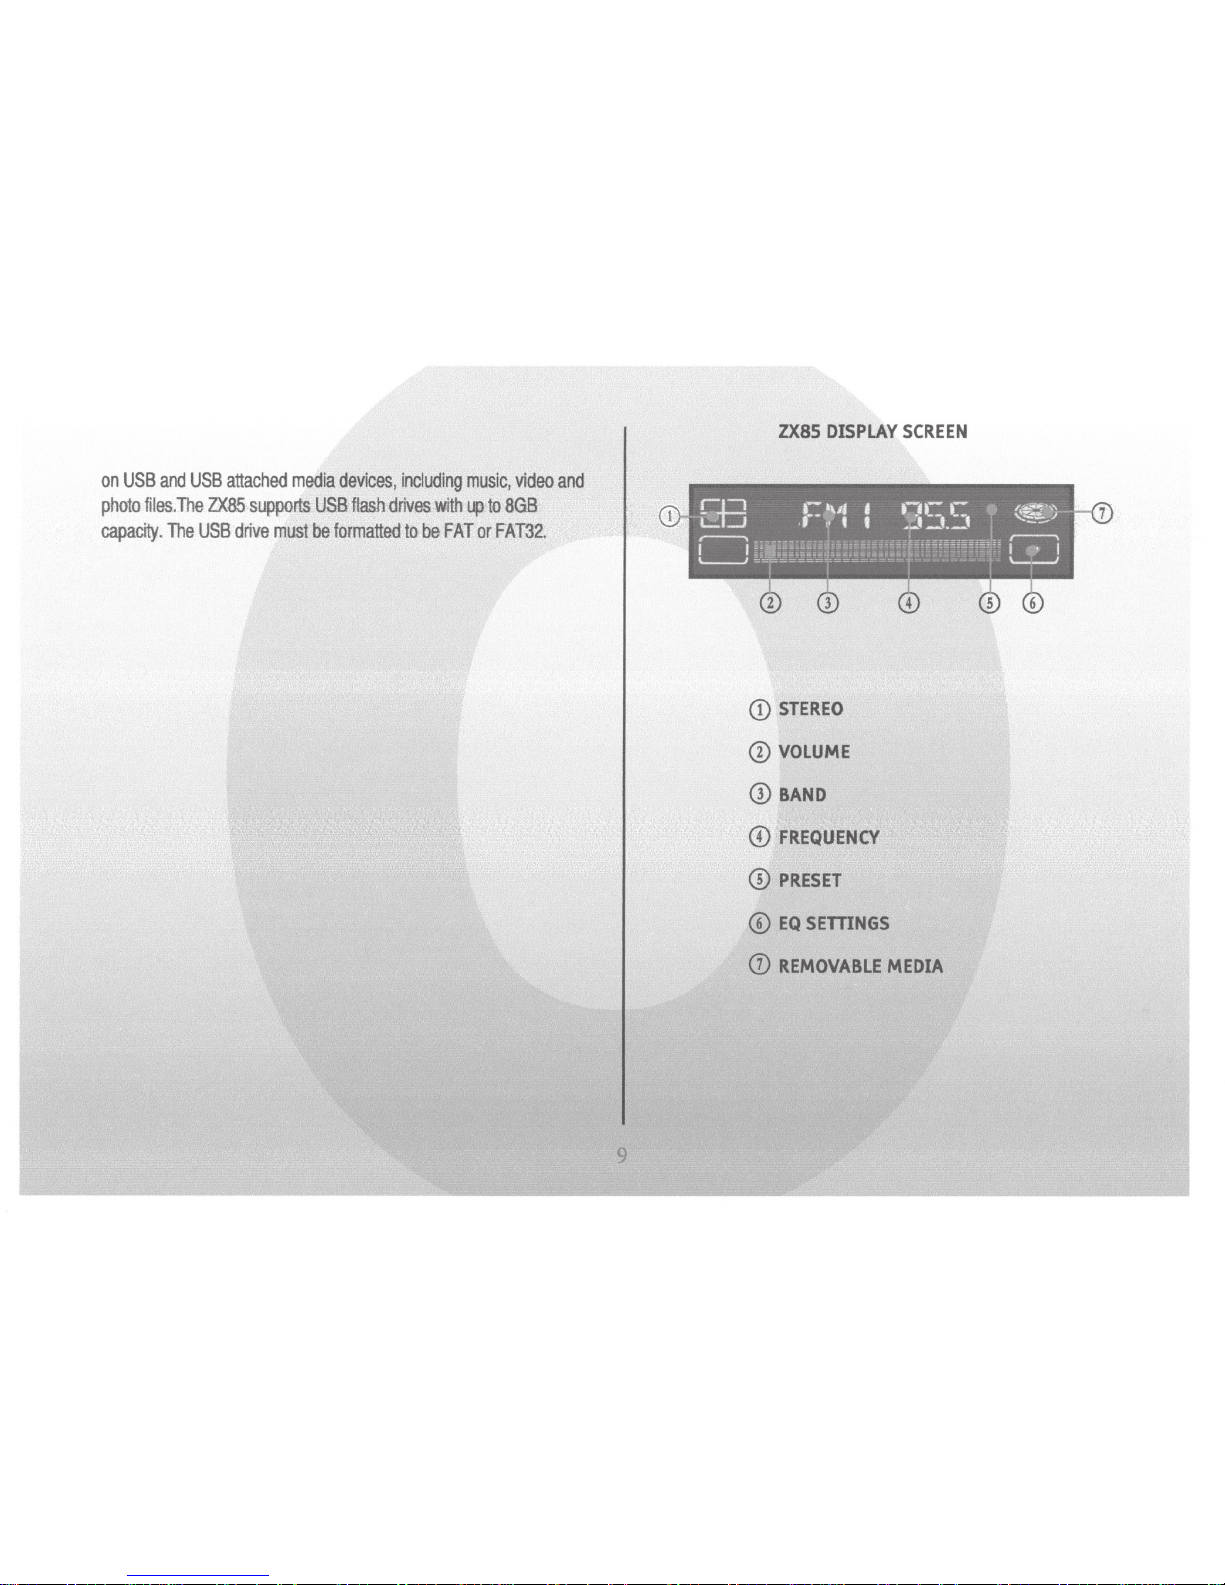
USB
I
SD
Card
This
unit
allows
users
to
play
files
stored
on
both
USB
and
SD
cards
including
MP3
music,
MP4
short
video
clips
and
JPEG
photo
files.
The
USB
port
will
also
charge
many
devices
like
iPods
and
MP3
pl~yf)rs.~
Built-In
AM/FI\4;,,-un.er··,~-,~··
·
27
preset
FM
stations
and
18
AM
stations
available
to
select.