Product name: Conquer Racing Simulator Seat
SKU: 355-RACESIM3
EMAIL: customercare@conquerequipment.com
TEL: 855-349-4327
help.ConquerEquipment.com
EMAIL: customercare@conquerequipment.com WEB: help.conquerequipment.com TEL: 855-349-4327
Open box. You will need an adjustable wrench and a Phillips head screwdriver in addition to
the enclosed Allen wrenches for assembly. Small hardware detailed above. Here are all the
parts in detail:
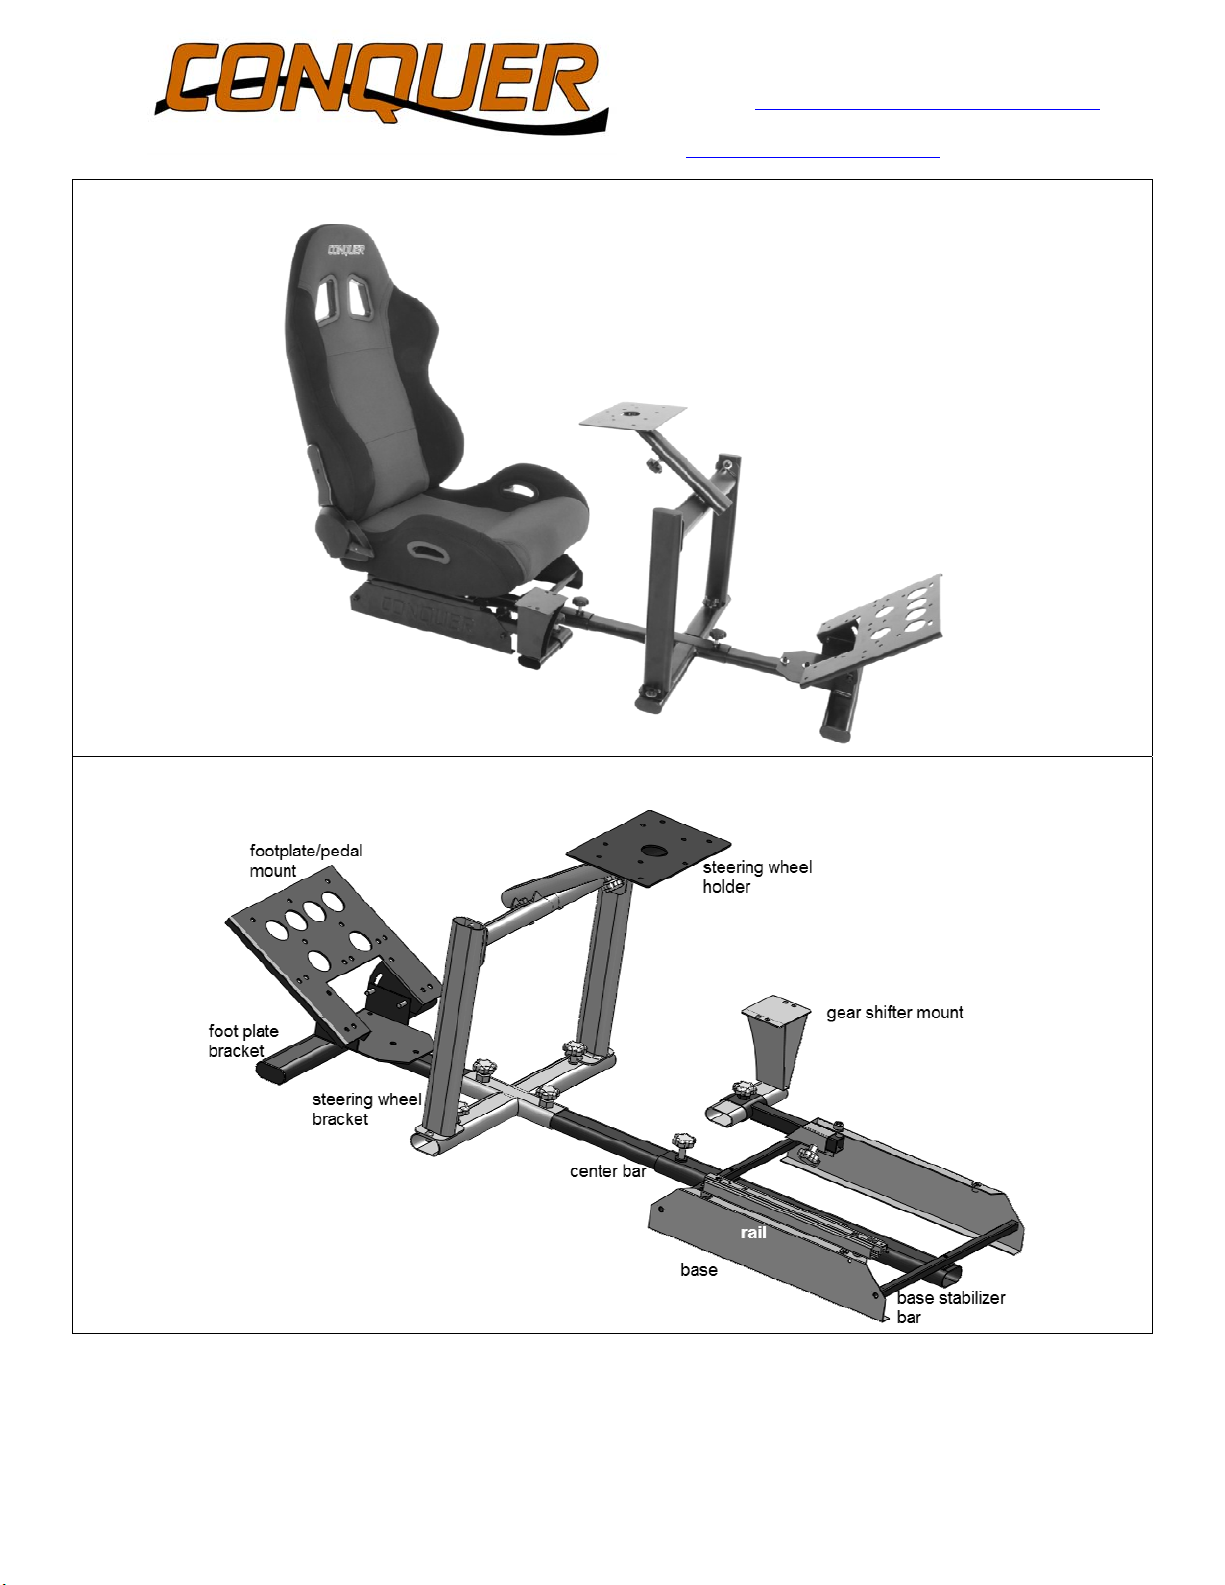
seat back
seat bottom
long thin box--contains the center bar in 2 pieces
smaller box
o assembly manual
o bag of hardware
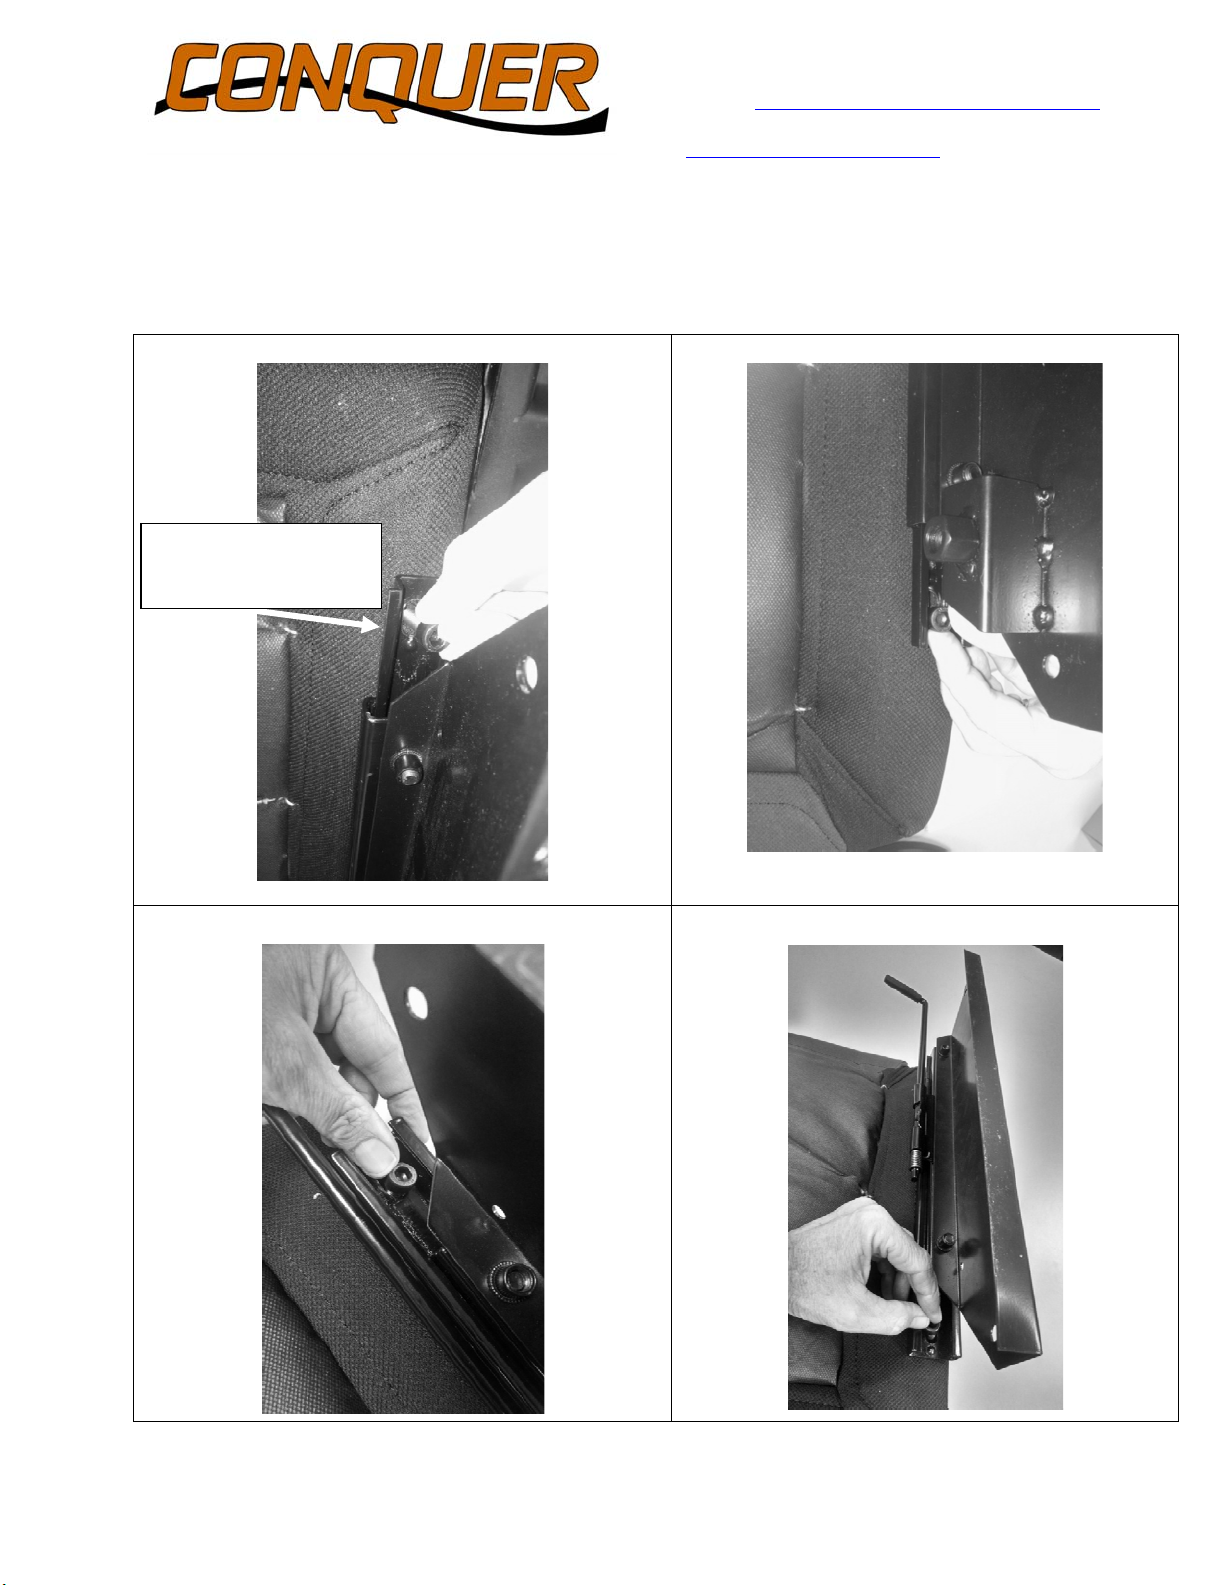
o 2 plastic pieces for seat back
o steering wheel platform
o shifter arm tube
larger box
o box containing 2 seat rails (left side rail piece has seat adjuster, right side does
not) and a small bag containing 4 spacers and 4 M8x20mm bolts
o box with 2 base pieces (right side base piece has shifter arm/tube mount, left
base piece does not)
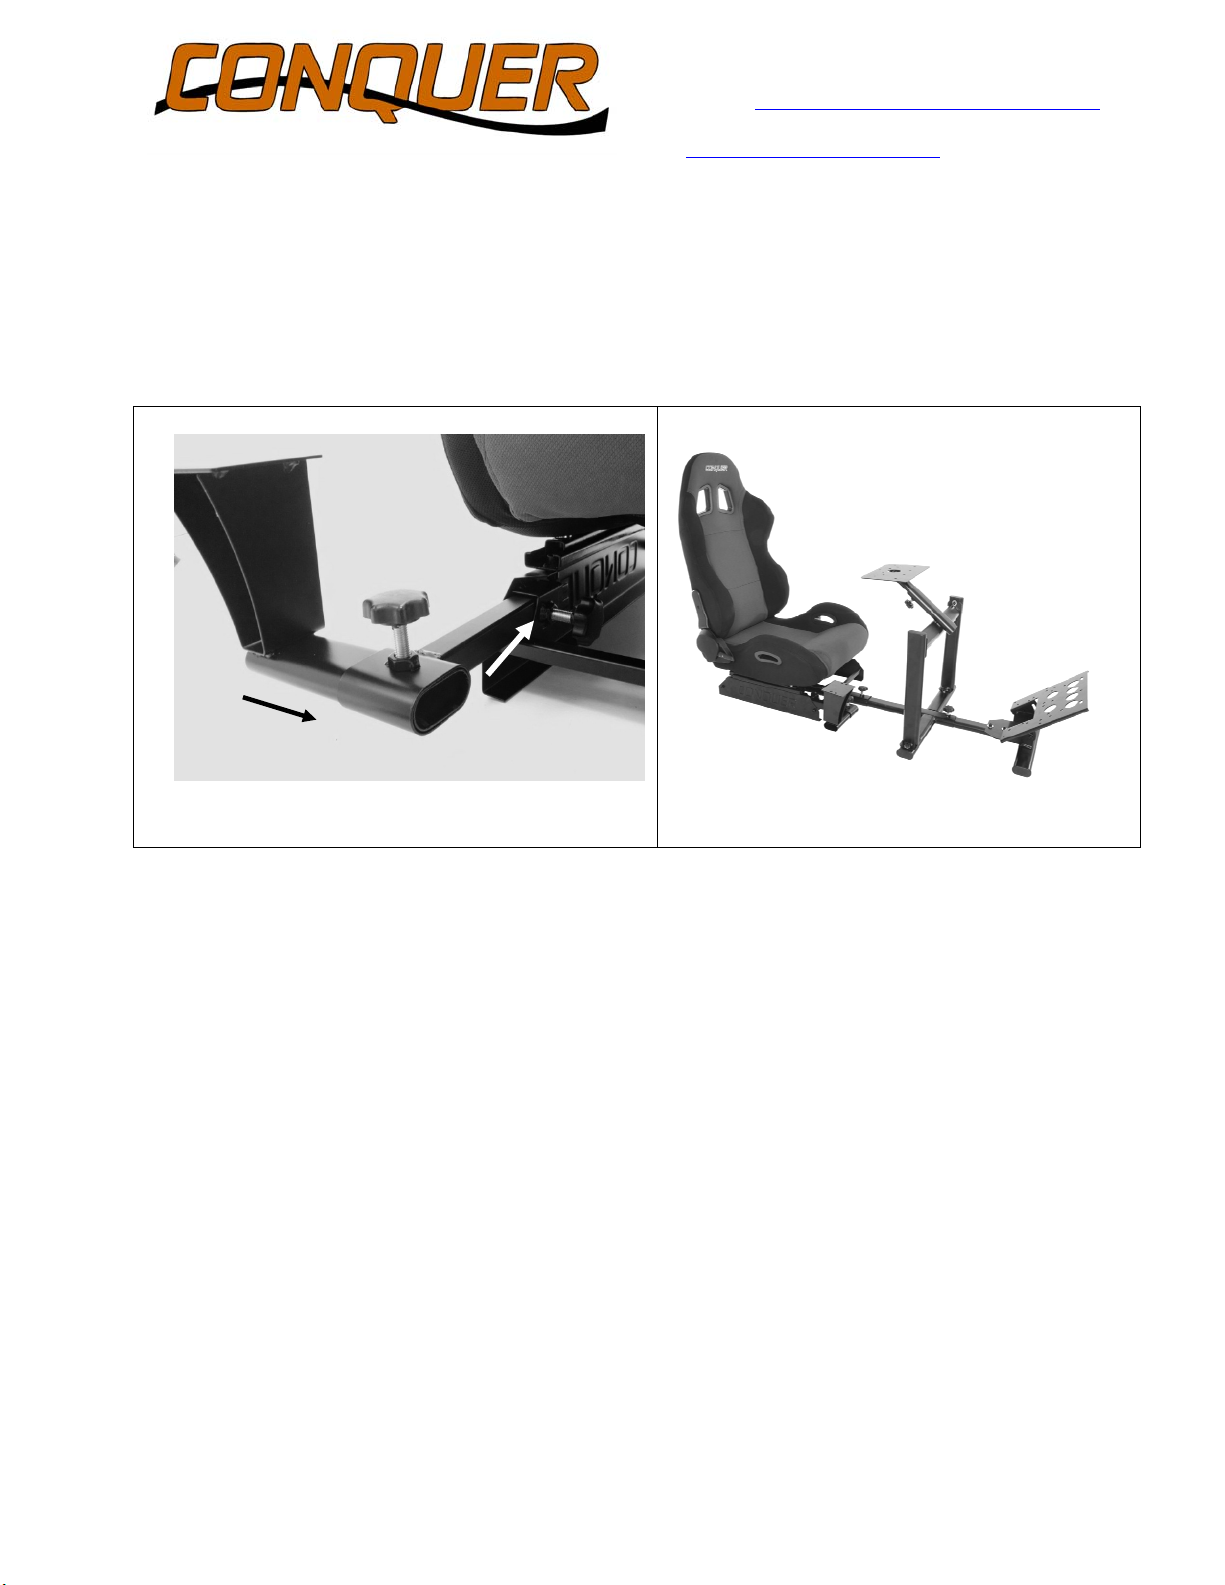
o 2 base stabilizer bars ( wrapped together in bubble wrap)
o gear shifter mount plate
o steering wheel bracket (in 4 separate pieces)
o footplate bracket
o footplate/pedal mount platform
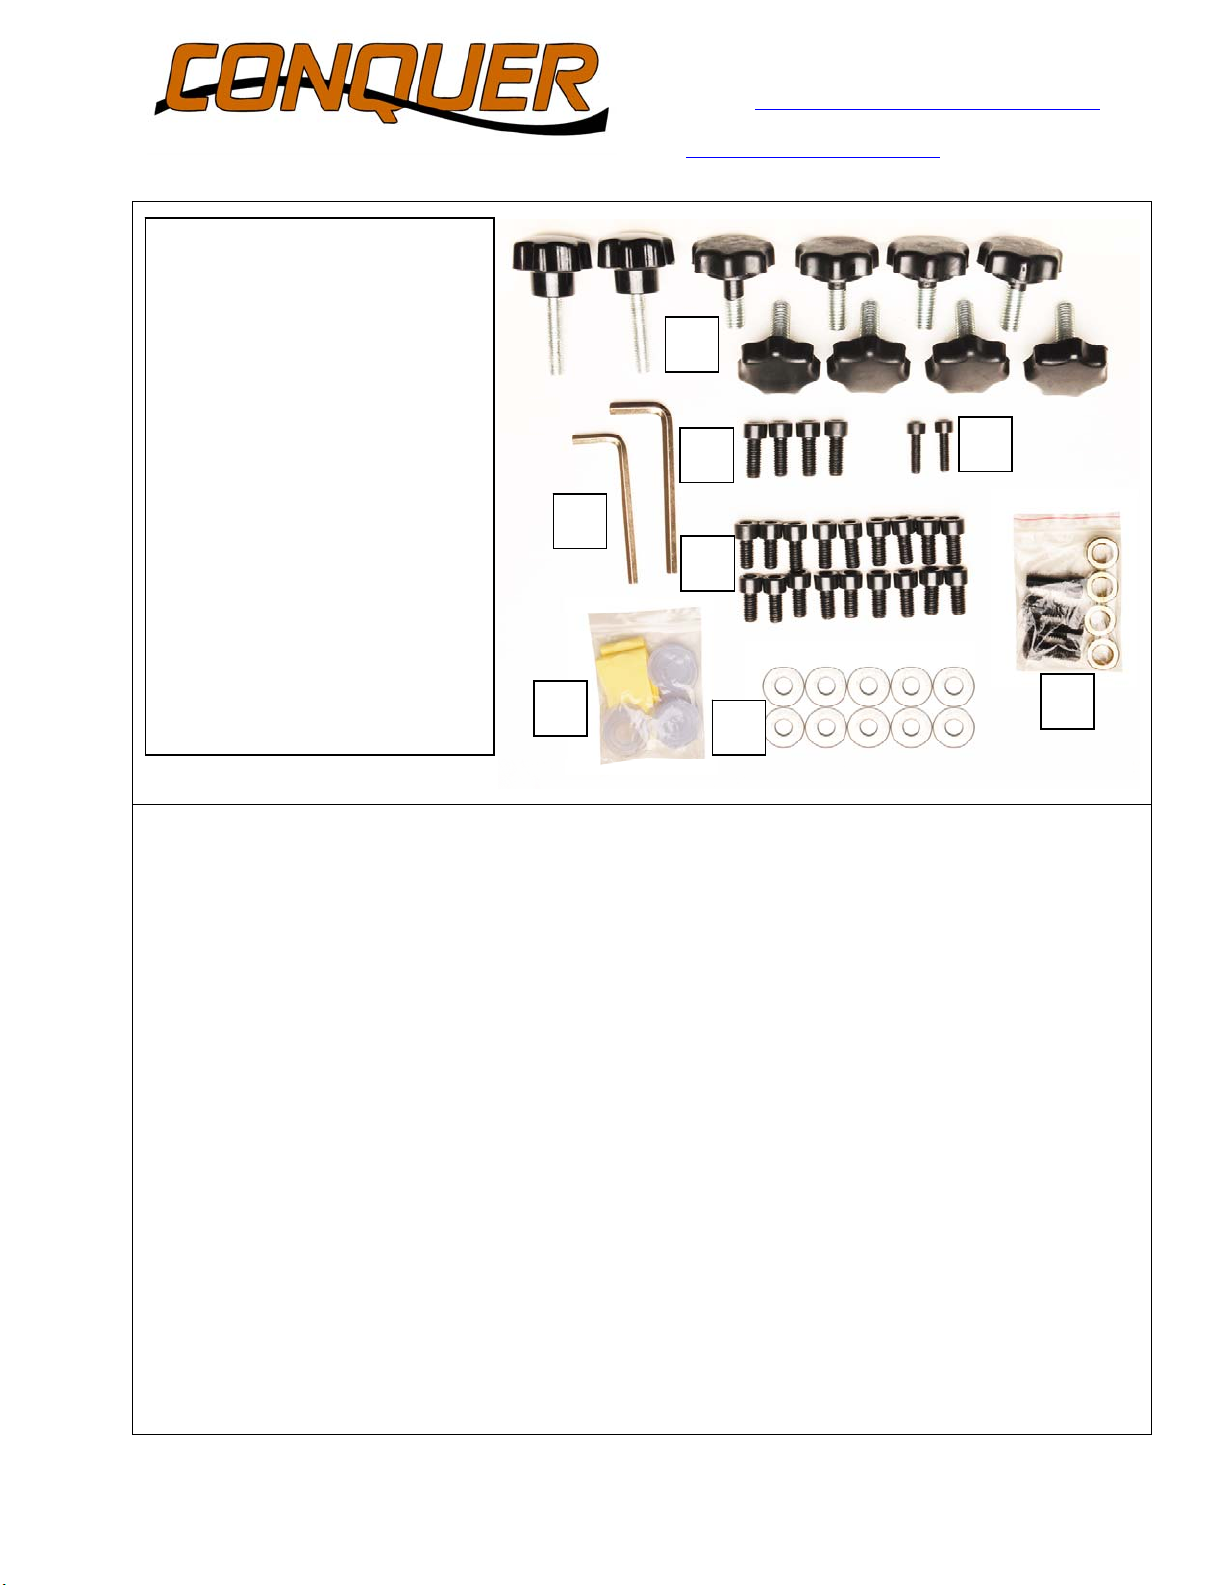
Small hardware:
1. Allen wrench/hex keys
2. Star knobs
3. 4 M8 x 20mm bolts
4. 2 M6 x 20mm bolts
5. 18 M8 x 15mm bolts
6. Floor protectors
7. Washers
8. 4 M8 x 20mm bolts, 4
spacers. This small bag will be
found in the box that contains
the rails, and will be used to
attach the rail/base pieces to the
underside of the seat bottom
2
4
3
1
7
6 8
5