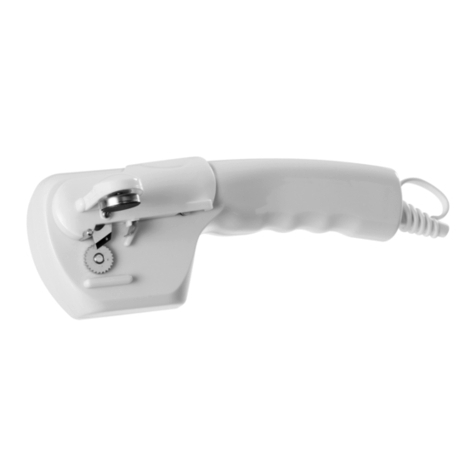
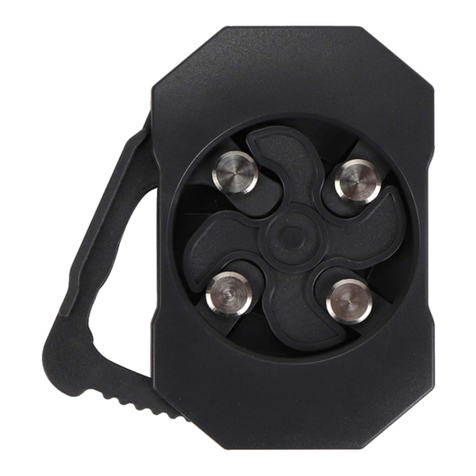
Continental Electric CE22261 User manual

IMPORTANT SAFEGUARDS
IMPORTANT: When using electrical appliances, especially when children are present,
basic safety precautions should always be followed, including the following:
1. READ ALL INSTRUCTIONS
2. To protect against electrical hazards, do not immerse cord, plugs or case in water or other
liquid.
3. Close supervision is necessary when any appliance is used by or near children.
4. Unplug from outlet when not in use, before putting on or taking off parts, and before
cleaning.
5. Avoid contact with moving parts.
6. Do not operate any appliance with a damaged cord or plug or after the appliance
malfunctions or has been damaged in any manner. Return appliance to the nearest
authorized service facility for examination, repair or adjustment.
7. Do not use outdoors.
8. Do not let cord hang over the edge of table or counter; or touch hot surfaces.
9. Do not open pressurized (aerosol-type) cans with this appliance.
10. Do not open cans of ammable liquids such as lighter uids with this appliance.
11. Do not use appliance for other than intended used.
12. The use of attachments not recommended or sold by the appliance manufacturer may cause
re, electric shock or injury.
FOR HOUSEHOLD USE ONLY
POLARIZED PLUG
This appliance has a polarized plug (one blade is wider than the other): To reduce the risk of
electric shock, this plug is intended to t into a polarized outlet only one way. If the plug does not
t fully in the outlet, reverse the plug. If it still does not t, contact a qualied electrician. Do not
attempt to modify the plug in anyway.
SHORT CORD INSTRUCTIONS
A short power-supply cord is provided to reduce the risk of becoming entangled in or tripping
over a long cord.
Longer detachable power-supply cords or extension cords are available and may be used if care
is exercised in their use.
If a longer detachable power-supply cord or extension cord is used, (1) the marked electrical
rating of the extension cord should be at least as great as the electrical rating of the appliance,
and (2) the longer cord should be arranged so that it will not drape over the countertop or table
top where it can be pulled on by children or tripped over unintentionally.
Can
Opener
User Manual
Model:
CE22261

OPERATING INSTRUCTIONS
IMPORTANT: To ensure continued efcient performance, keep the Cutting Blade clean. Electric
Can Opener should be turned off for one minute after operating for 5 minutes.
An y other service should be performed by a n authorized service representative.
BEFORE USING
1. Carefully unpack Can Opener.
2. Wipe with a soft cloth or sponge to remove small particles collected during packing and
handling.
3. Attach the magnetic part (used to hold the can in place when cutting) to the front panel of the
lever by sliding it down over the “hook”, with the circular surface facing down. Press down
rmly in place until top surface is ush with the lever.
4 . Plug Can Opener into electrical outlet, and press down on the Lever to make sure it is operat-
ing properly.
CAUTION: Do not place nger underneath the Lever where the Cutting Blade and Geared
Wheel are located; doing so may cause injury.
CAUTION: Never remove the magnet without rst unplugging the cord and returning the lever
to its ush, horizontal position
TO USE CAN OPENER
1. Place Can Opener on level surface.
2. Raise Lever, place can under the Guide Bar and against the Geared Wheel. (See Figure 1 to
identify parts). Make sure the magnet sticks completely to the top of the can.
3. Have one hand poised to grasp the can. With the other, press down on the Lever to pierce lid
of can. This automatically starts the cutting action. The Can Opener will continue to cut until
the lid is completely severed from the can.
4. Grasp the can, then raise the Lever to release the can.
5. Carefully remove lid from the magnet.
USE CAUTION TO AVOID INJURY FROM EDGE OF LID.
6
7
1
23
4
5
Getting to Know your Can Opener
1. Lever
2. Magnet
3. Geared Wheel
4. Base
5. Bottle Cap Opener
6. Cutting Blade
7. Guide Bar
TO USE KNIFE/SCISSORS SHARPENER
1. Place Knife Blade lightly in either left or right groove. Draw Knife slowly toward you with a
slow, even motion.
2. Place Blade in other groove and do the same. Repeat this alternating action 4 or 5 times,
from one groove to the other until desired sharpness is achieved.
3. The Knife/Scissors Sharpener can also be used for sharpening scissors. A large groove at
the side of the Sharpener is designed especially for scissors. Place one blade of the scissors
in the groove, and then draw it toward you slowly and evenly. Repeat with the other blade.
ATTENTION: Blades to be sharpened should be clean. Do not sharpen knives that have ser-
rated blades.
TO USE BOTTLE OPENER
1. Unplug appliance from electrical socket.
2. Place Can Opener on a level surface. To steady position one hand on top of the Can Opener.
3. Place bottle cap edge under Opener Flange.
4. Apply pressure on bottle downward until bottle cap pops off
NOTE: This bottle opener is not recommended for bottles having “Twist-Off” caps.

Abrelatas
Manual de Uso
Modelo:
CE22261
MEDIDAS IMPORTANTES
DE SEGURIDAD
IMPORTANTE: Cuando use equipos eléctricos, especialmente cuando hay niños
presentes, debe seguir las precauciones básicas de seguridad, incluyendo los
siguientes:
1. LEA TODAS LAS INSTRUCCIONES
2. Para proteger contra riesgos eléctricos, no sumerja el cable, los enchufes o el equipo en el
agua u otro líquido.
3. Es necesaria la supervisión cuando utilice cualquier aparato por o cerca de niños.
4. Desenchufe del tomacorriente cuando no esté en uso, antes de poner o quitar piezas, y
antes de limpiarlo.
5. Evite el contacto con partes móviles.
6. No opere ningún aparato con un cable o enchufe dañado, después de algún mal funciona-
miento del equipo o que este se haya dañado de alguna manera. Devuelva el aparato al
servicio autorizado más cercano para su revisión, reparación o ajuste.
7. No utilice al aire libre.
8. No deje el cable colgando sobre el borde de la mesa, o contacto con supercies calientes.
9. No abra latas presurizadas (tipo aerosol) con este aparato.
10. No abra latas de líquidos inamables, como líquido para encendedores con este equipo.
11. No utilice este equipoo para otros nes para los que no fue fabricado.
12. El uso de accesorios no recomendados o vendidos por el fabricante puede causar
incendios, descargas eléctricas o lesiones.
SÓLO PARA USO DOMÉSTICO
ENCHUFE POLARIZADO
Este aparato tiene un enchufe polarizado (una pata es más ancha que la otra). Para reducir
el riesgo de descarga eléctrica, este enchufe está diseñado para encajar en un tomacorriente
polarizado de una sola manera. Si el enchufe no encaja completamente en el tomacorriente,
invierta el enchufe. Si aún así no entra, llame a un electricista calicado. No intente modicar el
enchufe de ninguna manera.
INSTRUCCIONES DEL CABLE CORTO
Se proporciona un cable de alimentación corto para reducir el riesgo de enredarse o tropezarse
con un cable largo.
Se puede usar otros cables de alimentación o cables de extensión si se tiene cuidado en su uso.
Si utiliza un cable de alimentación desmontable o una extensión eléctrica, (1) la capacidad de
corriente de estos debe ser al menos igual a la clasicación eléctrica del equipo, y el cable más
largo debe ser colocado de manera que no cuelgue sobre la parte superior del mostrador o
mesa donde pueda ser jalado por niños o se tropiecen accidentalmente.

6
7
1
23
4
5
Conociendo su Abrelatas
1. Palanca
2. Imán
3. Rueda Dentada
4. Base
5. Abrebotellas
6. Hoja de Corte
7. Barra Guía
INSTRUCCIONES DE USO:
IMPORTANTE: Para asegurar un funcionamiento ecaz continuado, debe mantener la hoja
de corte limpia. Los Abrelatas eléctricos deben apagarse al menos un minuto después de ser
operados durante 5 minutos.
ANTES DE USAR
1. Desempaque cuidadosamente el Abrelatas.
2. Limpie con un paño suave o una esponja para eliminar pequeñas partículas recogidas
durante el embalaje y la manipulación.
3. Coloque la parte magnética (se utiliza para mantener la lata en su lugar al cortar) en el frente
de la palanca de deslizamiento y hacia abajo sobre el “gancho”, con la supercie circular
hacia abajo. Presione rmemente en su lugar hasta que la supercie superior esté a ras con
la palanca.
4. Coloque el Abrelatas en el tomacorriente, y presione hacia abajo la palanca para asegurarse
de que funciona correctamente.
PRECAUCIÓN: No ponga los dedos debajo de la palanca donde se encuentra la cuchilla y
rueda dentada, el hacerlo puede causar lesiones.
PRECAUCIÓN: Nunca retire el imán sin antes desconectar el cable y volver la palanca a su
posición a nivel horizontal
USANDO EL ABRELATAS
1. Coloque el Abrelatas en una supercie nivelada.
2. Levante y coloque la lata guía y contra la rueda dentada. (Ver Figura 1 para identicar las
partes). Asegúrese de que el imán se pegue completamente a la parte superior de la lata.
3. Agarre con una mano la lata. Con la otra, presione la palanca para perforar la tapa de la lata.
Esto inicia automáticamente la acción de corte. El abridor de latas seguirá cortado hasta que
la tapa esté completamente separada de la lata.
4. Tome la lata, luego levante la palanca para liberar la lata.
5. Retire con cuidado la tapa del imán.
TOME PRECAUCIONES PARA EVITAR LESIONES CON EL BORDE DE LA TAPA
USANDO EL AFILADOR DE CUCHILLO / TIJERA
1. Coloque ligeramente la hoja del cuchillo en la ranura por la izquierda o la derecha. Deslice el
cuchillo lentamente hacia usted lentamente, y repita el movimiento.
2. Coloque la hoja en la otra ranura y haga lo mismo. Repita esta acción alterna 4 o 5 veces, de
una ranura a otra hasta alcanzar el lo deseado.
3. El Alador ha sido diseñado con una ranura grande en el lado especialmente para las tijeras.
Coloque la hoja de la tijera en la ranura, y luego deslice hacia usted lenta y uniformemente.
Repita con la otra hoja.
ATENCIÓN: Las cuchillas aladas deben estar limpia. No debe alar los cuchillos que tienen
hojas serradas.
USANDO EL ABREBOTELLAS
1. Desenchufe el aparato del tomacorriente.
2. Coloque el Abrelatas en una supercie plana. Para mantener el equilibrio, coloque una mano
en la parte superior del Abrelatas.
3. Coloque la tapa de la botella en el borde del abridor.
4. Aplique presión en la botella hacia abajo hasta que expulse la tapa de la botella.
NOTA: Este Abrebotellas, no se recomienda para las botellas con tapas de rosca.
Other manuals for CE22261
1
Table of contents
Languages:
Other Continental Electric Can Opener manuals
Popular Can Opener manuals by other brands

aidapt
aidapt VM915 Usage and maintenance instructions

Hamilton Beach
Hamilton Beach Walk-n-Cut manual

Hamilton Beach
Hamilton Beach 76375 - CleanCut Extra-Tall Can Opener Use & care guide

Krups
Krups Open Control GVE142 manual

Rival
Rival CN-707 operating instructions

Sky Master
Sky Master AL instruction manual