IMPORTANT SAFEGUARDS
When using electrical appliances, basic safety precautions should always be
observed, including
the following:
• Read all instructions carefully. Keep this leaet for future reference.
• To protect against risk of electrical shock, do not immerse unit in water or other
liquid.
• Close supervision is necessary when used by or near children.
• Unplug cord from outlet when not in use, before putting on or
taking off parts, and before cleaning.
• Avoid contacting moving parts. Keep hands, hair, clothing & other utensils, away
from beaters
during operation to prevent injury and/or damage to the mixer.
• Do not operate any appliance with a damaged cord or plug or after the appli-
ance malfunctions or has been damaged in any manner.
Return appliance to the nearest authorized service facility for examination, repair,
electrical or mechanical adjustment.
• The use of attachments not recommended or sold by the appliance manufac-
turer may cause re, electric shock, or injury.
• Do not use outdoors.
• Do not let cord hang over edge of table or counter, or touch hot surfaces.
• Do not use appliances for other than intended use.
• This appliance is for household use only.
• Do not abuse the cord.
• Any servicing, other than cleaning and user maintenance, should be performed
by an authorized
service representative.
•Before connecting the appliance, please check if the voltage indicated on the
appliance corresponds
with the main voltage in your home.
•Do not place the appliance on a hot surface.
•Remove the main plug from the wall socket;
-If problems occur during making coffee;
-Before cleaning the appliance.
•Do not allow the main cord to come into contact with hot surface.
•Use the appliance out of children reach. Prevent them from pulling he main cord.
•Never use the appliance of the main cord plug or the appliance itself was dam-
aged.
•In case of damage of the main cord it shall be replaced by a repair shop that is
authorized by the manufacturer.
•Do not use appliance for other than intended household use.
•Do not pour any water once the appliance has been turned on.
•The heating plate is hot when in operation. Do not touch-risk of severe burn!
•To ll the water tank use fresh cold water only.
SAVE THIS INSTRUCTIONS
POLARIZED PLUG
This appliance has a polarized plug (one blade is wider than the other). To reduce
the risk of electric shock, this plug is intended to t into a polarized outlet only one
way. If the plug does not t fully into the outlet, reverse the plug. If it still does not
t, contact a qualied electrician.
Do not attempt to modify the plug in any way. If the plug ts loosely into the AC
outlet or if the AC outlet feels warm do not use that outlet.
1
Voltage rating: 120V - 60Hz
Environmental temperature:-20~+85
Power rating: 870 W
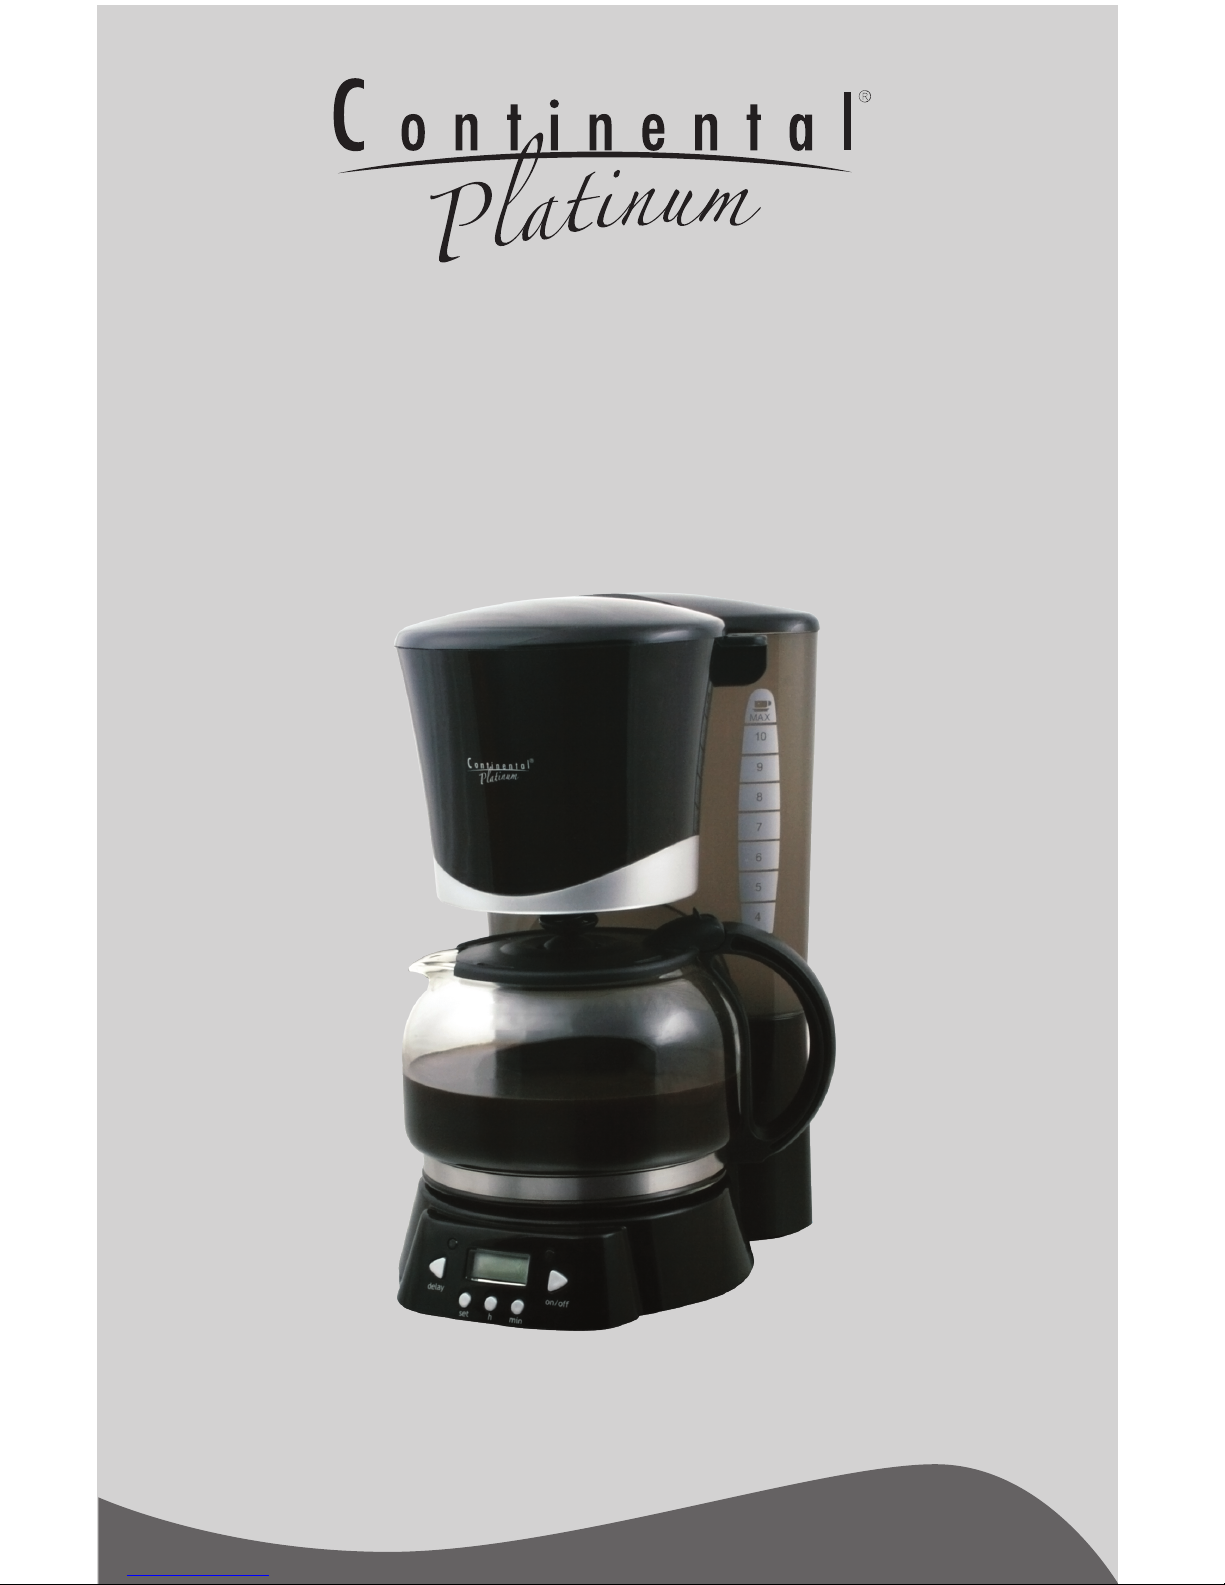
5 State display
(1) Initial switch on state: 12:00 shows on display with synchronous twinkling, but
not timing.
(2) Stand-by state: time shows on display without synchronous twinkling, but tim-
ing, equalling to a digital clock.
(3) Time setting: time setting indicator “SET TIME” lights constantly. The display
shows 12:00 at initial switch on state and current time in other moment with two
twinkling second dots in between.
(4) Reservation setting: reservation indictor “SET TIMER” lights constantly. The
display shows 12:00 at initial switch on state. Last set time will be shown when
reset the time. Two twinkling second dots are in between.
(5) Operating reservation: Time shows on display with the reservation indictor
(green lamp) lighting up, equalling to a digital clock.
(6) Operating state: Time shows on display with the operating lamp lighting up,
equalling to a digital clock. Outputs from the relay make the heater heat up.
6 Operation steps
(1) At Initial switch on state 12:00 shows with synchronous twinkling, but not tim-
ing. Pressing “ON/OFF’ button will heat up immediately, with the operating lamp
“WORK” on. The display stops twinkling. Any other button pressed can also stop
the display twinkling and meanwhile time from 12:00 on, entering into stand-by
state.
(2) Time setting: at stand-by state, press “SET” once to enter the time setting
state. “SET TIME” on left upper corner of the display will light up, showing the
time and with two-second dots twinkling. Press button “H” to set hour. Each press
will add one hour. Press “MIN” button to set minute. Each press will add one
minute.
Two ways for conrmation after nishing time setting:
a. Time setting will be automatically conrmed if no button stock in 3 seconds.
“SET TIME” lights off and clock shows.
b. Press the “SET” button twice continuously. Setting will be conrmed. “SET
TIME” lights off and clock shows.
(Press, “SET” for rotary chooses: TIME-TIMER-Stand-by state-TIME-)
(3) Setting reservation time: press “SET” button to enter the reservation time
setting state. “SET TIME” on the right upper corner of the display will light on,
showing the time and with two-second dots twinkling. Press button “H” to set
hour. Each press will add one hour. Press “MIN” button to set minute. Each press
will add one minute.
Two ways for conrmation after nishing time setting:
a. Time setting will be automatically conrmed if no button stock in 3 sec-
onds. “SET TIMER” lights off and clock shows.
b. Press the “SET” button once. Setting will be conrmed. “SET TIMER”
lights off and clock shows.
(Press, “SET” for rotary chooses: TIME-TIMEER-Stand-by state-TIME-)
4