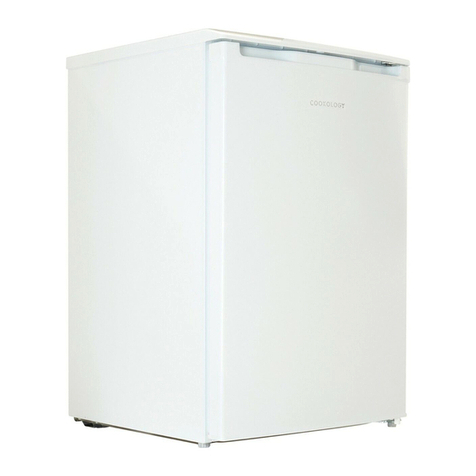
Cookology CITLF177 User manual

Larder Fridge
Instruction Manual
CITLF177
Built-In
Before use, please carefully read and follow all the safety rules and
operating instructions.
Simple but stylish home appliances

Contents
Cautions---------------------------------------------------------------------------------------------1~2
Diagram----------------------------------------------------------------------------------------------3
Preparation------------------------------------------------------------------------------------------3
Operation--------------------------------------------------------------------------------------------4
Instruction-------------------------------------------------------------------------------------------5~7
Defrosting, Cleaning and De-commissioning----------------------------------------------8~9
Troubleshooting-----------------------------------------------------------------------------------10

Cautions
Disposal of the Old Appliance
Before disposing of an old appliance, please make sure it is inoperative and safe. Unplug
the appliance and remove or destroy all locks in order to avoid the risk of child entrapment.
It must be noted that the refrigeration system contains insulating gases and refrigerants,
which require specialised waste disposal. The valuable materials contained in a refrigerator
can be recycled. Contact your local waste disposal centre for proper disposal of
an old appliance and contact your local authority or retailer if you have any questions.
Please ensure that the pipework of your refrigerator doesnot become damaged prior to
being collected bythe relevant waste disposal centre and contribute to environmental
awareness by insisting on an appropriate, any-pollution method of disposal.
Disposal of the Packaging of your New Appliance
All packaging materials used in the packaging of your newappliance may be disposed of
without any danger to the environment.
The cardboard box may be broken up or cut into smaller pieces and given to a waste paper
disposal service. The wrapping foil is made ofpolyethylene and the polyethylene pads and
stuffing contain no fluorochloric hydrocarbon.
All these valuable materials may betaken to a waste collecting centre and recycled.
Consult your local authorities for the details of the nearest waste materials collecting centre
and waste paper disposal services.
Safety Instructions and Warnings
Before switching on the appliance, read the information given in the User’s Guide carefully.
The User’s Guide contains very important observations relating to the installation,
operation and maintenance of the appliance.
Keep the User’s Guide in a safe place and remember to hand it over to the subsequent
owner, if you ever sell the appliance.
The manufacturer does not accept responsibility for any damages that may arise due to
non-observation of the following instruction.
*Damaged appliances must not to be used. If in doubt, consult your supplier.
1
CAUTIONS
Connection and installation of the appliance are to be carried out in strict
compliance with the relevant instructions set out in the User’s Guide.
For the purpose of safety, the appliance must be properly earthed in
accordance with specifications.
Always remember to unplug the appliance before cleaning. To disconnect
the appliance, pull at the plug itself, not the cable.
Keep alcoholic beverages in airtight bottles or containers and always store in
an upright position. In addition, do not store any explosive substances inside
the appliance. Danger of explosion!
Do not damage any parts of the appliance that carry refrigerant by piercing or
perforating the appliance cabinet with sharp or pointed items, crushing or
twisting any tubes, or scraping the coatings off the surfaces. If the refrigerant
comes into contact with eyes, it may result in serious eye injuries.
Do not obstruct or cover the ventilation grille of the appliance.
Children must never be allowed to sit on the drawers or hang on the door.
If you have bought your new fridge/freezer to replace an old appliance,
please make sure that all existing locks on the old appliance are destroyed,
before you dispose of it.This will ensure that a child cannot get trapped
inside.
Please dispose of the old appliance using a company specialised in
environmental protection, as the appliance may contain harmful components
in the refrigerant and this must be removed with special equipment.Please
check with your retailer or with your local authority.
Ensure that the refrigerating system containing the refrigerant (especially the
condenser at the rear) is not damaged during transportation to the disposal
or collection site, so that you ensure that the refrigerant does not leak out.
Details concerning the type of refrigerating/isolating agent used can be found
on the appliance rating plate.
Warning: Keep ventilation openings in the appliance cabinet and location
clear of obstruction.
Warning: Do not use mechanical devices or other means to accelerate the
defrosting process, other than those recommended by the manufacturer.
Warning: Do not damage the refrigerant circuit.
Warning: Do not use electrical appliances inside the appliance.
The plug must be accessible after installation.
If the power cable is damaged, it must be replaced by a cable or assembly
purchased from the retailer or its service agent.
Connection of power supply and installation should be carried out by
qualified personnel, in accordance with instructions in this manual.
Only tools indicated by the manufacturer can be used for defrosting.
SPECIFICATIONS
This appliance is designed for food refrigeration, ice making and frozen food
storage. It is intended strictly for household use. Use for industrial or
commercial purposes will invalidate the warranty.
The refrigerating circuit is leak-proof.

Refrigerator Diagram-- Preparation
1. Shelves
2. Vegetable and Fruit Tray
3. Temperature Controller
4. EggTray
5. Bottle Racks
This diagram may vary slightly with the layout ofthe refrigerator youhave
just purchased,due to technical improvements.
Preparation /Unpacking
Remove all packing materials.
Check Attachments and Materials
The Packing List should be checked to ensure that all parts are included.
Contact the local distributor if discrepancies are found.
Ensure Proper Location of the Refrigerator
*Ensure the refrigerator is kept upright during handling. If tilting is required, it should
not exceed 45 degrees,otherwise the appliance may become damaged, resulting in
compromised refrigeration performance.
*To avoid product damage or personal injury, the refrigerator should be unpacked by
two persons after it has been positioned in the required location.
*Before installation, make sure that the refrigerator has no visible exterior damage.
*When handling the refrigerator, do not lift it byholding the door, to prevent
any damage to the refrigerator.
*Do not start up a refrigerator that is damaged.
Clean the Refrigerator Before Use
(See the following section “Cleaning”)
Idle Time
After the refrigerator has been installed and cleaned, let it stand for more than 30
minutes before connecting the power source.
3

Operation
Starting the Refrigerator
After connecting to thepower supply, turn the temperature
controller clockwise from position 0 to any position
between 1 and 7 to start the refrigerator. The refrigerator
compressor will stopwhen the temperature controller
is set at position 0.
Adjusting the Temperature
The temperature inside the refrigerator is adjusted by turning the temperature
controller. Positions 1 to 7 represent different temperatures from the lowest to the
highest.
PositionConditions
1-2 Summer orambient temperature between 25-35℃
3-4
Spring, Autumn or ambient temperature between 15-25℃
4-5
Winter,orambient temperature between 5-15℃
6-7
QuickFreeze
Caution: Leave some time for the refrigerator to reach the set level after temperature
adjustments are made. The length of this period is determined by differencesin the
ambient and set temperatures, the frequency with which the door is opened and closed
and the amount of foodin storage.
Loading the Refrigerator with Food
When therefrigeratoris switched on, do not load fooduntil 1~2 hours have passed.
Usually, foodfor cold storage or deep freezingshould be loadedwhenthe
temperature inside thecompartment reaches theset point.
T
4

Instructions
Cold Storage is for Short-Term Food Storage or Daily Consumption
Although the temperature in most parts of the cold storage compartment can be regulated between 0 and 10
degrees Centigrade, extended periods of food storage are not recommended. Cold storage should only be
used for short-term storage.
Cold Storage Compartment
1. Eggs and Butter
2. Pickled food and Seasonings
3. Beverages and Bottled Food
4. Cooked Food and Milk
5. Meat and Sausages
6. Fruits, Vegetables and Salads
Cautions for Cold Storage
*Hot foodmust be cooled toroom temperature before storing in the refrigerator.
Dry any water droplets on the food before placing it in the refrigerator.
It is recommended that food be sealed in suitable storage bags before being placed
in the refrigerator;this will prevent moisture in the food from evaporating and prevent
vegetables and fruit from withering or altering in flavour.
5
5

Instructions
*Do not store excessquantities or weights of food; food should be stored with spaces
inbetweenfor better storage results. Never overload shelves,as they may collapse under
excessive loads.
*Food to be stored should be sorted accordingto consumer requirements. Food consumed
daily shouldbe placed inthe most convenient area, this will minimise door opening periods.
Do not place food tooclose to theinternalwalls.
Shelf Cleaning
*Shelves can be taken out for cleaning.
Lamp :
*Lamp: 230V-240V, 1W
*Lamp type: LED
6

Instructions
Instructions for Food Storage
*Storage periods for root vegetables are extended if their roots are placed towards the cold
source.
*Leaves of carrots or turnips should be removed before storage.
*Onions, garlic, ginger and other delicate root vegetables should not be stored in
the refrigerator,as these foods are more suitable for long-term storage at normal
temperatures.
*Melon, bananas and pineapples should not be stored in the refrigerator.
Cold air will accelerate the ripening process.
7

Defrosting - Cleaning - De-commissioning
Defrosting the Cold Storage Compartment
The cold storage compartment is designed for automatic defrosting. Frost formed on the back wall
will melt and flow via the drainpipe to the evaporating container over the compressor, which is
located on the back of the refrigerator. The heat generated by the compressor will evaporate the
water.
Caution: Always keep the drain over the vegetable and fruit tray clear to ensure
the normal flow of defrosted water. Use the rod provided to clear any blockages.
Cleaning
The refrigerator should be cleaned regularly to prevent the formation of bad odours.
* Disconnect the power before cleaning the refrigerator.
*Do not use a steel brush, strong detergent, hot water, acid or alkali products for cleaning.
*Wipe off water drops on the surface of the refrigerator with a soft cloth.
(1) Do not use excessive amounts of water for cleaning the refrigerator.
(2) Use a dry cloth to clean the switch, the lamp and the temperature controller.
* Always keep the rubber door seal clean.
* Clean the back and sides of the refrigerator regularly.
Cessation of Operation
If apower cut lasts for an extended period, unplug the refrigerator and clean it as
previously described.
Keep the door of the refrigerator open when the power is turned off,to prevent any
food remaining in the compartment from producing bad odours.
Caution: It is recommended that the refrigerator is not turned off in this situation.
8

Defrosting - Cleaning - De-commissioning
Power Cuts
Even in summer, food can be stored in the refrigerator for a few hours after a power cut.
* Do not put additional food into the refrigerator during a power cut.
*Avoid opening the door during power cuts.
*If prior notice of a power cut is given, make some ice and put it in a container in the top of
the cold storage compartment.
Caution: The temperature in the refrigerator will rise during a power cut or during
technical problems and the storage period will be therefore be reduced.
During Vacations
* Remove any food from refrigerator ifthe vacation is short. Turn the temperature selection
knob to the proper position and make sure that the door of the refrigerator is properly
closed.
*If the vacation is long, remove the food from the refrigerator and disconnect the power.
When the frost inside melts, clean and dry the compartment.
Disposal of the Refrigerator
*Remove the door of the refrigerator when you dispose of it, to avoid children becoming
accidentally trapped inside.
Moving the Refrigerator
* Unplug the refrigerator.
*Remove any food.
*Secure the shelf and vegetable tray with tape.
*Tightly close the door with tape.
9

Questions and Answers
Events below are NOT problems:
* The temperature of the refrigerator and the compressor will rise and the compressor will
run for comparatively longer periods when the refrigerator is first switched on.
*Wipe away water drops on the external surface of the refrigerator with a soft cloth.
*When the refrigerator is opened frequently or the door is kept open too long in humid
conditions, the cavity will become damp.
* A slight gurgling sound will be heard when the liquid refrigerant circulates or when the
compressor switches on and off.
*A slight sound will be heard when defrosted water drops into the evaporating dish.
*The compressor will operate for comparatively longer periods if excessive quantities of
food are stored or the ambient temperature is high.
* The evaporator will produce odours if the compartment is not cleaned.
Caution: The refrigerator should never be restarted until after a period of at least
5 minutes has elapsed.
NOTE: Please determine the cause of the problem before making
repairs or calling customer service.
Problem Cause
Refrigerator will not
start.
*Bad connection to power source (plug, socket or fuse)
* The temperature knob is at the 0 position
*Low voltage
The lamp does not
blink.
*Bulb failure
* Power supply not connected
* The temperature knob is at the 0 position
Excessive noise. * Uneven installation
*Contact between the refrigerator and a wall or other article
Compressor
operates for a long
period or
temperaturedoes
not reach set point.
* First time of operation
* Excessive food stored
* Frequent opening of the refrigerator door due to hot weather
* The temperature controller is not set properly
* Refrigerator is in direct sunlight, or close to a heat source
* Poor ventilation, or dirt on the condenser
Food dry * Food not properly covered or sealed
Strange odour
* Failure to seal food properly
* Rotting food inside refrigerator
* Refrigerator should be cleaned. See "Cleaning"
10

Installation and Ventilation
This appliance must never be installed close to heat sources i.e.
heating elements, cookers or in damp places
The diagram shows the ventilation requirements for your product.
Failure to provide adequate ventilation can lead to increased running
costs and
premature failure and may invalidate the warranty provided with the
product.
fig. 2
1770
45
57
545
540
1770-
1788
min. 30
560-570
550 min
= airow

Ventilation
The main consideration when installing any refrigeration unit into
a fitted kitchen is ventilation. The heat removed from the cooling
compartment needs to be dissipated into the atmosphere. Incorrect
ventilation can lead to premature compressor failure, excessive power
consumption and total system failure. For products intended to be
installed into a tall housing unit, the following requirements need to be
met: -
Important
Please follow the instructions to install this unit
300
300
plan view of cut out and ventilation gaps
The top of the cabinet needs to be
vented into the room
Recommended size of vent opening:
500 x 35mm
If the furniture does not allow free air
into the room then a plinth vent, or other
means of ventilation needs to be pro-
vided to ensure a natural flow of air
There should be space at the rear of the
cabinet to allow cool air to be drawn over
the condenser.
Recommended:
500 x 35mm
An air intake
should be
provided
somewhere in
the cabinet run to
allow free air in.
In this example,
a plinth vent is
shown underneath
the refrigerator .
A thin section of
the plinth can be
removed to allow
air into the unit
(recommended
600mm x 10mm)
Refrigerator
outline
Min 30mm
A hole should be cut in the supporting
shelf, as shown below
fig. 3

The open channel at the rear is clearly shown. For the correct
operation of the appliance it is important that the top of the housing
unit is not blocked o. A channel depth of 40-50mm is normal with
most units.
A hole is shown in the base shelf of the unit; this allows air to be
drawn over the compressor & heat exchange. Some installers fit a
decorative plinth vent. In most cases this is not required, but is a
welcome aesthetic addition.
As a rule, the more air can get in, the better and more ecient the
operation of the product.

Reversing the Door
It is possible to reverse the door on
this appliance, if required. To do so,
follow the steps below:
1. Loosen the top hinge fixing screws
and remove the top hinge, taking
care to support the weight of the
door.
2. Lift the door from the bottom hinge
and place on a soft surface to
protect the door from damage.
3. Refit the hinge taken from the top
to the opposite lower corner, as in
figure 4.
4. Replace the door and refit the
hinge taken from the lower corner
to the opposite top corner.
5. Adjust the hinges to ensure the
door is aligned correctly.
fig. 4

Mounting the Fascia
Door
• Using a screwdriver, fix the mounting
brackets to the appliance door, as
shown in figure 5.
• Position the appliance within the unit.
Ensure that there is a gap of 3
to 4 mm between the non-hinged
side and the cabinet wall.
• Locate the slider in the bracket and fix
the slider to the fascia
door 20 to 22 mm from the edge of
the fascia as shown in figure 6,
ensuring that the slider is positioned
centrally and horizontally
within the bracket. Tighten securely
by hand.
• Fill the gap on the non-hinged side
with the seal strip provided, as
shown in figure 7.
fig. 5
fig. 6
fig. 7
20 mm
door gasket
x4
x4

Manufacturer’s Declaration
The manufacturer hereby declares that this product meets the re-quirements of the following European directives:
·Low Voltage Directive 2014/35/EC
·Electromagnetic Compatibility (EMC) Directive 2014/30/EC
·ErP Directive 2009/125/EC
·Directive RoHS 2011/65/EC
and has thus been marked with the symbol and been issued with the CE symbol and been issued with
a declaration of compliance made available to market regulators.
Simple but stylish home appliances
Table of contents
Other Cookology Refrigerator manuals

Cookology
Cookology CFDF391IX User manual

Cookology
Cookology UCFR130WH User manual

Cookology
Cookology CSBS460IX User manual

Cookology
Cookology CBULF600 User manual

Cookology
Cookology CBUIB600 User manual

Cookology
Cookology UCFR110WH User manual

Cookology
Cookology UCIF93WH User manual

Cookology
Cookology MFR45WH User manual