Cool Nights Spas CN 3000 User manual

OWNER’S MANUAL
CN 3000 | CN 7000 | CN 8000 | CN 9000 | CN 10000
5301 E. Hanna Ave.
Tampa, L 33610
(727) 490-2239
www.CoolNightsSpas.com
Part Number 827617

Owner’s Information
Dealer:
Date Purchased:
__________________________
Company:
__________________________
Address:
__________________________
Telephone:
__________________________
Installer:
Date Installed:
__________________________
Company:
__________________________
Address:
__________________________
Telephone:
__________________________
Spa:
Date Delivered:
__________________________
Model:
__________________________
Color:
__________________________
Serial Number:
__________________________
Your unique spa serial number is located on a data plate outside
the cabinet at ground level directly below the topside control
panel. When calling for service, have your serial number in hand to
expedite its servicing.
You will need this serial number to access the online troubleshooting
guide at www.CoolNightsSpas.com

1
C
C
Co
o
oo
o
ol
l
l
N
N
Ni
i
ig
g
gh
h
ht
t
ts
s
s
S
S
Sp
p
pa
a
as
s
s
O
O
Ow
w
wn
n
ne
e
er
r
r’
’
’s
s
s
M
M
Ma
a
an
n
nu
u
ua
a
al
l
l
T
T
Ta
a
ab
b
bl
l
le
e
e
o
o
of
f
f
C
C
Co
o
on
n
nt
t
te
e
en
n
nt
t
ts
s
s
Introduction....................................................................................2
Important Safety Information......................................................3
Installation.......................................................................................7
Electrical Specifications...............................................................8
Startup ...........................................................................................14
Operating Instructions................................................................21
Water Management ..................................................................22
requently Asked Questions......................................................23
Troubleshooting ...........................................................................25
Maintenance and Care ............................................................29
Shutdown / Winterizing ..............................................................31
Glossary.........................................................................................32
Specifications...............................................................................34
Conditions of Warranties ...........................................................46
Limited Warranty………………………………Inside Back Cover
Online troubleshooting is available at www.CoolNightsSpas.com.
You will need your serial number to access this site.
Important – Cool Nights Spa Manufacturers is dedicated to
offering you the best in customer satisfaction and service. The
warranty is a manufacturer's limited warranty and is included in this
manual. Be sure to read, complete and sign the warranty to
ensure you understand what you are entitled to in terms of service.
If you have any questions whatsoever, do not hesitate to call Cool
Nights Spas for more details.
Copyright © 2007, Cool Nights Spas. All rights reserved. No portion of this manual
may be reproduced in any manner without express written permission of Cool
Nights Spas, Inc.
Printed in the U.S.A.
Part Number 827617 Version 4.9

2
I n t r o d u c t i o n
Your choice of a Cool Nights spa indicates that you are devoted
to excellence. The management and staff appreciate your
patronage and takes pride in the tradition of quality spas that our
company represents.
To properly acquaint yourself with your spa, we suggest that you
take time to read through this manual before hook up and
operation. Doing so will familiarize you with important operating
and safety procedures, thereby ensuring an enjoyable experience
right from the start.
If you need any more information than this manual provides, feel
free to visit our Web site at www.CoolNightsSpas.com or call our
24/7 technical support line at (727) 490-2239.
WA NING: This manual was written to ensure the proper use
and installation of your spa. Any modifications to
the procedures outlined in this manual may result in
voiding your warranty.
Important – Please complete, sign, and submit the warranty card
located on the back cover of this manual within 30 days of
purchase.
This manual and its contents are subject to change without notice.
Although Cool Nights Spas has prepared this manual as accurate
and precise as possible, we will not be liable for loss, injury or
damages caused by improper installation or use of spa (improper
or otherwise).
All Cool Nights spas are made with quality Eon
synthetic cabinet materials. Eon materials
won’t fade and are nearly invulnerable to
mold and mildew. Where wood splits, cracks,
and stains, Eon stands in timeless perfection.

3
I m p o r t a n t S a f e t y I n f o r m a t i o n
ead and Follow All Instructions
S
S
SA
A
AV
V
VE
E
E
T
T
TH
H
HE
E
ES
S
SE
E
E
I
I
IN
N
NS
S
ST
T
TR
R
RU
U
UC
C
CT
T
TI
I
IO
O
ON
N
NS
S
S!
!
!
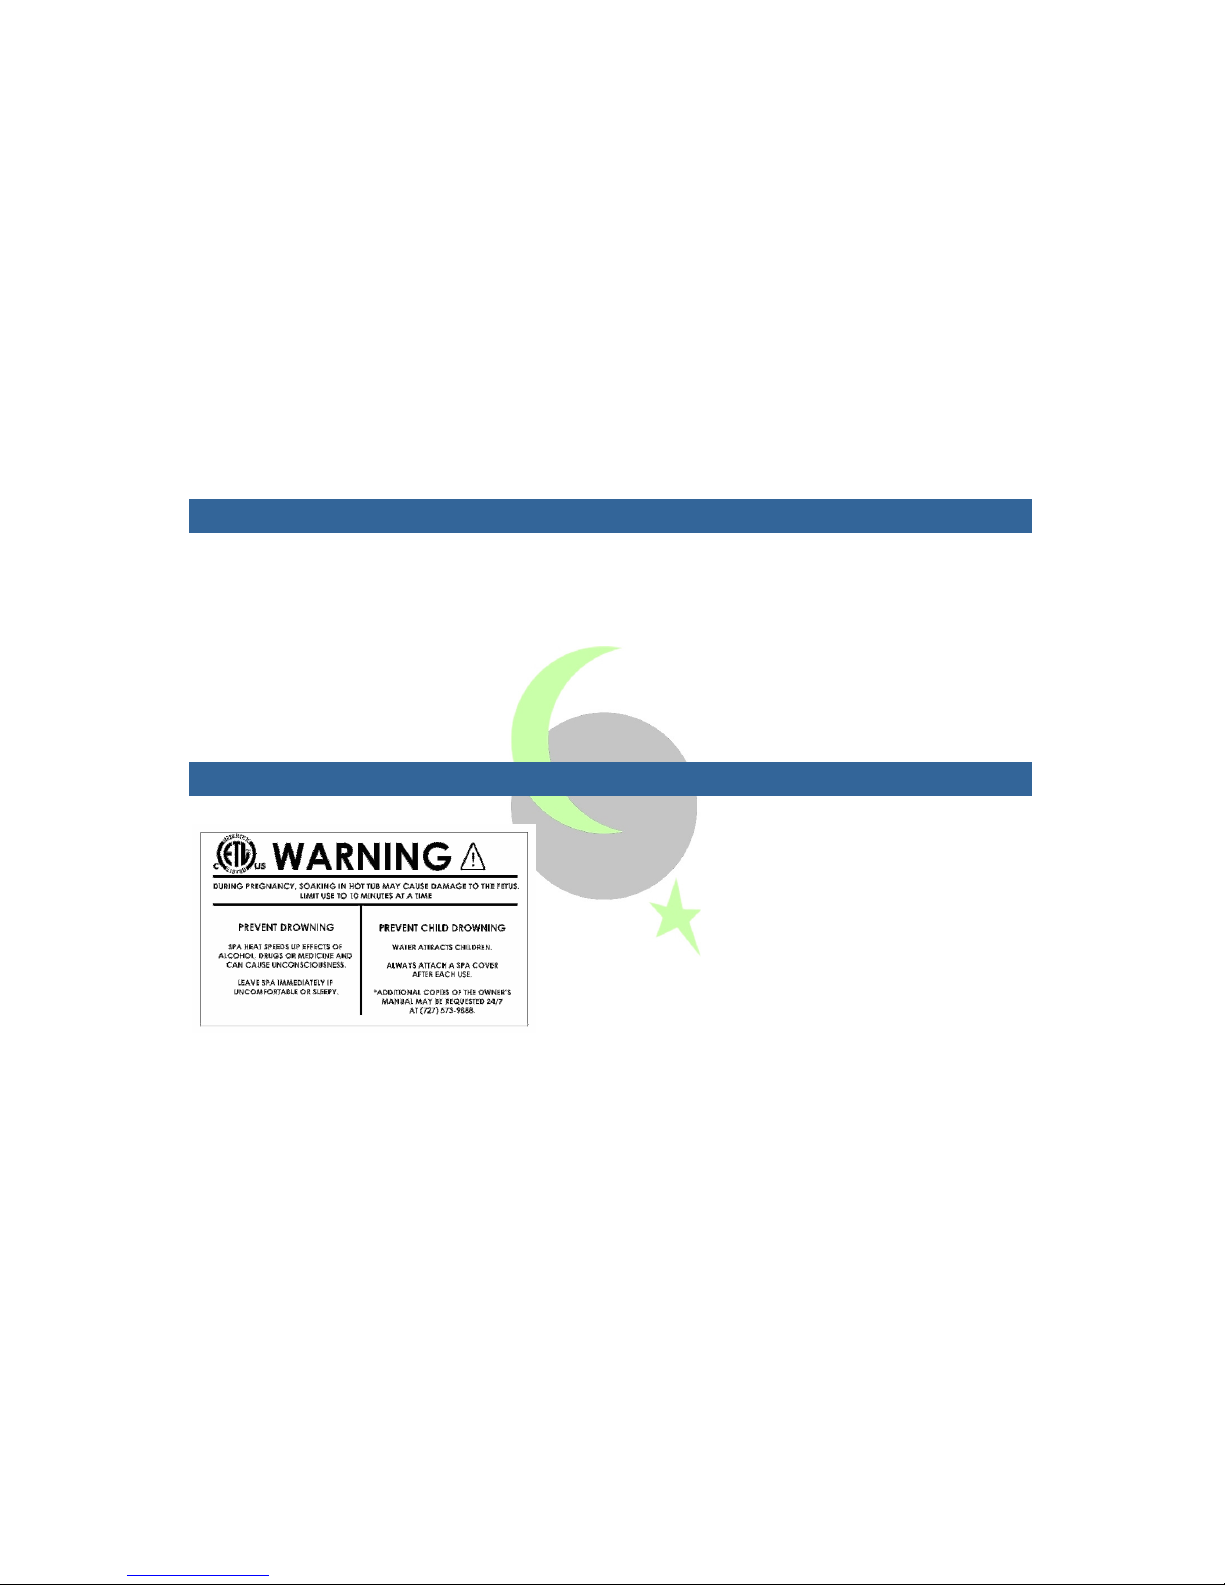
Avoid isks To Children:
DANGE : ISK OF CHILD D OWNING: Extreme care must be
exercised, to prevent unauthorized access by
children. To avoid accidents, ensure that children
cannot use the spa unless they are supervised at all
times. Always cover the spa and use safety locks.
WA NING: ISK OF CHILD INJU Y: Do not permit children to use
the spa unless they are closely supervised at all
times. Lower water temperatures are
recommended for children. Children are especially
sensitive to hot water.
Avoid isks of Electrocution
DANGE : ISK OF ELECT ICAL SHOCK: Install spa at least 5 feet
(1.5m) from all metal surfaces. A spa may be installed
within 5 feet (1.5m) of metal surfaces when each
metal surface is permanently connected by a
minimum No. 6 AWG (10 mm
2
) solid copper
conductor to the wire ground connector provided on
the terminal for this purpose. Do not permit any
electrical appliance, such as a light, telephone,
radio, or television within 5 feet (1.5m) of the spa,
unless factory installed.
Connect all metal equipment, metal enclosures of
electrical equipment, metal water pipes, or conduits
to the provided ground connector with a minimum
No. 6 AWG (10 mm
2
) solid copper conductor.
Position your spa to provide proper drainage of the compartment
for electrical components. or floor-recessed spas, allow access for
servicing from above or below floor. Consideration should be
taken for water to splash out. Water can ruin wood floors and
some finishes.

4
• DO NOT use a wall switch, ground fault circuit interrupter,
circuit breaker, fuse, or plugging and unplugging the spa as a
means of turning your spa on or off for normal everyday use.
• DO NOT bring any electrical appliances into or near the spa,
with the exception of a space heater used for
winterizing/troubleshooting ONLY. Call (727) 490-2239 for
instructions on this procedure.
• DO NOT operate any electrical appliances from inside the spa
or when you are wet unless such appliances are built-in by the
manufacturer.
Avoid isks of Hyperthermia
WA NING: To reduce the risk of injury, the water temperature in
a spa should never exceed 40ºC (104º ). Water
temperatures between 38ºC (100º ) and 40ºC
(104º ) are considered safe for a healthy adult.
Lower water temperatures are recommended for
young children, senior citizens, and when spa use
exceeds 10 minutes.
WATER TEMPERATURE IN EXCESS O 38ºC MAY BE
INJURIOUS TO YOUR HEALTH.
AVE TISSEMENT: DES TEMPERATURES DE L'EAU SUPERIEURES A
38ºC PEUVANT PRESENTER UN DANGER POUR LA
SANTE. L'AVERTISSEMENT: LA TEMPERATURE D'EAU
DEPASSANT 38ºC MAI EST NUISIBLE A VOTRE SANTE.
Since excessive water temperatures have a high potential for
causing fetal damage during early pregnancy, pregnant or
potentially pregnant women should limit water temperatures to
38ºC (100º ). Before entering a spa, measure the water
temperature with an accurate thermometer. The tolerances of
water temperature-regulating devices vary.

5
Hyperthermia occurs when the internal temperature of the body
reaches a level several degrees above the normal body
temperature of 98.6º (37ºC). The symptoms of hyperthermia
include drowsiness, lethargy, and an increase in the internal
temperature of the body. The effects of hyperthermia include:
• Unawareness of
impending hazard
• ailure to perceive
heat
• ailure to recognize
the need to exit spa
• Physical inability to
exit spa
• etal damage in
pregnant women
• Unconsciousness and
danger of drowning.
Avoid isks of Burns
• Before entering a spa, measure the water temperature
with an accurate thermometer since the tolerance of
temperature-regulating devices may vary by as much as
±5° (2°C).
• Test the water with your hand before entering the spa to
be sure it’s comfortable.
Warning Sign
Warning Sign Must Be Posted – The
red WARNING sign like the one
shown is packed with your new spa.
This sign must be posted in a
prominent place in close proximity to
the spa installation site immediately
upon completion of spa installation.
It is extremely important that this sign be permanently placed in
clear view of any persons using the spa. Occasional spa users may
not be aware of some of the dangers hot water poses to pregnant
women, small children, and people under the influence of alcohol.
If you did not receive a warning sign or your sign has become
damaged, please contact our 24/7 technical support line at
(727) 490-2239 for a replacement.

6
Basic Safety Guidelines
Your Cool Nights spa is meant to be enjoyable, healthful and
relaxing. Below are some basic safety guidelines to follow every
time you use your spa.
1) Always check the temperature of your spa before entering.
High water temperatures can be hazardous to your health.
2) Persons suffering from heart disease, diabetes, high or low
blood pressure and pregnant women should consult a doctor
before using your spa.
3) Persons under the influence of medication, drugs, or alcohol
should not be allowed into your spa.
4) Do not allow children to use your spa without continuous
supervision of an adult.
5) Do not use your spa alone.
6) The G CI breaker must be tested prior to using your spa each
time to ensure it operates properly.
7) Any electrical devices near your spa must be G CI protected
and out of reach from inside the spa.
8) Keep all breakables away from the spa area.
9) Lock the cover on your spa when not in use.
10) Enter and exit the spa slowly. Wet surfaces can be slippery.
11) Prolonged immersion can be hazardous to your health.
12) Maintain water chemistry in accordance with manufacturer’s
instructions.

7
I n s t a l l a t i o n
Proper planning is an important consideration when installing your
new spa. Site selection is a critical step and should be given some
serious thought. Planning ahead, before the delivery of your spa,
makes the installation process easier. The following information is
provided to assist you in site preparations.
1) Always comply with local building codes with respect to gates,
fences, etc.
2) Be sure your spa has proper access to water, drainage and
electricity.
3) Properly support its weight. There are many ways to support
your spa. In most cases, a 4-inch thick cement pad suffices. [Or
you may purchase a durable, synthetic spa pad by calling the
24/7 technical support line at (727) 490-2239.] Please consult
your spa sales representative before constructing a base.
4) Be sure your spa will fit into the space you have chosen.
5) Ensure there is proper access into the area of the spa for
normal servicing.
6) Provide adequate ventilation for the humidity created by your
spa. In most cases, a Spa Hard Cover is sufficient.
7) Check the load carrying capabilities of the floor on which the
spa will reside. Most homes meet the requirement of 80 pounds
per square foot.
8) Protect the pump and all equipment from the weather by
ensuring the cabinet panels are secure at all times.
Important – When building a skirt or sinking a spa into a deck or
ground, allow a minimum of 36 inches (1 meter) of unobstructed
access to all sides of your spa. This ensures proper serviceability to
internal plumbing and equipment. Consider your design carefully.
The more access the better. Make the access door in a logical
place (i.e. near controls and equipment). Call the 24/7 technical
support line at (727) 490-2239 for more details.

8
E l e c t r i c a l S p e c i f i c a t i o n s
Important – Qualified and licensed electricians must perform all
electrical hookups. The following specifications must be followed in
order to ensure proper performance and safety.
WA NING: Starting an incorrectly wired spa could cause
severe damage to the mechanical equipment or
even bodily harm. Have your licensed electrician
verify G CI (or RCD) wiring with the schematics on
pages 9-10 prior to starting the spa or call the
technical support line at (727) 490-2239.
Caution: ailure to abide by specifications listed may result in
damage to the equipment and will void the warranty.
US/Canada:
All spas must be wired with a G CI breaker in the service panel
(see table below for proper sizing). ailure to do so will cause
equipment damage and will not be covered under your warranty.
Model Volts Freq.
Rating
Amps
GFCI
Amps Wire size Controller
Domestic
CN 8000 CN 9000 CN 10000
240 60 40 50 6-3 plus ground VS510SZ
Domestic
CN 7000 240 60 40 50 6-3 plus ground VS501Z
Europe
CN 8000 CN 9000 CN 10000
220-240
50 1x32
or 2x16
IEE wire
regulation
3 or 5 Wires 4mm
GS510Z
Europe
CN 7000 220-240
50 1x32
or 2x16
IEE wire
regulation
3 or 5 Wires 4mm
GS501Z
CN 3000 240 60 32 40 6-3 plus ground VS500Z
EU OPE:
WA NING: Disconnect the electrical power before servicing.
Before obtaining access to terminals, all supply
circuits must be disconnected.
Avertissement: Disconnecter du circuit d'alimentation
electrique avent l'entretien.

9
Caution: Connect only to a circuit protected by a residual
current device. Test the RCD before each use of the
spa.
Attention: Connecter uniquement a un circuit protege par un
disjoncteur differentiel.
Toujours verifier l'efficacite du disjoncteur differentiel
avant d'utiliser le bain. Bonding lugs. Cosses demise a
la masse. Use the copper conductors only. Employer
uniquement des conduteurs de cuivre.
Nos stations thermales sont certifiées par les Services
de l'Essai d'Intertek NA Ltd. Ontario à CAN/CSA-
C22.2 No. 218.1-M89 et ANSI/UL 1563.
Parts with extra low voltage not exceeding 12v must be
inaccessible to a person in the spa. Earthed appliances must be
permanently connected to fixed wiring. Parts incorporating
electrical components, except remote control devices, must be
located or fixed so that they cannot fall into the spa. Appliances
should be supplied through a residual current device (RCD) having
a rated residual operating current not exceeding 30ma.
Means for disconnection must be used in fixed wiring in
accordance with wiring rules.
Important – To allow the 240V G CI to function properly, connect
the white Neutral wire from the spa to the Neutral terminal on the
G CI breaker, not the Neutral bus in the G CI breaker box. An
improperly connected Neutral causes the G CI breaker to trip.

10
240V Wiring
All wiring is 6-3 plus ground, solid copper

11
For CN 8000, CN 9000, and CN 10000 Domestic models
For CN 8000, CN 9000, and CN 10000 European Models

12
For CN 7000 Domestic model
For CN 7000 European Model

13
For CN 3000 Domestic Models

14
S t a r t u p
Important – Read these step-by-step startup procedures before
starting your spa. ailure to follow any of these steps listed may
result in damage to the equipment and may void your warranty.
Special Note: If you are unsure of any of the above startup
procedures, please call the 24/7 technical support line at
(727) 490-2239. or best results, read each step in its entirety before
proceeding.
Caution: Running the spa pump dry (without water running
through it) can cause IMMEDIATE damage and will
void the warranty! Be sure that the spa is installed
properly in accordance with the instructions in this
manual.
Refer to the following picture for an explanation of your spa’s
controls, components, and technical terms. Note that not all
models have all features and components.

15
Before Adding Water
Before adding water, go through these simple steps now to
prevent common issues when setting up your spa for the first time.
Verify that the following have all been rechecked.
1. Turn off all power to the spa at the main breaker panel.
2. Open the side panels to access the internal components.
3. Check that all slide valves are opened (T-handles
pulled out) to the heater and all pumps.
4. Check that there are no obvious signs of loose
wires or broken pipes.
5. Check that the two heater unions are tight. These are hand-
tightened and do not need any kind of special tool to tighten
them.
Caution: Do not use a wrench. Over-tightening may cause
damage to unions and gaskets, which will not be
covered under warranty.
6. Check that the unions on the pump are tight.
7. Clean out any foreign debris from within the service access
area or inside of the spa itself.
8. With the drain open and filters removed, thoroughly rinse out
the spa with warm water until the drained water runs clear. Run
water through the filtration canister and jet lines to remove any
incidental dust, dirt, and debris that may have accumulated
during shipment or installation. Drain all water completely.
9. Make sure that the spa drain valve is closed and the cap is on
tight (see page 27).
10. Install the filter.
11. Check that all of the spa jets are open (turned full counter-
clockwise).
12. Now is the best time to clean and polish the surfaces of your
spa (see page 28-29).

16
Filling Your Spa
Now it's time to fill your spa with water. Do not turn
on the electricity yet until the spa is completely
filled. To properly fill your spa:
1. Make sure that the filters (in the filtration
canister) are gently screwed into place. Turn
them clockwise until they stop being careful
not to over-tighten them (this avoids cracking
the filter).
2. Connect a standard garden hose to a faucet with regular cold
tap water (not softened water or hot water).
Caution: The water from your hot water tank should not be used
to fill the spa.
3. Put the AquaClara pre-filter (if equipped) on the other end of
the hose, turn on the water, and allow any sediment to be
flushed out.
4. Put the AquaClara pre-filter (if equipped) into the filtration
canister and turn on the hose.
Important: To assure that the pump is properly primed, fill the
spa through the filter area only.
5. ill the spa until the water level is about 1” above all jets (or
about ½” below the pillow). Do not over fill.
Note: Every person entering a spa displaces a given volume of
water, so adjust water level to the number of people regularly
using the spa.
Turn off the hose and check again for any small leaks.
Start-up Instructions
Caution: Do not turn on any pump until your spa is properly
filled with water. Running any pump without water in
your spa can cause IMMEDIATE damage, which is not
covered under warranty!
By now you have rechecked your spa’s mechanical connections
and filled it with water to about 1” above all jets by adding cold
tap water through the pre-filter. Turn on power to the spa at the
main breaker panel and test the operation of the electrical
system. If you encounter a problem, please reference the
troubleshooting guide.

17
1. Turn on the breaker and test the operation of the Ground- ault
Circuit Interrupter (G CI) breaker by pushing the small button.
This should automatically trip the spa's circuit breaker.
DANGE : If this breaker does not trip, immediately call your
electrician. Do not use your spa!
Only if pushing this button successfully trips this circuit breaker
should you reset this breaker and proceed to the next step.
2. Go to the topside control panel. The spa first goes into a 5-
minute Priming mode, indicated by “Pr” message. Water
heating is disabled during priming. To exit Priming mode and
begin normal spa operation, press “Up” or “Down” button.
3. Press the Jets (Jets 1) button. You should hear the pump turn
on, see water circulating, and see the Jets light illuminate on
the panel.
4. Press the Jets (Jets 1) button again. You should hear the pump
turn on a higher speed.
Caution: If water is not flowing from the jets in the spa after 2
minutes, turn the power off at the main panel and
bleed air from the system (see page 22). Turn the
power on again. Sometimes momentarily turning
the pump off and on will help to prime. Do not do
this more than four times.
5. If the water is running smoothly through the lines, open the air
control valve to the jets and you should see an increase in jet
pressure. Check and adjust the water and airflow of every jet if
necessary.
Each jet in your spa can be adjusted for massage intensity and
directional flow. Turn the outer jet dial counterclockwise to
increase the water volume and clockwise to turn it off. Pivot
the angle of a jet to achieve an optimal massage.
An air mixture intensifies the level of your massage. Turn the air
control valve counterclockwise to increase the air mixture and
clockwise to turn it off.
To minimize heat loss, close the air control valve when your spa
is not in use.

18
6. Press the Jets (Jets 1) button a third time to turn off the pump.
Note: The pump remains on if filtration or heat is needed.
7. Press the Light button to turn the spa Light on. Verify the spa
Light is on.
8. Press the Light button a second time to turn the spa Light off.
9. If equipped, press the Jets 2 button. You should hear the pump
turn on, see water circulating, and see the Jets2 light illuminate
on the panel.
10. Press the Jets 2 button again to turn off the pump.
11. If equipped, press the Blower button. You should hear the
blower turn on, see water bubbling, and see the blower light
illuminate on the panel.
12. Press the Blower button again to turn off the blower.
Step-by-step Programming
Jets1 – Jets 2 – Temp – Light
Blower – Jets – Temp – Light
7-button
Jets
Light
Steady – filtration
cycle ON
Temp
Light
Flashing – checking
water temperature
Steady – heater ON
Jets
Light
Steady – filtration
cycle ON
Temp
Light
Flashing – checking
water temperature
Steady – heater ON
Jet 1
Light
Steady – filtration
cycle ON
Heat
Light
Flashing –
checking water
temperature
Steady – heater
ON
Use Temp button to set the
desired water temperature
(80-104, 102°F
recommended). Press Temp
twice to change set
temperature while display is
flashing. Pressing Temp and
then Light switches between
standard, economy, and
sleep modes (see
Programming Summary on
the next page). Standard
mode heats the spa water to
the set temperature. “Std”
displays momentary when
switching to Standard mode.
Use the Warm/Cool buttons to
set the desired water
temperature (80-104, 102°F
recommended). Pressing
Warm/Cool and then the
Mode button switches
between standard, economy,
and sleep modes (see
Programming Summary on
the next page). Standard
mode heats the spa water to
the set temperature. “Std”
displays momentary when
switching to Standard mode.
This manual suits for next models
4
Table of contents
Popular Hot Tub manuals by other brands

Aquatic
Aquatic LUXEAIR 25 ai25lux7240 Specification sheet

Weslo
Weslo Renew 510 Spa LIVRET D'INSTRUCTIONS

Sunrise spas
Sunrise spas Classic Collection Series owner's manual

Marquis
Marquis SPIRIT Operating and troubleshooting guide

Image
Image IMSB63121 user manual

Artesian Spas
Artesian Spas Island Spas Series owner's manual