Corby Eton-E User manual

CO9061_V8_200223
USE & CARE MANUAL
www.corbyofwindsor.com
www.firedupcorporation.com/manual
MINIBAR
This manual is for the following models:
Eton-E 20L Glass Door 35L Glass Door 40L Glass Door
MB0007 MB0003 MB0001 MB0006
SC-10 SA SC-20 SA SC-35 SA SC-40 SA
20L Solid Door 35L Solid Door 40L Solid Door
MB0004 MB0005 MB0002
CB-20 SA CB-35 SA CB-40 SA
LANGUAGES
English 02-16
Français 17-32
Deutsch 33-48
Italiano 49-64
Español 65-80
Polski 81-96
Română97-112

These instructions must be read before use
These instructions are for your safety. Please read
through them thoroughly before use and retain for
future reference. Failure to follow them could cause
injury and/or property damage. These instructions are
also available on our website.
CONTENTS
SECTION 01
Cautions 03
Important 04
Introduction 05
Handling 05
Unpacking 05
Tools Required 05
SECTION 02
Identification 06
Parts supplied 06
SECTION 03
Installation 07-10
Use 10
Care 10
Dial 11
Specification 13-14
Guarantee 16
Contacts 16
02
SECTION 01

03
SECTION 01
IMPORTANT SAFETY INSTRUCTIONS
CAUTIONS
DO’S
• Ensure your mains supply rating corresponds with that stated on the rating label fixed
to the appliance before making any connections.
• Always install the appliance in accordance with this guide. If in doubt obtain expert
advice.
• Only use this appliance for its intended use as described in this manual.
• Always make sure the electrical socket is accessible after installation.
• Always disconnect the minibar from the electrical supply before carrying out
cleaning or maintenance.
• Always keep the specified amount of clearance around the appliance, especially
at the rear of the product, free from obstructions. Never obstruct the air vents.
• Wait at least 2 hours before storing goods in the appliance once it has been
switched on.
DON’TS
• Never use aerosols or steam cleaners on or around the minibar.
• Never route the mains supply cord under carpet etc.
• Never allow the supply cord to touch hot surfaces.
• Never sit or stand or put weight on the product.
• Do not store perishable food items (meats, dairy products, etc.) inside the
appliance.
• Do not use outdoors.
• Do not store explosive substances such as aerosol cans with a flammable propellant
in this appliance.
• Do not touch the cooled surfaces while the appliance is operating; especially not
with wet hands, because skin can stick to cold surfaces.
• Do not place any electrical items inside the appliance.
• Keep the appliance away from direct sun light, areas of high humidity and areas of
high temperature.

04
SECTION 01
IMPORTANT!
This appliance can be used by children aged from 8 years and above and persons with
reduced physical, sensory or mental capabilities or lack of experience and knowledge
if they have been given supervision or instruction concerning use of the appliance in a
safe way and if they understand the hazards involved.
Cleaning and user maintenance shall not be made by children without supervision.
Check the appliance and the supply cord for damage regularly. If the supply cord
becomes damaged, it must be replaced by a suitably qualified person using the same
rated cable. Do not attempt to make repairs to the appliance.
When cleaning, or storing away, always pull out the plug from the socket outlet. Never
yank the cord to disconnect from the outlet, instead grasp the plug and pull to
disconnect.
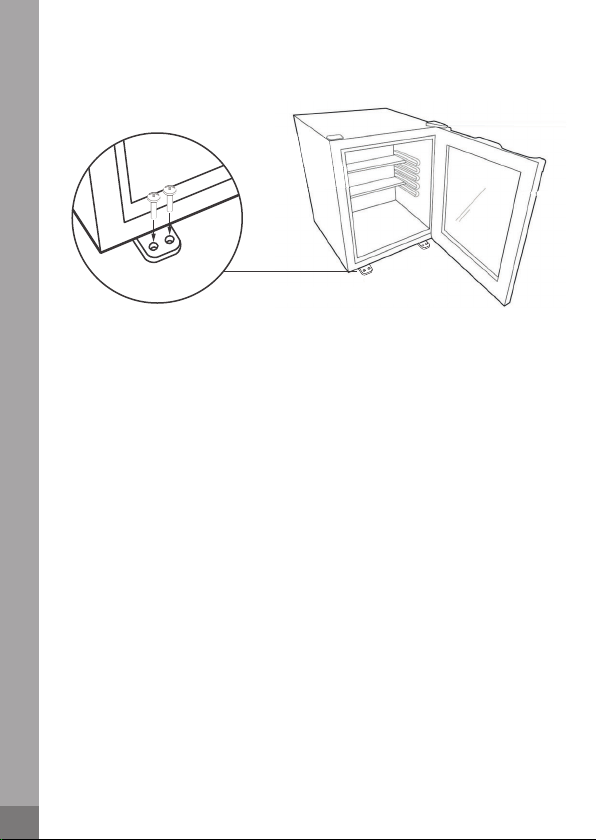
DANGER:Risk of child entrapment.
Before you throw away your old appliance, take off the door and leave the shelves in
place so that children may not easily climb inside.
IMPORTANT!
If damage has occurred to the product:
• Keep away from open flames and anything which creates a spark
• Disconnect from the mains
• Ventilate the room in which the appliance is located for several minutes
The more refrigerant there is in an appliance, the larger the room should be.
In the event of a leakage, combustible gases could build up if the appliance is in a
small room. For every 8g of coolant at least 1 cubic metre of room space is required.
The amount of refrigerant in the appliance is 25g (Eton-E, 20L & 35L) or 38g (40L).
SAVE THESE INSTRUCTIONS
!
CAUTION: Risk of Fire
This appliance contains a small quantity of the refrigerant R600a.
Although environmentally friendly, care must be taken during
transportation and installation of the appliance to ensure that no
parts of the cooling system are damaged. Leaking refrigerant can
damage the eyes or ignite.

05
SECTION 01
INTRODUCTION
Thank you for choosing this minibar. The product is designed to meet the most
stringent quality, performance, and safety requirements. This guide aims to
improve your understanding and appreciation of your new minibar by providing
simple and informative instructions.
This appliance is intended to be used in household and similar applications such
as staff kitchen areas in shops, offices and other working environments and by
clients in hotels, motels and other residential type environments.
HANDLING
Before continuing any further with the assembly and installation of this minibar
please read the following:
• When lifting always keep your back straight. Bend your legs and not your
back.
• Avoid twisting at the waist. It is better to reposition your feet.
• Avoid upper body / top heavy bending. Always bend from the knees rather
than the waist.
• Do not lean forward or sideways whilst handling the minibar.
• Always grip with the palm of the hand. Do not use the tips of fingers for
support.
• Always keep the product as close to the body as possible. This will prevent
unnecessary and undue strain on the body.
• Use gloves to provide additional grip.
• Always use assistance if required.
UNPACKING
Carefully unpack the product using the following procedure:
• Carefully lift the parts/product out of the box.
• Carefully remove the protective wrapping from the parts.
TOOLS REQUIRED
Crosshead screwdriver

06
SECTION 02
IDENTIFICATION (Images for illustrative purposes only)
Eton-E, 20L, 35L & 40L Minibars
GLASS DOOR SOLID DOOR
1. Blanking Plate 2. Main Shelf 1 3. Main Shelf 2
4. Feet 5. Bottom Hinge 6. Top Hinge
7. Door 8. Door Shelf 1 9. Door shelf 2
10. Locking Plate
PARTS SUPPLIED
Glass Door Solid Door
1. Minibar 1. Minibar 2. Left Side Hinge
2. 1x Main Shelf (Eton-E) 3. 2x Door Shelf 4. 2x Door Key
2x Main Shelf (20L) 5. 2x Main Shelf (20L)
2x Main Shelf (35L) 2x Main Shelf (35L)
6x Main Shelf (40L) 4x Main Shelf (40L)
3. 1x Spare Shelf (Eton-E)
4. Fixing Bracket (Eton-E)
5. 4x Screws (Eton-E)
2
6
5
3
4
7
8
9
10
16
2
3
5
7
4

07
SECTION 03
INSTALLATION
Positioning
Do not position this product in a location where it may be subject to extreme
temperatures, where it could be exposed to direct sunlight, or next to a heat
source.
The unit should be located in a cool, dry place.
Allow sufficient clearance around the minibar and ensure that it is positioned on a
stable and level surface.
Fixing the minibar - Eton-E Only
1. Position the fixing bracket at least 75mm away from the
wall/surface and screw it into place using 2 x screws.
Note: The bracket sits 215mm from the FRONT
of the minibar door. Please take this into consideration
when positioning the minibar and bracket.
IMPORTANT:
The bracket must be positioned centrally to
minibar in order to secure the minibar.
It is vital that a 50mm gap is left between the minibar’s sides, rear and top and any
surrounding surfaces (A)
AA
Front View
A
A
Side View
215mm
>75mm
>75mm
TOP VIEW

08
SECTION 03
2. Lift the minibar into place and slide backwards until
the rear feet sit underneath the fixing bracket.
3. Open the minibar door to reveal the front feet.
4. Screw the minibar into place using 2 x screws and
the 2 x holes in the front feet.
Changing the door
Ensure the minibar is placed on an even, flat surface when
changing the door
Please follow the relevant instructions
SOLID DOOR
1. Unplug the appliance and empty the contents,
including the shelves.
2. Carefully place the minibar on its back so the
door is facing up.
3. Remove the cap covering the top hinge.
4. Locate the second hinge on the bottom of the
minibar and remove the screws & hinge with a
screw driver.
5. Unhook the door from the top hinge. Then, using a screw
driver, remove top hinge.

09
SECTION 03
6. Remove the caps covering the screw holes in the top
corner of the minibar. Put the top ‘left’ hinge
(provided separately to the product) in to place and
attach with the screws (re-install the caps over the
previous top hinge position).
7. Remove the screws at the new bottom hinge position
and screw them in to the revealed holes at the
previous bottom hinge position.
8. Put the door in place ensuring it is the correct way
up and screw the bottom hinge in place.
9. Test the door to make sure both hinge brackets are
tight and secure before use.
GLASS DOOR
1. Unplug the appliance and empty the contents,
including the shelves.
2. Carefully place the minibar on its back so the
door is facing up.
3. Remove the cap covering the top hinge. Using a
screw driver, remove the screws and hinge, then
remove the door.
4. Locate the second hinge on the bottom of the
minibar and remove the screws & hinge with a
screw driver.
5. Remove the blanking plate covering the screw
holes on the top of the minibar. Put the top hinge
in to place and attach with the screws (re-install
the blanking plate over the previous top hinge
position).
6. Remove the screws at the new bottom hinge position
and screw them in to the revealed holes at the
previous bottom hinge position.
7. Put the door in place ensuring it is the correct way
up and screw the bottom hinge in place.
8. Test the door to make sure both hinge brackets are
tight and secure before use.
BOTTOM
BOTTOM

10
SECTION 03
USE
Once the minibar has been positioned correctly:
1. Plug the power cable into the mains (ensure the mains socket is switched
off first).
2. Turn the socket on (if applicable)
3. Close the door and allow it to operate continuously for 2 hours.
4. Beverages may then be stored inside.
5. The minibar can be locked using the keys provided. Rotate the key
anticlockwise to lock, and clockwise to unlock.
CARE
Never use harsh, abrasive or heavy-duty cleaners/solvents on any surface of the
appliance.
• Remove all contents (including shelves) before cleaning.
• Use warm soapy water to wipe and rinse down surfaces
• Be extra thorough when cleaning the inside.
• Baking soda solution (3 tablespoons per 1 Litre of water) may be used to
clean the interior.
• Wipe away all excess water and allow to dry
• Replace shelves and contents
ENERGY SAVING
• Always keep the door shut.
• Regularly check if the appliance is ventilating properly (adequate air
circulation).
• Make sure that before putting items in the appliance, they have been
cooled to room temperature.
• Keep the appliance away from direct sun light, areas of high humidity and
areas of high temperature.
SECURING THE MINIBAR - 20L, 35L & 40L
To secure the minibar in position, screw through the holes in the feet using the
appropriate fixings.

11
SECTION 03
DIAL
Minibar Cooling System
The cooling system works by removing heat from the minibar chamber. It can
remove up to 22°C from the chamber. This is dependent on the room (Ambient)
temperature. The cooler the room, the cooler the temperature the minibar can
achieve.
Adjustable Dial
The minibar is fitted with an adjustable dial on the rear as shown. This dial controls
the cooling system.
If the dial is turned to ‘L’, the minibar system will work constantly to achieve its
lowest temperature.
If the dial is turn to ‘H’, the minibar system will work less to achieve higher
temperature.
BACK VIEW
L = Lower Temperature
H = Higher Temperature
Adjustable Dial

12
SECTION 03
PLUG REPLACEMENT
(For Product fitted with BS plug)
This appliance is supplied with a BS1363 3 pin plug fitted with a 13 Amp fuse.
Should the fuse require replacement, it must be replaced with a fuse rated at 13
Amp and approved to BS1362.
In the event the mains plug has to be removed/replaced for any reason, please
note:
The wires in the mains lead on this appliance are coloured in accordance with
the following code:
THIS APPLIANCE MUST BE EARTHED
As the colours may not correspond with the markings identifying the terminals in
your plug proceed as follows.
• The green and yellow earth wire must be connected to the terminal in the
plug which is marked with the letter E or with the earth symbol
• The blue wire must be connected to the terminal marked N
• The brown wire must be connected to the terminal marked L
Important - any cut off plug should be disposed of safely to prevent hazard.
There is a danger of electric shock if a cut off plug is inserted into a socket outlet.
Earth
Neutral
Live
Green and Yellow -
Blue -
Brown -
E
N
L
Earth
(GREEN/YELLOW)
Neutral
(BLUE)
Live
(BROWN)
Fuse
(13 Amp)
Cord
Clamp
N

13
SECTION 03
SPECIFICATION
Eton-E Minibar
Model No. - MB0007
SC-10 SA
Capacity - 10 Litres
Rated Power - 58W
Voltage - 220-240V ~ 50/60Hz
Refrigerant R600a - 25g
(non ammonia)
Size - 440 x 360 x 280mm
20L Minibars
SOLID DOOR GLASS DOOR
Model No. - MB0004 - MB0003
CB-20 SA SC-20 SA
Capacity - 20 Litres - 20 Litres
Rated Power - 58W - 58W
Voltage - 220-240V ~ 50/60Hz - 220-240V ~ 50/60Hz
Refrigerant R600a - 25g - 25g
(non ammonia)
Size - 430 x 360 x 390mm - 440 x 360 x 375mm
35L Minibars
SOLID DOOR GLASS DOOR
Model No. - MB0005 - MB0001
CB-35 SA SC-35 SA
Capacity - 35 Litres - 35 Litres
Rated Power - 58W - 58W
Voltage - 220-240V ~ 50/60Hz - 220-240V ~ 50/60Hz
Refrigerant R600a - 25g - 25g
(non ammonia)
Size - 475 x 385 x 455mm - 485 x 385 x 440mm

14
SECTION 03
40L Minibars
SOLID DOOR GLASS DOOR
Model No. - MB0002 - MB0006
CB-40 SA SC-40 SA
Capacity - 40 Litres - 40 Litres
Rated Power - 58W - 58W
Voltage - 220-240V ~ 50/60Hz - 220-240V ~ 50/60Hz
Refrigerant R600a - 38g - 38g
(non ammonia)
Size - 560 x 400 x 425mm - 570 x 400 x 410mm

15
SECTION 03
ENVIRONMENTAL PROTECTION
• (WEEE) Waste Electrical and Electronic Equipment.
Waste electrical products should not be disposed of
with household waste. Please recycle where facilities
exist. Check with your Local Authority or retailer for
recycling advice.
• Cyclopentane is used as an insulation blowing gas. The gases in insulation
material require special disposal procedures. Please contact your local
authority regarding the safe disposal of this product.
CONFORMITY WITH DIRECTIVES
Conforms with relevant European Directives

16
SECTION 03
GUARANTEE
For your convenience, you are not required to complete a form and return it to
us in order to validate your guarantee. However, please ensure that you retain
your receipt which will act as both proof of purchase and a guarantee
validation document. We recommend that you attach your receipt to this
documentation.
Your product carries a minimum 12 month guarantee from the date that the
original purchaser receives it. If your product fails to operate to its specification
due to faulty workmanship or materials during the guarantee period, we will
either repair or replace the product. We will use our discretion to determine
whether to offer a repair or provide a replacement. The product will not be
covered by the guarantee if it has been misused, transformed, modified or
altered in any way.
If your product fails within the guarantee period please ensure that you have all
necessary documentation available including proof or purchase (receipt or
invoice with serial number, location and date of purchase) in addition to all
original undamaged packaging and leaflets etc. It is strongly recommended
that you inspect your product carefully before it is used or installed. For full
details of your product you should refer to the instruction manual which
accompanies the product. You are strongly advised to read this manual
carefully in its entirety and to retain it for future reference.
This product guarantee does not affect your statutory rights.
AFFIX RECEIPT OR PROOF
OF PURCHASE HERE
www.firedupcorporation.com
Fired Up Corporation Ltd
Fired Up Buildings
HD1 3LF, UK
Fired Up Corporation
(Ireland) Ltd
71, D02 P593, Dublin

G U I D E D ' U T I L I S A T I O N E T D ' E N T R E T I E N
www.corbyofwindsor.com
www.firedupcorporation.com/manual
MINIBAR
Ce manuel est destiné aux modèles suivants :
Eton-E 20L Porte En Verre 35L Porte En Verre 40L Porte En Verre
MB0007 MB0003 MB0001 MB0006
SC-10 SA SC-20 SA SC-35 SA SC-40 SA
20L Porte Solide 35L Porte Solide 40L Porte Solide
MB0004 MB0005 MB0002
CB-20 SA CB-35 SA CB-40 SA
17

Ces instructions doivent être lues avant utilisation
Ces instructions sont pour votre sécurité. Veuillez les
lire attentivement avant utilisation et les conserver
pour référence future. Le non-respect de ces
instructions peut entraîner des blessures et/ou des
dommages matériels. Ces instructions sont également
disponibles sur notre site web.
CONTENU
SECTION 01
Avertissements 19
Important 20
Introduction 21
Prise en main 21
Déballage 21
Outils Requis 21
SECTION 02
Identification 22
Pièces Fournies 22
SECTION 03
Installation 23-26
Utilisation 26
Entretien 26
Cadran 27
Spécification 29-30
Garantie 32
Contacts 32
18
SECTION 01

19
SECTION 01
INSTRUCTIONS DE SÉCURITÉ IMPORTANTES
AVERTISSEMENTS
À FAIRE
• Assurez-vous que la tension de votre alimentation électrique correspond à celle
indiquée sur l'étiquette de notation fixée à l'appareil avant de faire toutes les
connexions.
• Toujours installer l'appareil conformément à ce guide. En cas de doute, obtenir un
conseil expert.
• N'utilisez cet appareil que pour son usage prévu tel que décrit dans ce manuel.
• Assurez-vous toujours que la prise électrique est accessible après l'installation.
• Toujours débrancher le minibar de l'alimentation électrique avant de procéder à un
nettoyage ou à une maintenance.
• Toujours maintenir la quantité de dégagement spécifiée autour de l'appareil, surtout
à l'arrière du produit, libre d'obstructions. Ne jamais obstruer les orifices d'aération.
• Il est nécessaire d'attendre au moins 2 heures avant de stocker des produits dans
l'appareil une fois qu'il a été mis en marche.
À NE PAS FAIRE
• N'utilisez jamais de produits aérosol ou de nettoyeurs à vapeur sur ou à proximité du
minibar.
• Ne jamais faire passer le câble d'alimentation secteur sous un tapis, etc.
• Toujours éviter que le câble d'alimentation ne touche des surfaces chaudes.
• Ne jamais s'asseoir, se tenir debout ou poser de poids sur le produit.
• Ne stockez pas d'aliments périssables (viandes, produits laitiers, etc.) à l'intérieur de
l'appareil.
• Ne pas utiliser à l'extérieur.
• Ne pas entreposer de substances explosives telles que des aérosols à propulsion
inflammable dans cet appareil.
• N'utilisez pas les surfaces refroidies pendant que l'appareil fonctionne, surtout pas
avec les mains mouillées, car la peau peut adhérer à des surfaces froides.
• Ne placez pas d'articles électriques à l'intérieur de l'appareil.
• Veillez à ne pas exposer l'appareil à la lumière directe du soleil, à des zones
d'humidité élevée et à des zones de température élevée.

20
SECTION 01
IMPORTANT!
Cet appareil peut être utilisé par des enfants âgés de 8 ans et plus et des personnes
ayant des capacités physiques, sensorielles ou mentales réduites ou manquant
d'expérience et de connaissances, s'ils ont reçu une supervision ou une instruction
concernant l'utilisation de l'appareil de manière sûre et s'ils comprennent les dangers
encourus.
Le nettoyage et la maintenance par les utilisateurs ne doivent pas être effectués par
des enfants de moins de 8 ans à moins qu'ils ne soient supervisés.
Vérifiez régulièrement l'appareil et le cordon d'alimentation pour détecter tout
dommage. Si le cordon d'alimentation est endommagé, il doit être remplacé par une
personne qualifiée en utilisant le même câble de même puissance. Ne tentez pas de
réparer l'appareil.
Lors du nettoyage ou du rangement, débranchez toujours la prise de la prise murale.
Ne tirez jamais sur le cordon pour le débrancher de la prise, saisissez plutôt la prise et
tirez pour débrancher.
DANGER:Risque d'emprisonnement d'enfant.
Avant de jeter votre ancien appareil, enlevez la porte et laissez les étagères en place
afin que les enfants ne puissent pas facilement monter à l'intérieur.
IMPORTANT!
Si un dommage est survenu à l'appareil :
• Éloignez-vous des flammes et de tout ce qui peut provoquer une étincelle
• Déconnectez du réseau électrique
• Aérez la pièce dans laquelle se trouve l'appareil pendant plusieurs minutes.
Plus il y a de réfrigérant dans un appareil, plus la pièce doit être grande.
En cas de fuite, des gaz combustibles peuvent s'accumuler si l'appareil se trouve dans
une petite pièce. Pour chaque 8g de réfrigérant, une surface minimale d'au moins 1
mètre cube est nécessaire. La quantité de réfrigérant dans l'appareil est de 25g
(Eton-E, 20L et 35L) ou 38g (40L).
CONSERVEZ CES INSTRUCTIONS
!
ATTENTION: Risque d’incindie
Cet appareil contient une petite quantité de réfrigérant R600a.
Bien que respectueux de l'environnement, il faut faire attention
pendant le transport et l'installation de l'appareil pour s'assurer qu'
aucune partie du système de refroidissement ne soit
endommagée. Le fuite de réfrigérant peut endommager les yeux
ou s'enflammer.
This manual suits for next models
20
Table of contents
Languages: