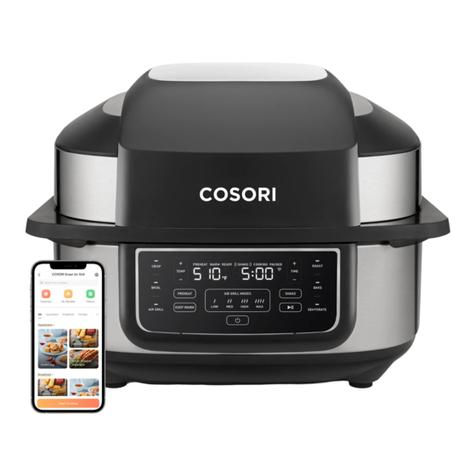
Cosori VeSync Aeroblaze CAG-A601 User manual

VeSync Aeroblaze™Indoor Grill
User Manual
Questions or Concerns?
Mon–Fri, 9:00 am–5:00 pm PST/PDT
Model Line: CAG-A601
Models: CAG-A601S-KUS, CAG-A601S-KUSR

2
Our helpful, in-house chefs are ready to assist you
with any questions you might have!
CONTACT OUR CHEFS
Email: [email protected]
Toll-Free: (888) 402-1684
M–F, 9:00 am—5:00 pm PST/PDT
join the Cosori Cooks Community on Facebook
facebook.com/groups/cosoricooks
explore our recipe gallery
www.cosori.com/recipes
enjoy weekly, featured recipes
made exclusively by our in-house chefs
(We hope you love your new indoor grill as much as we do.)
Thank you for
your purchase!
On behalf of all of us at Cosori,
Happy cking!

3
Table of Contents Package Contents
Specifications
Package Contents
Specifications
Important Safeguards
Getting to Know Your Indoor Grill
Display
Controls
Before First Use
• Setting Up
• Test Run
• VeSync App Setup
Cooking with Your Indoor Grill
• Using the Accessories
• Splatter Guard Assembly
• Oil Collector Assembly
• Cooking Functions
• VeSync App Functions
• Preheat Function (“PREHEAT”)
• Crisp Function (“CRISP”)
• Broil Function (“BROIL”)
• Roast Function (“ROAST”)
• Bake Function (“BAKE”)
• Air Grill Function (“AIR GRILL”)
• Dehydrate Function
(“DEHYDRATE”)
• Shaking Food
Accessories
Care & Maintenance
Troubleshooting
VeSync App Troubleshooting
Warranty Information
Customer Support
3
3
4
6
7
8
10
10
10
11
12
12
13
13
14
16
17
18
19
20
21
22
23
24
25
25
27
29
31
32
Power Supply AC 120V, 60Hz
Rated Power 1750 W
Capacity
6 qt / 5.7 L (Drip Tray)
4 qt / 3.7 L (Basket)
Temperature
Range
105°–510°F /
40°–265°C
Time Range 1 min–12 hr
Weight 19.6 lb / 8.9 kg
Dimensions 13.7 x 16.2 x 10.4 in /
34.7 x 41.2 x 26.5 cm
1 x Aeroblaze Indoor Grill
1 x Smoke Filter (Pre-Installed)
1 x Drip Tray
1 x Grill Grate
1 x Basket
1 x Cleaning Brush
1 x Recipe Book
1 x Quick Reference Guide
1 x User Manual
To get the most out of your indoor grill and
access smart functions, download the free
VeSync app.
Scan the QR code or search “VeSync” in the
Apple App Store®or Google Play Store.
For app setup instructions, see page 11.
VeSync App

4
IMPORTANT SAFEGUARDS
Follow basic safety precautions when using your indoor grill.
Read all instructions.
READ AND SAVE THESE INSTRUCTIONS
Key Safety Points
General Safety
• Do not touch hot surfaces. To open,
use handle and a heat-resistant glove
or oven mitt to avoid touching the
surface of the grill.
• The outside of the grill, including the
lid, is hot during and after use.
• Always use heat-resistant gloves,
pads, or oven mitts when handling
hot materials, and when placing
items in or removing items from
the grill, including accessories or
containers.
• Do not block any ventilation
openings. Keep hands and face clear
of vents at all times.
• When the grill is not in use, and
before cleaning, press to turn it
o, then unplug from outlet. Allow to
cool completely before putting on or
taking o parts.
• Do not immerse the housing, cord,
or plug in water or liquid.
• Closely supervise children near the
grill.
• Do not use your grill if it is damaged,
not working, or if the cord or plug
is damaged. Contact Customer
Support (see page 32).
• Do not use third-party replacement
parts or accessories, as this may
cause injuries.
• Do not use outdoors.
• Do not place the grill or any of its
parts on a stove, near gas or electric
burners, or inside a heated oven.
• Be extremely cautious when
removing a tray or basket if it
contains hot oil, grease, or other hot
liquids.
• Do not clean with metal scouring
pads. Metal fragments can break o
the pad and touch electrical parts,
creating a risk of electric shock, as
well as damage ceramic coating on
accessories.
• Clean the drip tray after using.
Accumulated grease and crumbs can
overheat and catch fire.
• Do not store anything on top of your
grill while it is operating. Do not
store anything inside your grill other
than recommended accessories.
• Do not operate with a separate
remote-control system.
• Only use as directed in this manual.
• Not for commercial use. Household
use only.

5
• An indoor grill works with hot air
only. Never fill the drip tray with oil
or fat.
• Do not place oversized foods or
metal utensils (except for Cosori
accessories) into your grill.
• Do not place paper, cardboard, or
non-heat-resistant plastic into your
grill, or any materials which may
catch fire or melt.
• To avoid overheating, do not use
metal foil in the grill unless directed.
Use extreme caution when using
foil, and always fit foil as securely as
possible. If the foil contacts the grill’s
splatter guard or heating element,
this can cause overheating and risk
of fire.
• Never put baking or parchment
paper into the grill without food on
top. Air circulation can cause paper
to move and touch the splatter guard
or heating element.
• Always use heat-safe containers.
Be extremely cautious if using
containers that aren’t metal or glass.
• Keep your grill away from flammable
materials (curtains, tablecloths, walls,
etc.). Use on a flat, stable, heat-
resistant surface away from heat
sources or liquids.
• Immediately turn o and unplug
your grill if you see dark smoke
coming out. White smoke is normal,
caused by heating fat or food
splashing, but dark smoke means
that food is burning or there is a
circuit problem. Wait for smoke to
clear before opening the lid. If the
cause was not burnt food, contact
Customer Support. (see page 32)
• Do not leave your grill unattended
while in use.
• Your grill has a polarized plug (one
prong is wider than the other),
which fits into a polarized outlet
only one way. If the plug does not
fit, reverse the plug. If it still does
not fit, do not use the plug in that
outlet. Do not alter the plug in any
way.
• Do not let the power cord (or any
extension cord) hang over the edge
of a table or counter, or touch hot
surfaces.
• Your grill should only be used with
120V, 60Hz electrical systems.
Do not plug into another type of
outlet.
While Cooking Power & Cord
Electromagnetic Fields (EMF)
This indoor grill complies with all
standards regarding electromagnetic
fields (EMF). If handled properly and
according to the instructions in this
user manual, the appliance is safe
to use based on scientific evidence
available today.
Note: This oven uses a short power-supply cord
to reduce the risk of entangling or tripping. Use
extension cords with care. The marked electrical
rating of the extension cord must be as great as the
rating of the oven (see page 3).
220-240V
120V, 60Hz

6
GETTING TO KNOW YOUR INDOOR GRILL
Indoor Grill Diagram
Your Cosori Indoor Grill uses rapid 360° air circulation technology to cook with little-to-no
oil for crispy, delicious food with up to 85% less fat than traditionally deep-fried foods. With 6
convenient cooking functions, and ceramic-coated accessories, the Cosori Indoor Grill is the star
of your kitchen.
A. Top Handle
B. Splatter Guard
C. Heating Element
D. Drip Tray Interlock
E. Control Panel
F. Basket
G. Grill Grate
H. Drip Tray
I. Upper Air Intake
J. Filter Cover
K. Smoke Filter
L. Oil Collector
M. Power Cord
N. Feet
O. Lower Air Outlet
P. Cleaning Brush
D
F
G
H
C
B
A
E
I
J
K
L
M
O
N
P

7
DISPLAY
Celsius/Fahrenheit
Indicators
Time
Display
Shake
Reminder
Temperature
Display
Cooking
Status Wi-Fi®Icon
Note: This indicates app
configuration status.
See the VeSync in-app
instructions for more
information.

8
CONTROLS
• Press to turn the grill on/o.
• While the grill is cooking or paused, press
to cancel cooking. The grill will return to
standby.
• Press and hold for 5 seconds to pair with
the VeSync app. See the VeSync in-app
instructions for more information. (see
page 11)
• Press and hold for 15 seconds to reset
the grill to factory settings. This will
disconnect the grill from Wi-Fi®, remove
the grill from the VeSync app, and restore
all default cooking function settings.
• Press +or –to adjust temperature in
increments of +/- 5°F.
• Press and hold to adjust in increments of
+/- 15°F.
• Press and hold both + and - for 5 seconds
to switch between Fahrenheit and Celsius.
• Press to start or stop a cooking function.
• Press to resume cooking after pausing.
• Press +or –to adjust cooking time.
• Time will adjust in increments of +/- 5
minutes.
• Press to add or remove preheat before or
during cooking.
• Preheat cannot be used with the
Dehydrate function.
• Preheat time is calculated automatically
but can be adjusted using the Time
button.
• Press to add or remove a Shake Reminder.
• The Shake Reminder will appear halfway
through the remaining cooking time.
The grill will beep, and “ ” will blink
on the display. This will repeat every 60
seconds until you open the lid to flip food
or press the button again to remove the
Shake Reminder.
• The Shake Reminder cannot be added to
the Dehydrate function.
• For more information on shaking, see
Shaking Food (page 24).
• Press to select the Air Grill function.
• Press repeatedly to cycle through heat
settings.
• Press before or during cooking to select
the Keep Warm function.
• If selected, Keep Warm function will begin
after cooking time is over.
• Keep Warm function defaults to 140°F
for 5 minutes, but can be adjusted on the
VeSync app.
• Keep Warm cannot be added to the
Dehydrate function.
Power Button TEMP Button
START/PAUSE Button
TIME Button
PREHEAT Button
SHAKE Button
AIR GRILL Button
KEEP WARM Button

9
Note:
• If the grill is inactive for 10 minutes, it will turn o automatically.
• When you open the lid during cooking (such as to shake food), the grill will pause cooking automatically.
When you close the lid, the grill will resume cooking.
• When the grill is plugged in and turned o, it will remember its previous settings.
Crisp, Broil, Roast, Bake
Below 60 minutes
Press once +/- 1-minute increments
Press and hold +/- 15-minute increments
1–2 hours Press or press and hold +/- 15-minute increments
Dehydrate
Below 60 minutes
Press once +/- 5-minute increments
Press and hold +/- 30-minute increments
1–2 hours Press or press and hold +/- 30-minute increments
Time Increment Chart
Temperature Increment Chart
Cooking Functions
Crisp
Air Grill
(Low,
Medium,
High, Max)
Roast Broil Bake Dehydrate Preheat Keep Warm
Crisp, Broil, Roast, Bake, Air Grill (Low, Medium,
High, Max), Dehydrate Temperature Increment
Press once +/- 5-minute increments
Press and hold +/- 15-minute increments

10
BEFORE FIRST USE
Setting Up Test Run
1. Remove all packaging around and
inside the grill, including any temporary
stickers.
2. Place on a stable, level, heat-resistant
surface, away from anything that can be
damaged by steam or heat (such as walls
or cupboards).
1. Make sure there is no food or packaging
in the grill and plug it in.
2. Place the splash guard on the underside
of the lid, below the heating element.
3. Place the drip tray in the base, then place
the grill grate on top of the drip tray.
4. Remove the filter cover and slide the
filter into the back of the grill with the
pull tabs facing outward. Replace the
filter cover.
[Figure 1.2]
5. Press POWER, then press MAX.
6. Press START/PAUSE to begin heating.
The START/PAUSE button will light
up, and the display will show the timer
counting down.
7. The grill will stop heating and beep
several times when finished.
A test run will help you become familiar with
your grill, make sure it’s working correctly,
and clean it of possible residues.
Note:
You may notice a slight smell during this
process. This is entirely normal for a new grill.
Note:
Leave 7 inches / 18 cm of space behind and
8 in / 20 cm of space above the grill.
[Figure 1.1]
Note:
Do not wash the smoke filter.
3. Wash the basket, drip tray, and grill grate
thoroughly, using either a dishwasher or
a non-abrasive sponge.
4. Wipe the inside and outside of the grill
with a slightly moist cloth. Dry with a
towel.
5. Wipe the outside surface of the smoke
filter. Dry with a towel.
7 in /
18 cm
8 in /
20 cm
Figure 1.1
Figure 1.2

11
VeSync App Setup
Note:
For Android™users, choose “Allow” to use
VeSync.
Note:
Due to ongoing updates and improvements,
the VeSync app may be slightly dierent than
shown in the manual. In case of any dierences,
follow the in-app instructions.
Note:
• You can change the name and icon at any time
by going to the grill screen and tapping
.
• You can use the VeSync app to connect your
grill to Amazon Alexa or Google Assistant™.
Disconnecting From Wi-Fi:
• To disconnect Wi-Fi, press and hold the
button for 15 seconds until the Wi-Fi indicator
turns o. This will restore the grill’s default
settings and disconnect it from the VeSync app.
• To reconnect, please follow the instructions in
the VeSync app for adding a device.
Note: You must create your own VeSync account
to use third-party services and products. These
will not work with a guest account. With a VeSync
account, you can also allow your family and friends
to control your grill.
1. To download the VeSync app, scan the
QR code or search “VeSync” in the Apple
App Store®or Google Play Store.
2. Open the VeSync app. If you already
have an account, tap Log In. To create a
new account, tap Sign Up.
3. Turn on Bluetooth®on your phone.
4. Tap +in the VeSync app and select your
grill.
5. Follow the in-app instructions to finish
setting up your grill.

12
COOKING WITH YOUR INDOOR GRILL
Note:
You can use the VeSync app to control your indoor grill, follow in-app recipes, and more. (see page 16).
CAUTION:
• The outer surface of the grill, including the lid, is hot during and after use. Temperature may
be over 212°F / 100°C. Do not touch hot surfaces. Use handle.
• Always use heat-resistant gloves, pads, or oven mitts when handling hot materials, and when
placing items in or removing items from the grill.
Using the Accessories
There are 3 accessories included with your
grill: the drip tray, basket, and grill grate.
The cooking functions require dierent
accessories, so make sure to use the correct
accessory. Follow the recipe instructions
or the suggestions given in each function
section.
Always make sure the drip tray is properly
in place at the bottom of the grill before
cooking.
[Figure 2.1]
The drip tray is not
intended to be used to place food on.
Figure 2.1

13
Splatter Guard Assembly Oil Collector Assembly
1. Align the splatter guard with the slots on
the underside of the grill lid.
[Figure 2.2]
2. Use one or both thumbs to gently push
the handle of the splatter guard into
place.
1. Align the oil collector with the slot on the
back of the unit.
[Figure 2.3]
2. Gently push the oil collector into place.
Note:
Make sure that the splatter guard is securely
in place before cooking.
Note:
Make sure that the oil collector is securely in
place before cooking.
Figure 2.2
Figure 2.3

14
Cooking Functions Quick Reference Chart
Cooking Functions
Customizing Cooking Functions
Name Use Suggested
Accessory Range
Air Grill
(Low)
• Grill setting using lowest heat
setting and lowest amount of air
flow
• Best used for foods that cook
through quickly, such as fish,
shrimp, vegetables, fruits, and
thin-cut chicken breasts
Grill grate
Temp: 400°–445°F /
205°–230°C
Time: 1 min–30 min
Air Grill
(Med)
• Grill setting using medium-high
heat and medium-high air flow
• Best used for foods that need
moderate amounts of time, like
burgers, steaks, or pork chops
Grill grate
Temp: 450°–495°F /
235°–255°C
Time: 1 min–30 min
Air Grill
(High)
• Grill setting using high heat and
high air flow
• Best used for searing meat Grill grate
Temp: 500°–505°F /
260°–262°C
Time: 1 min–30 min
Cooking functions are programmed with an ideal time and temperature for cooking certain
foods. For more information on each cooking function, see its individual section, or the Cooking
Functions Quick Reference Chart.
• You can customize a cooking function’s default settings, including time and temperature.
• To change a function’s default settings:
1. When the grill is not cooking or is paused, use the controls to choose the settings you
want to change for a function button. You can choose the time, temperature, Preheat
setting, Keep Warm setting, and Shake setting.
2. Press and hold the function button for 3 seconds until the grill beeps 1 time.
• To reset a function to its original default settings:
1. Make sure the grill is not cooking or is paused.
2. Without making any changes, press and hold the function button for 8 seconds total.
3. The grill will beep once after 3 seconds, and then again after 5 more seconds to
indicate the temperature and time settings returning to their defaults.
Note: You can also customize and reset functions using the VeSync app.

15
Air Grill
(Max)
• Grill setting using highest heat and
highest air flow
• Best used to achieve grill marks on
seared meats and other foods
Grill grate Temp: 510°F / 265°C
Time: 1 min–30 min
Crisp
• Cooks using high heat and high
air flow
• Best used for crispy foods, such as
chicken wings, fries, or bacon
Basket
Temp: 300°–450°F /
150°–230°C
Time: 1 min–60 min
Broil
• Focuses high heat on top of food
• Best for melting cheeses, cooking
sausages, vegetables, and
browning the tops of foods
Basket
Temp: 150°–500°F /
65°–260°C
Time: 1 min–4 hr
Roast
• Cooks using low to high heat
and even airflow to cook food
thoroughly
• Best used for large or tougher cuts
of meats, larger vegetables, and
potatoes
Basket
Temp: 250°–500°F /
120°–260°C
Time: 1 min–4 hr
Bake
• Cooks food evenly using low to
medium heat
• Best used for breads, cakes,
muns, pies, and cookies
Basket
Temp: 150°–400°F /
120°–205°C
Time: 1 min–4 hr
Dehydrate
• Dries food out over a longer period
of time using airflow and low heat
• Great for drying out herbs, fruit, or
making beef jerky
Basket
Temp: 105°–195°F /
40°–90°C
Time: 1 min–12 hr

16
VeSync App Functions
Remote Control
In-App Cosori Recipes
Doneness Control
Custom Cooking Programs
Third-Party Voice Control
The VeSync app allows you to access additional smart functions, including those listed below.
• All grill functions can be controlled
remotely (except for starting cooking, for
safety reasons).
• Cooking progress can be monitored from
a distance.
• Pre-programmed recipes made by
Cosori’s in-house chefs are available in
the app. Selecting a recipe automatically
sets the recommended time and
temperature.
• Create and save custom recipes.
• Pre-programmed doneness controlled
through the VeSync app helps you
achieve perfect results.
• Access a variety of doneness levels for
proteins such as beef, pork, and fish.
• Multiple presets can be combined to
make customized cooking programs for
multi-phase cooking.
• Compatible with Amazon Alexa and
Google Assistant™for voice commands.
• Connect your grill to the VeSync app.
• Tap More in the VeSync ap.
• Follow the in-app instructions to
connect to a third-party service and
set up voice control.
Note:
The VeSync app is continually updated and
app features will expand.

17
Preheat Function (“PREHEAT”)
We recommend preheating before placing food inside the grill, unless your grill is already hot.
Food will not cook thoroughly without preheating.
1. Plug in. Press to turn on the grill.
2. Select a cooking preset. The PREHEAT
function will light up automatically.
3. Optionally, bypass preheating by
pressing the PREHEAT button.
a. If you’ve deselected the Preheat
function, place food in the basket
before pressing . Press to start
cooking. The display will light up to
indicate that your food is cooking.
4. Preheat time is calculated automatically,
but it can be customized after you begin
cooking.
a. Press to pause preheating, adjust
settings using the TIME and TEMP
buttons, then press to continue
preheating with desired temperature
and time.
b. The Preheat function cannot be
used with the Dehydrate function.

18
Crisp Function (“CRISP”)
This function is ideal for cooking a variety
of food, including French fries and chicken
wings. Uses high heat and airflow.
1. Place the drip tray into the base of the
grill, followed by the basket.
2. Close the lid, press , then press
CRISP.
3. Optionally, customize the temperature
and time.
a. Press TEMP to control temperature.
Use +/– to adjust the temperature
between 300°–450°F / 150°–230°C.
b. Press TIME to control time. Use
+/– to adjust the time between 1
min–60 min.
c. If you would like to bypass
preheating, press PREHEAT to
deselect the preheat function.
4. Optionally select SHAKE to add a Shake
Reminder.
a. If selected, the Shake Reminder will
remind you to flip your food halfway
through cooking. The grill will beep
and SHAKE will flash on the display.
b. Press to resume cooking after
flipping your food.
c. Be extremely careful when flipping
food, as it may be very hot. Use oven
mitts or heat-resistant gloves, as
well as tongs or other utensils, to flip
your food.
5. Optionally, select KEEP WARM to add
the Keep Warm function after your food
is done cooking. The grill will beep and
the display will light up to indicate that
food is being warmed.
a. Customize temperature and time
settings for Keep Warm while food is
warming or cooking is paused.
6. Press to start cooking.
7. When preheating is complete, the grill
will beep and READY will flash on the
display.
8. Carefully lift the lid using the handle
while wearing oven mitts or heat-
resistant gloves and place food into the
grill. The grill will automatically pause
heating while the lid is open.
a. Do not overfill the basket.
b. For best results, add food up to one-
third of the basket’s capacity.
9. Close the lid and resume cooking. The
display will light up to indicate that your
food is cooking.
10. When cooking is done, the grill will
beep and END will show on the display.
Carefully remove food and leave the lid
open so that the grill can cool.

19
Broil Function (“BROIL”)
This function focuses heat on the tops of
foods, including cheeses, sausages, and
vegetables. Uses high heat.
1. Place the drip tray into the base of the
grill, followed by the basket.
2. Close the lid, press , then press BROIL.
3. Optionally, customize the temperature
and time.
a. Press TEMP to control temperature.
Use +/– to adjust the temperature
between 150°–500°F / 65°–260°C.
b. Press TIME control time. Use +/– to
adjust the time between 1 min–4 hr.
c. If you would like to bypass
preheating, press PREHEAT to
deselect the preheat function.
4. Optionally select SHAKE to add a Shake
Reminder.
a. If selected, the Shake Reminder will
remind you to flip your food halfway
through cooking. The grill will beep
and SHAKE will flash on the display.
b. Press to resume cooking after
flipping your food.
c. Be extremely careful when flipping
food, as it may be very hot. Use oven
mitts or heat-resistant gloves, as
well as tongs or other utensils, to flip
your food.
5. Optionally, select KEEP WARM to add
the Keep Warm function after your food
is done cooking. The grill will beep and
the display will light up to indicate that
food is being warmed.
a. Customize temperature and time
settings for Keep Warm while food is
warming or cooking is paused.
6. Press to start cooking.
7. When preheating is complete, the grill
will beep and READY will flash on the
display.
8. Carefully lift the lid using the handle
wearing oven mitts or heat-resistant
gloves and place food into the grill. The
grill will automatically pause heating
while the lid is open.
a. Do not overfill the basket.
b. For best results, add food up to
one-third of the basket’s capacity.
9. Close the lid and resume cooking. The
display will light up to indicate that your
food is cooking.
10. When cooking is done, the grill will
beep and END will show on the display.
Carefully remove food and leave the lid
open so that the grill can cool.

20
Roast Function (“ROAST”)
This function cooks food thoroughly and is
best used for large or tougher cuts of meats
and larger vegetables. Uses low to high heat
and even airflow.
1. Place the drip tray into the base of the
grill, followed by the basket.
2. Close the lid, press , then press
ROAST.
3. Optionally, customize the temperature
and time.
a. Press TEMP to control temperature.
Use +/– to adjust the temperature
between 250°–500°F / 120°–260°C.
b. Press TIME to control time. Use +/–
to adjust the time between 1 min–4
hr.
c. If you would like to bypass
preheating, press PREHEAT to
deselect the preheat function.
4. Optionally select SHAKE to add a Shake
Reminder.
a. If selected, the Shake Reminder will
remind you to flip your food halfway
through cooking. The grill will beep
and SHAKE will flash on the display.
b. Press to resume cooking after
flipping your food.
c. Be extremely careful when flipping
food, as it may be very hot. Use oven
mitts or heat-resistant gloves, as
well as tongs or other utensils, to flip
your food.
5. Optionally, select KEEP WARM to add
the Keep Warm function after your food
is done cooking. The grill will beep and
the display will light up to indicate that
food is being warmed.
a. Customize temperature and time
settings for Keep Warm while food is
warming or cooking is paused.
6. Press to start cooking.
7. When preheating is complete, the grill
will beep and READY will flash on the
display.
8. Carefully lift the lid using the handle
while wearing oven mitts or heat-
resistant gloves and place food into the
grill. The grill will automatically pause
heating while the lid is open.
a. Do not overfill the basket.
b. For best results, add food up to
one-third of the basket’s capacity.
9. Close the lid and resume cooking. The
display will light up to indicate that your
food is cooking.
10. When cooking is done, the grill will
beep and END will show on the display.
Carefully remove food and leave the lid
open so that the grill can cool.
This manual suits for next models
2
Table of contents
Other Cosori Grill manuals
Popular Grill manuals by other brands

LION
LION 60000LP instruction manual

Cadac
Cadac Carri Chef 2 User instructions

Kenmore
Kenmore 415.1613911 Use and care guide

Barbecook
Barbecook CAMPO CERAM 223.7320.000 user guide

Bifinett
Bifinett KH 1140 Operating and safety instructions

Mayer Barbecue
Mayer Barbecue Zunda MGG-341 PRO Assembly instructions