Put the proper amountof clothes(notover 2/3) and keep the
inside flat
bottom
Fig1
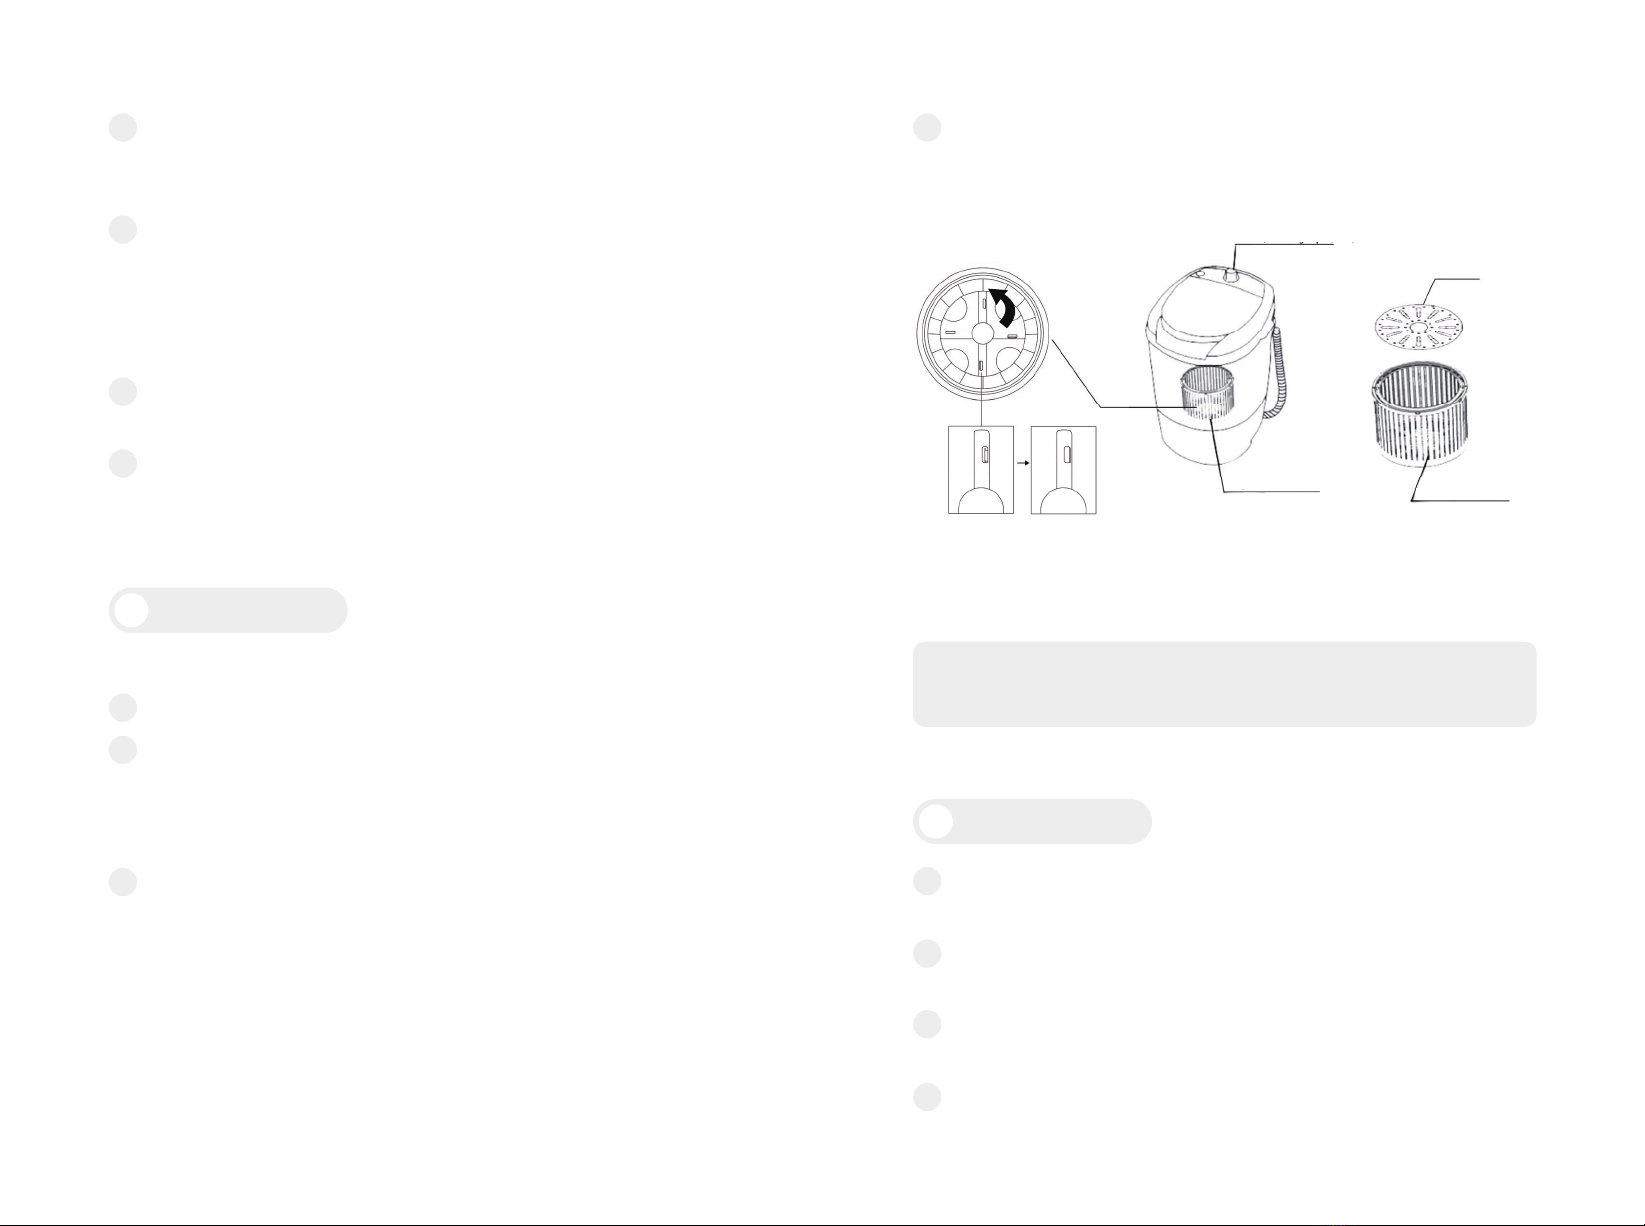
knob(washing&spin)
dehydration basket dehydration basket
safety cover
Dehydrated please click below operation method:
4 Rinsing guide
Suspend the drain hose again, put the laundry into the tub,
and then let water flow into the tub at the proper level.
Set the rinsing time by turning the washing timer, normally,
the rinsing time is set at around 5 minutes.
After rinsing time is over, put down the drain hose to drain the
water and twist the laundry.
Repeat the above steps for 2 to3times.
1
2
3
4
After washing, pipe down to drain the water.
Put the clothes what need tospin into the dehydration basket.
After finishing, gently press the safety cover once, then put
the basket into the body of washing machine, make the
bottom and pulsator firmly fixed.
Close the washing machine cover and put the knob to “spin”,
select the spin time according tothe type and quantity of
clothes(start with “off”, counterclockwise for dehydration side,
clockwise for washing side, OFF toON as pause stage, timer
will still work counterclockwise for dehydration side, if it
exceeds OFF, will enter the dehydration process.Therefore, if
the washing is completed, please turn the knob to spin “0” on
time.)
1
2
3
When washing, please take out the basket, the specific
method, please refer to specification.(the longest washing
process in 10 minutes for washer with basket)
4
3 Washing guide
Add the proper amount of detergent, if the amount of
detergent is too much, the laundry can’t be rinsed sufficiently,
so please add the proper amount of detergent.
Turn the “WASH TIMER” knob tothe desired wash time clock
wise and the washing action will begin. Set the washing time
according to how the laundry soiled or its amount. Normally,
the timer for low soiled laundry is around 8 minutes and more
than 12 minutes for the extremely soiled laundry.
After washing is completed, drain the water by laying down
the drain hose, twist the laundry and prepare for rinsing.
The washing machine have vents,which cannot be blocked by
the carpet.
2
3
4
5
REMARK:
NO SPINNING TOGETHER WITH WASHING !!!!
04 05