Creda IDV60 User manual

Instructions for Installation and Use
Dishwasher
Model IDV60
TotheInstaller:
Beforeinstallationpleasemakeanoteoftheproductdetailsspecifiedonthebackcover
ofthisbook.
Theinformationcanbefoundontheratingplate.
TotheUser:
Youmustreadtheinstructionspriortoinstallingandusingtheappliance
andthenretainthemforfuturereference.

2
DISHWASHER
Contents
Electrical Connection
For Your Safety
Installation
Getting to know your Dishwasher
The Controls
How to use your Dishwasher
Programme Chart
Before Using your Dishwasher
Loading your Dishwasher
Care and Cleaning
Troubleshooting
Information for Test Labs
Key Contacts
3
4
5
6
6
7
8
9-10
11
12
13
14
Back Cover
Retention of this Instruction Book
This Instruction Book must be kept handy for reference as it contains important details on the safe and proper use of
the appliance.
If you sell or pass the appliance to someone else, or move house and leave it behind, make sure this Book is also
provided so the new owner can become familiar with the appliance and safety warnings.
If the Book is lost or damaged a copy may be obtained from:
GDA LTD., Morley Way, Peterborough, PE2 9JB

3
DISHWASHER
ElectricalConnection
Fuses
Yourappliancecomesfittedwithapluganda13Afuse.Ifyouneedtoreplace
thefuse,onlythoseratedat13AandASTAapprovedtoBS1362shouldbe
used.Ifyoulosethefusecover,areplacementmaybeobtainedfromyour
localauthorisedServiceCentreorElectricalcompany.Correctreplacementis
identifiedbycolourcodingorthemarkingonbaseofplug.
WARNING:DONOTusetheplugunlessthefusecoverisfitted.
WARNING:Thedishwashermustnotbeconnectedtotheelectricity
supplywhileinstallationisbeingcarriedout.
WARNING:Thisappliancemustbeearthed.
ChangingthePlug
Cutoffanddisposeofthesuppliedplugifitdoesnotfityoursocket.
WARNING:ToavoidashockhazardDONOTinsertthediscardedplug
intoasocketanywhereelse.
IMPORTANT:WIRESINTHEMAINSLEADARECOLOUREDIN
ACCORDANCEWITHTHEFOLLOWINGCODE:
Green/Yellow - Earth
Blue - Neutral
Brown - Live
Ifyouchangetheplug,thecolourofthewiresinthemainsleadmaynot
correspondwiththeterminalmarkingsintheplug,whichifnotcoloured,could
be:
EARTH ‘E’ or
NEUTRAL ‘N’
LIVE ‘L’
ChangingtheMainsLead
AleadcanbeorderedfromCredaService
UK:08709066066or
RepublicofIreland:1850302220
Ifyouhavedamagedtheexistingleadorrequirealongeroneachargewillbe
made. Itisstronglyadvisedthatthisworkiscarriedoutbyaqualified
electrician.
Ifthedomesticwiringincludesaresidualcurrent-operatedcircuitbreaker,
ensurethatitconformstothelatestregulations.
SafetyInformation
Atthetimeofdelivery...
Allfunctionsofyourdishwasherhavebeenthoroughlytestedatthefactory. A
smallnumberofwatermarksmayhavebeenleftasaresult,theywill
disappearwhentheapplianceisusedforthefirsttime.
- Thisapplianceshouldonlybeconnectedtoa230/240VAC source,
viaaproperlyinstalledearthedsocket.
- Usethedishwashersolelyinadomesticenvironment.
- DONOTstandorplaceheavyobjectsonthedoorwhenitis
open,thiscoulddamagethedoororcausetheappliancetotip
forward.
Ifyourfamilyincludeschildren...
- DONOTallowchildrentoplaywiththeapplianceortamper
withitscontrols.
- Keepdetergentsandrinseaidsawayfromchildren.Keep
childrenawayfromtheopendoorofadishwasher,therecould
stillbesomedetergentleftinside.
CAUTION:
Thedishwashermeetstherequirementssetoutbytheregulationsinforce
concerningsafetyandelectricalequipment.
Anytechnicalchecksshouldbeconductedexclusivelybyatrainedand
authorisedtechnician:Repairscarriedoutbyunaithorisedpersonswill
invalidatetheguarantee,aswellasposingapotentialhazardtotheuser.
Themanufacturerdeclinesallresponsibilityfordamagetopersonsorproperty
resultingfromfailuretoobservetheaboveprecautions,fromtamperingwith
evenasinglecomponentorfromtheuseofnon-originalspareparts.

4
DISHWASHER
ForyourSafety
Thismanualformsanintegralpartoftheappliance.Itmustalwaysbekepthandyforreference.Readthroughalltheinstructionscontainedinthismanualbeforeusingthis
dishwasher.
1. Seperatethevariouspackaging
materialsanddisposeofsafely-
DO NOT leave discarded
packagingmaterialaroundthe
home.
2. Afterremovingthepackaging,
checktomakesureyourappliance
isintact.Ifindoubt,contacta
qualifiedprofessional.
3. DONOTuse extensionleadsand
multipleplugs.Iftheelectricity
supplywireisnotlongenough,
thenhaveitreplacedwithoneof
thecorrectlengthandremember
thatitshouldbefreeofbendsor
dangerouskinks.
4. Intheeventofanydamagetothe
powercordhaveitreplacedbya
qualifiedtechnician.
5. Themainsplugmustbeeasily
accessibleafterinstallation.
6. Iftheapplianceisnotoperating
properly or if maintenance
operations are necessary,
disconnectthedishwasherfrom
themainspowersupply(unplug
it!).
7. DONOTinstalloutdoors,noteven
iftheareaiscoveredbyaroof:itis
extremelydangeroustoleaveit
exposed to rain and
thunderstorms.
8. If installed on a carpeted or
coveredfloor,ensurethatthe
openingsontheundersidearenot
obstructed.
9. Donottouchtheheatingelement
duringorstraightafterawash
cycle.
10. Iftheappliancemalfunctions,
turnoffthewaterinlettapand
disconnecttheplugfromthewall
socket.Thenreadthesection
entitled"Troubleshooting".Ifyou
cannotresolvetheproblem,then
callCredaService(seeKEY
CONTACTS,backpage).
Installationmustbeperformedbyaqualifiedtechnician,incompliancewiththe
regulationsinforce,includingthepreventionandeliminationofradiofrequency
interference.
Thedishwasherisdesignedforwashinganddryingdishes,anyother
useshallbeconsideredimproper.Themanufacturerdeclinesall
responsibilityforusesotherthanthosedescribedabove.
Theratingplate,featuringthe
technicaldata,serialnumberand
markings,isvisiblypositioned
ontheinneredgeofthedoor.
DONOTremovetheratingplate.
Thedishwasherisintendedforusebyadults.DONOTallowchildrentocome
nearorplaywiththecontrols.
Keepchildrenawayfromdetergentsandclearofthedishwasherdoorwhen
open.
Keepallpackagingmaterialawayfromchildren.
1. DONOTusesolvents,suchasalcoholorturpentinewhichmaycausean
explosion.
2. DONOTloaddishestowashthataresoiledwithash,waxorpaints.
3. DONOTlean,sitorstandonanypartofthedishwasher-thiscouldcause
injuryand/ordamagetheappliance.
4. DONOTdrinkanywaterresiduesfrominsidethedishwasher.

5
DISHWASHER
Installation
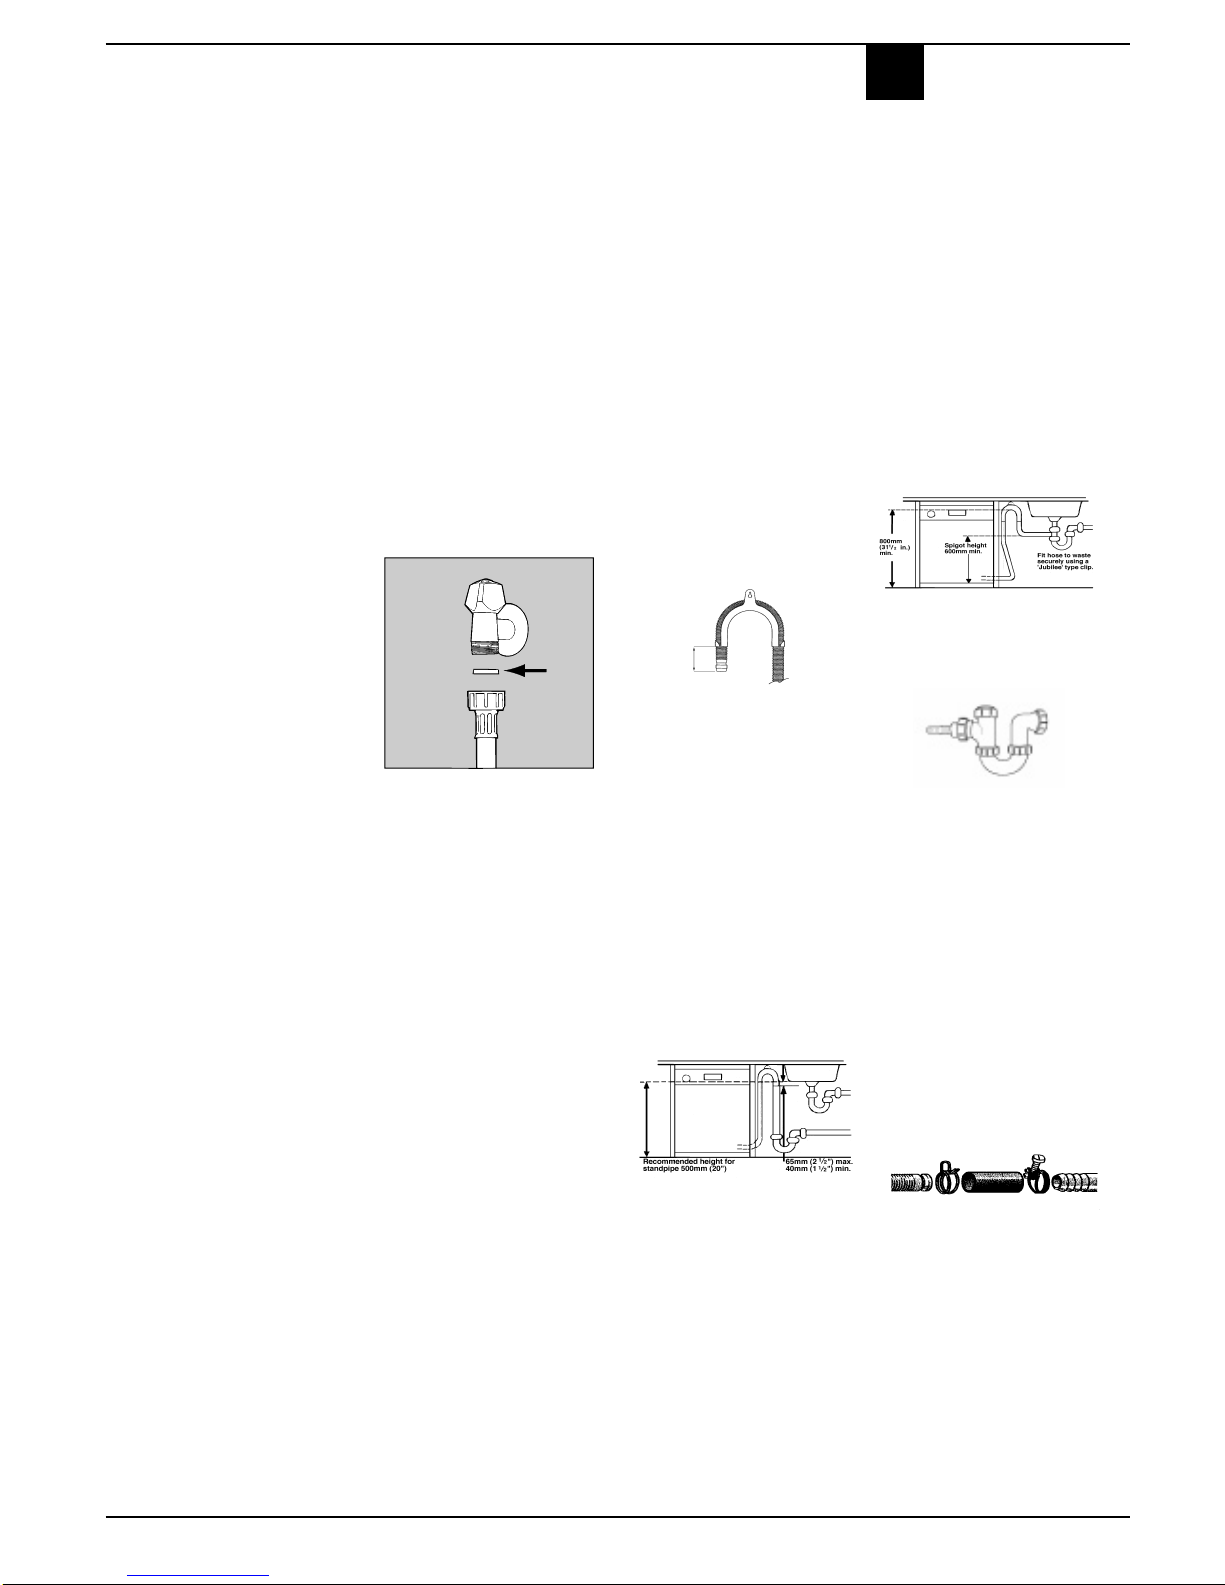
Coldwaterconnection.
Connectthecoldwatersupplyhose,
insertingthesmallfiltersuppliedwiththe
dishwasherandmakingsurethatitis
fastenedtightlyinplace(seefigure2).If
thewaterhosesareneworhavebeen
outofuseforanextendedperiodoftime,
letthewaterruntomakesureitisclear
andfreeofimpuritiesbeforemakingthe
connection.Ifthisprecautionisnottaken,
thewaterinletcouldgetblocked,causing
damagetoyourdishwasher.
Choosewhereyouwanttoinstallyour
dishwasher,youcanplaceitsothatits
sidesorbackpanelaresidebysidewith
furnitureorupagainstthewall.The
dishwasherisprovidedwithwatersupply
anddrainhoses,whichcanbedirected
towardstheleftorrighttofacilitate
appropriateinstallation.
Levelling.
Oncetheapplianceispositioned,adjust
thefeetbyscrewingtheminorout
dependingonhowhighyouwantitand
tolevelitsothatitishorizontal.Make
surethatitisnotinclinedmorethan2
degrees.Iftheapplianceislevel,itwill
helpensureitscorrectoperation.
HeightAdjustment
Inserttheapplianceintothecutoutand
thenadjusttheheightusingthescrews
locatedonthefrontbottompartofthe
machine.Useascrewdrivertoturnthe
screwsintheclockwiseoranti-clockwise
directiontoincreaseordecreasethe
heightrespectively.
Drainhoseconnection.
WARNING:Connectyourdishwasher
drainhosetopipeswhichconnecttothe
fouldrainsystemandnottosurface
waterdrains.
IMPORTANT:Forthecorrectoperation
ofyourdishwasher,itisessentialto
complywiththefollowinginformation:-
Standpipe:
Ensurethatthehoseisnotpushedtoo
fardownthestandpipe.
Iftheendofyourdrainhoseisfittedwith
‘retainingflaps’,ensuretheyareinserted
fullyintothestandpipe. Thiswillprevent
thepipe from jumping out during
installationanduse.
DONOTpositionthestandpipenearan
electricaloutlet.
ENSUREthatthedrainhoseisnot
kinkedanditisroutedasshowninthe
diagram.
Thestandpipeshouldhaveaboreofat
least38mm(11/2”).Itshouldbeinstalled
asshown,haveatrapfittedandmust
dischargeintothesamedrainsystem
asyourhouseholdsink.
ItMUSTNOTbeconnectedtoasurface
waterdrain.
SinkWasteSystem:
Forundersinkdrainage:
Beforeconnectingthedrainhose,
removeanyinternalrestrictions-This
willpreventabuildupofdebriswhich
couldcauseablockage.
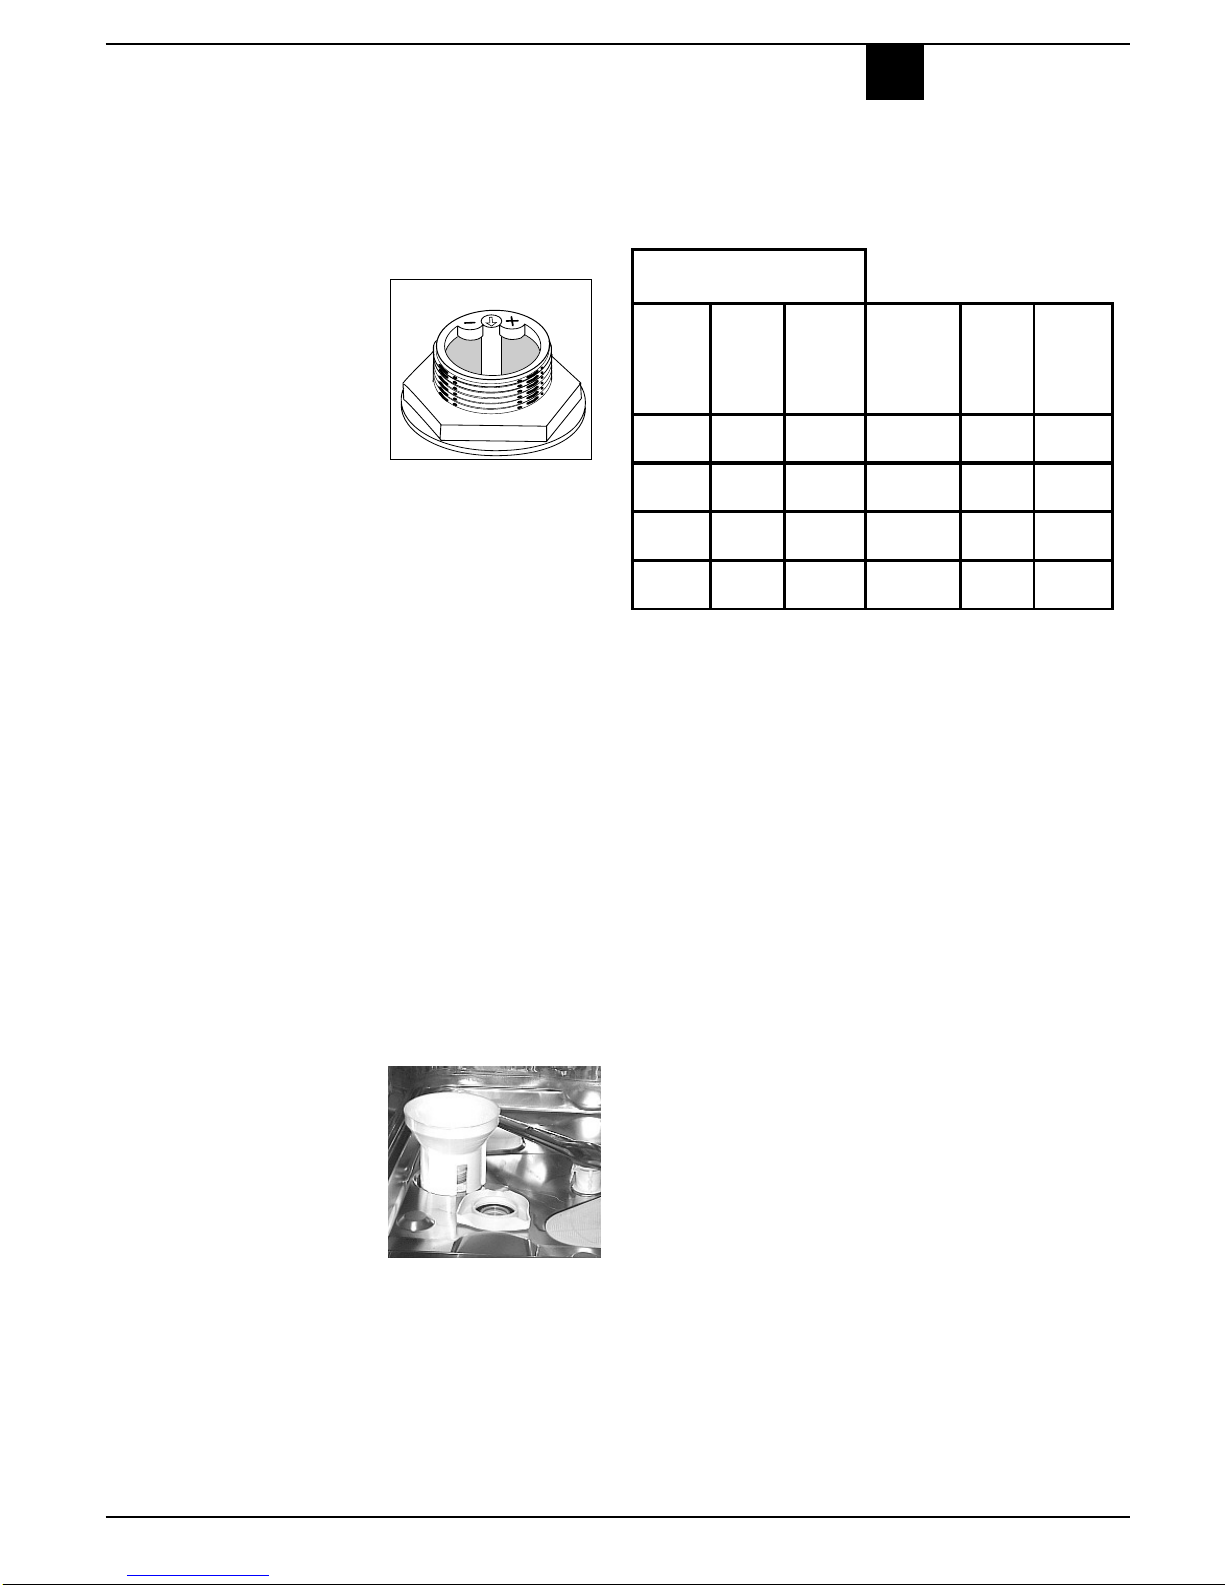
Removeanyrestrictionsfromthewaste
spigotandensurethatthesealingbung
isremoved.Thehoseshouldberouted,
suchthatitisraisedtoaminimumheight
of800mm(31/2”).
NOTE:Ensurethesinkoutletpipe
hasaminimumdiamtereof32mm.
1.UntietheendoftheGREY
drainagehosefromtherearofthe
appliance.
2.Repositionthe‘HookedEnd
Support’asrequiredalongtheGREY
drainagehose.
3.Iffittinganundersinkwaste
disposalunit,cutoutthemembrane,
bungorblankingplug.
4.AttachtheGREYdrainagehoseto
theundersinkwastedisposalunit
securely,usingtheclipandrubber
tubesupplied.
Ensurethedrainhoseis
securelyattached,topreventit
comingawaywhilethemachine
isinuseandcausingaflood.
A
Fig.2

6
DISHWASHER
GettingtoknowyourDishwasher
TechnicalCharacteristics
TheControls
A. ON-OFFButton
Pressthisbuttontoswitchtheappliance
on.
B. ON-OFFIndicatorlight
This light informs you that the
dishwasherison.
C. Dooropeninghandle
Usethishandletoopenthedishwasher
door.
D. WashProgrammeSelector
Usethisknobtoselectthecycle.
E. Cyclephaseindicatorlight
(pre-wash,wash,rinses,drying)
E. Upperbasket
F. Topsprayarm
G. Basketheightadjuster
H. Lowerbasket
I. Bottomsprayarm
J. Saltcontainercap
K. Washingfilter
L. Detergentandrinseaiddispenser
Technical characteristics
Width cm. 59,5
Depth cm. 57
Height cm. 82
Capacity 12 standard place settings
Mains water pressure 20 KPa÷ 1MPa (0,2 ÷10 bar)
Power voltage See data plate
Total absorber power See data plate
Fuse See data plate
E
G
F
H
I
K
L
J
A
B
ECD
Thisdishwasherconformstothe
followingEuropeanCommunity
Directives:
•73/23/EECof19/02/73(Low
Voltage)andsubsequent
modifications;
•89/336/EECof03/05/89
(ElectromagneticCompatibility)
andsubsequentmodifications
•97/17/CE
(Labelling)

7
DISHWASHER
Firstofall.
-Turnonthewatersupplytap
completely.
-Addthecorrectamountof
detergent.
-Loadthebasketscorrectly.
-Checkthatthesprayarmsrotate
freely.
-Closethedoorsecurely.
-
PresstheON-OFFbutton"A":indica-
torlight"B"comeson.Yourapplianceis
nowonandreadytobeprogrammed.
Selectthewashcycle.
Toselectthewashcycle,turnknob"D"
clockwiseuntiltheindicatorontheknob
linesupwiththenumberorsymbolfor
thewashcyclemostsuitableforthetype
ofdishestowash(see‘Programme
Chart’).
Afterafewseconds,youwillhearashort
beep:thewashcyclehasstarted,itis
notadvisabletomakeanychangesfrom
thispoint.
Indicatorlights
Yourdishwasherisfittedwithindica-
torlights(E)thatcomeontoshowyou
atwhichpointthewashcycleisat.
Herearethesymbolscorresponding
toeachcyclephase:
Startingfromtheindicatorlightonthe
leftmovingtowardstheoneonthe
right:pre-wash,wash,rinses,drying.
Atalltimes,yourdishwashertellsyou
whereitisat.
Modifying a wash cycle in
progress.
Ifyouhavechosenthewrongcycle-You
canmodifythewashcycleinprogress,
ifithasonlyjuststarted.Turnknob"D"
anti-clockwiseandsetittoReset,after
afewsecondsyouwillhear3short
beepsand
Indicatorlight"E"willgoouttoshowall
thesettingswillhavebeencancelled.You
arenowfreetore-setthecorrectwash
cycle.
You'veleftoutadish?
Interruptthewashcyclebypressingthe
ON-OFFbutton,insertthedishyouhad
forgottenandpresstheON-OFFbutton
again.
Thecyclewillstartupfromwhereyou
interruptedit.
Cycle end
Theendofthewashcycleisindicated
by2shortbeepsandaflashingdrying
phaseindicatorlight.
Settheknobtotheresetpositiontoclear
allsettings.
Turntheapplianceoffbypressingbut-
ton“A”,cuttingofftheelectricitysupply.
Turnoffthewatertap.
Waitafewminutesbeforeunloadingthe
dishes:theyareveryhot!Ifyouwaita
littlewhile,theydrybetterdue tothe
steam.
Emptythelowerbasketfirst.
There'sbeenapowerfailureor
youopenedthedishwasher
door
Thewashcyclestopsandthenrestarts
whentheelectricitycomesbackonor
whenyouclosethedoor.
HowtouseyourDishwasher

8
DISHWASHER
ProgrammeChart
Selectthemostsuitableprogrammeforthetypeofdishesandhowdirtytheyare.Toselectthewashprogrammeseethechartbelow:
Tooptimisewashperformanceandsaveonenergy,trytousethedishwasherwithafullwashload. Ifittakessometimetofillyourdishwasher,use
thesoakcycletoavoidcakedonfoodandbuildupofbadodours.
R
3URJUDPPH :KHQ3URJUDPPH
VKRXOGEHXVHG
3URJUDPPH'HVFULSWLRQ $PRXQWRI
GHWHUJHQWIRU
SUHZDVK
ZDVK
5LQVH
$LG
+HDY\'XW\
9HU\GLUW\GLVKHVDQGSDQV
QRWWREHXVHGIRUGHOLFDWH
LWHPV
3UHZDVKZLWKFROGZDWHU
3UHZDVKZLWKKRWZDWHUDW&
([WHQGHGZDVKDW&
5LQVHZLWKFROGZDWHU
5LQVHZLWKKRWZDWHUDW&
'U\LQJ
JU
'DLO\F\FOH
1RUPDOO\GLUW\SDQVDQG
GLVKHV6WDQGDUGGDLO\
F\FOH
SUHZDVKHVZLWKFROGZDWHU
([WHQGHGZDVKDW&
5LQVHZLWKKRWZDWHUDW&
'U\LQJ JU
5DSLG
(FRQRP\DQGIDVWF\FOHWR
EHXVHGIRUVOLJKWO\GLUW\
GLVKHV
5XQF\FOHLPPHGLDWHO\
DIWHUXVH1RGU\LQJ
6KRUWZDVKDW&
&ROGULQVH JU
6RDN
3UHOLPLQDU\ZDVKF\FOHIRU
GLVKHVDQGSDQVDZDLWLQJ
FRPSOHWLRQRIWKHORDGZLWK
WKHGLVKHVIURPWKHQH[W
PHDO
6KRUWFROGZDVKWRSUHYHQWIRRG
IURPGU\LQJRQWRWKHGLVKHV

9
DISHWASHER
BeforeUsingyourDishwasher
Adjustingthewatersoftener.
Yourdishwashercanadjustitssaltcon-
sumptionaccordingtothehardnessof
thewaterinyourhome.Thisway,you
canoptimiseandcustomiseyourdish-
washer'ssaltconsumption.
Toadjustsaltconsumption,doas
follows:
1.Unscrewthesaltcontainercap
2.Thereisanarrowontheneckofthe
container(seefigure):ifnecessary,
turnthearrowanti-clockwisefrom
the"-"settingtothe"+"setting.
Selectthearrowpositiondependingon
thewaterhardness,referringtothetable.
To prevent rust from
forming, load the salt
just before beginning a
wash cycle.
Water Hardness
Clarke
degrees °fH mmol/l Selector
position
Salt
consu-
mption
(grams/-
cycle)
Autono-
my
(cycles\2-
kg)
0 - 14 0 - 17 0 -1,7 / 0 /
14 - 36 18 - 44 1,8 - 4,4 "-" 20 60
36 - 71 45 - 89 4,5 - 8,9 MED 40 40
>71 >89 > 8,9 "+" 60 25
Fillingthesaltcontainer.
Alwaysusesaltwhichisintendedfor
dishwasheruse.
Thesaltcontainerissituatedunderneath
thelowerbasket,fillitupasfollows:
1.Pulloutthelowerbasketcompletely,
unscrewandremovethecontainer
cap
2.Ifitisthefirsttimeyouaddthesalt,
firstfillthecontainerupwithwater
(youwon'thavetodothisagainnext
time)
3.Putthedishwasherfunnelonthehole
andpourinapproximatelytwokilos
ofsalt.Itisnormalthatsomewater
comesoutofthecontainer.
4.Screwthecapbackinplacecarefully.
LowSaltindicator
Thisgreendeviceislocatedatthecen-
treofthecapforthedecalcificationcar-
tridgeanditindicateswhetherthecon-
tainerisfull.
Whentheindicatorisnotvisibleitmeans
thatyouneedtoaddsalt.
Salt
You don't know how hard
the water in your home
is? Ask the company that
supplies water in your
area.

10
DISHWASHER
Rinseaid.
Rinseaidmakesdishessparklemore
asitimprovestheirdrying.Therinseaid
containerissituatedontheinsideofthe
appliancedoor,youshouldrefillitwhen
light “D”indicatesthatitisempty.
(Ifyourdishwasherisfittedwitha“low
rinseaid”indicatorlight,fillthecontainer
upwhentheindicatorlightflashesor
lightsup).
Addingrinseaid.
Toopenthedispenser,turncapC
anticlockwise.Takecarewhenyoupour
intherinseaidtoavoiditoverflowing.
Youcanregulatetheamountofrinseaid
usedbythedishwasher,movethe
adjusterFwhichyouwillfindunderlid
C.
Thedetergent
Addingdetergent
ToopenlidA,pressbuttonB.
Thedetergentshouldbeputintothetwo
containersCandD.
Ifusingatablet,putitincontainer"D".
Nowyoucanclosethelid:pressitdown
untilyouhearitclick.
Ifitwon'tclose
Checkwhetherthereisanydetergent
residueontheedgesofthedispenser.
Removetheexcess.
Youcanchoosefromsixdifferentpositions.
Itisnormallysetto4.
BeforeUsingyourDishwasher
-Theamountofrinseaidneeds
tobeincreasedifthedishes
appeardulloryoucansee
circularstains.
-Theamountofrinseaidneeds
tobereducedifthedishesare
stickyoryoucanseewhite
streaks.
WerecommendGlist3in1foruseinallCredadishwashers...
BrilliantcleaningisguaranteedwithGlist3in1.
CredaonlyrecommendsGlist3in1Dishwashertabletstogiveoutstandingcleaningandcare.
Itisimportanttousedetergentspeciallydesignedfordomesticdishwashers.(Alwaysfollowthemanufacturers
instructions.)
Glist3in1advanceddishwashertabletswithactiveenzymesaretheidealwaytoprotectandcareforyourdishwasher,
whilegettingyourdishesandglassessparkingclean.
SofterWater:
Builtinsaltactionsoftenswater,helpingtopreventthebuildupoflimescaleinthedishwasherandimprovethe
cleaningresult*.
CleanerDishes:
WithuniqueactiveenzymesinthecleaningphaseGlist3in1breaksdowneventhehardtoshiftfoodstuffsand
grease,leavingthedishesspotlessandthedishwashercleantoo.
SparklingResults:
Thebuilt-inGlistrinseagentensuresthedishesandglassesarefreefromwatermarksandsmears.
IfyouhaveanyquestionsregardingGlist3in1,pleasecontactthehotlineon0800216730.
*Ifyouliveinanareaparticularlyprone
toveryhardwater( 35
°
f)
GlistandCredarecommendthatyou
continuetokeepyourdishwashersalt
toppedup.
•Usetherightamountofdetergent(see
programmechart).
•Storeyourdetergentandrinseaidina
cool,dryplace,safely awayfrom
children.
25 gr
.
5 gr.
C
D
B
A
F
D
C

11
DISHWASHER
LoadingyourDishwasher
Firstofall.
Beforeplacingdishesinthebaskets,
removeallcoursefoodremains.This
avoidsblockingthefilter,whichwould
reducetheefficiencyofthewash.
Ifsaucepansandfryingpansarevery
dirty,allowthemtosoakbeforebeing
washed.
Tomakeiteasiertoloadyourdishes,
pullthebasketsout.
Whatgoesintothelower
basket?
Werecommendyouplacethemost
difficultdishestowashintothelower
basket:saucepans,lids,soupdishesand
plates(aloadexampleisshowninthe
photo).
• Servingdishesandlargelids:
placethemonthesidesofthe
basket.
• Saucepans,saladbowls:must
alwaysbeplacedupsidedown
• Verydeepdishes:placethem
obliquely,thusallowingwatertorun
downthemandcleaningthembetter
Placethecutlerywiththehandlesatthe
bottom;ifthebasketistheonewithside
inserts,theninserttheteaspoonsone
byoneintotheslots.
Itisbestifyouplacelongerutensils
horizontallyatthefrontoftheupper
basket.
Afterloadingthedishes,rememberto
checkthatthe sprayarmscanturnfreely
withouthittingagainstanydishes.
lowerbasket
Whatgoesintotheupper
basket?
Placedelicateandlightweightdishesin
theupperbasket:glasses,teacupsand
coffeecups,saucersandplates-shallow
saladbowls,slightlydirtyfryingpansand
shallowpans.
Positionlightweightdishesinsuchas
wayastoavoidtheirbeingmovedby
thesprayofwater.
Howtoadjusttheupperbasket.
Theupperbasketcanbesetinhighor
lowpositiontoenableyoutoorganise
yourdisheseffortlessly.
Loadexamples
upperbasket
lowerbasket
upperbasket
Opentherailstopflapsandpullthe
basketoutcompletely.Nowplaceit
inhighorlowposition,thenslideit
alongtheguiderailsuntilthefront
wheelsalsogoin.Nowclosetherail
stopflaps.Followthesequenceof
actionsillustratedinfigure"F".
12
3
4
Fig.F
WhatcanIWash
Itemsnotsuitableforthedishwasher:
•Cutleryandtablewaremadefromwoodorpartwood-Theymaybecomefadedandunsightlyinappearance.
•Avoidwashinghornhandledandbronzecutleryinthemachine.
•Delicate/decorativeglasswareandvases,specialantiqueorirreplaceablechina-thedecorativepatternsprintedonthese
itemswillnotbedishwasherproof.
•Plasticobjectsthatarenotresistanttohotwater.
•CopperandPewterutensils.AluminiumandSliverobjects.
•Sometypesofglasscanbecomeopaqueinappearanceaftertheyhavebeenwashedtoomanytimesinadishwasher.
•Highlyabsorbentmaterialssuchasspongesandtowelsshouldneverbeplacedinadishwasher.
• Ifinanydoubt,checkwiththemanufactureronitemssuitabilityfordishwasher’s.
WARNING:Dishesorcutlerysoiledwithtobaccoash,wax,lubricatinggreaseorpaintshouldnotbeputinthe
dishwasher.
Ourrecommendation:Infuture,onlypurchasetableorkitchenwarethathasbeenconfirmed-dishwasherproof.

12
DISHWASHER
CareandCleaning
Thefilterassembly
• Ifyouwantconsistentgoodresults
fromyourdishwasher,youneedto
cleanthefilterassembly.
•Removethelargerfoodparticles
trappedinsidethecup“C”andthe
semi-circularfilterAaftereachwash;
pullthecuphandleupwardstoremove
them.Justrinsethemunderrunning
water.
•Theentirefilterassemblyshouldbe
cleanedthoroughlyonceamonth:cup
C+semi-circularfilterA+cylindrical
filterB.Rotatefilter“B”anticlockwise
toremoveit.
Forcleaning,useanonmetallicbrush.
Reassemblethefilterparts(asshown
inthefigure)andreinsertthewhole
assemblyintothedishwasher.Position
it into its housing and press
downwards.
Thedishwasherisnottobeused
withoutfilters.Improperreplacement
ofthefiltersmayreducetheefficiency
ofthewashandevendamageyour
dishwasher.
Cleaningthesprayarms.
Foodresiduemaybecomeencrusted
ontothesprayarmsandblockthe
holeswherewatercomesout.Check
thesprayarmsregularlyandclean
themonceinawhile.
DONOTusesolventsorabrasivesto
cleantheexteriorandrubberpartsof
yourappliance,donotusesolventsor
abrasivecleaningproducts.Usea
clothdampenedwithlukewarmsoapy
wateronly.
Ifthereareanystainsonthesurface
oftheapplianceinterior,useacloth
dampenedwithwaterandalittlewhite
vinegar, or a cleaning product
specificallymadefordishwashers.
1
2A
B
C
CleaningtheWaterInletFilter
Periodicallycleanthewaterinletfilter
(seefigure2under"Installation")
locatedontheoutletofthewater
supplytap.Afterturningoffthewater
tap,unscrewtheendofthewater
supplyhose,removethefilterand
cleanitcarefullyunderrunningwater.
Then,returnthefiltertoitsplaceand
tightenthewatersupplyhosebackinto
position.
Unplugtheappliance.
Beforecarryingoutanycleaningor
maintenanceonthedishwasher,
alwaysremovetheplugfromthe
electricitysocket.
Aftereverywash.
Whenthewashcyclehasended,
alwaysremembertoturnoffthewater
supplytapandtoleavetheappliance
doorajar.Thisway,moistureandbad
odourswillnotbetrappedinside.
Theseals.
One of the factors that cause
unpleasantodourstoforminsidethe
dishwasherisfoodthatremains
trappedintheseals.Periodiccleaning
usingadampspongewillpreventthis
fromoccurring.
Goingaway
Ifthedishwasherisnotgoingtobe
usedforsometime,carryoutthe
following:
•runacyclewiththedishwasher
empty.
•switchoffattheelectricalsocketand
unplug.
•turn off the water supply tap,
disconnecttheinlethoseandallow
todrain.
•filltherinseaiddispenser.
•leavethedoorajar,topreventthe
buildupofunpleasantodours
insidethedishwasher.
Beforeusingthedishwasheraftera
longbreak,pluginandswitchonat
theelectricalsocket.Reconnectthe
inlethoseandturnonthewatersupply
tap.Checktherearenodepositsof
rustinsidethewaterpipe,ifthereare
allowwatertorunfromthesupplytap
forafewminutes.
Movingtheappliance.
Drainwaterfromthedishwasher.
Securealllooseparts.Onlytransport
inanuprightposition.
•Ifnotkeptuprightduringtransport,
anywaterremaininginsidemay
seepintothecontrolmoduleand
causesubsequenterrorswith
programmefunctions.
Disconnectingthedishwasher.
Whendisconnectingthedishwasher
itisimportantthattasksarecarried
outinthecorrectsequence.
•switchoffatthemainsandremove
theplugfromthesocket.
•turnoffthewatersupply.
•disconnectdrainandwaterinlet
hose.
•pulloutthedishwasher,carefully,
withdrawinghosesatthesame
time.

13
DISHWASHER
Caution
-Donotforgetthatrepairsshouldonlybecarriedoutbyaqualifiedspecialist.Improperrepairscanleadtoconsiderableequipmentdamage,aswellas
dangertotheuser.
-Thedishwashermustfirstbedisconnectedfromtheelectricitysupplybeforeanyrepairsorotherworkcanbecarriedout.Switchoffatthemainssocket
andwatersupplyandremovetheplug.
Ifthedishwasherwon'tstart,
check...
■Isthedishwasherpluggedinatthe
electricitysocketandswitchedon?
■Isthereapowerfailure,checkother
appliances.
■Checkthefuse.
■Isthewatersupplytapturnedon?
■Isthewaterinlethoseconnected
properly?
■Isthepressureofthewatersupply
sufficient?
■Istheinlethosekinked?
■Isthefilteronthewatersupply
hoseblocked?
■Isthedishwasherdoornotclosed
properly?
Ifwaterremainsinsidethe
dishwasher,check...
■thedrainhoseisnotkinked.
■thedrainsyphonisnotobstructed.
■thedishwasherfiltersarenot
clogged.
Ifthedishesarenotbeing
cleanedproperly,check...
■thecorrectamountofdetergent
hasbeenadded.
■thereisregeneratingsaltinthesalt
container.
■thedisheshavebeenloaded
correctly.
■theselectedprogrammeissuitable
forthetypeofdishesandthe
degreeofsoiling.
■allfiltersarecleanandpositioned
correctly.
■thesprayarmnozzlesarenot
obstructed.
■thereisnothingobstructingthe
rotationofthesprayarms.
Ifthedishesfailtodryor
remaindirty,check...
■thereisrinseaidinsidetherinse
aidcontainer.
■therinseaiddispensersettingis
correct.
■thedetergentbeingusedisofgood
quality and has not lost its
effectiveness(forexample,through
incorrectstorage,withtheboxleft
open).
Ifthedishesshowsignsof
streaking,stainingetc.check...
■therinseaiddispensersettingis
notsettoohigh.
Iftherearevisibletracesofrust
insidethetank, check...
■thecapoffthesaltcontaineris
securelyclosedandthatthewater
softnersettingiscorrect.
■thecorrectamountofdetergentis
beingused.Certaindetergentscan
bemorecorrosivethanothers.
■thetankismadeofsteeland
thereforeanyrustmarksaredue
toexternalelements(fragmentsof
rustfromthetankpipes,pots,
cutleryetc.)Specialproductsare
commerciallyavailabletoremove
suchmarks.
Errormessages
Yourdishwasherisequippedwitha
safetysystemwhichisabletodetect
operatingfaults.
Thesefaultsarereportedbyoneor
twowashcycleindicatorlights"E"
flashingrapidly.Take noteofwhich
lightsareflashing,turntheappliance
offandcallCredaServicefortechni-
calassistance.
Tapoffalarm
Ifyouhaveforgottentoturnthewater
tapon,yourappliancewillremindyou
ofthisbysoundingafewshortbeeps
forafewminutes.Turnthetaponand
yourappliancewillstartupagainafter
afewminutes.Wereyoutobeabsent
whenthesebeepsaresounded,the
appliancewillbeblockedautomatically
andwashcycle2and3indicatorlights
(wash and rinse)willflashrapidly.Turn
theapplianceoffattheON-OFFbut-
ton,turnonthewatertapandwaitap-
proximately20secondsbeforeturn-
ingtheappliancebackon.
Re-selectthewashcycleandthe ap-
pliancewillstartupagain.
Ifafterallthechecks,theappliancestill
doesnotoperateortheproblemper-
sists,callCredaService(seeKEY
CONTACTS,backpage)andinform
themof:
-thetypeofproblem
-theabbreviationofthemodel name
(Mod.)andtherelativenumbers(S/N)
writtenontheratingplate
locatedonthe inner edge of
the door.
Switch off at the mains
socketandremovetheplug.
Turn off the water supply.
Troubleshooting
Resolvingminorproblemsyourself.
Experiencehasshownthatyoucanresolvemostproblemsthatariseduringnormaldailyusageyourself,withouthavingtocalloutaservice
engineer.Notonlydoesthissavecostsbutitalsomeanstheapplianceisavailableforuseagainthatmuchsooner.Thefollowinglistofcommon
occurencesandtheirremediesshouldhelpyouidentifythecausesofmostproblems.

14
DISHWASHER
Detergent
Detergent specifically intended for use with dishwashers
must be used. The dispenser must be refilled before the
startof each wash cycle followingtheinstructionsprovided
in the "Programme Chart". The detergent dispenser is
located on the inside panel of the door.
Loading the detergent
To open lid "A", press button "B". The cleaning detergent
shouldbe introduced into the threecontainers"1", “2”and
“3”. "(see table at the end of the page)
Afterpouringinthedetergent,replace the lid,pressingdown
until it clicks.
The rinse aid
This product makes dishes sparkle more as it improves
theirdrying.Therinseaidcontainerissituatedontheinside
ofthe door, youshouldrefill it when light “D”indicates that
it is empty.
(If your dishwasher is fitted with a “low rinse aid” indicator
light,fill the container up whentheindicatorlight flashes or
lights up).
Loading the Rinse Aid
Toopenthedispenser,turn the"C"capintheanti-clockwise
direction and then pour in the rinse aid, making sure not to
overfill. The amount of rinse aid used for each cycle can
beregulated by turning the doseadjuster‘F’which you will
find under lid ‘C’.
Thereare 6 different settings; thenormaldosageis setting
5.
To use the Normal or daily wash cycles (See Programm Chart in the instruction booklet)
Load for 12 Standard Settings tests (upper rack at top position)
INFORMATION FOR TEST LABS
B
A
Comp1 Comp2 Comp3
C
F
D
EN 50242
IEC/ DIN
Cycle
See booklet
See booklet
Total detergent
30 gr.
30 gr.
Comp.1 Comp.2 Comp.3
25 5
10 20

15
DISHWASHER
Notes

January 2003 Part no. FP188 - 01
Over 1200 trained specialists, directly employed by us, ensure that you can have complete confidence in
both the appliances and services we offer.
Repair Service and Information Desk
UK: 08709 066 066
(Open 8 to 8 Mon - Fri, 8 to 6 Sat, 10 to 4 Sun & Bank Holidays)
www.theservicecentre.co.uk
Republic of Ireland: 1850 302 200
Note: Our operators will require the following information:
Model number:
Serial number:
Extended Warranties
UK: 08709 088 088
(Open 8 to 8 Mon - Sun)
www.theservicecentre.co.uk
Republic of Ireland: 1850 502 200
Genuine Parts and Accessories
UK: 08709 077 077
(Open 8-30 to 5-30 Mon - Fri & 9 to 12 Sat)
www.theservicecentre.co.uk
Republic of Ireland: (01) 842 6836
General Domestic Appliances Limited, Morley Way, Peterborough, PE2 9JB.
Key Contacts
After Sales Service
195.036.729.00
Table of contents
Other Creda Dishwasher manuals