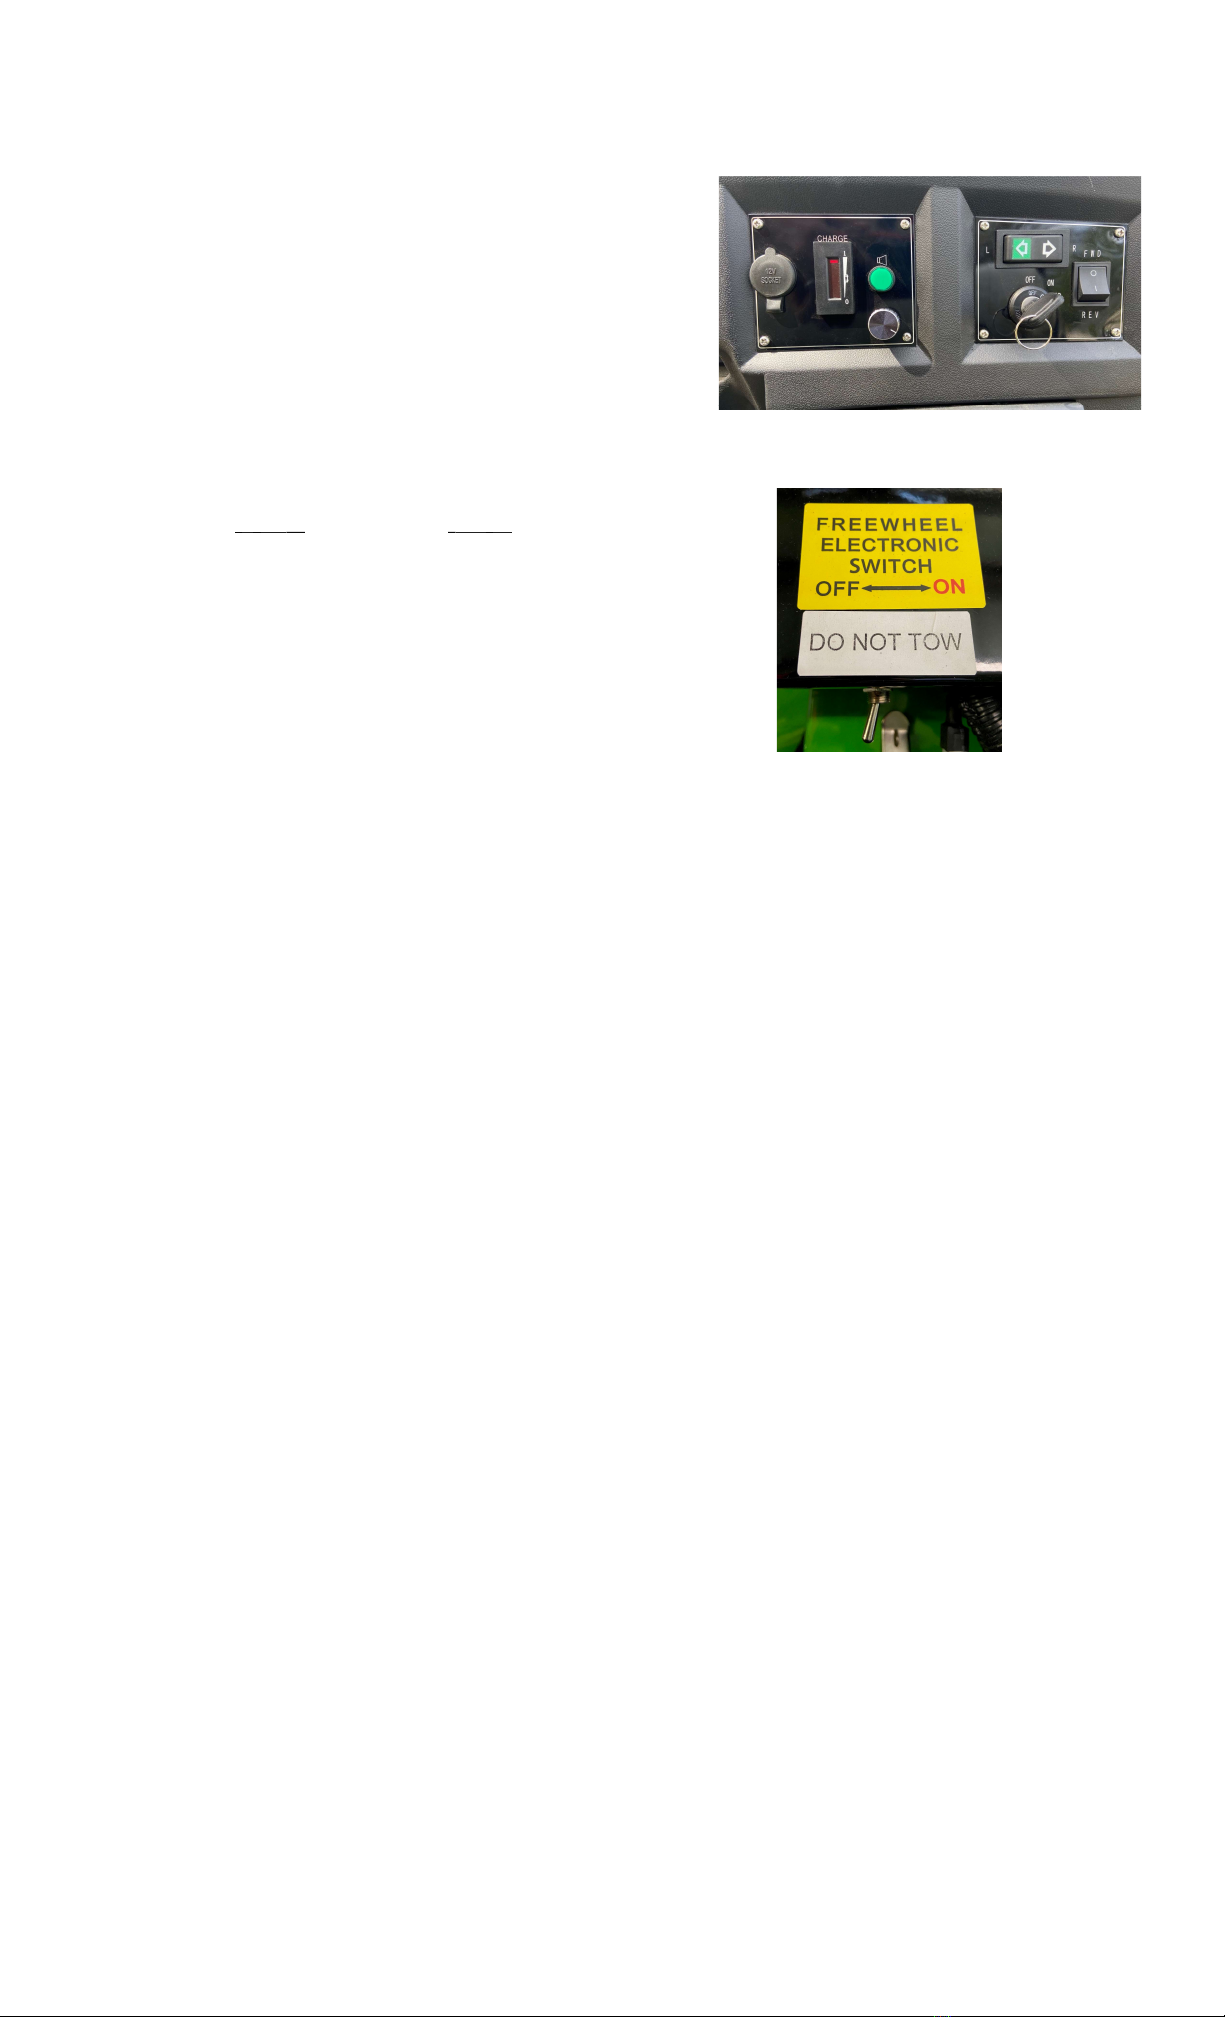
Cricket SX3 Instruction Manual

CRICKET© SX3 Electric Sport Vehicle
CRICKET SX3 Electric Sport Vehicle Owner's Manual,
Safety Guide, and Warranty Information
Thank you for the purchase of your new CRICKET SX3 Electric Sport Vehicle. This
owner's manual is designed to furnish you with a basic understanding of the features and
operation of this vehicle.
Important safety information and information about special
techniques and skills needed to operate and ride your CRICKET SX3 are included,
as well
as basic maintenance and inspection procedures, and warranty information.
2)
3)
SX3
Electric Sports
Vehicle
Rick's Specialty Vehicles
748 N. Harbor City Blvd.
Melbourne, FL 32935
321-752-4041
www.ricksesv.com
Rick's Specialty Vehicles reserves the express right to make design adjustments, improvements, or changes without obligation to
make these changes on units previously sold, and the information contained in this publication is subject to change without notice.
Rick's Specialty Vehicles is not responsible for inadvertent errors in this publication, or/or incidental and consequential damages
that result from the use of the material in this publication.

Please consult Rick's Specialty Vehicles at 321-752-4041 or via email at
info@ricksesv.com if you have any questions regarding the operation or
maintenance of your CRICKET.
For your safety, and the safety of all passengers:
Please read this addendum
and
the original CRICKET SX3
owner's manual carefully and completely before operating your
CRICKET. Make sure you understand all instructions.
• Take special notice of all warning and caution notices herein.
Operate your CRICKET vehicle only after proper training or
instruction.
No one under 16 years of age should ever operate a CRICKET
electric sport vehicle.
NOTE:
Whenever there is any doubt whatsoever about
anything
involved with the operation, maintenance, and safe operation of your
CRICKET Electric Sport Vehicle, always call FREE TECHNICAL
can also visit us online where you will find informational videos,
support documentation and our online store for accessories and parts.
www.ricksesv.com

3
Table of Contents
CRICKET SX3 Product Specifications 4
General Information 5
CRICKET Installation and Setup Instructions 7
CRICKET SX3 Control Functions 10
CRICKET Operational Instructions, Maintenance, and Adjustments 11
Warranty Information 13

4
CRICKET SX3 Product Specifications
Model:
Double-seat CRICKET SX3 Electric Sport vehicle - Four-wheel,
electric powered.
Power:
Single magnet DC 1,000-watt motor
Transmission:
Direct drive through 16:1 reduction gearbox
Speed Control:
Standard accelerator pedal on left side of floorboard
Directional Control: Forward/Reverse switch conveniently located on
main control
Maximum Speed:
Controlled from 0 to 12 mph in consideration of
congested areas and terrain
Hill-climbing ability
:
1:3 Gradient
Battery Charging
: Permanent on-board charging unit underneath front
seat Frame: MIG-welded high-tensile steel with corrosion protection
Body:
Molded in polymer-reinforced plastic
Brakes
: Single regenerative electromagnetic braking
Batteries:
3 heavy-duty glass-mat U1, 12-volt 35-amp\hour in series (36-volt
system) Battery charger: 10-amp, automatic cut-off when fully charged
Tires:
13" x 6.50 x 6" Tubeless - Recommended air pressure at 12-15
psi Turning Radius: 102"
Overall Length:
With Rear Passenger Step Plate Installed: 78"
Adjusted Overall Length
: For Storage and Transport: 58" (with
floorboard extension removed)
Overall Width:
32" (including utility box)
Overall Height:
28" (with seat back removed, steering wheel folded down,
and rear passenger safety bar removed)
Load Capacity:
600 Ibs.
Vehicle Curb Weight:
313 Ibs.
NOTICE: CRICKET
SX3
specifications, safety, and performance features are
subject to change as we continue to improve the vehicle.

5
General Information
This guide is provided to assist the owner or operator of this CRICKET SX3 in the safe operation
and
maintenance of the vehicle.
Safety
General Safety Information
This guide is provided to assist the owner or operator of this Rick's Specialty Vehicles product in the
maintenance and safe operation of the vehicle. The warnings in this manual are not a replacement for good
common sense and safe driving practices. Your Cricket SX3 is designed and manufactured for off-road use.
It
does not conform to Federal Motor Vehicle Safety Standards and is not equipped for operation on public streets.
Operators of the Cricket SX3 should have a valid motor vehicle driver's license. No one under 16 years of age
should be allowed to operate a Cricket SX3.
Operating Safety
1. Always use your CRICKET in a responsible manner and maintain the vehicle in safe operating
condition.
2. Always read and observe all warnings and operation instruction labels affixed to the CRICKET vehicle.
3. Always follow all safety rules established in the area where you are operating the CRICKET vehicle.
4. Always use extreme caution when making sharp or blind turns.
5. Always release throttle gradually (rotate forward, away from yourself) to control speed and stability on steep
grades.
6. Do not tow the CRICKET vehicle.
7. Always use extreme caution when traveling:
a. In wet areas
b. In blind spots
c. Along loose terrain
d. On uneven roads
e. In traffic with other vehicles
f. Near pedestrian areas.
Notes, Cautions, and Warnings
The following notations indicate important information. Failure to follow the warnings contained in this owner's
manual could result in serious injury or death.
Conditions should be observed. This provides key information that makes procedures easier and clearer.
CAUTION: CONDITIONS THAT MAY RESULT IN DAMAGE TO THE VEHICLE. SPECIAL PRECAUTIONS
MUST BE TAKEN TO AVOID DAMAGE TO THE VEHICLE.
WARNING: HAZARDOUS CONDITIONS THAT COULD RESULT IN SEVERE INJURY OR DEATH TO THE
MACHINE OPERATOR, BYSTANDER OR A PERSON INSPECTING AND/OR REPAIRING THE VEHICLE.
General Safety Practices
WARNING
Steep Grade:
In areas where steep grades exist, vehicle operations should be restricted to the
designated vehicle pathways wherever and whenever possible. Such potential hazards should be identified with a
suitable warning giving the following information: "Warning: STEEP GRADE - Ascend or descend slowly and
proceed with due caution.”
WARNING
Wet Areas
:
Wet grassy areas may cause a vehicle to lose traction and may affect stability. Wet areas
should be chained or roped off to prevent access and potential accidents with injury.
WARNING
Sharp Turns, Blind Corners, Bridge Approaches:
Sharp turns, blind spots, bridge
approaches and other potentially hazardous areas shall be either chained or roped off to prevent vehicle
operations or identified with a suitable warning to the operator of the nature of the hazard and stating the proper
precautions to be taken to avoid the hazard.

6
WARNING
Loose Terrain:
Loose terrain may cause a vehicle to lose traction and may affect stability. Areas of
loose terrain should be repaired if possible, or chained or roped off to prevent vehicle operation, or identified by a
suitable warning to operators not to operate vehicles in this area due to lose terrain or possible hazardous conditions.
WARNING
Pedestrian Areas:
Areas where pedestrians and vehicles interfere shall be avoided whenever
possible by rerouting the vehicle traffic or the pedestrian traffic to eliminate the interference. If elimination of the
interference is not possible or is highly impractical, signs should be erected warning pedestrian traffic and to drive
slowly and use extreme caution.
CAUTION
Ventilation:
Never charge a vehicle in an area that is subject to flame or spark. Pay particular attention
to natural gas or propane gas water heaters and furnaces.
Safety
On steep hills it is possible for vehicles to coast at greater than normal speeds encountered on a flat surface. To prevent
loss of vehicle control and possible serious injury, speeds should be limited to no more than the maximum speed on
level ground. Limit speed by reducing or eliminating pressure on the accelerator pedal, which engages the automatic
brake function.
Catastrophic damage to the drive train components due to excessive speed may result from driving the vehicle above
specified speed. Damage caused by excessive speed may cause a loss of vehicle control and is costly. This is considered
abuse and will not be covered under warranty.
If the vehicle is to be used in a commercial environment, signs should be used to warn of situations that could result in
an unsafe coasting condition.
Keep this manual as part of the permanent service record in case the vehicle should be resold.
Your CRICKET vehicle is intended for off-road use only. The owner should check local and other applicable laws and
regulations before operating.
WARNING SEVERE INJURY OR DEATH can result if you do not follow these instructions:
Read this entire manual carefully and follow the operating procedures described.
Operate a CR1CKET SX3 only
if
you have had proper training or instruction.
Follow these age recommendations:
No one under 16 years of age should operate a CRICKET vehicle or be left without adult supervision.
Be wary of the safety of passengers and pedestrians.
Do not operate a CRICKET vehicle on a highway.
Do not consume alcohol or drugs before, or while operating, this machine.
Never operate at speeds too fast for your skills or the outdoor conditions. Always operate at a speed that is
suitable for the terrain, visibility and operating conditions, and your experience.
Never attempt wheelies, jumps, or other stunts.
Inspect your vehicle every time it is used to make sure it is in safe operating condition. Follow the inspection
and maintenance procedures and schedules described in this manual.
Always keep both hands on the steering wheel during operation.
Always drive at slower speeds and be cautious when operating on unfamiliar terrain. Be alert to changing
terrain conditions always when operating a CRICKET vehicle.
Do not operate your vehicle on excessively rough, slippery or loose terrain until you have learned and practiced
the skills necessary to control the vehicle on such terrain. Be especially cautious of these kinds of terrain.
Always follow proper procedures for turning as described in this manual. Practice turning at low speeds
before attempting to tum at faster speeds. Do not tum at excessive speed.
Do not operate the vehicle on hills too steep for the vehicle or for your ability. Practice on smaller hills before
attempting larger ones.
Always follow safe procedures for climbing hills. Check the terrain carefully before you start up any hill. Never
climb hills with excessively slippery or loose surfaces. Shift your weight forward. Never press down on the
accelerator suddenly. Never go over the top of a hill at high speed.
Always follow safe procedures for going down hills and for braking on hills. Check the terrain carefully
before you start down any hill. Shift your weight backward. Never go down a hill at high speed. Avoid going
down a hill at an angle that could cause the vehicle to lean sharply to one side. Go straight down the hill

7
wherever possible.
Always follow proper procedures for crossing the side of a hill as described in this manual. Avoid hills with
excessively slippery or loose surfaces. Shift your weight to the uphill side of the vehicle. Never attempt to turn
the vehicle around on any hill until you have mastered the turning technique on level ground. Avoid crossing the
side of a steep hill if possible.
Use proper procedures if you stall or roll backwards when climbing a hill. To avoid stalling, use proper gear and
maintain a steady speed when climbing a hill. If you stall or roll backwards, follow the special procedure for
braking. Dismount on the uphill side or to a side if pointed straight uphill. Turn the vehicle around and remount.
Always check for obstacles before operating in a new area.
Never attempt to operate over large obstacles, such as large rocks or fallen trees.
Be careful when skidding or sliding. Learn to safely control skidding or sliding by practicing at low speeds and
on level, smooth terrain. On extremely slippery surfaces, such as ice, go slowly and be very cautious in order to
reduce the chance of skidding or sliding out of control.
Never operate a CRICKET in fast-flowing water or excessively deep waters. Contact with water may affect the
batteries and may reduce stopping ability. Test your stopping ability after leaving water by removing pressure
from accelerator pedal rapidly several times in a row.
Always use the size and type tires specified in this manual.
Always maintain proper tire pressure as described in this manual. (8-15 PSI)
Never modify a CR1CKET vehicle through improper installation or use of accessories.
Never exceed the stated load capacity for a vehicle, Cargo should be properly distributed and securely attached.
Reduce speed and follow sound procedures for carrying cargo or pulling a trailer. Allow greater distance for
braking.
CRICKET Installation and Setup Instructions
Once you have safely and completely removed your vehicle from its shipping crate, you are ready to perform the basic
installation and set-up procedures prior to the initial operation of your new CRICKET SX3.
*You may dispose of the protective barrier.
1. Unpack the CRICKET Vehicle
1.1. Remove all packing material including the rear step plate and the front seat from the CRIKCET. Set these items
aside until needed.
2. Install the Steering Shaft
2.1. Make sure the steering wheel in the correct orientation for driving straight and the front wheels are pointing
straight. Line up the square pin (Fig. 2.1.1) on the lower shaft with the upper shaft and slide the two shafts
together. Then tighten the large nut on the upper shaft until tight. (Fig. 2.1.2)
Figure 2.1.2 SX3 Steering Shaft Nut Figure 2.1.1 RX5 Lower Steering Shaft

8
3. Install the Floorboard Extension
3.1. Use your hand to pull up on the spring-loaded T-Lever in the center of the permanent floorboard. Turn the lever
clockwise until it locks open. (Fig. 3.1.1)
3.2. Gently pull or push the vehicle chassis front end forward until it stops. Then lift and turn the T-Lever
counterclockwise and lock the chassis into position. You might need to slightly adjust the two chassis once the T-
Lever is lowered for it to “click” into lock. Check that the lever is locked. (Fig 3.2.1)
3.3. Remove the floorboard knobs from both sides of the chassis, located just under the front seat on the frame.
3.4. Slide the floorboard extension into position by angling it in toward the front of the CRICKET. Check that the Key is
in the “OFF” position and you may need to depress the throttle pedal slightly to get the floorboard to clear.
3.5. Slide the floorboard extension underneath the stainless-steel flash plate of the permanent floorboard assembly.
(Fig 3.5.1)
3.6. Make sure both sides of the floorboard extension are lined up and securely
fitted underneath the front stainless-steel flash plate and into the black
plastic tabs on the front body.
3.7. Install but do not tighten one of the floorboard knobs located on the chassis
under the front seat, then install the second knob. You may need to slightly
move the floorboard in order to line up with the threaded holes for the
knobs. Once both knobs are installed tighten them down to secure the
floorboard in place.
Figure 3.1.1 SX3 T-Lever Released
Figure 3.2.2 SX3 T-Lever Locked
Figure 3.5.1 SX3 Floorboard Installation

9
4. Install Front Seat Back Rest
4.1. Gently guide both seat back support arms into the metal slots located behind the front seat. Install the small
knobs into the threaded inserts on
4.2. the rear of the metal slots to secure the seat back.
5. Install Rear Passenger Step Plate
5.1. Loosen both locking nuts located below the back seat and rear carrier rack. (Fig. 5.1.1)
5.2. Insert both step plate bars into the rear chassis frame tubing and gently guide both bars into the tubes. Check
that the step plate bars are all the way in and that the knobs are tightened securely. (Fig 5.2.1 and 5.2.2)
Figure 5.2.1
Figure 5.1.1
Figure 5.2.2
Figure 4.1.1

10
Freewheel Electronic Switch
CRICKET SX3 Control Functions
SX3 Controls
Key Switch Functions:
ON: One click of key clockwise activates power and makes
engine ready for operation. One more click clockwise turns
on the headlight and taillights.
OFF: With the key in the OFF position, all electrical circuits
are switched off. The key may now be removed.
Charge Meter:
CHARGE: "I"
signifies
full charge. "0"
signifies no
charge.
Directional Toggle Switch:
Up (F) for forward - Down (R) for reverse.
Rheostat Speed Control:
Use this knob to adjust the maximum speed of the cart.
Turn clockwise for full speed and turn
counterclockwise to limit the maximum speed.
Turn Signal:
The turn signals are activated with the switch on the
dash.
Horn:
The horn activated with the Green button on the dash.
Freewheel Electronic Switch:
Located under the front seat use this switch to
disengage the brake. Under normal operation this
switch is “OFF”. NOTE: When this switch is in the
“ON” Position the CRICKET will not drive.
Entering the Vehicle
All passengers (including driver) must always be seated while the CRICKET vehicle is in use.
Turning the Vehicle On
Switch the key switch to the “On” Position and select the desired direction (Forward or Reverse).
Driving the Vehicle
After making the desired directional selection, depress the floorboard-mounted accelerator pedal with your right
foot to engage the vehicle's power train. Always be aware of surrounding terrain and use caution. Judge speed
accordingly. Be cautious when encountering loose or wet terrain. Do not attempt steep grades.
Stopping the Vehicle
Slow down by gradually lifting your right foot off the accelerator pedal. Once you reach zero forward speed, the
automatic electronic braking system turns your CRICKET off.
Turning the Vehicle Off
After taking your right foot completely from the accelerator pedal and automatically stopping the vehicle, switch
the key to the Off position.
Exiting the Vehicle
Once the vehicle has come to a complete stop, and the key switch is turned to the Off position, all passengers may
carefully exit the vehicle. Never attempt to exit the vehicle while it is still moving. This could lead to severe
injury.
Storing the Vehicle
Store your CRJCKET vehicle with the key switch in the Off position. Do not store vehicle for more than one day
with the battery charger hooked up.
SX3 Dash Panel

11
SX3 Battery Charger
SX3 Free-Wheel Lever
Riding the Vehicle
Ride with Care and Good Judgment.
Get Training
If YOU
Are Inexperienced.
This CRICKET vehicle should only be used
by
experienced operators. This vehicle requires special skills
obtained through practice. Take your time to fully learn techniques before attempting more difficult
maneuvers.
You should familiarize yourself with the operation of the vehicle to achieve the skill necessary to enjoy
riding safely. Be sure you have read this entire guide and understand the operation of the controls before you
begin to ride. Pay particular attention to the safety information.
Beginners should become familiar with this vehicle at slow speeds first, even
if
you are an experienced
operator. Do not attempt to operate at maximum performance until you are totally familiar with the vehicle's
handling and performance characteristics.
WARNING Passenger and Driver Safety ~
During Operation
Always keep your feet inside the vehicle during operation. Otherwise, your feet may contact the rear
wheels. Removing even one hand or foot can reduce your ability to control the vehicle or could
cause you to lose your balance and fall out of the vehicle. If you remove a foot from inside the
vehicle, your foot or leg may come into contact with the rear wheels or objects outside the vehicle.
Always keep both hands on the
steering
wheel and both feet inside the vehicle during
operation.
CRICKET Operational Instructions, Maintenance, and Adjustments
Tires and Tire Air Pressure
Operating this vehicle with improper tires, or with improper or uneven tire pressure, may cause loss of
control, thereby increasing your risk of an accident.
Always use the size and type tires specified in this manual for this vehicle.
Always maintain proper 8-15 PSI tire pressure as described in this manual, adjusting periodically for
conditions, load, and terrain.
Check tire pressure and adjust accordingly by removing custom full wheel cover from each wheel
and removing cap from valve stem, just as with any automobile using pneumatic tires. Always
replace valve stem cap and wheel cover after each tire pressure check operation.
Charging the Batteries
1. Simply raise the hinged front seat with the convenient lift strap for easy access to the new on-board
permanent charging system.
2. Insert the plug (it will fit only in one direction)
attached to the battery-charging unit into any
convenient 110-volt electrical outlet. (Also works with
Coach and other portable generators.)
3. Charge light turns GREEN when CRICKET is fully
charged, and the unit cuts off automatically. Just
unplug the cord, replace it in the under-seat
compartment, and return the seat to its secure driving
position.
Adjusting the Free-Wheel Lever
1. The free-wheel lever is conveniently located just underneath the left rear of your SX3.
2. Pull the free-wheel lever toward rear of vehicle
"out-of-gear" condition for free-wheeling operation;
when you hear the "click", you've engaged the free-
wheeling function. (This makes pushing, rolling,
and/or loading the vehicle much easier.)
3. Remember to push the free-wheel lever back in,
toward the front of the vehicle, prior to normal
operation. (Listen for another "click" to indicate you
have returned to regular driving configuration.)

12
Replacing your CRICKET SX3 Batteries
NOTE: Batteries are hermetically sealed and require NO MAINTENANCE for the life of the
battery. No acid. No acid odor. No leakage
1. To remove battery cover, unhinge two latches at front of engine compartment (beneath the front portion of
the seat) and slowly, carefully slide the cover forward to reveal both batteries.
2. Use 13mm wrench or pliers to turn bolts counterclockwise to loosen and remove batteries with built-in,
convenient rope handles. Use Caution not to “short” batteries with the wrench when disconnecting or
connecting the battery terminal leads.
3. Install new batteries by reversing procedure in step 1, above. (Replace and secure cover.)
Operating the Convertible Rear Passenger Seat
To convert your rear seat into the rear cargo carrier for a non-passenger load-carrying capacity, simply grab
the rear frame of the rear passenger seat and flip it toward the rear and down.
Adjusting Chassis Rigidity for Heavy Loads or
Rough Terrain
Your fully assembled SX3 is delivered with the chassis secured in a safe, yet somewhat flexible chassis
configuration--basically perfect for normal, everyday operating conditions.
If you should need to haul a heavier payload (up to 600 pounds maximum) or drive your SW3 over
moderately rough terrain, you may elect to tighten the two under-chassis frame bolts (shown here, to your
right) to provide a more rigid, firmer ride.
1. Use a 17mm wrench (or an adjustable wrench) to turn nuts on both bolts clockwise until they fit
snugly---but not too tightly.
2. To return chassis rigidity to normal operating configuration, simply turn the nuts on both bolts
counterclockwise until both return to their original position on the bolt.
NOTE: Whenever there is any doubt whatsoever about anything involved with the operation,
maintenance, and safe operation of your CRICKET SX3, always call FREE TECHNICAL SUPPORT
at 321-752-4041, or e-mail us at info@ricksesv.com
SX3 Rear Passenger Seat SX3 Rear Cargo Carrier
SX3 Chassis Rigidity Adjustment

13
Warranty Information
Limited Warranty
Rick's Specialty Vehicles hereby warrants that new CRICKET vehicles purchased from an authorized CRICKET dealer,
or direct from Rick's Specialty Vehicles, in the continental United States will be free from defects in material and
workmanship for the period of time stated herein, subject to certain stated limitations. Rick's Specialty Vehicles is not
responsible for any abuse, negligence, vandalism, or acts of nature.
The Period
of Warranty
All CRICKET vehicles shall have a warranty period of six months from the date customer takes possession, or upon
verified delivery of vehicle to customer's designated delivery address.
During the Period
of Warranty
Rick's Specialty Vehicles, will, free of charge, repair or replace, at its option, any part adjudged defective by Rick's
Specialty Vehicles during the warranty period due to faulty workmanship or material from the factory. Parts used in
warranty repairs will be warranted for the balance of the product's warranty period. All parts replaced under warranty
become property of Rick's Specialty Vehicles.
General Exclusions
Exclusions from this warranty shall include any failures caused by:
a. Competition or racing use.
b. Installation of parts or accessories that are not qualitatively equivalent to genuine Rick's Specialty
Vehicles manufacturer parts or accessories
c. Abnormal strain, neglect, or abuse
d. Lack of proper maintenance
e. Accident or collision damage
f. Modification to original parts
g. Damage due to improper transportation
Specific Exclusions
This warranty does not extend to those items which may require replacement due to normal wear and tear.
Plastic Shrouds
Upholstery and Seating
Tires and Rims
Exclusions also include components with damage or failure caused by:
Contamination
Abuse, misuse, accident or negligence
Use other than normal design specifications
Improper operation, maintenance or storage
Do not return faulty parts without prior written authorization. All transportation costs and shipping damage incurred
while submitting parts for repair or replacement are the responsibility of the purchaser.
The Customer's Responsibility
Under this limited warranty, the customer's responsibility shall be to:
a. Operate and maintain the vehicle as specified in the appropriate owner's manual.
b. Give notice to Rick's Specialty Vehicles, or an authorized CRICKET dealer, of any and all apparent
defects within ten (10) days after discovery, and make the vehicle available at that time for inspection
and repairs at such dealer's place of business, or at Rick's Specialty Vehicles in Melbourne, FL.
c. Maintain proper battery care.
Care of Batteries:
Starting from the date of product delivery battery charge must be maintained to ensure warranty
coverage. For products which are not used regularly, or during periods of storage prior to and after
purchase date, batteries must be charged once a week, for 24 hours. Failure to do so will void battery
warranty. It may take a few days for the temperature of your batteries to stabilize and adjust to their

14
new temperature. It takes a few charging cycles (partial draining followed by full recharging) to establish
the critical chemical balance that is essential to a deep-cycle battery’s peak performance and long life.
Note: Gradual deterioration in performance because the battery has been left in a discharged state, left
in cold or hot conditions for an extended period or time or worn out through heavy use is not covered.
If you use your Cricket daily, charge its batteries as soon as you finish using it for the day. We recommend
that you charge the batteries for at least 8 to 14 hours after daily use.
Maximum Battery Life:
We recommend that you keep your batteries fully charged whenever possible. Try to maintain an even
speed while your Cricket is in motion. Make sure all harness connections are secured properly.
To extend battery life, always turn off Cricket and remove the key when not in use.
Pro Charging System Battery Charger Two-year Warranty:
The charger is covered by a separate two-year warranty provided by the charger manufacturer. The charger is not
warranted by the Cricket company. Contact Pro Charging Systems at (800)742-2740. You will need to provide the
Charger’s Serial Number which is located on a white label attached to the AC power cord for the charger.
Rick's Specialty Vehicles makes no other warranty of any kind, expressed or implied. All
implied warranties of merchantability and fitness for a particular purpose which exceed
the obligations and time limits stated in this warranty are hereby disclaimed by Rick's
Specialty Vehicles and herewith excluded from this warranty.
Some states do not allow limitations on how long an implied warranty lasts, so the above
limitation may not apply to you. Also excluded from this warranty are any incidental or
consequential damages, including loss of use. Some states do not allow the exclusion or
limitation of incidental or consequential damages, so the above exclusion may not apply
to you.

15
CRICKET WARRANTY Registration Form
You can fill out your warranty registration online at
www.ricksesv.com/warranty-registration
or
you can fill out this form completely (please print legibly or type) and mail it to:
RICK'S SPECIALTY VEHICLES
748 N. Harbor
City
Blvd.
Melbourne, FL 32935
Customer Name:
Phone Number:
Delivery Address:
Vehicle Serial Number: __________________________________
Vehicle Model:
Color: (Circle one)
Date of Purchase: Date of Delivery:
Dealer

16
This manual suits for next models
1
Table of contents
Other Cricket Golf Car manuals