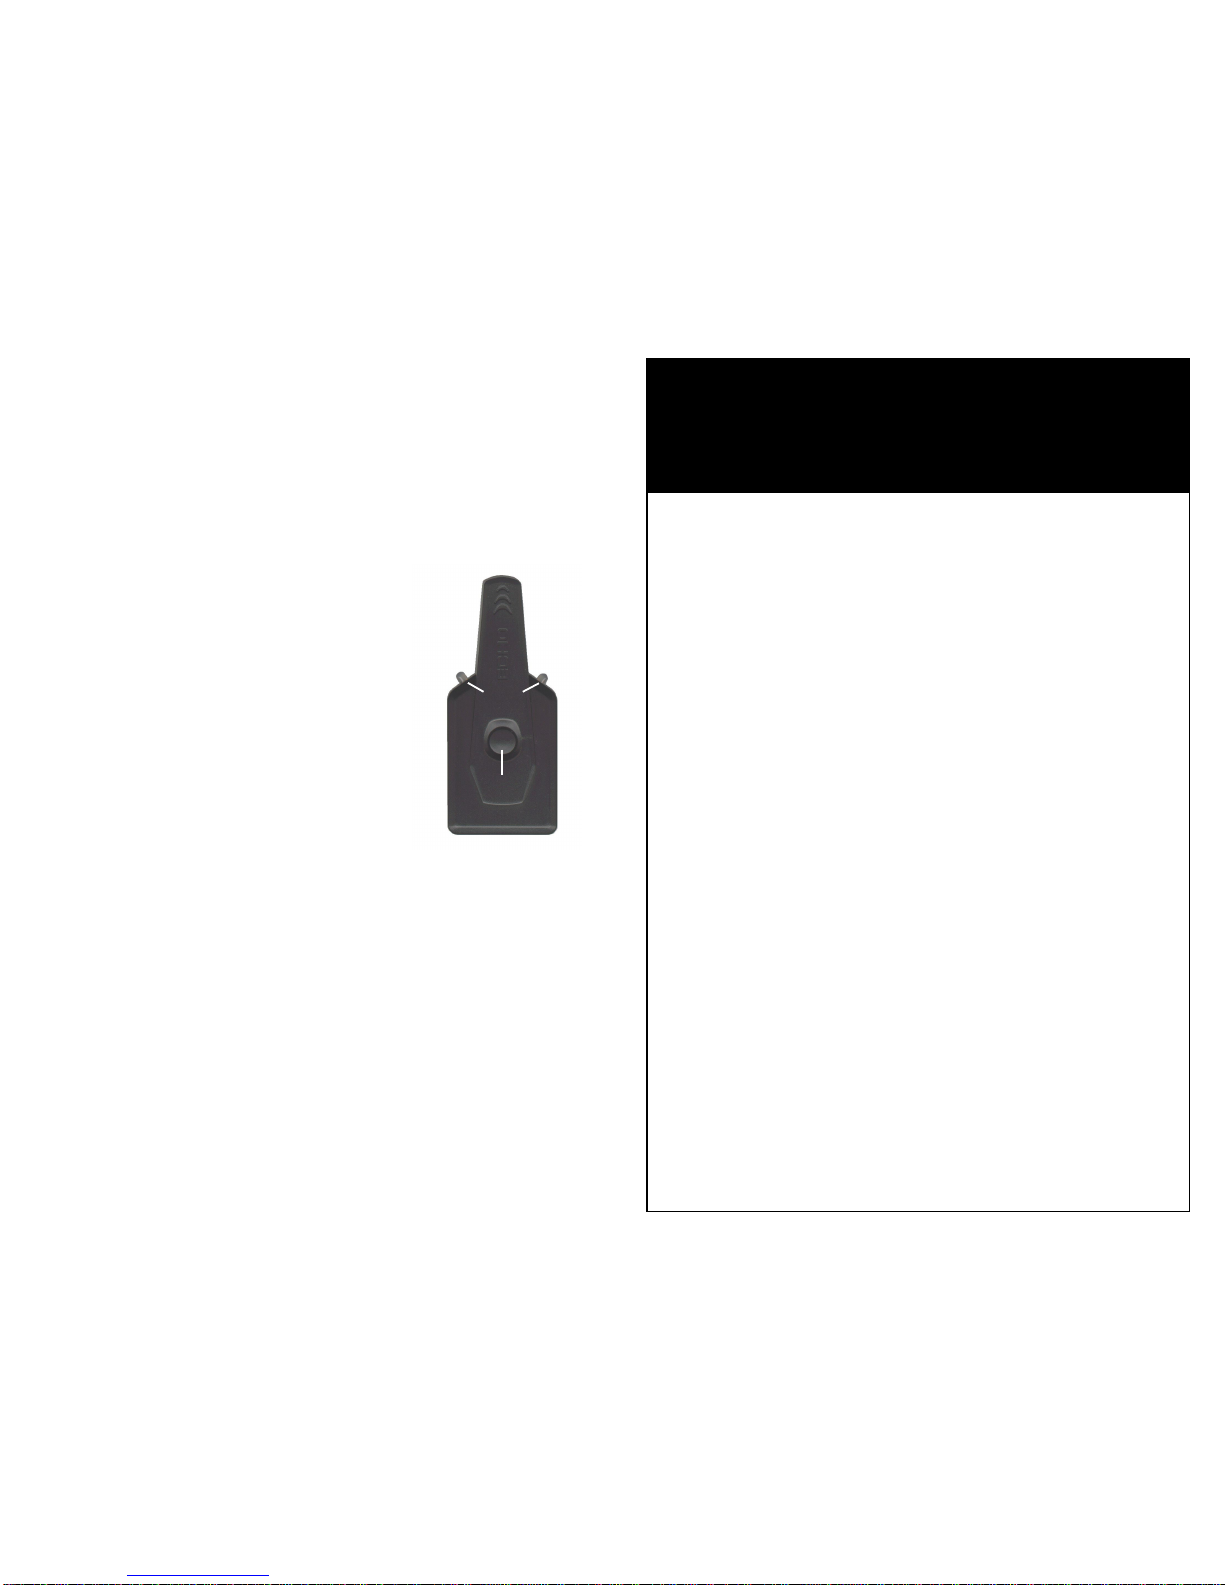
Crime Guard 750i6 User manual

COPYRIGHT 2009: OMEGA RESEARCH & DEVELOPMENT, INC.
Crime Guard
750i6
OPERATION MANUAL
FRONT COVER
PRINTER’S NOTE:
production front cover
is color; this is a
place marker cover.
ProductsmanufacturedandsoldbyOMEGARESEARCH&DEVELOPMENT,
INC. (the "Company"), are warranted to be free from defects in materials and
workmanship under normal use. If a product sold by the Company proves to be
defective,theCompany willrepairor replaceitfree ofchargewithin thefirstyear
and thereafter all parts to be repaired will be free with only a nominal charge for
Omega'slaborandreturnshipping,totheoriginalownerduringthelifetimeofthe
car in which it was originally installed.
All products for warranty repair must be sent postage prepaid to Omega
Research & Development, Inc., P.O. Box 508, Douglasville, Georgia 30133, or
send via UPS to: 981 N. Burnt Hickory Rd., Douglasville, Georgia 30134, with
billofsale or other dated proof of purchase. Thiswarrantyis nontransferable and
doesnotapply to any product damaged by accident,physicalor electrical misuse
or abuse, improper installation, alteration, any use contrary to its intended
function, unauthorized service, fire, flood, lightning, or other acts of God.
This warranty limits the Company's liability to the repair or replacement of
theproduct.TheCompanyshallnotberesponsibleforremovaland/orreinstallation
charges, damage to or theft of the vehicle or its contents, or any incidental or
consequential damages caused by any failure or alleged failure of the product to
function properly. UNDER NO CIRCUMSTANCES SHOULD THIS
WARRANTY,ORTHEPRODUCTCOVEREDBYIT,BECONSTRUED
AS A GUARANTEE OR INSURANCE POLICY AGAINST LOSS. The
Companyneitherassumesnorauthorizesanypersonororganization tomake any
warranties or assume any liability in connection with the sale, installation, or use
of this product.
This device complies with F.C.C Rules part 15. Operation is subject to the
followingtwoconditions:(1)Thisdevicemaynotcauseharmfulinterferenceand,
(2) This device must accept any interference that may be received, including
interference that may cause undesired operation.
The manufacturer is not responsible for any radio TV interference caused by
unauthorizedmodificationstothisequipment.Suchmodifications couldvoid the
user’s authority to operate the equipment.
L I M I T E D L I F E T I M E W A R R A N T Y
Omega Research and Development, Inc.
P. O. Box 508
Douglasville, Georgia 30133
www.caralarm.com May2009 MO-CG-750i6
BACK COVER
PRINTER’S NOTE:
production back cover
is color; this is a
place marker cover.

This device complies with FCC Rules part 15. Operation is subject to the
followingtwoconditions,(1)Thisdevicemaynotcauseharmfulinterfer-
ence and, (2) This device must accept any interference that may be
received, including interference that may cause undesired operation.
The manufacturer is not responsible for any radio or TV interference
caused by unauthorized modifications to this equipment. Such modifica-
tions could void the user's authority to operate the equipment.
One or more of these patents may apply to this product:
#5,612,669 #5,654,688 #5,663,704 #5,729,191 #5,818,329 #5,612,578 #5,739,747
#382,558 #385,878 #5,750,942 #5,739,748 #5,719,551 #406,107 #701,285
#5,973,592 #5,982,277 #5,986,571 #6,011,460 #6,037,859 #6,049,268 #6,130,605
#6,130,606 #6,140,938 #6,140,939 #6,150,926 #6,144,315 #6,184,780 #6,188,326
#6,243,004 #6,249,216 #6,275,147 #6,297,731 #6,320,514 #6,320,498
Foreign Patent #199700312 #EP0817734B1 #98906445.6 #2,320,248 #701,285
Omega Research and Development, Inc.
www.caralarm.com
Page - 2
Coin batteries used in the transmitter which is used to operate this
security system may contain Perchlorate Material - special handling
may apply. See www.dtsc.ca.gov/hazardouswaste/perchlorate
Page - 35
Complete Programmable Features Matrix
Features Ignition on, off, then press Valet Switch 5times (Status Light turns on steady).
# Feature Default Setting Option 2nd Option 3rd Option
1 SecureCode 1 & 0 2 stages, of up to 9 presses each (total of 99 possible combinations)
2 Last Door Arming OFF (L) ON w/o doorlock (U) ON w/ doorlock (2)
3 Automatic Rearming OFF (L) ON w/o doorlock (U) ON w/ doorlock (2)
4 Starter Interrupt Functions Alarm only (L) Off (U) Automatic (2)
5 Ignition Activated Override OFF (U) ON (L)
6 Doors Lock With Ignition On ON (L) OFF (U)
7 Doors Unlock With Ignition Off ON (3) OFF (L) o/p 1 only (U) o/p 2 only (2)
8 Open Door Bypass to above ON (L) OFF (U)
9 Confirmation Chirps ON (L) OFF (U) exc. Valet (2) Valet only (3)
10 Confirmation Chirp Volume Medium Loud (2) Low (L) Med Lo (U) Loud (3)
11 ActivatedAlarm Cycle 30 Seconds (L) 60 Sec. (U) 90 Sec. (2) 120 Sec. (3)
12 Lights On Upon Disarm ON (L) OFF (U)
13 Disarm Upon Trunk Release ON (L) OFF (U)
14 Arming Delay 3 Seconds (L) 15 Seconds (U) 30 Seconds (2) 45 Seconds (3)
15 Steady Siren / Pulsed Horn Steady Siren (L) Pulsed Horn Lo (U) Pulsed Med. (2) Pulsed Hi (3)
16 Alarm Functions Bypass OFF(U) ON (L)
17 Ignition Anti-Carjacking OFF (U) ON (L)
18 Door Anti-Carjacking OFF (U) ON (L)
19 Remote Anti-Carjacking OFF (U) ON (L)
20 Open Door Warning atArm OFF (U) ON (L)
21 III Button Operation 3rd Chan. (L) Panic (U) 4th Chan. (2) 5th Chan. (3)
22 Doorlock Functions .8 second (L) 3 Seconds (U) Double Unlock (2) Total Closure (3)
23 Lock Relay Functions Lock (L) Parking Light (U) Channel 4 Latch (2) Channel 4 On Demand (3)
24 Unlock Relay Functions Unlock (L) Horn, med (U) Channel 5 Latch (2) Channel 5 On Demand (3)
installation features

Page - 3
This Booklet Contains
Introduction to the System ..................................................... 4-6
Status Light, Valet Switch, Controller & Transmitter
System Versatility - An Important Note......................................... 6
UsingtheCrime GuardSystem ................................................ 7
Arming Using the Controller or Transmitter .......................... 7-8
Arming Bypass, Sensor Bypass
Automatic “Last Door Arming” of the System ....................... 8-9
While the System is Armed, and should it Trigger................. 9-10
Prewarning
Disarming the System Using the Controller or Transmitter ... 10-11
Safety Disarm Feature; Activation Alert; Automatic Rearming
Disarming By Emergency Override ........................................ 11-12
Remote Panic Feature.............................................................. 12
Other Controller and Transmitter Operations ......................... 13
Silent Arming & Disarming, Sensor Bypass;2nd, 3rd, 4th & 5th Channels
Using the Valet Switch............................................................ 14-15
SecureCode.............................................................................. 15
The Status Light ...................................................................... 16
2-Way Controller..................................................................... 17-20
Icons & Programming
Anti-CarjackingProtection ..................................................... 21
Controller and Transmitter Protection .................................... 22
How to Program Controllers or Transmitters ......................... 22-23
Programmable Features List.................................................... 24
How to Program Features........................................................ 25-26
Programmable Features Descriptions ..................................... 26-34
Programmable Features Matrix............................................... 35
Limited Lifetime Warranty .............................................. Back Cover
Note: Features #23 and #24 involve two outputs of the Crime Guard control
unitwhichgivetheinstallergreaterflexibility. Theseoutputscanbeprogrammed
toperformseveraldifferentfunctionsandtheymustbeconfiguredbytheinstaller
to perform the desired operations.
Page - 34
The final 3 Programmable Features are for the installer’s use.
Feature #24 Unlock Relay Functions
Factory Default Setting Door Unlock Output
(press “arm/lock” button to program)
Options:
Horn Output (press “disarm/unlock” button to program)
Channel 5 Latch Output (press “II” button to program)
Channel 5 On Demand Output (press “III” button to program)
This is the second of two built-in relays which can be programmed to perform
several different functions. As described above for the “lock” relay, the primary
functionof this second relayisthe “unlock” function, whichinmany cases is not
required and making the relay available for other uses. In the case of this relay,
a very popular application is operating the vehicle’s existing horn; either in
conjunctionwiththeelectronicsiren,orinplaceofthesiren. Usingboththesiren
andthehorncreatesanextremelyeffectivesecuritysystem. Theremainingoptions
areChannel5,withthesameoperationparametersasdescribedaboveforChannel
4, except that the “disarm/unlock” and “III”buttons operate it.
Feature #23 Lock Relay Functions
Factory Default Setting Door Lock Output
(press “arm/lock” button to program)
Options:
Parking Light Output (press “disarm/unlock” button to program)
Channel 4 Latch Output (press “II” button to program)
Channel 4 On Demand Output (press “III” button to program)
The Crime Guard 650i5has two built-in relays, which can be programmed to
perform several different functions. Although the primary function, or default
setting,ofthisrelayistooperateasadoor“lock”function,therearemanyvehicles
which don’t actually require a relay in which case the relay is available for the
optional functions. Other options for this relay are parking light flash, and an
additional remote output, operated by the transmitter’s “arm/lock” and “II”
buttons together, and in two forms: “Latch”, in which the output toggles with
eachbuttonspress,and“OnDemand”whichisoutputwhilethebuttonsarebeing
pressed. Feature #21 can change this channel’s button assignment.

Valet
Switch
Status
Light
Congratulations for your choice of the most versatile, fully-featured vehicle
securityandconveniencesystemavailabletoday,theCrimeGuard750i6byOmega
Research and Development. To enjoy the most from your new system, please take
afewmomentstolearnabouttheprincipalusercomponents,andthebasicoperation
of the system. These subjects are found in next several pages, followed by more
detailed specifics of complete operations and features.
Page - 4
Introduction to the System
• The Valet Switch can also be used, in conjunction with
thevehicle’s ignition key, toperforman emergency disarming ofthe security
systemintheeventthetransmitterortransceiverislostorbecomesinoperable.
This is referred to as “performing an Emergency Override”.
• The Valet Switch is used in the procedure of programming operational
features and also for encoding transmitters and transceivers to the system.
A complete description of the Valet Switch and its operations is on pages 14-15.
TheRedcoloredStatusLightsreporttheoperationalstatus
of the system at all times, and also serves as a visual
deterrenttobreak-insandtheft. Specificdescriptionofthe
Status Light operation may be found on page 16.
The Valet Switch has three main functions:
• The Valet Switch can be used to turn off the system’s
security functions, including any automatic arming or
lockingfeatures(if used). Keyless entry functions will
still operate. This is placing the system into “Valet
Mode”.
The system can operated by two types of devices: the 2-Way Controller and the
1-Way Transmitter. Your system comes with one of each of these, pre-learned
to operate the system. The controller, in addition to operating your system, also
receives signals from the system, and displays a variety of system conditions on its
LCDscreen. ThisisthepatentedEcho2-waytechnology. Thetransmitterwillfully
operatethesystem, but it cannotreceive signals nor reporteventsfrom the vehicle.
Your system can be operated by as many as four controllers and/or transmitters.
Oneof thecomponents,typically mountedon thewindshield, is theWindow Unit
module which contains the Status Lights and the Valet Switch. The window
unit also receives and transmits the Echo technology
communications for the system’s 2-way operation.
Thecontroller andthe transmitterboth sharethesamefouroperational buttons,and
their use to operate the system is the same. These buttons and a brief description
of what they do are:
Feature #22 Doorlocking Functions (installer feature)
Factory Default Setting .8 Second Lock & Unlock Output
(press “arm/lock” button to program)
Options:
3 Second Lock & Unlock Output (press “disarm/unlock” button to program)
Double Pulse Unlock Output (press “II” button to program)
Total Closure Lock Output (press “III” button to program)
This single feature gives the installer several needed options, to match the
security system’s doorlocking outputs to suite different vehicle requirements.
• The first setting (programmed by the “arm/lock” button) has the system
produceboth thelock andunlock outputsas.8 secondin duration. Thisis the
most common form of output needed, which interfaces most vehicles.
• The second setting (programmed by the “disarm/unlock” button) changes
the lock and unlock outputs to be a longer 3 second pulse output. This is for
certain vehicles which require a longer output pulse, typically cars having
pneumatic doorlocking systems, although the longer setting is also more
suitable in some newer-model vehicles.
• Some newer vehicles require a double pulse output to remotely unlock the
doorsand/or to disarmafactory-equipped securitysystem,which is whatthe
Double Pulse Unlock setting provides (it is programmed by the “II” button ).
• TheTotalClosureLockOutput(programmedbythe“III”button)maybeused
with vehicles which are originally equipped with the total-closure feature.
Typically,atotalclosurefeatureiswhenlockingthevehicle’sdoorsifthekey
in the door is held to “lock” for a period of time the vehicle will close all
windows and the sunroof, in addition to locking the doors.
Note:When this feature is turned on, during the 28 second period after arm-
ing the system, the lock output can be stopped on demand by the user by
pressing the “arm/lock” OR the “disarm/unlock” button. Only the output
itself will stop- pressing either button again will normally operate the sys-
tem, and at any time after the 28 second lock output period ends.
The following two features, when they are set for factory alarm “arm” or “dis-
arm” output operation, will follow the setting of this feature.
Page - 33
The final 3 Programmable Features are for the installer’s use.
These features are described to explain their function; as these
featuresare dependentuponthe installationconfigurationwithin the
vehicle, they should not be changed except by the original dealer or
qualified installer.

Page - 32
Feature #19 Remote Activated Anti-Carjacking Protection
Factory Default Setting Off (press “disarm/unlock” button to program)
Option: On (press “arm/lock” button to program)
This form of Anti-Carjacking is initiated by a signal from the controller or
transmitter. The Anti-Carjacking protection, including the three ways to initiate it
are described on page 21.
Feature #20 Open Door Warning Upon Arming
Factory Default Setting Off (press “disarm/unlock” button to program)
Option: On (press “arm/lock” button to program)
When this feature is turned on, if one of the vehicle's doors is open at the time that
thesystemisarmedviathecontroller ortransmitter, thesiren will chirp3 timesand
the parking lights will flash 3 times instead of once.
Feature #21 “III” Button Operation
Factory Default Setting 3rd Channel
(press “arm/lock” button to program)
Options:
Panic (press “disarm/unlock” button to program)
4th Channel (press “II” button to program)
5th Channel (press “III” button to program)
This feature changes how the controller’s or transmitter’s “III” button operates.
Normaloperation, orthe defaultsetting,hasthe“III”button operatethe3rdchannel
output. Thisfeatureallowschangingittoinsteadoperatethepanicfunctionoreither
of the two other optional channel outputs should a dedicated one-button operation
be desired for any of these functions. Panic can always be operated, by the
alternativemethodsofpressingeitherthe“arm/lock”and“disarm/unlock”button
for 3 seconds. This feature can also assign the 4th and 5th channels to the “III”
button, in the same manner as the 3rd channel.
Feature #18 Door Activated Anti-Carjacking Protection
Factory Default Setting Off (press “disarm/unlock” button to program)
Option: On (press “arm/lock” button to program)
This form of Anti-Carjacking is initiated by a door being opened. The Anti-
Carjacking protection, including the three ways to initiate it are described on page
21.
“disarm/unlock”
• Pressing and releasing the “disarm/unlock” button disarms the system and
unlocks the doors unless the alarm is triggered, in which case it will disarm the
activated alarm, but not unlock the doors unless the button is pressed again.
• Pressing and holding this button for three seconds will first disarm, and then
activate the Panic feature, unlocking the doors.
• The unlock operation may be optionally configured during the system’s
installation so that pressing this button once disarms the system and unlocks
only the driver's door, and pressing a second time unlocks all of the doors.
Page - 5
The 1-Way Transmitter
“III” button
“II” button
“disarm/unlock”
button
“arm/lock”
button
“arm/lock”
• Pressing and releasing the “arm/lock” button arms the security system and
locks the doors.
• Pressing and holding this button for three seconds will first arm, and then
activate the Panic feature, locking the doors.
• Pressing and releasing this button 2 times within 5 seconds will activate the 2-
way controller’s parking timer which you can use to time how long you’ve
parked your vehicle in a particular spot or parking meter.
The 2-Way Controller
“III” button
“II” button
“P”rogram
button
“arm/lock”
button
“disarm/unlock”
button

“II” or “:”
• Pressing the “II” button for two seconds can be used to activate an extra output,
known as the “2nd channel”, for an optional function such as trunk release.
• Pressingand releasing thisbuttontwice arms ordisarms the systemwithoutthe
confirmation chirps.
• Pressing this button immediately after arming will leave the alarm armed, but
with the shock sensor feature bypassed.
“P” on the controller only.
• The controller has a fifth button, “P”, which will illuminate the LCD screen
when pressed. This is also the “Programming” button; it is used to customize
controller operations, which is explained on pages 19 and 20.
•Multi-carselection:The2-waycontrollercanoperateupto2separatesystems.
Pressingthe “P”buttonand the “lock”button at thesame time for1 second will
select CAR 1and pressing the “P” button and the “unlock” button at the same
time for 1 second will select CAR 2 as indicated on the controller’s display.
“III” or “ ”
• Pressing and releasing the “III” button 2 times in 5 seconds will activate the
3rd channel output. This will also activate a factory remote start if your vehicle
is equipped and the system is configured to do so.
• The“III”buttoncanbereprogrammedforadditonaloperations.Seeprogrammable
feature #21.
...
Page - 6
How the 2-Way Echo controller reacts is included in the following
general system operation descriptions, and then a more detailed
description the Echo’s icons and instructions for its programming
are detailed on pages 17-20.
The Crime Guard 750i6is one of the most versatile vehicle security
systemsmade. Ithasmanyprogrammablefeatureswhichcanoffer
more functions and operations beyond which are described in the
basic system instructions.
To a large degree, these extra features and operations are config-
ured at the installation of the system. Please read the sections of
this manual which explain programmable features, and please
consult your installer for specifics on how your system is config-
ured, and for installation options which may have used, or can be
added to system after installation.
EXAMPLE-thesystemcansoundthevehicle’shorninplaceoforin
addition to the electronic siren which is included with it. But the
operations are described with the siren only.
- IMPORTANT -
Feature #15 Steady Siren or Pulsed Horn
Factory Default Setting Steady Siren
(press “arm/lock” button to program)
Options:
Pulsed Horn Low (press “disarm/unlock” button to program)
Pulsed Horn Medium (press “II” button to program)
Pulsed Horn High (press “III” button to program)
It is important to understand that the Excalibur has a primary audible output, for
the electronic siren; and that it also has a programmable output used to sound the
vehicle’s existing horn. This feature changes only the primary audible output, so
that it can be utilized to sound the existing horn by itself. This is for cases when
the programmable output is desired for other features, such as OEM disarm, or as
an additional auxiliary output.
The Steady Siren setting is exactly that- a steady output which the electronic
sirenrequires. Whenprogrammingthisfeaturefor using the output for the vehicle’s
horn, the optional setting produce pulsed output on the system’s siren wire, in
three different pulse timings, which allow a degree of customization of the horn’s
sound during the alarm activation.
Feature #16 Alarm Functions Bypass
Factory Default Setting Off (press “disarm/unlock” button to program)
Option: On (press “arm/lock” button to program)
This feature converts the system into a strictly Remote Keyless Entry System by
eliminating all antitheft alarm-oriented operations and features. When this feature
is programmed on, the Excalibur has remote keyless entry operation only.
Page - 31
Feature #17 Ignition Activated Anti-Carjacking Protection
Factory Default Setting Off (press “disarm/unlock” button to program)
Option: On (press “arm/lock” button to program)
This form of Anti-Carjacking is initiated by the ignition key being turned on. The
Anti-Carjacking protection, and the three ways to initiate it are described on page
21.
there is a brief period of time in which a system activation, or alarm, cannot occur.
ThisArmingDelayallowsthesystemtocompletelyprocessitssensoryparameters,
which can include allowing the vehicle to stabilize. In some cases more time is
needed than the factory-set 3 seconds, and this feature offers three longer delay
options.

Arming Using the Controller or Transmitter
Thesystemcanalwaysbearmedfromthecontrollerortransmitter,iftheignition
key is “off” and the system is not in the Valet Mode. To arm the system, exit the
vehicle,closeallofthedoors,andsimplypressandreleasethe“arm/lock”button
once.
Your system is designed to deter theft of both your vehicle and its contents.
“Arming” your system turns on the protection, disabling the vehicle’s starter and
locking the doors. Once the system is Armed, any intrusion attempt will Activate
it,soundingtheelectronic“Psyren”psychosirenandflashingtheparkingandinterior
lights to attract attention. The unique and patented “2-in-1” Psyren psycho siren
actually produces the sounds of two different sirens at once, ensuring that it won’t
be ignored like all of the other “common” car alarms. Disarming the system turns
offtheprotection,unlockingthedoorsandturningontheparkingandinteriorlights,
allowing lighted access to, and normal use of, the vehicle.
There are two methods of arming the system:
1- The first method is to use the controller* or transmitter, by pressing and
releasing the “arm/lock” button. The system must not already be armed or be
in Valet Mode, and the vehicle’s ignition key must be off.
2- The second method is Last Door Arming, which configures the system to
automaticallyarmitselfeverytimeyouexit thevehicle. Thismethodofarming
is programmable, and may be used or not used as desired.
Using the System
Regardlessofhowitbecamearmed,ifthesystemisarmedthewindowunit’sStatus
Light flashes in the red color.
The system’s reaction: The parking lights will flash once, the siren will chirp
once and the Status Light will begin to flash red, confirming that the system is
armed.* In addition, the doors will lock and the starter interrupt will engage to
prevent any attempt to start the vehicle. Your security system is now fully armed,
and is ready to respond if an intrusion attempt is detected.
If the controller was used: Immediately after the system responds the control-
ler will chirp twice (or four times if a zone is bypassed), the “ARM” icon will
appear, the “locked lock” icon appears, confirming that doors have locked, and the
number of operating transmitters or controllers is briefly displayed.
Page - 7
*If the 2-way controller is used to operate the system, it will receive a signal
back and confirm that the arming operation was performed.
*The system is described in its most common and basic configuration, with
doorlocks connected, and the interior lights connected. Also, the vehicle horn
may used in place of, or in addition to, the system’s electronic siren.
Feature #11 Alarm Duration
Factory Default Setting 30 Seconds
(press “arm/lock” button to program)
Options:
60 Seconds (press “disarm/unlock” button to program)
90 Seconds (press “II” button to program)
120 Seconds (press “III” button to program)
This feature allows four choices of the Alarm Duration, which is the period of time
for which the system sounding the siren (and/or horn, optionally) and flashes the
parking lights when it is triggered. Caution: Before lengthening the Alarm
Duration you should always check and determine if there are any local anti-
noise or nuisance ordinances in your area, to avoid the possibility of receiving
a violation citation.
Feature #12 Parking Light Illumination Upon Disarm
Factory Default Setting On (press “arm/lock” button to program)
Option: Off (press “disarm/unlock” button to program)
Thisfeatureaffectstheparkinglightoperationwhenthesystemisdisarmed. When
this feature is turned on, the parking lights flash once, and then turn back on for
externalillumination for 30seconds unlesstheignition keyis turnedonduringthat
time. If this feature is turned off, the parking lights flash once only, and do not
illuminate. This feature only affects the system’s parking light operation, and not
the interior light operation.
Feature #13 2nd Channel Also Disarms System
Factory Default Setting On (press “arm/lock” button to program)
Option: Off (press “disarm/unlock” button to program)
“2nd channel” is most commonly used to remotely open the vehicle’s trunk, in
which case the alarm should also disarm. This feature, turned on, configures the
systemtodisarmwhenthe2ndchannelisused. Ifturnedoff,the2ndchanneloutput
willstilloccur, withoutchirpsorparkinglight flashes;andif armed,thesystemwill
not disarm.
Feature #14 3 or 45 Second Arming Delay
Factory Default Setting 3 Seconds
(press “arm/lock” button to program)
Options:
15 Seconds (press “disarm/unlock” button to program)
30 Seconds (press “II” button to program)
45 Seconds (press “III” button to program)
Whenthesystemisarmed,whetherbythecontroller,transmitterorbyanautomatic
Page - 30

Arming Bypass: Upon arming, if any system sensing circuit is inoperable,
thatcircuitonlywillautomaticallybebypassed. Whenanunsecuredsensingcircuit
isinabypassedstate,allothernormallyoperatingcircuitswillbeprotected. Should
the bypassed circuit become secured, it will automatically be reinstated for
protection 5 seconds later. When certain protection circuits are bypassed, such as
the hood/trunk and impact sensor, and the system is armed, it will indicate this by
chirping the siren three times and flashing the parking lights three times instead of
the normal arming indication of one chirp and one flash.
For example, should the trunk be open, such as containing an oversized object,
you can still arm the system with the transmitter, and in this case the arming
indicatorwillbe3sirenchirpsand3parkinglightflashes. ArmingBypasswillonly
operate when arming the system with the transmitter.
If the controller was used for the arming, it will chirp three times instead of the
normal one time, and its display will also flash the icon of the zone which is
bypassed.
SensorBypass:Whenarmingthe systemwiththecontrolleror transmitter,
you may conveniently and easily temporarily deactivate the impact sensor without
affecting the system’s other sensing circuits. To deactivate the sensor, arm the
system by pressing the “arm/lock” button, then press and release the transmitter’s
“II”buttonwithinthree seconds. Youwillhear asecondsirenchirpconfirmingthat
the security system has armed without the sensor protecting the vehicle. The next
time the system is armed normally with one “arm/lock” button press, the sensor
will again be part of your protection.
If the controller is used for the arming and then bypassing the sensor, let it
confirm the arming, then press the “II” button. The controller will then chirp twice
and turn on its “Impact” icons to indicate the bypassed sensor.
Automatic “Last Door Arming” of the System
The system can also be programmed to automatically arm itself, and in this
process, to lock or not lock the doors. When this feature is utilized, closing the
vehicle'slastdoorwill cause the siren to chirp once, the parkinglightstoflash once
and the Status Light to start rapidly flashing red. Thirty seconds later the siren will
chirp again and the parking lights will flash again, the doors will lock (which is
separately programmable) and the Status Light will slow to a steady red flash,
confirming that the security system is fully armed. If a point of entry is reopened
beforethesingle sirenchirpat30seconds, theLastDoorArmingprocess stops,and
will reset to start over when the point of entry is again closed. All protected entries
The system’sseparate “arm/lock” and “disarm/unlock”buttondesign allows
repetitive operation- if already armed, pressing the “arm/lock” button will simply
rearm the system, and vice versa when pressing the “disarm/unlock” button.
Controllers and transmitters both operate in this fashion.
Page - 8
Feature #8 Open Door Bypass of Ignition Locking
Factory Default Setting On (press “arm/lock” button to program)
Option: Off (press “disarm/unlock” button to program)
This feature cancels the automatic locking or unlocking of the vehicle’s doors
should one of the doors be open when the ignition switch is turned on or off.
Page - 29
Feature #9 Confirmation Chirps
Factory Default Setting On
(press “arm/lock” button to program)
Options:
Off (press “disarm/unlock” button to program)
Chirps Excepting Valet Mode (press “II” button to program)
Chirps in Valet Mode Only (press “III” button to program)
This feature removes the system’s 1 arming and 2 disarming confirmation chirps.
When this feature is used to remove these chirps, the system will still have 3 chirps
upon arming if a protected zone is violated, and still have 4 chirps upon disarming
if the system was previously activated. Using this feature to turn off the arm and
disarming chirps will also not affect the Prewarning operation, Unauthorized
Transmitter Alert (if used), nor will it affect the chirps used when programming.
The other two settings will have the confirmation chirps operate only when the
systemisinValet Mode, and not otherwise; or, the chirpswilloperateexcept when
the system is in Valet Mode.
Feature #10 Confirmation Chirp Volume
Factory Default Setting Medium High
(press “II” button to program)
Options:
Low (softest) (press “arm/lock” button to program)
Medium Low (press “disarm/unlock” button to program)
High (loudest) (press “III” button to program)
This feature allows the choice of four different volume levels of the system’s con-
firmation chirps, and when programming it, the buttons can be repeatedly and
sequentially pressed, thus making it easy to hear and choose the setting with the
best chirp volume.
This feature operates regardless of how feature #15, “Steady Siren” or “Pulsed
Horn” is set. Feature #15 sets “Steady”; or “Pulsed” as three different timings, for
the activated alarm period output. This feature, #10, affects only the confirmation
chirps.

Page - 9
While the System is Armed, and should it Trigger
Whilethesecuritysystemisarmed,theStatusLightflashesredincolor. Should
any intrusion attempt be detected, the system will instantly activate, or "trigger".
Oncetriggered,thesystemloudlysoundsthesirenandflashestheparkingandinterior
lights on and off.
must be closed to initiate the Last Door Arming sequence.
TotemporarilypreventthesystemfromautomaticallyLastDoorArming,youhave
theseoptions:putthesystemintoValetMode(page14and15),leavethedooropen,
or,inmost cases turning on the dome light maycausethesystem to detect that your
door is still open. Leaving the ignition key turned "on" is not recommended.
Last Door Arming offers a high level of security, since you do not have to
remember to arm the security system every time you leave the vehicle, and using it
may entitle you to an insurance discount (please check with your agent or carrier).
When it is first triggered, the Status Light changes its red flash pattern, and the
doors will automatically relock. Should a door be open when the system triggers,
itwillwaituntilthe door is closed, and at that time relock the doors. The automatic
relockingofthedoorsdeniesaccesstothethief,andisjustoneofthemanyexclusive
patented features of the system. The siren will sound and the parking and interior
lights will flash for 30 seconds unless you disarm the system first (60, 90 and 120
seconds activated periods are options- see Feature #11, page 30). If all protected
entriesare secureat theendof the30 seconds,thesystem willstop andrearm itself,
ready to detect further entry attempts. If there is a protected entry still open or the
impact sensor still in a violated state at the end of 30 seconds, the system will
reactivatefortwomore30secondcycles.Inthiscasethesystemwillstopafteratotal
of3cyclesandrearmautomatically,andthenignoreonlytheopenentryorviolated
sensor.Whentheentryisclosedorthesensorisreset,protectionwillbegininstantly
for the formerly affected circuit.
Anytime the security system triggers, the Status Light will indicate which
protected zone triggered the system by flashing two (hood/trunk), three (door) or
four (sensor) times between pauses. This “Zone Violation” code will continue to
flash,evenafter disarming.Thesystem canholdtwo differentviolationcodes init's
memory,whichis cleared by turningtheignition switch "on". Once thesystemhas
beenactivatedandreset,thedisarmingconfirmationchangestomaketheuseraware
that it was activated.
How the controller reacts: Any 2-way controller programmed to the system
will react to an alarm activation, provided it is within range of the system. Upon
receiving a signal from the activated system, the controller will start chirping, and
an icon will start flashing, indicating which protected zone’s violation caused the
system’s alarm condition.
The controller will continue the chirping for 15 seconds, or until any of its
Feature #5 Ignition Activated Override
Factory Default Setting Off (press “disarm/unlock” button to program)
Option: On (press “arm/lock” button to program)
This feature allows an activated system to be overridden and disarmed by simply
turning the ignition switch on within 10 seconds of the system’s activation. After
10 seconds, the Emergency Override must be performed or the controller or trans-
mitter “disarm/unlock” button can be used to disarm the system.
Feature #6 Doors Lock With Ignition On
Factory Default Setting On (press “arm/lock” button to program)
Option: Off (press “disarm/unlock” button to program)
This feature configures the system to automatically lock the vehicle’s doors every
time that the ignition switch is turned on. An exception to this would be if feature
#8 is turned on, and a door being open when the ignition switch is turned on. The
following feature #7 controls the automatic unlocking operations, and feature #8
providesforanoverrideofthisautomaticlockingifadoorisopenwhentheignition
is turned on.
Feature #7 Doors Unlock With Ignition Off
Factory Default Setting On (all doors will unlock)*
(press “III” button to program)
Options:
Off (press “arm/lock” button to program)
Driver’s Door Only* (press “disarm/unlock” button to program)
All Doors Except Driver’s Door* (press “II” button to program)
Similar to the previous locking feature, except this feature controls the unlock
operations when the ignition is turned off, and it has more options because of the
systems multiple unlocking outputs.
*Multiple unlock outputs offer the capability of unlocking only the driver’s
door when the system is disarmed (Driver Door Priority Unlocking), and then the
option of unlocking all doors with a second press of the “disarm/unlock” button.
The driver’s door unlocking differently from the other doors must be config-
ured when the system is installed!
IfthesystemisinstalledwithouttheDriver’sDoorPriorityUnlockinginterface,
this feature unlocks all of the doors when the ignition switch is turned off.
If Driver’s Door Priority Unlocking is installed, this feature can control only the
driver’s door unlocking when the ignition is turned off, all doors unlocking, or all
doors except the driver’s. The following feature provides for an override of this
automatic unlocking if a door is open when the ignition is turned off.
Page - 28

Feature #2 Last Door Arming
Factory Default Setting Off
(press “arm/lock” button to program)
Options:
On without doors locking (press “disarm/unlock” button to program)
On with doors locking (press “II” button to program)
“LastDoorArming” hasthesystemautomaticallyarmitselfeverytimeyouexitthe
vehicle(thecompleteoperation isdescribedonpages 8&9). Thisfeature turnsthat
operation on or off, and with options of having Last Door Arming operate with or
without also locking the doors when the system does arm.
Feature #3 Automatic Rearming
Factory Default Setting Off
(press “arm/lock” button to program)
Options:
On without doors locking (press “disarm/unlock” button to program)
On with doors locking (press “II” button to program)
“Automatic Rearming”, described on page 11, prevents the system from becoming
accidentally disarmed by having it arm itself after being disarmed, if a door is not
then opened or the ignition turned on. Options are to have Automatic Rearming
operate with or without also locking the doors when the system does rearm.
Feature #4 Starter Interrupt Functions
Factory Default Setting On
(press “arm/lock” button to program)
Options:
Off (press “disarm/unlock” button to program)
Automatic (press “II” button to program)
This feature controls the Starter Interrupt circuit, in several ways. In its default
setting, “On”, the Starter Interrupt is operable whenever the alarm is armed.
The “Automatic” option will cause the Starter Interrupt output to automati-
cally engage 90 seconds after the ignition switch is turned "off", and also 90 sec-
onds after disarming the system. This automatic engagement will occur even if the
security system is in a disarmed state, but not if it is in Valet Mode. Once the
Starter Interrupt output is activated, the system must be armed, then disarmed with
the controller or transmitter, or placed into the Valet Mode by pressing and holding
the Valet Switch for 2 seconds to disengage it. There are no Status Light indica-
tions with this automatic form of Starter Interrupt.
Programming this feature “Off” completely eliminates the Starter Interrupt
output, while leaving all other system operations fully functional.
Page - 27Page - 10
There are two methods of disarming the system:
Disarming the System
Disarming the System Using
the Controller or Transmitter
2- The second method is an “Emergency Override” alternative, should the
controlleror transmitter becomelost or inoperable. Thismethod uses theValet
Switch, but the vehicle’s ignition key is also required.
1- The primary method is to use the controller or transmitter by pressing and
releasing its “disarm/unlock” button. This is the normal “daily use” method.
Press and release the controller or transmitter “disarm/unlock” button
once to instantly disarm the system, disengage the starter interrupt and unlock the
doors. If you have the optional unlock driver's door feature installed, then upon
disarming only the driver's door will unlock, and if the “disarm/unlock” button is
pressed again at anytime thereafter, all of the doors will unlock.
Thesystem’sreaction: Disarmingisconfirmedbythesirenchirping twice,the
StatusLight turning off,andthe parkinglightsflashing twice, thenwith the interior
lights illuminating for 30 seconds for approach illumination. The lights will turn
off instantly if the ignition switch is turned "on" before the 30 seconds expires.
If the controller was used: It will confirm by chirping twice (or four times if
thesystemwasactivated and reset), showing “DISARM” icon and “unlocked lock”,
buttons are pressed. Which controller button that is pressed will have these
corresponding effects upon the triggered system:
• Pressing “arm/lock” will rearm the system, stopping both system’s alarm
condition (leaving it armed), and stop the controller’s chirping.
• Pressing “disarm/unlock” will disarm the system, leaving the doors locked,
stopping both system’s alarm condition (leaving it disarmed) and the
controller’s chirping. Pressing the button a second time unlocks the doors.
• Pressing and releasing any of the three other buttons will simply stop the
controller’s chirping, but leave the security system still sounding in its
alarm state.
The controller will continue to display the flashing icon indicating the violated
zone, while the system is disarmed, until the ignition switch is turned on.
Prewarning Detection Circuit: When the sensor is triggered by a light impact
orshocktothevehicle,thesecuritysystemwillrespondbychirpingthesiren3times
and locking the doors. After this Prewarning circuit has been triggered five times
it will automatically shutdown until the alarm system is disarmed, then armed.
Ifthecontrollerwasusedtoarmthesystemandprewarningoccurs,ifinrangeitwill
react by chirping 3 times and showing the “impact” starburst icon on its display.

Page - 11
Safety Disarm/Storm Mode: While the system is activated, i.e. sounding the
siren and flashing the lights, pressing the “disarm/unlock” button will disarm the
system,butnotunlockthedoors. Thissafetyfeatureensuresthatthevehicleremain
secureshould thesystemrequire disarmingdue tobeingactivated fromnuisance or
malicious false sensory inputs, such as typically produced by severe weather
conditions. Toremotelyunlockthedoorsifthesystemis disarmedwhile activated,
simply repeat the disarm operation by pressing and releasing the “disarm/unlock”
button again. If disarmed from a panic mode, the normal disarm indications are
present, including the unlocking of the doors.
AutomaticRearmingFeature:AutomaticRearmingisaprogrammablefeature
which ensures that your system is never inadvertently disarmed. It is possible to
accidentally or unknowingly operate the controller or transmitter from a pocket or
purse. You may not even be aware of an accidental disarming due to the enhanced
operating distance offered by the systems extended range, or if the controller
confirmation is not noticed. Automatic Rearming has the alarm rearm itself 90
secondsafterithasbeendisarmed,unlessavehicledoorisopenedortheignitionkey
turnedon. AutomaticRearmingisconfirmedbyafastflashingStatusLightafterthe
disarming,unlessthesystemwastriggered,inwhichcaseaZoneViolationcodewill
flash instead.
During the 90 second period, Automatic Rearming can be paused by opening
the door or stopped completely by turning the ignition key "on". Also, Automatic
Rearmingcanbe cancelledbytheSafetyDisarm/StormModefeature;ifthesystem
is disarmed while triggered, Automatic Rearming will not occur.
Ifthesystemwasactivatedandresetitself: Thedisarmingconfirmationwill
no longer be 2 siren chirps, and the parking lights flashing twice before staying on
with the interior lights. Instead, the system will respond with 4 siren chirps and the
parking and interior lights flashing 4 times before staying on for 30 seconds. The
Status Light will have changed to flashing two to four times between pauses as a
“Zone Violation” code to indicate which protection circuit triggered the system (2
flashes, hood/trunk; 3 flashes, doors; 4 flashes , impact sensor). These special
audibleandvisualdisarmingindications,andZoneViolationcode,willremainthis
way until the ignition key is turned “on”.
Disarming the System by Emergency Override
Shouldthetransmitterbecomelost,damaged,oritsbatteriesbecomeexhausted,
the Valet Switch and the vehicle’s ignition key may be used to disarm the system:
Step 1 With the system in the armed condition, enter the vehicle via the driver's
door (be aware that the alarm will trigger when the door is opened).
and briefly showing the number of operating controllers or transmitters.
Step 7 Allow 10 seconds to pass without performing any programming
actions, or turn the vehicle’s ignition on.
Exit Programming mode:
• The siren will sound briefly and the Status Light will go out.
Programmable Features Descriptions
To custom program a new SecureCode:
Step 3 After entering the first stage by pressing the “arm/lock” button the
desirednumber oftimes, andreceiving achirp foreach press,waitforthe
Step 2 Within10secondsslowlypressandreleasethecontrollerortransmitter’s
“arm/lock” button the number of times equal to the desired SecureCode
for stage 1, allow the system to respond to each controller/transmitter
button press with a siren chirp before pressing the button again.
Step 1 Follow Steps 1 to 4 in the previous “How to Program Features” instruc-
tions; at Step 4 the Valet Switch will be pressed and released once (the
siren chirps once) to access “feature #1”.
Feature #1 SecureCode
Factory Default Setting 1 Press
Options:
1 to 9 presses, in each of two stages
Step 4 Continue to configure stage 2 of the SecureCode by now pressing and
releasingthe“disarm/unlock”buttonthenumberoftimesdesiredforthe
stage2. Thisshouldbedoneintheexactsamefashionasthestage1entry-
pressthe“disarm/unlock”button,wait forasingle chirpbeforepressing
the button again, and then when final button press is done, wait after the
single chirp for the siren to chirp the total number you entered via the
Valet Switch.
system, after the final button press, to chirp the siren again the total
number of times that the button was pressed.
SecureCode is a unique patented feature which allows you to custom select the
number of Valet Switch presses in two stages, instead of a single “1 press”, which
would be required in order to perform an Emergency Override. If any of the three
anti-carjacking features are utilized, a customized SecureCode would also be
required to turn it off once it is fully activated. The SecureCode operation is
described on page 15.
Page - 26

Page - 12
The number of Valet Switch presses which are required for the Emergency
Override is custom-programmable! This is the SecureCode feature, which is
describedonpage15 and page 26. The aboveEmergencyOverrideinstructions
reflect the “as received from the factory” default setting.
Step 3 Within5seconds pressand releasethe Valet Switchone time. Thesystem
will disarm.
Shouldyoufeelthreatened,ortheneedtoattractattention,youcanactivateyour
system's remote “Panic” feature at any time by pressing and holding for 3 seconds
thecontrollerortransmitter’s “arm/lock”,the“disarm/unlock”,oroptionally the
“III”button(seeprogrammablefeature#21). Yoursystemwillrespondbysounding
the siren and flashing the parking lights for the normal activated alarm period of 30
seconds. Additionally, the system features an unique “enhanced” remote Panic
operation,regardingadditionaloperationsduringPanic,and inassociation withthe
transmitter button used in it’s activation or deactivation:
Remote Panic Feature
To disengage remote Panic, simply press and release any one of the same three
transmitter buttons, or, allow it to automatically stop after 30 seconds.
• Activating Panic with the “III” button will not affect the system’s armed or
disarmed status; the doors locked or unlock condition; nor will it affect the
starter disable circuit.
• Activating it with the “disarm/unlock” button will unlock the doors, disarm
the system and does not engage the starter interrupt.
• Activating Panic with the “arm/lock” button will lock the doors, arm the
system and engage the starter interrupt.
• Deactivating Panic with the “arm/lock” button will stop Panic, and leave the
system armed with the starter interrupt engaged, and the doors locked.
• Deactivating it with the “disarm/unlock” button will stop Panic, and leave the
system disarmed with the starter interrupt disengaged, and the doors unlocked.
• Ifthe system isallowedto reset itselffrom remote Panic,itwill enter thearmed
state, locking the doors and engaging the starter interrupt, regardless of which
of the three buttons was used to activate it.
• Deactivating Panic with the “III” button will stop Panic, and leave the system
in the same state it was in at the moment Panic started, without locking or
unlocking the doors.
Step 2 Using the ignition key, turn the vehicle’s ignition switch on.
The vehicle ignition key and the Valet Switch are used to enter the Programming
Mode,thenthecontrollerortransmitterisusedtochangefeatures. Once thesystem
is in Programming Mode, a 10 second period without programming activity will
causethesystemtoautomaticallyexitProgrammingMode. Featurescanbeselected
in any order as desired.
How to Program Features
Step 6 If there are more features to be programmed, within 10 seconds of
the previous action Press & Release the Valet Switch the same
number of times as the next desired feature’s number.
• Again the siren will chirp and the Status Light will flash as many times as
the Valet Switch was pressed to indicate the new feature number which is
now accessed. Then use the controller or transmitter as described in
Step 5 to change the newly accessed feature as desired.
To Access and Change further Features:
Step 5 After accessing the desired feature, within 10 seconds Press &
Release the appropriate controller or transmitter button.
• Pressing the “arm/lock” button typically turns the feature on; or sets the
feature’s first option. The siren will chirp once when this button is pressed.
• Pressing the “disarm/unlock” button also typically turns the feature off;
or, sets the feature’s second option. The siren will chirp twice.
• Many features have third, and even fourth setting options. Pressing the
“II” and “III” buttons select these options. Confirmation chirps when
these buttons are pressed are three and four chirps respectively.
Change the Feature:
Step 4 Within 10 seconds, Press & Release the Valet Switch the same
number of times as the desired feature’s number.
•The siren will chirp and the Status Light will flash off the same number of
times as the Valet Switch was pressed to indicate the feature number
accessed.
Access a Feature:
•The siren will chirp then sound briefly and the Status Light will light
steady to confirm that the system is entering Programing Mode.
Step 3 Within 5 seconds, Press & Release the Valet Switch 5times.
Step 2 Turn the ignition off.
Step 1 Turn the vehicles’s ignition on.
Enter Programming mode:
Page - 25

Other Controller and Transmitter Operations
The 2nd channel output, which is operated by pressing and holding the
controlleror transmitter “II”button for 1second,is designed specificallytooperate
yourvehicle’s electricpowertrunk release. Yourvehicle willrespondby releasing
the trunk lid or rear hatch, chirping the siren twice, turning on your parking and
interiorlightsfor30seconds,unlockingthedoors,anddisarmingthesystemifitwas
armed. The 2nd channel output will not operate when the ignition switch is "on"
unlessthevehicle'sdoorisopen. Ifdesired,thesecuritysystemcanbeprogrammed
to remain armed when this feature is used, and connection of the 2nd channel may
require extra parts or installation.
To Silently Arm or Disarm the alarm, press and release the “II” button
twice. The siren’s confirmation chirps will not occur, and this operation simply
reverses, or “toggles” the armed and disarmed status of the system.
The sensor may be temporarily bypassed. When arming the alarm with
the controller or transmitter, within 3 seconds after the arming chirp press the “II”
button. The system will respond with another single chirp, confirming that the
sensor is bypassed.
Thesystemalsohasa3rdchanneloutputwhichissimilartothe2ndchannel,
but it does have some special operational design differences. To operate it, press
and release the “III” button 2 times in 5 seconds to operate this output.
The differences are that 3rd channel output will operate regardless of the
ignition switch being "on" or "off", and there is no audible or visual confirmation
(exceptonthe2-waycontroller’sLCDdisplay). Connectionofthe3rdchannelwill
vary, depending upon the chosen application, and may require extra parts or
installation. Consult with your installer for more info.
Thereare alsooptional 4th channel and5th channel outputs,whichare
available if more remote control functions are desired. These outputs can be
repurposed from two other system outputs by programmable features #23 and #24.
Thesystemmustbeconfiguredtoutilizetheseoutputs;pleaseconsultyourinstaller.
When these outputs are programmed and configured to operate, pressing the
transmitter or controller “arm/lock” and “II” buttons together will activate the 4th
channeloutput. Pressingthe“disarm/unlock”and“III”buttonswillactivatethe5th
channel. Or,ifdesired,thecontrollerortransmitter“III”buttoncanbeprogrammed
by to operate either of these channels.
Page - 13Page - 24
The Programmable Features
It is important to note that programmable features affect the exact
operation of the system, and that the descriptions of any features
utilized should be used to supplement the basic system operations
which were described in previous sections of this booklet.
EachoftheProgrammableFeaturesisdescribedindetailinthepages
following the features’ list and programming instructions.
1 SecureCode
2 Last Door Arming
3 Automatic Rearming
4 Starter Interrupt Functions
5 Ignition Activated Override
6 Doors Lock With Ignition On
7 Doors Unlock With Ignition Off
8 Open Door Bypass To Previous Two Features
9 Confirmation Chirps
10 Confirmation Chirp Volume
11 Activated Alarm Cycle
12 Lights On Upon Disarm
13 Disarm Alarm Upon Trunk Release
14 Arming Delay
15 Steady Siren Output / Pulsed Horn
16 Alarm Functions Bypass
17 Ignition Activated Anti-Carjacking Protection
18 Door Activated Anti-Carjacking Protection
19 Remote Activated Anti-Carjacking Protection
20 Open Door Warning Upon Arming
21 III Button Operation
22 Doorlock Functions (an installation feature)
23 Lock Relay Functions (an installation feature)
24 Unlock Relay Functions (an installation feature)
The Crime Guard 750i6’s versatility is due to an incredible array of programmable
features. These are:
“Features Programming Mode” is the means for changing any of the features.

TheValetSwitchislocatedintheWindowUnit,oroptionally,theinstallermay
have instead mounted a separate Valet Switch in a hidden, yet accessible location.
Please ensure that you and others who use your vehicle are aware of the location of
the Valet Switch and its uses. The Valet Switch has several functions:
Using the Valet Switch
• It is also used in the procedures for programming features and programming
controllers or transmitters to operate the system. See the
“Programming sections of this manual for details on these uses.
• Should your controller or transmitter be lost or become inoperable, the Valet
Switch, and the ignition key, can be used to disarm the system with an
Emergency Override. Disarming the System by Emergency Override is
described on pages 11 and 12.
• Placing your system into Valet Mode, which prevents it from arming.
Page - 14
ValetMode: Thisallowsyoutoturnoffallofthe“alarm”operationsofthesecurity
systemwhileretainingtheremoteconveniencefeaturessuchaskeylessentry,Panic,
and the Auxiliary Outputs. The system may only be placed into Valet Mode when
it’s disarmed; if armed, an Emergency Override must be performed before placing
into Valet Mode. Once the system is in Valet Mode, it cannot become armed from
the transmitter, Last Door Arming, or Automatic Rearming.
ValetMode andEmergency Overridearetwo similar,but differentprocedures,
although both operations use the Valet Switch. Emergency Override disarms an
armedandactivated system,andrequirestheignitionkey. ValetModeturnsoffthe
alarm operations of the disarmed system, but without the need of the ignition key.
Valet Mode is designed for situations in which it is not convenient for the
security portion of the system to be operational, such as during extended stopovers
for vehicle servicing, maintenance, valet parking, washing, etc.
To Enter Valet Mode: With the system disarmed, press and hold the Valet
Switch for 2 seconds.
• The siren will chirp twice, the parking lights will flash twice and the Status
Light will illuminate on solid.*
• To indicate that the system is in Valet Mode, the Status Light remains on
whenever the system is in Valet Mode.
• To remind the user that the system is in Valet Mode, the siren will chirp once
every time the vehicle’s ignition is turned off.
*A pair of red Status Lights are standard, mounted in the 2-way window unit
transceiver;or,separately mounted redandblueStatus Lights are available
as optional equipment, which replaces the standard Status Light.
If the Unauthorized Transmitter Alert feature is on, programming a
controllerortransmittertothesystemwillactivatetheUnauthorized
Transmitter Alert warning and the extended Status Light visual
display; for the next 48 hours the siren will sound a brief series of
chirps every time the vehicle’s ignition key is turned on. The
following special procedure programs the controllers/transmitters
and also turns the Unauthorized Transmitter Alert feature on.
Step 3 Press the “arm/lock” button on each remaining controller or transmitter.
The system will chirp the sirenonce to confirm that each was learned.
The controller or transmitter’s other three button's functions will
automaticallybeassignedwhenthe“arm/lock”buttonislearned. Ifacode
is not received within a 10 second period, the learning process will
automatically terminate, as indicated by another siren burst.
Step 2 Within5secondsofturning ontheignition,presstheValetSwitch5times.
The siren will briefly sound, confirming that for the next 10 seconds the
system is ready to learn a controller/transmitter code. To enter a code,
simply press and release the “arm/lock” button (the button which is
designedtoarmthesystem). Whenthefirstcontroller/transmittercode
is learned all existing stored codes will be erased.
Page - 23
Special Programming procedure to turn On the UTA feature: Use this
method to program controllers or transmitters, and to turn on the Unauthorized
Transmitter Alert feature.
Follow the same steps as the Standard Programming, but on any controller/
transmitterbeingprogrammedinsteadofpressing the“arm/lock”button,pressthe
“arm/lock” and the “disarm/unlock” buttons together. This action turns on the
UnauthorizedTransmitterAlertfeatureandatthesametimeprogramsthecontroller/
transmitter to operate the system.
Once the Unauthorized Transmitter Alert feature is turned on, the warning will
sound for 48 hours after any controller or transmitter programming, including the
programming session which was used to turn it on. NOTE: Once UTA is turned
on, it cannot be turned off unless sent back to Omega for a factory reset.

To Exit Valet Mode, simply Press & Release the Valet Switch at any time.
• The Status Light will turn off to confirm exit from Valet Mode.
To Enter/Exit Remote Valet: With the system disarmed and the door open,
press LOCK, UNLOCK, LOCK on the controller/transmitter within 10 seconds.
• Confirmation is the same as normal Valet Mode.
“SecureCode” allows the user to customize the number of Valet Switch presses
which are required to successfully perform an Emergency Override. The basic
EmergencyOverrideprocedureisdescribedonpages11-12. Insteadofa single
“1 press” of the Valet Switch which would be required in order to perform an
Emergency Override, two stages of Valet Switch presses must be made. In each of
the two stages, the Valet Switch will need to be pressed 1 through 9 times, as
programmed by the user. This is the Emergency Override procedure if the system
has programmed with a customized SecureCode:
Step 1 With the system in the armed condition, enter the vehicle via the driver's
door(beaware thatthesystemwillactivatetoanalarm conditionwhenthe
SecureCode
Page - 15
Once the system is disarmed, if Valet Mode is desired, just press and hold the
Valet Switch for 2 seconds to place the system into Valet Mode.
ShouldamistakebemadeenteringtheSecureCodeforanEmergencyOverride,
after a failed attempt the ignition switch must be turned off, then on again before
another SecureCode entry attempt is made. Should two failed SecureCode
attemptsbemade,thesystemwillignoreanyfurtherpressesoftheValetSwitch
for two minutes.
In addition to Emergency Override, if any of the three anti-carjacking features
are utilized, a correct customized SecureCode would also be required to turn off
anti-carjacking once it has become fully activated. How to program your own
customized SecureCode is explained on pages 26.
door is opened).
Step 2 Using the ignition key, turn the vehicle’s ignition switch on.
Step 3 Within 5 seconds press and release the Valet Switch the same number of
times that have been programmed for stage #1.
Step 4 After a few seconds, the siren will stop sounding, chirp once, and then
resume sounding.
Step 5 Now,within5secondspressandreleasetheValetSwitchthesamenumber
of times that have been programmed for stage #2. Within a few seconds
the siren will stop sounding, and the unit will disarm.
Page - 22
UnauthorizedTransmitter AlertTM is a protectionfeature which maybeturned
onbytheuser (seethenextsection,“HowtoProgramControllersandTransmitters”).
When this protection feature is utilized, whenever a controller or transmitter is
added to operate the system, for 48 hours afterward a warning consisting of a brief
series of siren chirps sounds every time the vehicle’s ignition is turned on.
Also during this 48 hour warning period, the 10 second Automatic Transmitter
Verification visual display will increase to being displayed for 90 seconds instead
of 10 seconds. When this feature is used and activated, after 48 hours the warning
chirpsdisappearandtheStatusLightflashingtransmitter/controllernumberreturns
to being displayed for 10 seconds.
Automatic Transmitter VerificationTM shows the total number of controllers
and/or transmitters which can operate the system, by flashing the Status Light with
this number for 10 seconds every time that the ignition key is turned on.
The system features several security safeguards in one of the most vulnerable
areas of any remotely controlled system. These features are found in both 2-way
controllers and 1-way transmitters.
Controller and Transmitter Protection
Code JumpingTM It is quite easy, with the proper equipment, to record an alarm
or keyless entry system’s transmitter signal, and simply play the captured signal
back to the system to defeat it. The systems Code Jumping renders such “code
grabbing” devices useless by randomly changing each signal that the controller or
transmitter sends.
The system is capable of being operated by as many as four controllers or
transmitters; these can be any combination of 1-way transmitters or 2-way
controllers. Regardless of which, the transmitter or transceiver must be encoded,
or programmed, to the system in order to operate it (excepting the originals, which
were programmed at the factory).
The programming procedure is identical for a transmitter or for a controller.
Also, it is during the controller/transmitter programming procedure that the
Unauthorized Transmitter Alert feature may be turned on.
How to Program Controllers or Transmitters
Step 1 Have all controllers and/or transmitters which are to operate the system at
hand. Turn the ignition “on”.
StandardProgramming: Usingthismethodtoprogramadditionalorreplacement
controllers or transmitters does not affect Unauthorized Transmitter Alert.

The Status Light
SecuritySystemStatus:Theseare the“normal”operations ofthe Status Light,
indicating the state of the security system. Exceptions to normal operation are the
transmitter verification display upon turning on the ignition key, and
1) Off = Thesecuritysystem is disarmed and not performing automatic functions.
2) On Constant = The security system is in the Valet Mode.
3) Flashing Slowly = The security system is fully armed.
4) Flashing Fast = Last Door Arming or Automatic Rearming is in progress.
Page - 16
Automatic Transmitter Verification: For the first 10 seconds after the
vehicle’signitionisturnedon,theStatusLightwillflash anumberoftimesbetween
pauses that equal the number of controllers or transmitters that are programmed to
operate the system:
5) 1 Flash /pause = 1 controller or transmitter is programmed.
6) 2 Flashes /pause = 2 controllers or transmitters are programmed.
7) 3 Flashes /pause = 3 controllers or transmitters are programmed.
8) 4 Flashes /pause = 4 controllers or transmitters are programmed.
ZoneViolation:Ifthe systementersan alarmcondition,theStatusLight willstop
flashing slowly and begin to flash in a sequence between pauses to indicate which
protected zone caused the alarm condition. The Status Light will flash and pause to
indicate which protected zone was violated while the system is still armed, after it
is disarmed, and until the vehicle’s ignition is turned on. The system’s Zone
Violation feature’smemorycanstoretwoconsecutivezoneviolations.Iftherehave
been multiple violations, the Status Light will show the two most recent violations
in the order in which they occurred.
9) 2 Flashes / Pause = System was triggered by open hood or trunk.
10) 3 Flashes / Pause = System was triggered by an open door.
11) 4 Flashes / Pause = System was triggered by the sensor.
• Turning on the ignition will clear the Zone Violation.
The Status Light visually confirms the status of the system and provides a high
level of visual deterrence. The Status Light is in the window unit, and actually
consistsoftwoLEDlights,withidenticaloperation,formaximumvisibility. These
lightsilluminateRedin color,butseparatelymountableStatusLightsareavailable,
in either Red or Blue color. So whereas the standard Status Light is described as
Red, other colors may be found.
Step 2 Turning the ignition back on.
Page - 21
Anti-Carjacking Protection
ThesystemisequippedwiththreeseparateAnti-Carjackingprotectionfeatures,
whose operation may be selectively activated by the ignition, by an open door, or
by the transmitter. All three are programmable, and must be turned on to operate.
Once activated, the user has 53 seconds to cancel the Anti-Carjacking protection
process by pressing the Valet Switch once. If Anti-Carjacking is not cancelled, 53
seconds after being activated the siren will begin to chirp for 7 seconds to alert the
userthatthe systemisabout toenterintoanalarmcondition. TheValetSwitchmay
still be pressed once during this period to cancel the Anti-Carjacking process.
If the Anti-Carjacking process is not cancelled before the 60 second count-
down expires, the system will enter an alarm condition, sounding the siren and
flashing the parking lights. 30 seconds after this occurs, or should the ignition be
turned off in the meantime, the stater interrupt will engage. Once the system
enters the alarm condition, it will not respond to the transmitter, nor will the sys-
tem reset automatically after 60 seconds, and it can only be disengaged by:
Step 1 Turning the vehicle’s ignition off.
Step 3 Within 5 seconds, perform an Emergency Override using the Valet
The three types of Anti-Carjacking protection features are:
Switch. If the SecureCode has been customized, the correct number of
Valet Switch presses must be made.
Anti-Carjacking protection activated using a controller or transmitter
hastheprocess start by pressingandholding the “III” buttonfor3 seconds, but only
if the vehicle’s ignition is on. The Valet Switch must be pressed within 60 seconds
afterthisisdonetocancelAnti-Carjacking.ThisisUserProgrammableFeature#19
(see page 32).
Anti-Carjackingprotectionactivatedbyanopendoorhastheprocessstart
should a door be opened after the vehicle is started and the engine is running. The
Valet Switch must be pressed within 60 seconds after the door is opened to cancel
Anti-Carjacking. This is User Programmable Feature #18 (see page 32).
Anti-Carjacking protection activated by the vehicle’s ignition has the
process start every time the vehicle’s ignition is turned on. The Valet Switch must
be pressed within 60 seconds every time the vehicle is started to cancel Anti-
Carjacking. This is User Programmable Feature #17 (see page 31).

• The “DISARM” also shows
“ARM”; to indicate the Armed
or Disarmed status of the sys-
tem. Neither icon is present
when the system is in Valet
Mode.
Controller Icons: The LCD screen on the controller has various icons which
indicatesystemstatus. Whenthecontrollerisusedtooperatethesystem,itreceives
back a signal which causes it to chirp (emulating the siren) and display the
appropriate icons. Brief descriptions of the icons are:
The 2-Way Controller
The four system- operating buttons are described on pages 4-7. This section
explains the controller’s icons, and how to program the controller’s features.
• The digit readout is a clock, with AM and PM indication. This readout also
shows how which vehicle is
selected (1 or 2) and is used for
the timer functions (page 20).
• When “BAT LOW” appears the transceiver’s 1.5 volt AAA battery should be
replaced with a new battery.
• The locked or unlocked padlock (windshield) reflects the locked or unlocked
doors status as last operated by the system (certain programmable
features can automatically arm the system, but not lock the doors). Arming
with the controller or transmitter always locks the doors; when disarming they
will unlock unless the system is activated and sounding.
• “VALET” indicates alarm Valet Mode, replacing the “ARM” or “DISARM”
icons. A musical tone occurs when placing the system into Valet Mode.
• The “crossed-out key” icon, on the hood area, only appears when the controller
is used with systems having built-in remote starting. This icon indicates an
aborted remote starting due to a violated safety circuit. The system can
• “HOOD/TRUNK” indicates that this vehicle zone is or has been violated. If
associated with the system being activated, the controller also emits chirps,
until any button is pressed. In this case, the icon remains flashing until the
ignition switch is turned on.
• The “3” within a circle appears when the 3rd Channel Output is operated.
• The controller’s chirps and musical tones may be turned off, which makes the
unit vibrate instead; “MUTE” indicates this state.
Page - 17
6) Press and release the “:” button. Each press of the button changes to
the next melody, note that the LCD screen displays “S” and a numeral, which
is the melody number. When the desired musical tone has been the last one
played press and release the “P” button.
OR
press and release the “P” button to scroll back through the features.
7) The controller will play another musical melody; this is the Stop Melody which
playswhenremotestartenginerunperiod ends. There are five different melody
choices which can be made. Press and release the “:” button . Each
press of the button changes to the next melody, note that the LCD screen dis-
plays a numeral, which is the melody number. When the desired musical tone
has been the last one played, you may
• While the controller programming must be “scrolled” through, programming
mode can be exited at any point within the menu by simply not pressing any
buttons for 12 seconds. The Echo chirps once when it exits programming mode.
leave the controller undisturbed for 12 seconds, until it chirps once
• If the Echo is configured for “MUTE” operation (vibrates instead chirping),
then in programming it will not play the musical melodies. Instead, it vibrates
when the remote start Melody and Stop Melody are accessed for programming.
Page - 20
CAR
Timer Functions: The ECHO 2-way controller has 2 timer functions.Aparking
timer for timing how long you’ve parked in a limited parking zone or at a parking
meter. Also, if this system is used to activate an optional remote start system, the
controller has a remote start timer to keep track of how long the vehicle’s engine
has been running.
Parking Timer: Press the “LOCK” button twice within 5 seconds to activate.
The digital clock display will change to “0:00” to indicate the timer has started.
The timer is in hours/minutes format and can be canceled by pressing the
“UNLOCK” button. Press the “P” button during the timer to see the clock
display. It will display for 5 seconds then return to the timer.
Remote Start Timer: Using the 3rd channel output to activate a remote start
system will automatically start the timer. The digital clock display will change
to “0:00” to indicate the timer has started. The timer is in hours/minutes format
and can be canceled by deactivating the remote start system. Press the “P”
button during the timer to see the clock display. It will display for 5 seconds
then return to the timer.
Multi-Vehicle Operation: The ECHO 2-way controller is capable of operating
up to 2 separate systems in separate vehicles. This is indicated by seeing “CAR1”
or “CAR2” in place of the clock display. Select “CAR1” by pressing “LOCK” and
“P” for 1 second. Select “CAR2” by pressing “UNLOCK” and “P” for 1 second.
Every alert to the controller will also indicate which “CAR” sent the alert.

Page - 18
• If an optional remote start unit is added to the system, the “start” icon at
the rear of the vehicle can confirm remote starting, and it is accompanied by a
musical melody. The 3rd channel must be operated first, and then if the system
detects that the ignition circuit is turned on it will display this icon.
• The “DOOR” icon will indicate that the system was activated via the door
detection circuit. The controller chirps until any button is pressed, and the
icon remains flashing until the ignition is turned on.
• On the vehicle’s windshield is a “hammer” and “impact” icon. When the shock
sensor detects light impact, causing the system to prewarn, the “impact” icon
alone will momentarily appear, accompanied by three chirps. If the sensor
detects a harder impact or breaking glass, activating the system, the full
hammer and impact icon appears, and the controller chips until any button is
pressed, and the icon remains flashing until the ignition switch is turned on.
• The “CARJACK” icon within the vehicle’s front tag frame indicates that this
operation has been activated, which can be performed by any of three methods.
be used with an optional remote starting unit; the remote “start” icon (below)
will operate, but not this icon.
• The system will only transmit a signal to the controller if it was last used to
operate the system (as in arming or disarming it). Example: if the 1-way trans-
mitter is used to arm the alarm, the system will not transmit a signal which will
cause the 2-way controller to chirp and change its icons.
• The various lines at the upper rear of the vehicle graphic represent a unique
feature which allows the user to customize the vehicle type represented by the
display. Options are: passenger car, pickup truck, and sport utility/van.
• The “transmitting tower” icon is an in-range indicator. It is present if the last
transmission by the controller was answered by a return signal from the
system. Should the controller be operated, and no return signal is received,
this icon will disappear.
• The “2” within a circle indicates use of the 2nd Channel Output, which is most
commonly used for a remote trunk release feature.
• If multiple controllers are programmed to operate the system, the system will
immediately send a page signal to the last one used. It will send the same signal
to additional controllers within 10 seconds of the first.
Notes about the Controller and its operation:
• When the system does send a signal to the controller, a few seconds is
needed for this wireless “handshake” to occur. If the system is operated in a Page - 19
• A final point to remember is that the controller cannot receive a signal from the
system while it itself is transmitting. For normal operations, the
controller’s buttons are pressed and released. Even when “Panic” is operated,
the controller button should be released as soon as “Panic” engages. Otherwise,
the controller cannot receive the signal from the system.
rapid fashion, as in quickly repeating arm and disarm cycles, the controller will
not have time to receive the signal from the system, and therefore it will stop re-
sponding and reporting the system’s status. Normally operating the system
corrects this symptom.
Programming the Controller:
The 2-way controller has several user-programmable features:
•Chirp or Mute The chirps may be turned off, and replaced with vibration.
•VehicleType Choices are apassenger car,pickuptruck, orvan/SUV. This can
be selected separately for CAR1 and CAR2 profiles.
•Time Adjust To set the controller’s clock time.
•Start Melody; and Stop Melody These are played with remote starting.
Programming these features is a sequential process- the controller is placed into
programmingmode,theneachprogrammableoperationisaccessedinturn, andeither
changed as desired, or left as is, and then the next step is accessed. Programming is
done using the Echo unit’s three round side buttons:
2) After 5 seconds the controller chirps twice; release the “P” but-
ton; the upper rear of the vehicle will flash; Vehicle Type may be chosen.
3) Press and release the “:” button; each press of the button changes the
vehicle from Passenger Car, then to Pickup Truck, and then to Van/SUV.
When the desired type is flashing, press and release the “P” button; the
Time’s “Hours” will flash, and may be set now.
5) Press and release the “:” button to advance the minutes or press and
release the “ ” button to reverse the minutes. When the minutes are
correct press and release the “P” button. The controller will play a
musical melody; this is the Start Melody which plays upon remote starting.
One of five melodies may be chosen now.
...
4) Press and release the “:” button to advance the hours, or press and
release the “ ” button to reverse the hours. When the Hours are correct
(please note “AM” or “PM”), press and release the “P” button.
The Time’s “Minutes” will flash, and may be set now.
...
A- Choose Chirp or Mute by pressing the “:” button for 1 second.
B- Continue holding this button for 5 seconds to enter programming mode.
OR
1) Press and hold the “P” button AND:
Other manuals for 750i6
1
Table of contents
Other Crime Guard Car Alarm manuals

Crime Guard
Crime Guard 328i2 User manual

Crime Guard
Crime Guard 533i 3 User manual

Crime Guard
Crime Guard 745i3 User manual

Crime Guard
Crime Guard Crime Guard 533i3 User manual

Crime Guard
Crime Guard Crime Guard 533i4 User manual

Crime Guard
Crime Guard 750i6 User manual

Crime Guard
Crime Guard 745i2 User manual

Crime Guard
Crime Guard Crime Guard 250i6 User manual

Crime Guard
Crime Guard Crime Guard 328i4 User manual

Crime Guard
Crime Guard 328i3 User manual