Crommelins CG64RP Series Administrator Guide
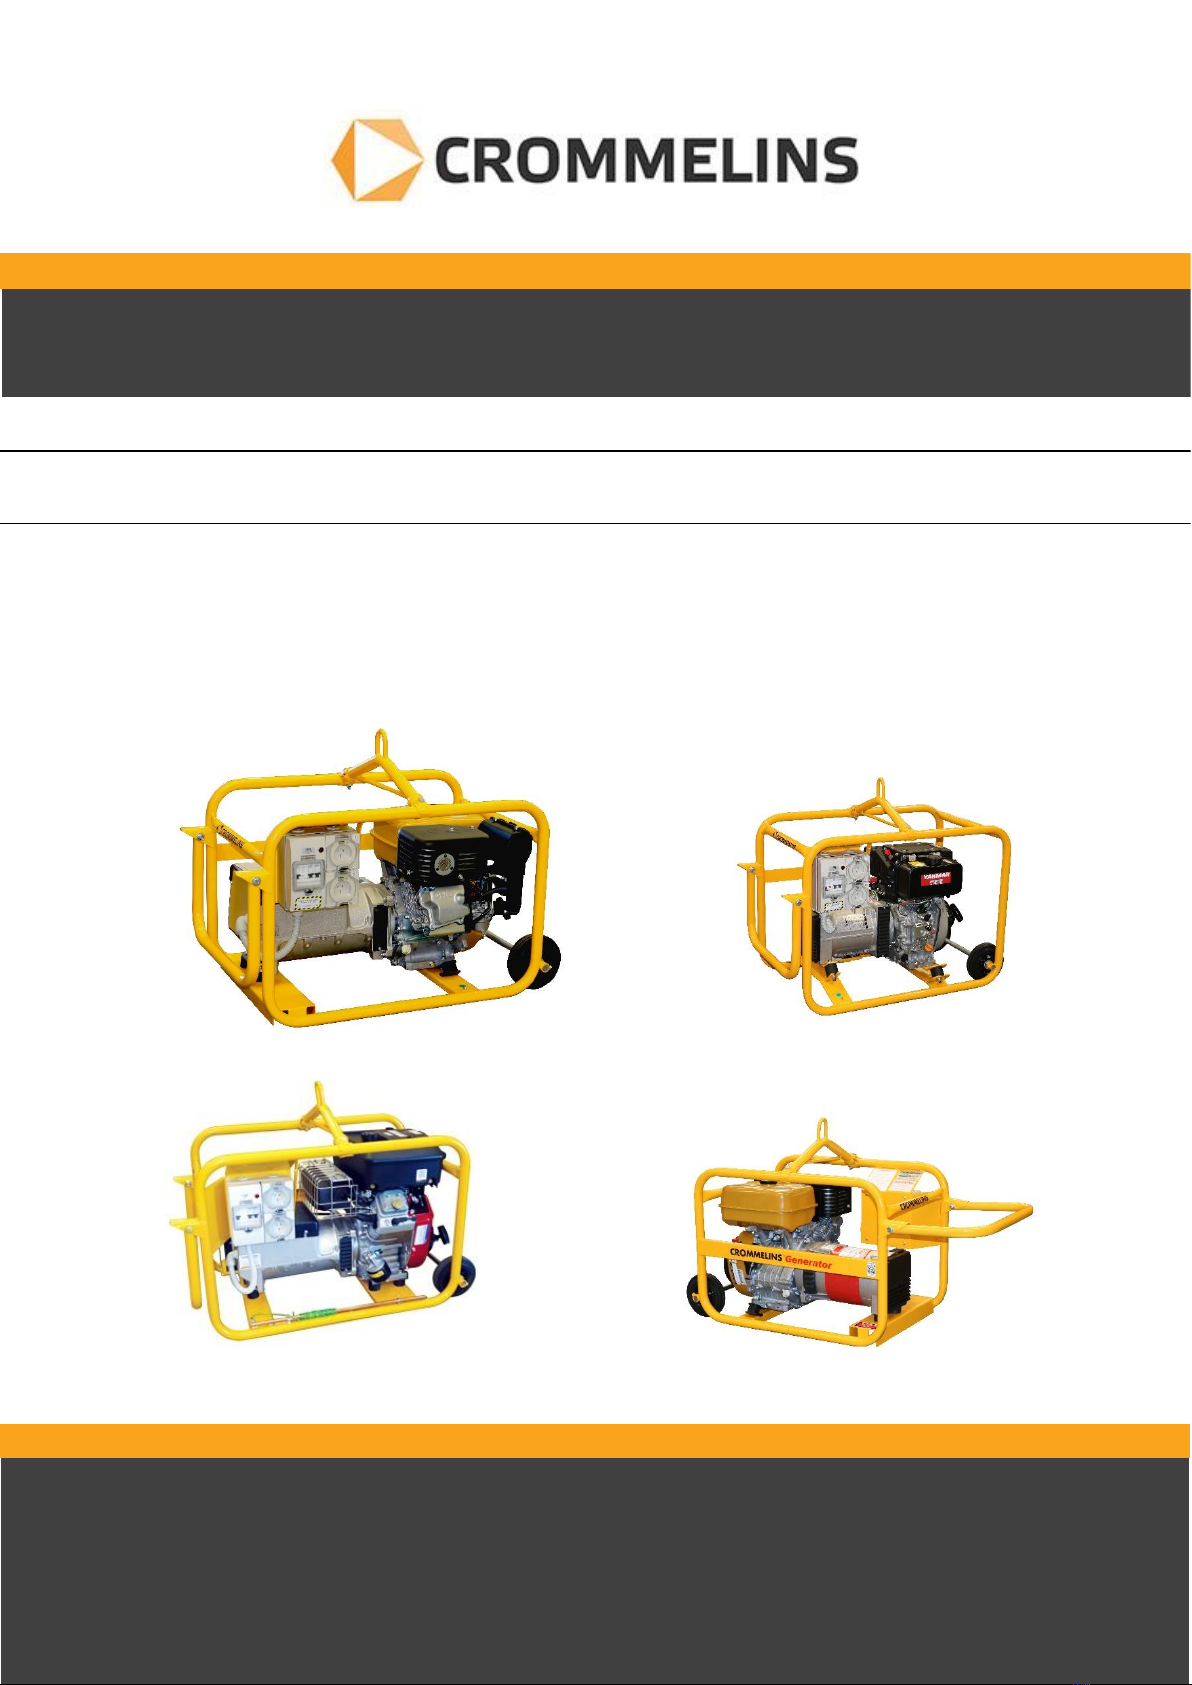
CROMMELINS GENERATORS
OPERATION & INSTRUCTION MANUAL
Sales: 1300 650 659
Customer Service 1300 554 524
email@crommelins.com.au
Head Office: (08) 9350 5588
www.crommelins.com.au
Thank you for selecting a Crommelins Generator. This Operation Manual explains its use,
installation, checking and maintenance. We highly recommend that you retain this manual for
ready reference regarding its proper handling.

2
Crommelins Generator Operation & Instruction Manual
Thank you very much for purchasing a Crommelins Generator which can be used in the agricultural,
mining, construction, hire industries and for general recreational appliances. Never use this generator for
any other purpose. This manual covers its operation and maintenance.
Please take a moment to familiarise yourself with the proper operation and maintenance procedures to
ensure the safe and efficient use of this product. Keep this manual at hand, so that you can refer to it at
any time.
Due to constant efforts to improve our products, certain procedures and specifications are subject to
change without notice.
When ordering spare parts, please have handy the product’s model and serial numbers. Please fill in the
following blanks after checking the model and serial numbers of your product. (The location of these
numbers varies depending on product).
MODEL NO
SERIAL NO
INDEX
1. WARRANTY_________________________________________________________________ 3
2. CONSUMER ADVICE __________________________________________________________ 3
3. SAFETY PRECAUTIONS ________________________________________________________ 4
4. PRE-OPERATION CHECKS ______________________________________________________ 6
5. OVERLOAD PROTECTION ______________________________________________________ 8
6. OPERATING PROCEDURES _____________________________________________________ 8
7. WATTAGE INFORMATION _____________________________________________________ 9
8. SPECIFICATIONS - PETROL ____________________________________________________ 10
9. SPECIFICATIONS - DIESEL _____________________________________________________ 11
10. FEATURES _________________________________________________________________ 12
11. “HOW-TO” MAINTENANCE ___________________________________________________ 13
12. MAINTENANCE SCHEDULE____________________________________________________ 14
13. TRANSPORTATION AND STORAGE _____________________________________________ 15
14. TROUBLE SHOOTING ________________________________________________________ 16

3
Crommelins Generator Operation & Instruction Manual
1. WARRANTY
CROMMELINS™ and CROMTECH™ are a registered trademark of Crommelins Machinery. Crommelins
warrants their goods against defects in materials and workmanship under normal use and service.
Crommelins Machinery warranty does not cover fair wear commensurate with the age of the product,
any damage caused by accident, abuse, misuse, neglect, or failure to observe proper operating
instructions or proper machinery maintenance as described in the instruction manual.
It is the owner’s responsibility to regularly maintain a product in accordance with the instruction manual
and only use the equipment for its designed purpose.
Our goods come with guarantees that cannot be excluded under the Australian Consumer Law. You are
entitled to a replacement or refund for a major failure and for compensation for any other reasonably
foreseeable loss or damage. You are also entitled to have goods repaired or replaced if the goods fail to
be of acceptable quality and the failure does not amount to a major failure.
2. CONSUMER ADVICE
Any claim under these warranties must be made in the warranty period from the date of purchase of the
product.
To make a claim under the warranty, you must return the product (with proof of purchase) to the closest
warranty agent or to the place of purchase.
There are over 185 national authorised service/repair agents available, visit www.crommelins.com.au for
their details and locations.
Where a failure does not amount to a major failure, Crommelins Machinery is entitled to choose between
providing you with a repair, replacement, or refund. To obtain compensation, you would need to provide
documentary evidence of the loss or damage suffered, and documentary evidence that such loss or
damage was a reasonably foreseeable consequence of a failure by Crommelins Machinery to comply with
a consumer guarantee under the Australian Consumer Law.
Crommelins Operations Pty Ltd trading as Crommelins Machinery and Crommelins Australia.
CROMMELINS MACHINERY:
Ph: (08) 9350 5588
email@crommelins.com.au
www.crommelins.com.au
ABN 11 008 889 656

4
Crommelins Generator Operation & Instruction Manual
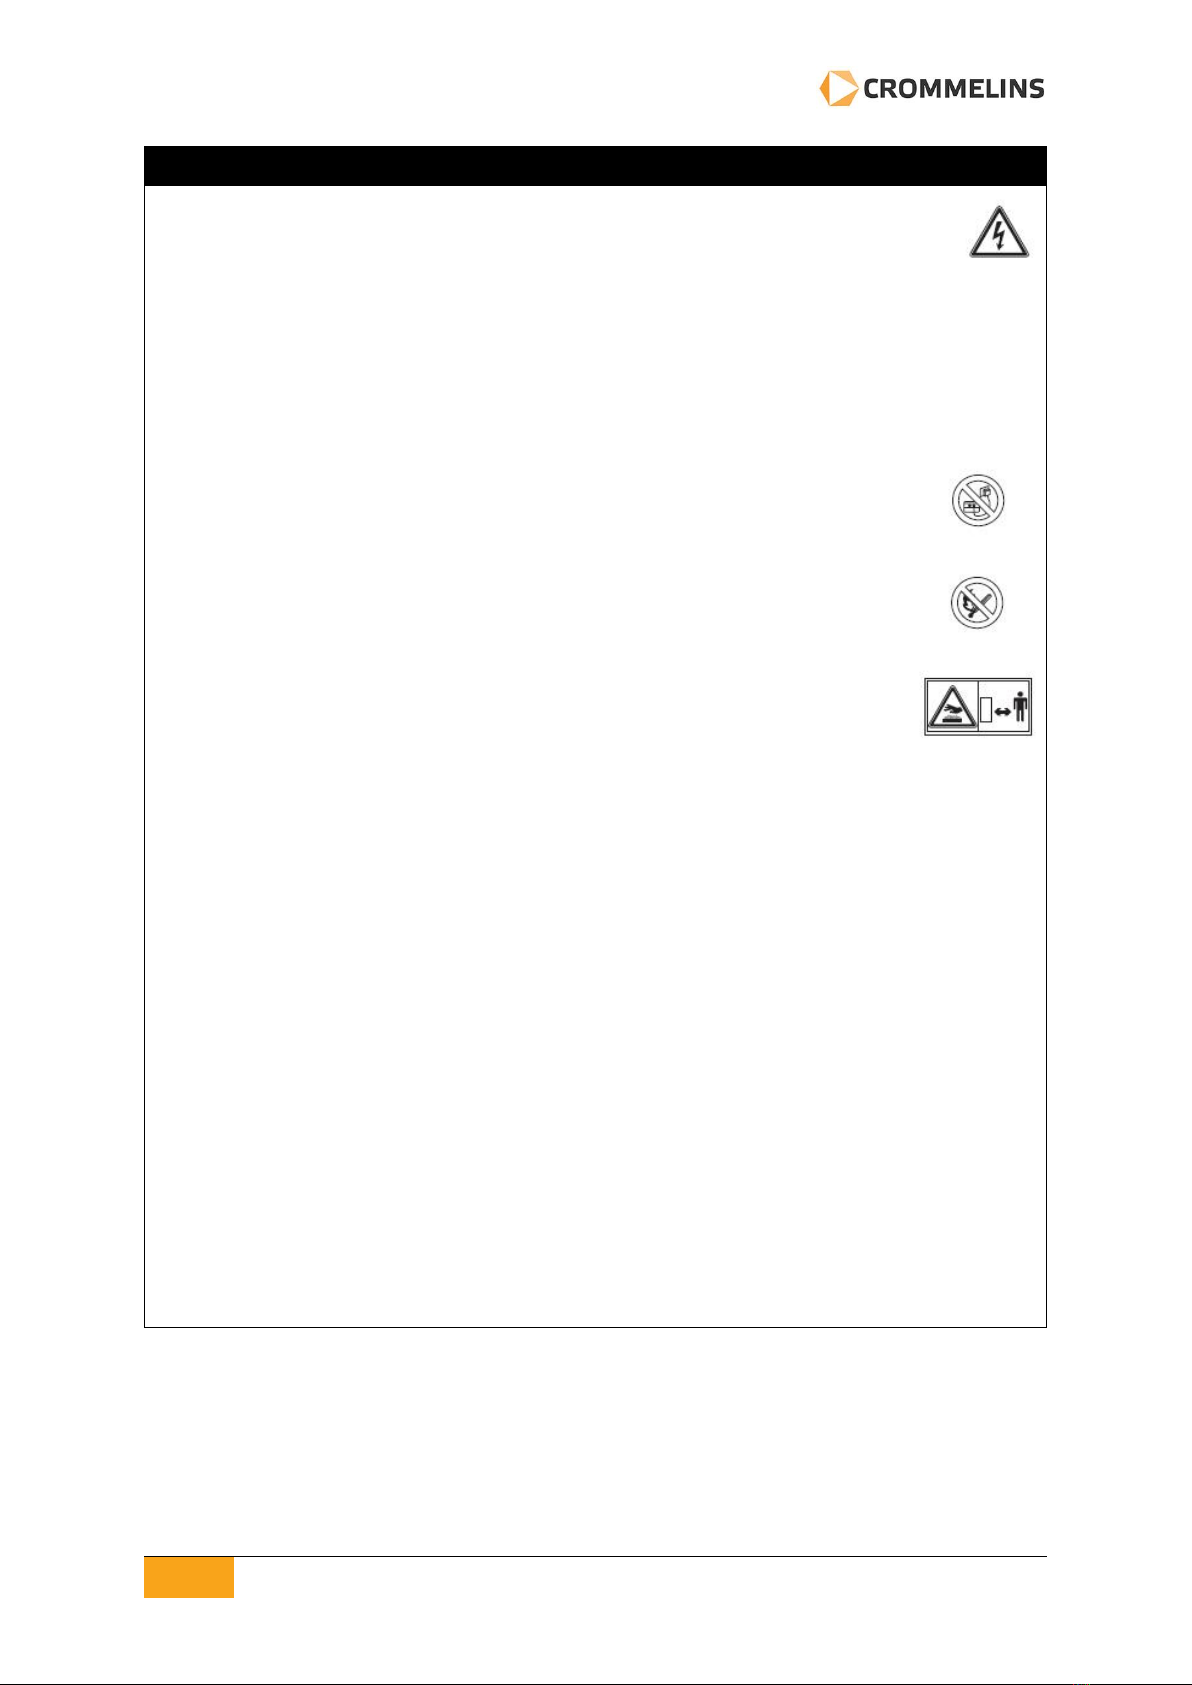
3. SAFETY PRECAUTIONS
This manual contains important information on how to use Crommelins Generators properly and safely.
You must read through this manual carefully before you attempt to operate this product.
Take safety seriously, Crommelins generators are designed to give safe and dependable service if
operated according to the instructions. Pay special attention to statements preceded by the following
words:
“WARNING” indicates a strong possibility of severe personal injury or loss of
life if instructions are not followed.
“CAUTION” indicates a possibility of personal injury or equipment damage if
instructions are not followed.
WARNING
•ALWAYS follow the instructions given in this manual when using this generator.
•ALWAYS make a pre-operation inspection before starting the engine. (For more information read
engine’s instruction manual).
•NEVER allow anyone to operate the unit without proper instructions.
•KNOW how to stop the engine quickly and understand the operation of all controls.
•DO NOT operate the generator near petrol or gaseous fuel because there is a
danger of explosion or fire.
•DO NOT smoke or use an open flame near the fuel tank.
•DO NOT fill the fuel tank with fuel while the engine is running. Allow the engine to
cool before refuelling.
•RE-FUEL OUTDOORS or in a well-ventilated area.
•BE CAREFUL not to spill fuel during refuelling. If fuel is spilt, wipe it off and let dry before starting
the engine.
•DO NOT store, spill, or use flammables / combustible material near the generator. Be careful not
to place fuel, matches, gunpowder, oily cloths, straw, trash, or any other flammables or
combustible material near the generator.
•DO NOT operate the generator inside a room, cave, tunnel, or other
insufficiently ventilated area. Using a generator indoors CAN KILL YOU
IN MINUTES. Generator exhaust contains carbon monoxide. This is
poison you cannot see or smell. NEVER use inside a home or garage
EVEN IF doors and window are open. Only use OUTSIDE and far away
from windows, doors, and vents. Keep the generator at least 1 metre
(3 feet) away from any structure, building or overheads.
•DO NOT enclose the generator nor cover it with a box. The generator
has a built-in forced air-cooling system and may become overheated if
it is enclosed. If the generator has been covered to protect it from the
weather during non-use, be sure to remove and keep it well away
from the area while using the generator.
•OPERATE the generator on a LEVEL SURFACE. It is not necessary to prepare a special foundation
for the generator. However, the generator will vibrate on an irregular surface, so choose a level
place without surface irregularities. If the generator is tilted or moved during operation, fuel may
spill and/or the generator may tip over, causing a hazardous situation. Proper lubrication cannot
be expected if the generator is operated on a steep incline or slope. In such a case, piston seizure
may occur even if the oil is above the upper level.
WARNING
CAUTION
M
5
Crommelins Generator Operation & Instruction Manual
WARNING
•PAY ATTENTION to the wiring or extension cords from the generator to the connected
device. If the wire is under the generator or in contact with a vibrating part, it may
break and possibly cause a fire, generator burnout, or electric shock. Replace damaged
or worn cords immediately.
•DO NOT operate in rain, wet or damp conditions, or with wet hands. The operator may suffer
severe electric shock if the generator is wet due to rain or snow. If wet, wipe and dry it well before
starting. DO NOT pour water directly over the generator, nor wash it with water.
•ENSURE ALL necessary electrical grounding procedures are followed during each and every use.
Failure to do so can be FATAL.
•The generator SHOULD NOT be connected to a fixed electrical installation except by an
appropriate licensed person. The output of this generator is potentially FATAL.
•NO SMOKING while handling the battery. The battery emits flammable hydrogen
gas, which can explode if exposed to electric arcing or open flame.
•KEEP the area well-ventilated and keep open flames/sparks away when handling
the battery.
•BE VERY CAREFUL not to touch any parts of the hot engine especially the muffler
area or serious burns may result. The engine becomes extremely hot during and
for some time after operation.
•KEEP all bystanders at a safe distance from the generator and work areas.
•Children and animals MUST always be kept away from the generator and work
areas.
•NEVER leave the generator unsupervised whilst in operation.
•NEVER allow the generator to be exposed to direct sunlight or at high temperatures.
•ALWAYS unplug all appliances connected to generator before starting.
•ALWAYS read, understand, and follow the tool/appliance instruction manuals. It is essential you
know the safe and proper use of the power tool or appliance that you intend to use. Tool and
appliance uses and limitations must be understood. Follow all directions given on labels and
warnings. Keep all instruction manuals and literature in a safe place for future reference.
•USE ONLY 10AMP or 15AMP extension cords. When a tool or appliance is used outdoors, use only
extension cords marked “For Outdoor Use”. Extension cords should be stored in a dry and well-
ventilated area when not in use.
•ALWAYS switch off the generator’s AC circuit breaker and disconnect tools or appliances when not
in use, before servicing, adjusting, or installing accessories and attachments.
•DO NOT tamper with engine speed as damage could result.
•DO NOT tamper with governor springs, governor links, or other parts which may increase the
engine speed.
•OBSERVE the following cautions when transporting. Close fuel tank cap securely and close fuel tap
tightly during transportation. Drain petrol or diesel from fuel tank before transporting over a long
distance or on rough roads.
•MAKE SURE the engine is stopped before starting any maintenance, servicing or repair.
•FAILURE to properly maintain this generator, or improper maintenance, or failing to correct a
problem before operation, could result in a significant malfunction in which you can be seriously
injured or killed.
6
Crommelins Generator Operation & Instruction Manual
4. PRE-OPERATION CHECKS
4.1 CHECK ENGINE OIL
Before checking or refilling oil, be sure the generator is located on a stable and level surface with the
engine stopped then follow these steps:
STEP 1 Remove oil filler cap and check the level of the engine oil.
STEP 2 If oil level is below the lower level line, refill with suitable oil to upper level line.
STEP 3 Do not screw in the oil filler cap when checking oil level.
STEP 4 The oil will need to be changed if contaminated.
4.2 RECOMMENDED ENGINE OIL
SAE 10W-30 or 10W-40 is recommended for general, all-temperature use.
4.3 CHECK ENGINE FUEL
WARNING
MAKE SURE you review each of the following warnings in order to prevent a fire or explosion:
•DO NOT refill tank while engine is running or hot.
•Before filling fuel, turn the engine switch into fuel stop/close position.
•DO NOT refuel while smoking or near open flame or other potential fire hazards and combustible
material.
•BE CAREFUL not to allow dust, dirt, water, or other foreign objects into fuel.
•ALWAYS wipe off and let dry properly any spilt fuel before starting engine.

7
Crommelins Generator Operation & Instruction Manual
STEP 1 Check fuel level at fuel level gauge.
STEP 2 If fuel level is low, refill with the correct fuel, use unleaded if petrol or use diesel if a diesel unit.
STEP 3 Be sure to use the fuel filter screen on the fuel filter neck.
4.4 CHECKING COMPONENT PARTS
Check the following items before starting engine:
•Fuel leakage from fuel hose, etc.
•Bolts and nuts for looseness.
•Components for damage or breakage.
•Generator not resting on or against any adjacent wiring.
4.5 CHECK GENERATOR SURROUNDINGS
WARNING
Make sure you review each of the warnings in order to prevent fire hazard.
•KEEP area clear of flammables or other hazardous or combustible materials.
•KEEP generator at least 1 metre away from buildings or other structures.
•ONLY operate generator in a dry, well ventilated area.
•KEEP exhaust pipe clear of foreign objects.
•KEEP generator away from open flames. NO SMOKING!
•KEEP generator on a stable and level surface.
•DO NOT block generator air vents with paper or other material.
4.6 GROUNDING THE GENERATOR (if applicable)
These generators are ground to earth via the frame. If grounding is required by an earth stake, consult
with a licensed electrician prior to installation.
4.7 BATTERY INSTALLATION –(Electric Start Models)
Recommended battery:
•Type –Gel mat sealed
•Capacity (Ah/5hr) –12V-21AH or more
•Size –Less than 185(L) x 125(W) x 150(H) mm
WARNING
Death, personal injury and/or property damage may occur unless instructions are followed carefully:
•KEEP area clear of flammables or other hazardous or combustible materials.
•USE battery of recommended capacity.
•Turn the starter switch to the “O” (stop) position when mounting or dismounting battery. When
mounting battery, connect the positive (+) cable first and then the negative (-) cable to the battery.
•BE CAREFUL not to short battery cables. When dismounting battery, disconnect negative (-) cable
first:
oRED CABLE –To positive (+) terminal
oBLACK CABLE –To negative (-) terminal
•Incorrect connection of terminals will result in wiring and engine damage.
•ENSURE bolts and nuts are tightened on terminals securely so they will not be loosened by
vibration.
•DISCONNECT battery cables when charging battery.

8
Crommelins Generator Operation & Instruction Manual
5. OVERLOAD PROTECTION
5.1 NON-TRADE PACK MODELS
•These generators are protected by an overload button positioned on the end cover of alternator next
to the power outlets.
•In the event of overloading the generator, the overload protection button will trip and will cut the
power output from the generator set and the engine will continue to run.
•Switch off the connected appliances and unplug them from the power outlets.
•Check the individual and combined appliances compliance plates for wattage draw, they must not
exceed that of the generator. Push the overload button in to reset it.
5.2 TRADE PACK MODELS
•These generators are protected by an RCD device which protects against earth current faults, overload,
and short circuits. This is located in a weatherproof enclosure next to the weatherproof outlets.
•This device will trip in the event of either of these being detected and cut the power output from the
generator, the engine will continue to run.
•Switch off the connected appliances and unplug them from the power outlets. Check the individual
appliances compliance plates for wattage draw and for any damage to the power cable or appliance.
•Reset the switch on the RCD upwards to regain power. If the RCD trips again cease using the appliance
immediately.
•NOTE: The RCD device must be tested every time the generator is started and before any appliances
are plugged in.
6. OPERATING PROCEDURES
6.1 STARTING THE GENERATOR
CAUTION
•ALWAYS unplug all appliances connected to generator before starting.
•Check the oil level before each operation as outlined by the section “CHECK ENGINE OIL”.
•KEEP all bystanders at a safe distance from the generator and work areas.
•Children and animals MUST always be kept away from the generator and work areas.
STEP 1 Turn the engine switch to the position ‘I’ (On).
STEP 2 Open the fuel valve.
STEP 3 Set choke lever to close if the engine is cold.
Recoil Start:
oPull the starter handle slowly until passing the compression point (resistance will be felt), then
return the handle to its original position and pull briskly.
oIf the engine fails to start after several attempts, repeat above procedures with choke lever
returned to “OPEN” position.
oDo not fully pull out the rope.
oAfter starting, allow the starter handle to return to its original position while still holding the
handle.

9
Crommelins Generator Operation & Instruction Manual
Electric starter model:
oIf mine spec, turn the battery isolator switch to the “ON” position, twist the emergency stop
switch clockwise to ensure it is open, this procedure must be done before starting generator.
oInsert the key into the key switch and turn it clockwise to the “I” (on) position to start the
engine, IF DIESEL GENERATOR, make sure to turn on the fuel tap by moving the lever to the
down position, turn the key further to the start position until engine starts.
oThese generators are fitted with IP66 weatherproof outlets, an RCD safety switch and MCB
overload protection switches. After starting the generator and before every use check the RCD
switch works by setting the switch to on, then push the TEST button to trip, then reset. If TEST
fails and trips –DO NOT USE THE GENERATOR and contact your nearest service agent.
CAUTION –IF ELECTRIC START FITTED
•DO NOT run the starting motor over 5 seconds continuously. If the engine fails to start, return the
key to the “I” (on) position and wait about 10 seconds then start again.
•DO NOT turn the key switch to start position when the engine is running to prevent damage of
starting motor.
•When starting the engine by recoil starter, set the key switch to the “I” (on) position and pull the
starter handle.
STEP 4 After the engine has started, return the choke lever gradually to “OPEN” position.
STEP 5 Warm up the engine without load for a few minutes.
6.2 STOPPING THE GENERATOR
STEP 1 Turn off the power switch of the electric equipment and unplug the cord from receptacle of the
generator.
STEP 2 Allow the engine to cool down for approximately 3 minutes at no-load before stopping.
STEP 3 Recoil starter model - Turn the engine switch to the position ‘O’(off).
STEP 4 Electric starter model - Turn the key switch to the STOP position.
STEP 5 Close the fuel valve.
6.3 OIL SENSOR
STEP 1 The oil sensor detects the fall in oil level in the crankcase and automatically stops the engine
when the oil level falls below a predetermined level.
STEP 2 When engine has stopped automatically, switch off generator’s AC circuit breaker, allow the
engine to cool, and check the oil level. Refill engine oil to the upper level as outlined by the
section “CHECK ENGINE OIL” and restart the engine.
STEP 3 If the engine does not start by usual starting procedures, re-check the oil level.
7. WATTAGE INFORMATION
Some appliances need a “surge” of energy when starting. This means that the amount of electrical power
needed to start the appliance may exceed the amount needed to maintain its use.
Electrical appliances and tools normally come with a label indicating voltage, cycles/Hz, amperage (amps)
and electrical power needed to run the appliance or tool.
Check with your nearest dealer or service centre with questions regarding power surge of certain
appliances or power tools.

10
Crommelins Generator Operation & Instruction Manual
•Electrical loads such as hot plates require the same wattage to start as is needed to maintain use.
•Loads such as fluorescent lamps require 1.2 to 2 times the indicated wattage during start-up.
•Electrical motors require a large starting current. Power requirements depend on the type of motor
and its use. Once enough “surge” is attained to start the motor, the appliance will require only 50% to
30% of the wattage to continue running.
•Most electrical tools require 1.2 to 3 times their wattage for running under load during use. For
example, a 5000w generator can power an 1800 to 4000w electrical tool.
•Loads such as submersible pumps and air compressors require a very large force to start. They need 3
to 5 times the normal running wattage to start. For example, a 5000w generator would only be able to
drive a 1000w to 1700w pump.
8. SPECIFICATIONS - PETROL
Model
CG64RP Series
CG85RP Series
CG100BPE Series
Type
Sincro Alternator, 2
Pole, Single Phase
Sincro Alternator, 2
Pole, Single Phase
Sincro Alternator, 2
Pole, Single Phase
Voltage Regulating System
Capacitor
Capacitor
Capacitor
AC Output - Rated Voltage-
Frequency V-Hz
240 - 50
240 - 50
240 - 50
Rated Output VA (Watts)
4700
6200
7500
Maximum Output (Watts)
5000
6800
8000
Rated Power Factor
1
1
1
Engine Model
EX40
EX40
BS16
Type
ROBIN Air-cooled, 4-
stroke, Gasoline Engine
ROBIN Air-cooled, 4-
stroke, Gasoline Engine
VANGUARD Air-cooled,
4-stroke, Gasoline
Engine
Displacement ml
404
404
479
Fuel
Automotive Unleaded
Automotive Unleaded
Automotive Unleaded
Fuel Tank Capacity L
7
7
8.4
Engine Oil Capacity L
1.2
1.2
1.7
Rated Continuous
Operation H
1.9
1.9
4.1
Spark Plug
BR6HS
BR6HS
RC12YC
Starting System
Recoil (Electric Start
model CG64RPEH)
Recoil (Electric Start
model CG85RPEH)
Electric Start
¾ Load Fuel Consumption
(L/H)
1.4
1.4
2.9
Noise Level (Db@7m)
76
76
76
Direction of Rotation
Counter-clockwise
Counter - clockwise
Counter - clockwise
Length (mm)*
935
935
970
Width (mm)
515
535
515
Height (mm)
725
720
715
Dry weight (kg)
89
95
105
Manufacturer’s Warranty
2 Years
2 Years
2 Years
Engine Warranty
3 Years
3 Years
3 Years
NOTE: Specifications are subject to change without notice.

11
Crommelins Generator Operation & Instruction Manual
9. SPECIFICATIONS - DIESEL
MODEL
CG40YDE Series
CG69YDE Series
CG80ZDE Series
CG80KDE Series
Type
Sincro Alternator,
2 Pole, Single
Phase
Sincro Alternator,
2 Pole, Single
Phase
Sincro Alternator,
2 Pole, Single
Phase
Sincro Alternator,
2 Pole, Single
Phase
Voltage regulating
system
Capacitor
Capacitor
Capacitor
Capacitor
AC Output - Rated
Voltage-Frequency
V-Hz
240 - 50
240 - 50
240 - 50
240 - 50
Rated output
(Watts)
3800
5000
5000
5000
Maximum output
(Watts)
3500
5500
6000
6000
Rated power factor
1.0
1.0
1.0
1.0
MODEL
L70
L100
1B40
KD500
Type
YANMAR Air-
cooled diesel
engine
YANMAR Air-
cooled diesel
engine
Hatz diesel engine
Kohler diesel
engine
Displacement mL
320
435
462
505
Fuel
Automotive
Diesel
Automotive
Diesel
Automotive
Diesel
Automotive
Diesel
Fuel tank capacity L
2.7
4.7
5.0
5.0
Engine oil capacity L
1.05
1.6
1.5
1.5
Rated continuous
operation H
1.3
1.8
1.8
1.88
Starting system
Electric Start
Electric Start
Electric Start
Electric Start
¾ Load Fuel
Consumption (L/H)
1
1.3
1.4
1.4
Noise Level
(db@7m)
81
81
82
82
Direction of
rotation
Counter-clockwise
Counter-clockwise
Counter-clockwise
Counter-clockwise
Length (mm)*
930
930
960
960
Width (mm)
520
520
700
700
Height (mm)
850
850
910
910
Dry weight (kg)
85
120
130
130
Manufacturer’s
Warranty
2 Years
2 Years
2 Years
2 Years
Engine Warranty
2 Years
2 Years
2 Years
3 Years
NOTE: Specifications are subject to change without notice.
12
Crommelins Generator Operation & Instruction Manual
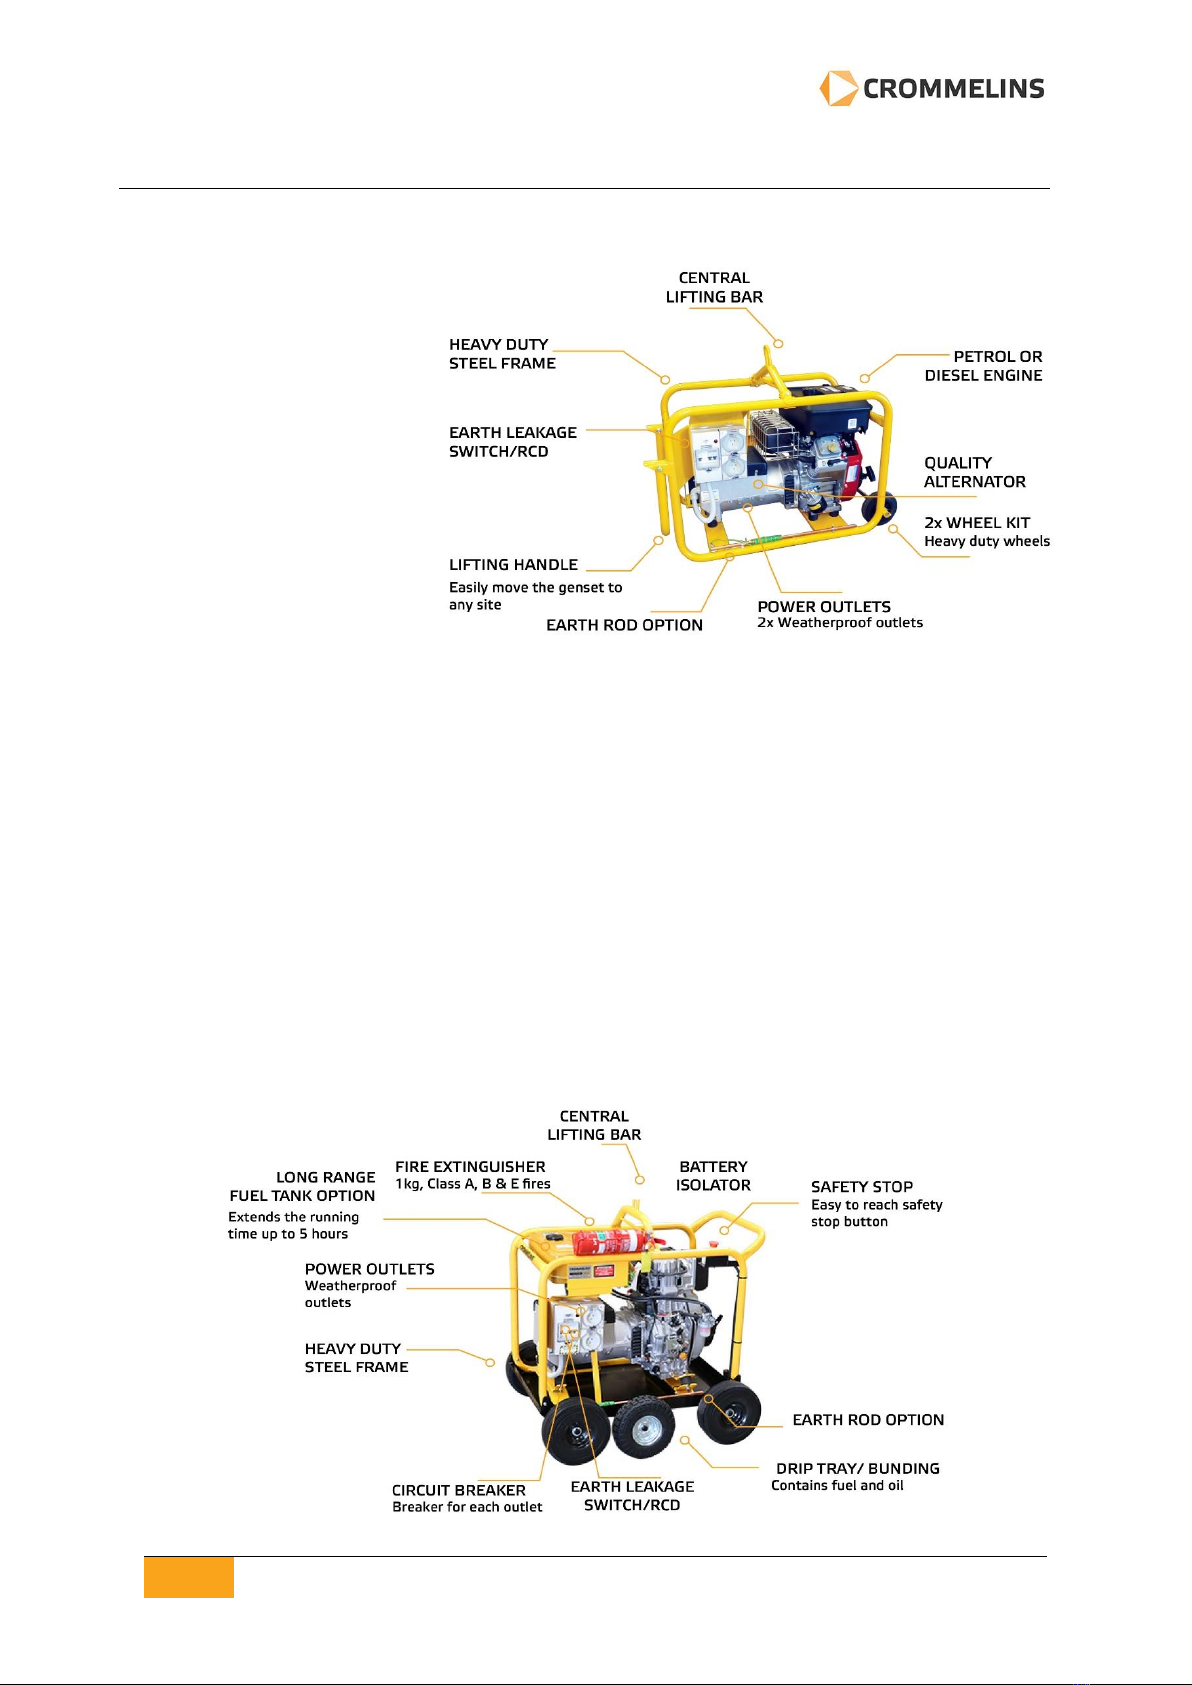
10. FEATURES
Mine Spec Standard
•Earth leakage switch/RCD
•Circuit breakers
•2 x Weatherproof (IP66) outlets
•Emergency stop button
•Lockable battery isolator
•Bunding
•1kg fire extinguisher
•Electric start with sealed battery
•4x or 6x Wheels (larger models)
•2 x Wheels with fold out handle
•Central lifting point
Optional Extras for Mine Spec
•Anderson jump start plug
•Recoil lockout
Hire Pack Standard
•Earth leakage switch
•Circuit breakers
•Weatherproof outlets
•Central lifting bar
•Lifting handle
•2x Wheel kit
Optional Extras
•Long range fuel tank
•Earth rod & lead
•Drip tray
•2x or 4x Wheel kit
Electric Start Option
•Battery included

13
Crommelins Generator Operation & Instruction Manual
11. “HOW-TO” MAINTENANCE
Maintenance is essential to give a safe and dependable service. The following sections provide
information on how to care for your generator properly and safely. This includes basic inspections and
simple maintenance procedures. Other service tasks that are more difficult, or require special tools
should be carried out by an authorised Crommelins service agent.
WARNING
•ALWAYS read and follow the maintenance recommendations and schedules in this manual, and
MAKE SURE you have the appropriate tools and skills required.
•FAILURE to properly maintain this generator, or improper maintenance, or failing to correct a
problem before operation, could result in a significant malfunction in which you can be seriously
injured or killed.
•MAKE SURE the engine is stopped and cooled before starting any maintenance, servicing, or
repair.
NOTE: It is recommended to use ear protection when performing operation, maintenance, and repair
of the generator set.
11.1 ENGINE OIL CHANGE (refer to engine instruction manual for full details)
NOTE: Before changing oil, make sure there is a suitable way to dispose of the old oil. Do not pour it
down sewage drains, onto garden soil or into open streams. Your local zoning or environmental
regulations will give you more detailed instructions on proper disposal.
For a new engine, the initial oil change should be performed after 20 hours. Thereafter, change oil as per
the engine’s instructions manual. To change the oil, follow these steps:
STEP 1 Drain oil by removing the drain plug and the oil filler cap while the engine is warm.
STEP 2 Reinstall the drain plug and fill the engine with oil until it reaches the upper level on the oil filler
cap.
STEP 3 Use fresh and high-quality lubricating oil to the specified level as outlined by the section “PRE-
OPERATION CHECKS”. If contaminated or deteriorated oil is used or the quantity of the engine oil
is not sufficient, engine damage will result, and its life will be greatly shortened.
STEP 4 Dispose of oil in accordance with your local zoning or environmental regulations.
11.2 SERVICING THE AIR CLEANER
Maintaining an air cleaner in proper condition is very important. Dirt induced through improperly
installed, improperly serviced or inadequate elements causes damage and wears out the engine. Always
keep the element clean by following these steps:
STEP 1 Remove the bolt off the air cleaner cover.
STEP 2 Remove the air cleaner cover and cleaner element.
STEP 3 Urethane foam: wash urethane foam element in washing oil (kerosene) or diesel fuel. Then
saturate the element in a mixture of 3 parts kerosene or diesel fuel and 1-part engine oil.
STEP 4 Squeeze the element to remove the mixture and install it in the air cleaner.
NOTE: Instead of washing oil (kerosene), it is possible to wash the urethane foam element in a
solution of mild detergent and warm water. Then rinse the element thoroughly in clean water. Allow
the element to dry properly. Soak the element in clean engine oil and squeeze out excess oil.

14
Crommelins Generator Operation & Instruction Manual
11.3 CLEANING AND ADJUSTING SPARK PLUG
STEP 1 If the plug is contaminated with carbon, remove and clean it with a plug cleaner or wire brush.
STEP 2 Adjust the electrode gap to manufacturer’s specifications –refer to engine’s instruction manual.
11.4 CLEANING FUEL STRAINER
Dirt and water in the fuel are removed by the fuel strainer. To clean the strainer, follow these steps:
STEP 1 Remove the strainer cup and clean out any water and dirt.
STEP 2 Clean the screen and strainer cup with petrol.
STEP 3 Tightly fasten the cup to main body, making sure to avoid fuel leak.
12. MAINTENANCE SCHEDULE
12.1 ROUTINE INSPECTIONS
This inspection schedule applies to normal operating conditions. If you operate your generator under
severe conditions, such as sustained high-load or high-temperature operation, or use in dusty conditions,
consult your Crommelins service agent for recommendations applicable to your needs and use.
DAILY
•Check oil level.
•Check all components according to “PRE-OPERATION CHECKS”.
EVERY 50 HOURS
•Wash air-cleaner element (more often if used in dirty/dusty
environments).
•Check spark plug, clean if necessary.
EVERY 100 HOURS
•Change engine oil. * More often if used in dirty/dusty environments.
•Clean spark arrestor.
EVERY 200 HOURS
•Adjust spark plug gap.
•Clean fuel strainer.
EVERY 500 HOURS
•Replace spark plug and cleaner element.
•Clean and adjust carburettor, valve clearance and valve seat along with
cylinder head.
EVERY 1000 HOURS
(24 MTHS)
•Inspect control panel parts.
•Check rotor and starter.
•Replace engine mount rubber.
•Overhaul engine.
•Change fuel lines.
NOTE: (*) Initial oil change should be performed after first 20 hours of use. Thereafter, change oil as
per the engine’s instructions manual.
12.2 PERIODIC OPERATION AND INSPECTION
When generator is used as an emergency electrical power source, periodic operation and inspection is
required to ensure generator will operate when needed.

15
Crommelins Generator Operation & Instruction Manual
Fuel and engine oil will deteriorate overtime, and this may cause the engine to be difficult to start and
will result in improper engine operation and fault.
CAUTION
Since the fuel will have deteriorated overtime, replace with fresh fuel periodically, every (3) months is
recommended.
STEP 1 Check the fuel, engine oil and air cleaner.
STEP 2 Check there are no leaks from the engine oil and /or fuel.
STEP 3 Start engine and check it runs smoothly and has a stable power output.
STEP 4 Apply a power load of approximately ¾ of generator continuous output capacity and allow to run
for approximately 10-15 minutes.
13. TRANSPORTATION AND STORAGE
13.1 TRANSPORTATION
When transporting the generator, make sure that the fuel is drained from the tank.
CAUTION
•To prevent fuel spillage due to vibration and impact, NEVER transport the generator with a full fuel
tank.
•ENSURE the fuel tank cap is securely fitted and tight.
•NEVER allow the generator to be exposed to direct sunlight or at high temperatures as this may
cause expansion of the fuel tank and a potential danger of fire or explosion.
•KEEP the fuel in a separate storage tank when transporting.
STEP 1 Turn the engine switch to the “STOP” position.
STEP 2 Drain the fuel from the tank.
STEP 3 Secure the tank cap.
CAUTION
•DO NOT place any heavy objects on the generator.
•ENSURE the generator is positioned on a flat surface and secured safety in the transport vehicle.
13.2 STORAGE
The following procedures should be followed prior to storage of your generator for periods of 6 months
or longer:
•Drain fuel from fuel tank carefully by disconnecting the fuel line. Fuel left in the fuel tank will
eventually deteriorate making engine starting difficult.
•PETROL ONLY - Remove the carburettor float chamber and drain the carburettor.
•Change engine oil.
•Check for loose bolts and screws, tighten them if necessary.
•Clean generator thoroughly with oiled cloth. Spray with preservative if available. (NEVER USE WATER
TO CLEAN GENERATOR).
•Pull starter handle until resistance is felt, leaving handle in that position.
•Store generator in a well ventilated, low humidity area.

16
Crommelins Generator Operation & Instruction Manual
14. TROUBLE SHOOTING
When generator engine fails to start after several attempts, or if no electricity is available at the output
socket, check the following chart. If your generator still fails to start or generate electricity, contact your
nearest service agent for further information or corrective procedures. To locate your nearest service
agent, go to www.crommelins.com.au.
When Engine Fails to Start:
Check if choke lever is in its proper position.
Set the choke lever to “CLOSE” position.
Check if fuel valve is open.
If closed, open fuel valve.
Check fuel level.
If empty, refill fuel tank making sure not to
overfill.
Check if engine switch if in OFF position.
Turn engine switch to “ON”.
Check to make sure generator is not
connected to an appliance.
If connected, turn off the power switch on
the connected appliance and unplug.
Check spark plug for loose spark plug cap.
If loose, push spark plug cap back into place.
Check spark plug for contamination.
Remove spark plug and clean electrode.
NO Electricity is Generated at Receptacle:
Check to make sure AC circuit breaker is in the
“ON” position.
After making sure that the total wattage of
the electrical appliance is within permissible
limits and there are no defects in the
appliance, turn the AC circuit breaker to the
“ON” position. If breakers continue to
actuate, consult your nearest service agent.
RCD switch is “OFF” or tripped.
Switch to “ON” if tripped, shutdown the
generator and remove faulty appliance and
have it inspected by an electrician
Check to see if engine starting was attempted
with appliances already connected to
generator.
Turn off switch on the appliance and
disconnect cable from receptacle.
Reconnect after generator has been started
properly.
Low power.
Contact your nearest Crommelins Machinery
service agent.
-------------- END OF MANUAL --------------
Head Office: (08) 9350 5588
www.crommelins.com.au
Sales: 1300 650 659
Customer Service 1300 554 524
email@crommelins.com.au
Head Office: (08) 9350 5588
www.crommelins.com.au
This manual suits for next models
10
Table of contents
Other Crommelins Portable Generator manuals

Popular Portable Generator manuals by other brands

Senci
Senci SCDE12LS3 user guide

Albo marine
Albo marine MN 305 Operation manual

Champion Global Power Equipment
Champion Global Power Equipment 100520 quick start guide

Champion Global Power Equipment
Champion Global Power Equipment 201083 quick start guide

Briggs & Stratton
Briggs & Stratton 30380 Illustrated parts list

KFSSI
KFSSI Magravs 1-2016 user guide


