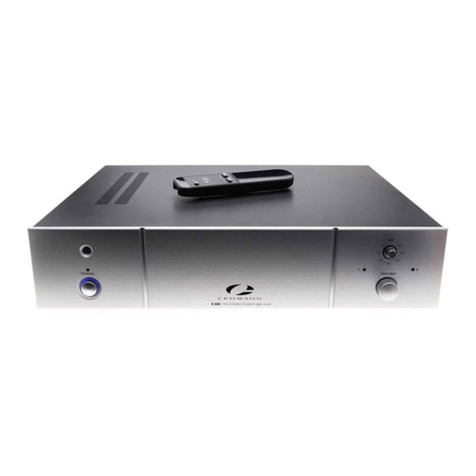
Crowson BMP-3s User manual

BMP-3s
Stereo Bass Management Pre-Amplifier
OPERATING MANUAL

FL FR
PRE OUT
Subwoofer
LFE
Surround Sound
Receiver
Stereo Amplifier
RCA
Y adaptor
Left TES
Transducer
Right TES
Transducer
BMP-3s
Connect the
supplied 12V
AC adaptor
(center neg.)
out in
SYSTEM CONNECTIONSSYSTEM CONNECTIONS
INTRODUCTION
Thank you for your purchase of the Crowson Technology BMP-3S (Stereo Bass
Management Pre-Amplifier). The BMP-3S is a bass management device, mixer and pre-
amplifier, featuring a variable low-pass filter and gain control. The BMP-3S is intended
for use with the TES 100 (Tactile Effects System) and the A200 Power Amplifier or other
suitable 2-Channel power amplifier.
INSPECTION
Unpack and inspect the BMP-3S box and package. If obvious physical damage is
noticed, contact the carrier immediately to make a damage claim. We suggest saving the
shipping carton and packing materials for safely transporting the unit in the future.
INSTALLATION
Connect the BMP-3S to your receiver using standard RCA interconnect cables (and/or
"subwoofer" cable). The BMP-3S is designed to accept up to three (3) channels of
source information from your audio receiver. The input jacks, located on the rear panel
of the BMP-3S, are clearly marked, "L," "R," and "LFE." If your receiver does not have
L/R pre-outputs, you may also use TAPE or AUX outputs, although these are fixed
volume signals and will not respond to the master volume control on your audio
receiver. You may also choose not to use the L/R inputs, although this will negate the
ability to achieve STEREO motion effects, and the TES 100 actuators will respond only
to the information received from the LFE channel.
Connect the supplied 12V AC power adapter (male) to the BMP-3S (female)
port, located on the rear panel and marked "DC 12V" (fig 1). Connect the adapter to a
standard 110V electrical outlet. The blue LED indicator should illuminate, indicating
that the unit is on.
Connect the BMP-3S to the A200 Amplifier (or other suitable amplifier) with
standard RCA interconnects (L/R). Ensure that you maintain left (L) and right (R)
integrity when connecting the BMP-3S outputs to the inputs of your power amplifier.
Please Refer to the A200 and TES 100 manuals to complete the installation of
the entire system.
SETTING AND CALIBRATING THE GAIN CONTROL
The BMP-3S front panel features a gain control knob, which allows you to control the
intensity of the motion. After the installation is complete (TES actuators, A200 and
BMP-3S), you will need to calibrate the gain/volume levels of each component in order
to maximize the performance of the entire system.
To begin, set the gain control knob on the BMP-3S to the center position
(indicated by the detent or "tick" on the dial). Next, set the gain control knob on each
channel of the A200 Power Amplifier to the minimum position (full counterclockwise).
Initiate the movie or music clip of your choice and take a seat in your TES-equipped
chair or couch. Next, increase the gain control knob on each/both channels of your
A200 Power Amplifier to a motion level that is appropriate to your taste. If you are
unable to achieve an adequate level of motion effects with the BMP-3S set to center
position, adjust the gain control knob on the BMP-3S clockwise until your A200 is
delivering desired effects.
SETTING THE VARIABLE LOW-PASS FILTER
The BMP-3S features a low-pass filter (LPF), controlled by a knob on the front panel.
This feature allows you to adjust the maximum operating frequency of the TES 100
actuators from 20Hz to 500Hz, depending on your preference. You may find that your
favorite level for music is different from your favorite level for movies. The variable low-
pass filter allows quick and easy adjustments to perfectly personalize each experience.
SPECIFICATIONS
Size: L=4.8" x W=2.0" x H=3.6"
Inputs: 3 RCA, unbalanced Left, Right and LFE
Outputs: 3 RCA, unbalanced Left, Right and Mono
Controls: Low Pass Filter, 20Hz - 500Hz continuously variable
Gain: -20dB (min) to +20dB (max) continuously variable
Power: 12VDC 100mA, center negative (adaptor supplied)
Weight: 1.5lbs

LIMITED TWO (2) YEAR WARRANTY
This product is warranted to the original consumer purchaser to be free from
defects in materials and workmanship under normal installation, use and service
for a period of two (2) years from the date of purchase as shown on the
purchaser's receipt.
Crowson Technology, LLC's obligation under this warranty shall be limited to
repair or replacement (at our option), during the warranty period of any part
which proves defective in material or workmanship under normal installation,
use and service, provided the product is returned to CrowsonTechnology LLC,
TRANSPORTATION CHARGES PREPAID.
Products returned to us must be clearly marked with an RMA number and
include a copy of the purchase receipt. In the absence of such purchase receipt,
the warranty period shall be two (2) years from the date of manufacture.
This warranty shall be invalid if the product is damaged as a result of
defacement, misuse, abuse, neglect, accident, destruction or alteration of the
serial number, improper electrical voltages or currents, repair, alteration or
maintenance by any person or party other than our own service facility or an
authorized Service Center, or any use violative of instructions furnished by us.
This two-year warranty is in lieu of all expressed warranties, obligations or
liabilities. ANY IMPLIED WARRANTIES, OBLIGATIONS, OR LIABILITIES,
INCLUDING BUT NOT LIMITED TO THE IMPLIED WARRANTIES OF
MERCHANTABILITY AND FITNESS FOR A PARTICULAR PURPOSE, SHALL
BE LIMITED IN DURATION TO THE TWO YEAR DURATION OF THIS
WRITTEN LIMITED WARRANTY. Some states do not allow limitations on how
long an implied warranty lasts, so the above limitation may not apply to you.
IN NO EVENT SHALL WE BE LIABLE FOR ANY SPECIAL, INCIDENTAL
OR CONSEQUENTIAL DAMAGES FOR BREACH OF THIS OR ANY OTHER
WARRANTY, EXPRESSED OR IMPLIED, WHATSOEVER. Some states do not
allow the exclusion or limitation of special, incidental or consequential damages
so the above limitation or exclusion may not apply to you. This warranty gives
you specific legal rights, and you may also have other rights which vary from
state to state.
Table of contents
Other Crowson Amplifier manuals


