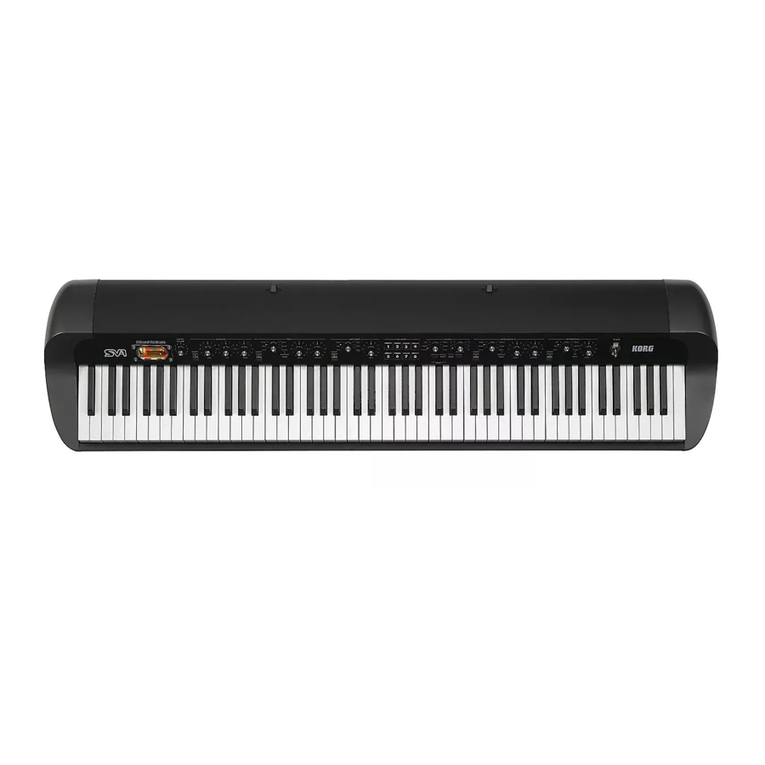
Crumar MOJO User manual

THE ULTIMATE
TONEWHEEL ORGAN
EXPERIENCE
USER'S MANUAL
Firmware version 1.00
www.Crumar.it
CRUMAR MOJO DESKTOP USER'S MANUAL - Page 1/20

Congratulations for purchasing your new Crumar Mojo Desktop. We are confident
that this instrument will e the perfect expansion to your live and studio setup, as well as
to your musical inspiration. Read through this useful manual to explore its capa ilities
and, most importantly, have fun!
SAFETY INFORMATION
–Do not open the in trument. The in trument can be opened and repaired only
by qualified per onnel. Unauthorized opening void the warranty.
–Do not expo e the in trument to rain or moi ture.
–Do not expo e the in trument to direct unlight.
–Be careful not to infiltrate powder and liquid in ide the in trument. Nor on
the out ide.
–If liquid get in ide the unit, remove the power immediately to prevent the ri k
of electric hock and contact a ervice center a oon a po ible.
–Do not clean u ing abra ive cleaner a they may damage the urface .
–Plea e keep all packaging in ca e you need to tran port the in trument to a
ervice center.
–The in trument can be u ed in any Country that ha a main voltage between
100 Vac and 240 Vac.
–Do not touch the AC adapter with wet hand .
CRUMAR MOJO DESKTOP USER'S MANUAL - Page 2/20

WARRANTY
–Crumar Mojo De ktop i ubject to 12 month manufacturer' warranty.
–Warranty exten ion are at the di cretion of the retailer.
–Damage cau ed by mi u e, improper maintenance or tran portation are not
covered by thi warranty.
–During the warranty period, the cu tomer i entitled to repair or replacement
of any part con idered defective at no charge.
–The po ible replacement of the entire product i at the manufacturer'
di cretion.
CHAPTER SUMMARY:
1. The ound of Mojo De ktop p. 4
2. The Command Panel p. 5
3. The Rear Panel p. 7
4. Di play Page p. 8
5. Global Setting p. 11
6. File Operation p. 12
7. Organ Edit Parameter p. 13
8. Effect Edit Parameter p. 14
9. The USB Port p. 18
10. MIDI Map p. 19
11. Specification p. 20
NOTES ABOUT THIS MANUAL
Thi manual can be con idered a live document, a it may be updated in future
according to po ible change introduced in new firmware update . We recommend
to keep an eye at the upport ection of the Crumar web ite and check for new
ver ion of both the manual and the in trument' firmware.
You will find that ome concept might be repeated more than once, thi happen
becau e there could be a mention in a chapter, and a detailed explanation in a later
chapter.
We recommend you to read thi manual with the in trument in front of you, o you
can put into practice what you are reading and can have an in tant feedback of the
notion here explained.
CRUMAR MOJO DESKTOP USER'S MANUAL - Page 3/20

1. THE SOUN OF MOJO ESKTOP
VB3-II virtual tonewheel organ
The Crumar Mojo De ktop i the perfect hardware counterpart of the
mo t acclaimed tonewheel organ imulator virtual in trument
known a GSi VB3-II. It reflect the exact ame ound engine, with the
ame parameter et, mo tly the ame function (con idering the
difference between a oftware and an hardware in trument), and can
even exchange the ame Program and Bank of program . While the
GSi VB3-II oftware can run on regular computer (Window and
Mac), the Mojo De ktop i ba ed on one of the mo t modern and dependable
embedded proce ing unit , and doe n't need a full computer to run. De pite that,
the ound that i produced i 100% the ame, with every ingle detail.
Main feature :
•Full polyphony (61 upper + 61 lower + 25 pedal = 147 note )
•91 modeled tonewheel with accurate pha e ynchronization
•Adju table leakage noi e and cro modulation between tonewheel
•A total of 22 different tonewheel generator to choo e from
•Generator haping for a total of 154 generator combination
•Adju table global tuning from 430 to 450 Hz
•Foldback on 16" deactivatable
•Complex wheel
•Re i tor wiring with multiple option
•Reali tic “run” motor wow & flutter
•Bu bar and 9 key contact imulation
•String Ba with adju table relea e time
•Loudne "robbing" effect
•Single triggered percu ion with natural capacitor di charge/recharge
•Adju table Percu ion Level & Decay
•Vibrato/Choru virtual canner
•Adju table Vibrato Scanner depth & mix
•Dynamic tube overdrive imulation
•Spring Reverb (pre) and Digital tereo reverb (po t)
•Rotary peaker imulation with virtual microphone po itioning, tube overdrive, tube feedback
•Rotor "Front Stop" brake po ition with adju table preferred po ition
•Upper and Lower manual SPLIT with adju table plit point
•Support pedal u tain
•Room for 128 Program
•Color Touch 3,2” Di play
•9 Phy ical drawbar a ignable to each of the 3 manual
•Large Illuminated button for percu ion, Choru /Vibrato and Rotary Speaker control
•Large encoder knob for Choru /Vibrato type election
•Six potentiometer for immediate parameter
•Input for Swell Pedal and Foot Switch
•Two MIDI input
•Two USB ho t input
•Cla -compliant USB-MIDI port
•Headphone output
•Balanced Stereo output
CRUMAR MOJO DESKTOP USER'S MANUAL - Page 4/20

2. THE COMMAN PANEL
In thi chapter we get familiar with the command panel of the Mojo De ktop. Mo t of
the ound editing i done via the large color di play in the middle of the panel, while
real-time performance command are directly available on the panel under the form
of large illuminated button and knob for an ea y reach while playing mu ic.
2.1 - KNOBS
From left to right, you have the volume, ba & treble equalization, keyclick volume,
overdrive level, and digital reverb level. The e knob are alway active and are
internally connected to their re pective parameter . The Volume knob i a general
volume by default, but can be optionally et to reflect the volume parameter tored
with each ingle Program.
PLEASE NOTE: the spring rever effect level can only e adjusted from the appropriate
parameter from within the editing page, or from external MIDI CC message.
2.2 – ROTARY SPEAKER SPEE BUTTONS
The two button labeled BRAKE and SPEE are u ed to control the internal Rotary
Speaker imulator peed . Pu h SPEED to witch between low and fa t, the light will
animate reflecting the rotation of the ba rotor. Pu h BRAKE to top the rotation;
pu h BRAKE again to return to the previou peed. If the Memphis Style i active ( ee
parameter editing chapter ), the light will not animate.
CRUMAR MOJO DESKTOP USER'S MANUAL - Page 5/20

2.3 - VIBRATO/CHORUS
Ju t like on the keyboard ver ion of the Crumar Mojo, and like on a vintage
tonewheel organ, there are two large button for turning the effect on or off on the
upper or on the lower manual independently, and a large knob that let you choo e
the type of effect to u e between the 6 po ible combination : V1, C1, V2, C2, V3, C3
wherea the 'V' produce ju t a vibrato effect and the 'C' produce a choru effect. In
the Mojo De ktop the elector i a rotary encoder with 6 LED that indicate the
current election. The LED will update according to the current Program.
PLEASE NOTE: just like on a vintage tonewheel organ, when the C/V effect is turned on
for the lower manual, it's also applied to the pedal oard tones.
2.4 - PERCUSSION
Like on the the vintage tonewheel organ , the command panel feature the four
percu ion witche that have the following function , from left to right:
1. Turn the percu ion on or off.
2. Select between oft or normal percu ion volume.
3. Select between fa t or low decay.
4. Select the harmonic applied to the percu ion tone.
PLEASE NOTE: the percussion is only present at the upper manual. Also, when the
percussion is active, the 1' draw ar will e muted.
2.5 - MANUAL SELECTION BUTTONS
The three button in the middle of the panel are u ed to elect which of the three
manual (upper, lower or pedalboard) the 9 phy ical drawbar hall control. The
re pective LED indicate the active manual. They blink when MIDI note me age are
received for each manual eparately, according to the note channel .
2.6 - COLOR TFT TOUCH SCREEN
The 3,2” di play in the middle of the panel how all the parameter editing page ,
global etting , Program and other u eful information . It' mainly u ed to acce
the ound editing without the need of an external unit. Next to the touch creen
there i a VALUE encoder with pu h-button. Thi can be u ed to witch between
Program in the Home Page, or to in ert value in the editing page .
PLEASE NOTE: if you have trou les using the fingers for activating certain small items
shown on the screen, you might want to use a stylus, a pencil or just the tip of your
fingernails. This is a resistive touch screen, so any o ject will work for activating the touch
sensor.
CRUMAR MOJO DESKTOP USER'S MANUAL - Page 6/20

3. THE REAR PANEL
All connection are found on the back panel of the Crumar Mojo De ktop. From left
to right, on the upper row we find:
–Swell Pedal input: thi i a TRS Jack that receive an expre ion pedal with a
10K to 50K linear potentiometer. Thi i mainly u ed to modulate the “Swell”
(expre ion) pedal of the tonewheel organ.
–Foot Switch input: thi i a TRS Jack that receive Crumar' dual foot witch
u ed for witching the Rotary Simulator effect peed . Plea e refer to Crumar'
web ite for information about the acce orie .
–Two parallel MI I inputs. The e two MIDI input are internally merged, o you
can connect two traditional MIDI keyboard and have them end on two
different channel (u ually 1 for upper and 2 for lower) o you can play the two
manual of the tonewheel organ imultaneou ly without having to u e an
external merging unit.
On the bottom row we have:
–A/C Adapter input. We recommend to u e the adapter that come with the
unit. Should you lo e your adapter, ince thi i a tandard connector, you can
replace it with a different adapter type that ha a 2.1 DC jack with center
po itive, and carrie at lea t 2000 mA of current at 9V or 12V. If you're uncertain,
call your dealer or contact Crumar.
–Power button. Make ure thi i pu hed in to rock the world.
–Two SYSTEM USB ports. The e are USB-ho t port that can accept external
device . In the ca e of the Mojo De ktop, they can accept Cla -compliant USB-
MIDI device uch a ma ter keyboard or other controller , or USB fla h drive
for importing/exporting Program and Bank or for performing the Firmware
update.
–MI I I/O USB: thi i a Device type USB port, u ed mainly to connect the Mojo
De ktop to your computer for MIDI input and output connectivity.
–Audio outputs L & R: the e are TRS Jack that carry balanced audio ignal .
–Headphones: connect your headphone here.
CRUMAR MOJO DESKTOP USER'S MANUAL - Page 7/20

4. ISPLAY PAGES
4.1 - HOME PAGE
The Home Page how , from top to bottom:
–the Program number and name
–all drawbar po ition
–value of all ix knob
–oft-button for going to the GLOBAL
etting or to the EDIT page
Tap on the Program number in the top left
corner to acce the keypad page, where
you can in ert a number between 0 and 127
to recall the de ired Program. Tap on the Program name to acce the Program li t
that you can croll up and down to reach the de ired Program. Turn the VALUE
encoder to croll the Program li t while the home page i di played.
4.2 - KEYPA
U e the keypad to type a number between 0
and 127. Tap DONE to jump to the de ired
Program, or Back to return to the previou
page.
4.3 - PROGRAM LIST
To croll the li t up or down, tap on the
arrow on the right of the creen or turn the
VALUE rotary encoder. To recall a Program,
tap on the name of the de ired program or
pu h the VALUE encoder. To return to the
previou page, tap on BACK on the bottom
right corner.
CRUMAR MOJO DESKTOP USER'S MANUAL - Page 8/20

4.4 - E IT PAGES
Tap on the EDIT oft-button in the bottom
right corner of the home page to reach the
main EDIT menu page.
Here you can tap on the EDIT ORGAN
button to acce the parameter li t
dedicated to the organ part, or EDIT
EFFECTS to acce the parameter li t
dedicated to the effect .
To generate an initialized Program, tap the
INIT button on the top right corner. Tap
BACK to return to the previou page. After your editing i done, you can return to thi
page and tap the WRITE button to go to the page that let you give a name to your
program and choo e a memory location where to tore it.
4.5 - PARAMETER E IT
Once in an EDIT page, you can croll the
parameter li t tapping on the up and down
arrow on the right, or by rotating the VALUE
encoder. The current parameter i highlighted
in blue.
To activate a parameter for editing, tap on the
parameter name or pu h the VALUE encoder.
The active parameter become highlighted in
red. To change the parameter value, u e the up and down arrow on the right or
rotate the VALUE encoder. You can keep your finger on the arrow for fa ter
parameter croll.
When you're done with your editing and you're ready to ave your new Program, tap
on the BACK button to return to the previou page, then tap the WRITE button.
Sound parameter are explained in detail later in thi manual, in a eparate chapter.
CRUMAR MOJO DESKTOP USER'S MANUAL - Page 9/20

4.6 - PROGRAM WRITE
Fir t, you hould give your Program a name.
U e the QWERTY keyboard for thi , ju t like
you normally do with a martphone. To
change the cur or po ition, tap on the text
field in the de ired po ition or u e the
VALUE encoder. Tap on the 123 button to
witch to the number & ymbol page, u e
the SHIFT button to witch to capital . Tap
on BACK if you changed your mind and
need to continue editing, otherwi e tap on
DONE to proceed with the next page.
PLEASE NOTE: the keys on the virtual qwerty key oard are pretty small. If you have an
hard time hitting the correct keys with your finger, try using a stylus or the tip of your
fingernail.
In the WRITE page you can elect the
memory location where to tore your new
Program. By default, the current location i
elected, o you can ea ily overwrite the
current Program. To choo e a different
location, turn the VALUE encoder. Tap on
CONFIRM to permanently tore your
Program. Thi will ave the Program and
return to the home page.
4.7 - GLOBAL MENU
From the home page, tap on GLOBAL to go
to the main GLOBAL menu. Tap on
SETTINGS to go to the li t of global etting .
Tap on FILES to go to the li t of file function
(import/export of Program and Bank , and
Firmware update). Tap BACK to return to the
home page.
Tap ABOUT to open the page that how the
current firmware ver ion and other
information .
CRUMAR MOJO DESKTOP USER'S MANUAL - Page 10/20

5. GLOBAL SETTINGS
The li t include the following item :
–Tuning A=Hz; Thi i the global
tuning, where the reference A note
can be et to a frequency between
430 and 450 Hz. The default value i
440 Hz.
–MI I Channel selection for Upper,
Lower and Pedalboard. The default
value are, re pectively, 1, 2 and 3.
The e can be et on any channel between 1 and 16. Setting two ore more
manual on the ame channel will cau e them to play imultaneou ly when
that channel i received.
–Receive MI I Program: et thi to ON (default) if you wi h to witch program
from the external MIDI Program Change event. Set to OFF to ignore the event.
–Receive MI I Control: et thi to ON (default) for controlling certain
parameter from external MIDI Continuou Controller me age . Set to OFF to
ignore the event .
–Send MI I Program: et to ON to end MIDI Program Change event when a
new Program i recalled. Set to OFF to ignore (default).
–Send MI I Control: et to ON to end MIDI Continuou Controller me age .
Set to OFF to ignore (default).
–Volume is Global: et to ON (default) to u e the Volume knob a a global
volume. Set to OFF if you wi h the volume parameter to be et according to the
Program .
–MI I CC #64 Function: decide what to do when a MIDI CC #64 event (Su tain
Pedal) i received:
–OFF (default): ignore the me age ;
–Rotary Speed (Latch): u e the u tain pedal to witch between rotary peed in latched
mode, i.e. the peed change each time the pedal i pu hed and relea ed;
–Rotary Speed (Mom.): u e the u tain pedal to witch between rotary peed in
momentary mode, i.e. hold the pedal down for low, relea e for fa t;
–Sustain Upper Lower All: decide whether to u e the u tain pedal to u tain note on
the upper manual only, or on the lower manual only, or on both manual .
CRUMAR MOJO DESKTOP USER'S MANUAL - Page 11/20

6. FILE OPERATIONS
The Crumar Mojo De ktop upport any USB
fla h drive formatted with the FAT32
file y tem. If you have bought a new drive, you
don't need to format it. If you are a Mac u er
and need to format an exi ting drive, make
ure you're formatting it u ing the FAT32
file y tem. Every file function a ume that the
drive i connected to one of the two Sy tem
USB port on the back of the in trument. If the
drive i not pre ent, the di play will pop up an
alert window.
Import Program. U e thi function to import ingle Program that were previou ly
exported either by thi or another Crumar Mojo De ktop or by the VB3-II virtual
in trument. Make ure the file are on the drive and the drive i connected. After
tapping on thi item, the drive i canned for compatible file and a new li t i
loaded. Scroll the li t u ing the up and down arrow or the VALUE encoder, then tap
on the Program you wi h to import or pu h the VALUE encoder. The program i
imported in a temporary memory location. You can audition and edit it, but it will be
lo t if you witch to a new Program or import a new Program from di k, unle you
go to the WRITE page and tore it into a memory location of your choice.
Export Program. U e thi function to export the current Program. A new file will be
created on the connected drive with the ame Program name. Thi file can be later
imported on thi or on another Crumar Mojo De ktop or in the VB3-II virtual
in trument.
Import Bank. U e thi function to import the whole Program Bank containing all 128
Program . The proce i imilar to importing ingle Program . The di k i canned for
valid file , then a new li t i loaded with the exi ting bank file that you can load.
Tapping on a bank will replace the entire bank with the new one.
Export Bank: U e thi function to export the whole Program Bank to di k. The Bank i
alway exported a a file named “MojoDesktop.VB3Bank”. If thi file i already pre ent
on di k, it will be overwritten.
Update Firmware. When a new firmware i
relea ed, after you've downloaded the file and
copied to the USB drive, u e thi function to
perform the update. Follow the on creen
in truction after tapping on thi item.
Factory reset. Tap on thi item to re tore the
entire Program Bank and all Global option to
factory condition .
CRUMAR MOJO DESKTOP USER'S MANUAL - Page 12/20

7. ORGAN E IT PARAMETERS
–Generator: elect a tonewheel generator from thi li t. Each generator i ba ed
on actual value a mea ured from real con ole organ of the B/C/A erie .
–Generator Shape: elect between OFF (no haping) or 3 level of CUT and 3
level of BOOST. The e will modify the amplitude chart of the generator value
according to different po ition along the generator. Thi parameter doe not
apply any equalization to the ound. Level 1 can boo t or cut tarting from
wheel n. 25; level 2 tart from wheel n. 52; level 3 tart from wheel n. 72.
–Leakage: adju t the background hum & hi .
–Crosstalk: adju t the amount of cro talk cau ed by the analog circuitry. Thi
i a very important element of the tonewheel organ ound.
–Xtalk Shape: ince the cro talk con i t of both ba and treble tone , thi
parameter mixe between the pre ence of one or the other, left toward a
“rumble” noi e, right toward a “brilliant” noi e.
–Complex wheels: are pecial tonewheel only u ed for the fir t 12 tone wired
with the pedalboard. Un electing thi parameter will u e tandard inu
tonewheel .
–Foldback on 16': the fir t 16 wheel wired to the keyboard are u ually folded
back, thu tarting from wheel n.13 rather than from wheel n.1. If you wi h to
u e the fir t 12 wheel on the manual , uncheck thi option but you hould al o
uncheck the Complex wheel .
–Resistor wires: are the mall wire that in the vintage organ connect the
keyboard to the generator. Thi parameter offer three different value :
“Con ole: NEW”, a pecified by the original B3 pecification ; “Con ole: OLD”,
re ulting in a more pre ent low-end; “Spinet”, ame a “Con ole NEW” but
without the foldback.
–rawbar trims: the 9 parameter under thi ection can be u ed to adju t the
pre ence of each drawbar. Thi will apply on top of the actual drawbar
regi tration for both the upper and the lower manual.
–Percussion settings: et the parameter of the percu ion circuit uch a the
level when it' on normal or oft, the decay time when it' on low or fa t, the
overall level, and the loudne lo when the volume tab i et to normal.
–Perc Paradise Mod: thi i a “hack” that cau e the percu ion to never decay.
What' pecial in thi i that if you activate the canner vibrato effect, you'll
notice that the vibrato i applied to the re t of the drawbar but not to the
percu ion tone.
–Other settings: here you can adju t the depth of the vibrato circuit and the mix
amount that affect the choru etting , plu ome parameter related to the
generation of the KeyClick noi e.
–Preamp Bass / Treble: adju t the frequency re pon e of the organ' built-in
preamp circuitry.
–Split Toggle and Note: u e thi to activate the plit between upper and lower
manual, and to elect the plit point (lowe t note of the upper part).
CRUMAR MOJO DESKTOP USER'S MANUAL - Page 13/20

8. EFFECT E IT PARAMETERS
Parameter for the Spring Reverb are:
–Level: adju t the volume of the pring reverb which i alway po itioned before
the Rotary effect, and doe not exclude the Digital Reverb, which i po itioned
after the Rotary effect.
–Timbre: adju t the frequency re pon e of the reverberated ound according to
your ta te. In real life, different type of pring reverb tank give different
timbre .
–ecay: adju t the length of the reverberation.
–amp: when pring are made of a larger gauge they tend to dampen the
ound fa ter. Adju t the damping effect with thi parameter.
Parameter for the Rotary Speaker are:
–Rotary ON / OFF: witche the Rotary Speaker Simulator on or off. If you wi h
to u e an external rotary peaker (real or imulator), make ure thi parameter i
et to OFF.
–Horn slow / fast: adju t the peed off et of the horn for when the peed i on
low or on fa t.
–Bass slow / fast: ame a above but for the ba rotor.
–Horn up / down: adju t the acceleration and deceleration time of the horn for
the tran ition between the low and fa t peed . When the brake i engaged,
the power i taken off from the motor o the horn low down until topping
only driven by the centrifugal force, o the time between fa t and top may be
longer than from fa t to low.
–Bass up / down: ame a above but for the ba rotor.
–Balance: adju t the balance between the horn and the ba rotor.
–Ambience: a real amplifier tay in a real environment cau ing the
microphone to capture the ound reflection a well a the direct ound
coming from the peaker . Thi parameter adju t the amount of
environmental reflection .
–Cabinet: adju t the amount of re onance cau ed by the wooden cabinet.
–Mic Angle: adju t the angle between the two microphone at the horn,
ranging from 0 (both microphone in the ame pot) to 180 degree
(microphone at the oppo ite ide of the cabinet ). Thi imulation con ider
only three microphone , two for the horn and one for the ba rotor.
CRUMAR MOJO DESKTOP USER'S MANUAL - Page 14/20

–Mic istance: adju t the di tance between the microphone and the cabinet.
A longer di tance re ult in more ound di per ion, a horter di tance re ult in
a deeper proximity effect.
–Horn EQ: not all vintage rotary peaker have the ame quality for what
concern the ound coming from the horn, ome are brighter, ome are duller
or maybe ju t well balanced. Thi parameter let you adju t the treble re pon e
of the horn ound.
–Mid reflections: adju t the amount of ound reflection happening in the
middle of the tereo field.
–oppler intensity: the o called “Doppler” effect i the fundamental of the
“Le lie” effect that cau e the ound to be cyclically untuned while the ound
ource (the peaker) get farther or nearer to the li tened; thi parameter let
you adju t the amount of thi effect that i mo tly cau ed by the ound
reflection over the wall around the amplifier.
–ry Leak: ome of the dry ound coming from the peaker doe not reach the
rotating element and i mixed with the rotating ound. U e thi parameter to
adju t the amount of dry ignal you want to be mixed in.
–Bass Port: a real Le lie cabinet ha a hole in the back that erve for two
rea on : 1) let the heat from the motor ventilate out from the cabinet and 2)
act a a ba tuning port, like tho e found on modern peaker . If you put a
microphone in front of thi hole you get nothing but ub-ba frequencie . U e
thi parameter to adju t the amount of ub-ba you want to get into the mix.
–Tube feedback. Thi i a very important parameter that work on an a pect of
the whole amplification y tem that can dra tically vary both the dynamic
re pon e and the frequency re pon e, a well a have an impact on the
overdrive. When a Le lie cabinet i et very clo e to the Hammond organ and i
played at a high volume, there' ome ort of feedback between the tube , the
tran former and the pickup of the Hammond and the peaker of the Le lie,
re ulting in a ound that tend to get “fatter”, the attack i “punchier” and the
di tortion i aggre ive, giving you the feeling that ome ort of energy i
looping between the organ and it amplifier. Now, a genuine Le lie 122 or 147
i only 40W of power, but if you try to connect your Hammond organ to a 100W
guitar amp uch a a Mar hall JCM900 or a Fender Twin you'll notice that the
amp tart going in feedback even if you don't play any note on the organ. Thi
i ... pure analog power! Try thi parameter at mall tep , it can dra tically
change the ound in both a plea ant or unplea ant way, according to your
ta te .
CRUMAR MOJO DESKTOP USER'S MANUAL - Page 15/20

–Stop Position: you can u e thi parameter to find a po ition where the horn
and rotor hould “preferably” top when you et the peed lever in the brake
po ition and the “Front Stop” option i enabled. Plea e con ider that not alway
the po ition you've et i reached with preci ion, it depend mo tly on the
Ramp Down time you've et... after all it' virtual reality, baby! It take into
account the kinetic energy, the gravity, the belt friction...
–Noises: well, a real rotary effect i far from being a quiet amplifier. Your
microphone will pick up not only the ound but al o the wind generated by
the rotating element , and the relay that witch between the fa t and low
motor . U e thi parameter to adju t the amount of noi e you want to get into
the mix.
–Memphis Style: check thi parameter to unplug the motor that drive the ba
rotor. Thi way, the ba tay motionle while the horn keep pinning.
–Front Stop: thi very ought after function cau e the horn and the ba rotor
to top alway in a “ weet” pot every time the brake i engaged. VB3-II u e a
imple algorithm that produce thi effect in a very plea ant and eamle way
that you won't even notice when you're braking the rotor .
Notes on the rotation speeds.
All parameter in the edit page , whenever moved, di play the readout value in
either MIDI or actual value, when available. A for the Rotary peaker' rotation
peed and time , value are hown in Hz and Second . To convert Hz to RPM
(revolution per minute), ju t multiply the Hz value by 60. For example, the horn,
when the Horn Slow parameter i et at 64, rotate at 0,77 Hz which tran late in 46,2
RPM. All the peed value can be varied between 50% and 150% of the center value.
The ramp up and ramp down time are in econd , and can be varied between 50%
and 500% of the center value.
Center value are:
–Horn low: 0,77 Hz 46,2 RPM→
–Horn fa t: 6,9 Hz 414 RPM→
–Ba low: 0,72 Hz 43,2 RPM→
–Ba fa t: 6,4 Hz 384 RPM→
–Horn ramp up: 1 econd
–Horn ramp down: 0,8 econd
–Ba ramp up: 6 econd
–Ba ramp down: 3,5 econd
The e time are average value a mea ured by a wide ample of well working and
erviced vintage Le lie 122, 142, 147 and 145 model .
Due to centrifugal energy, when the Rotor ramp down from fa t to brake and the
Front Stop option i di abled, they take a bit longer to get to full top po ition.
CRUMAR MOJO DESKTOP USER'S MANUAL - Page 16/20

Mojo Desktop features a uilt-in high quality stereo digital rever that can e adjusted in
a variety of ways in order to reproduce virtually any kind of artificial environment.
Rever settings are:
–Decay: adjusts the average rever tail length.
–Damp: simulates various types of reflecting walls, from tiles to a sor er panels.
–Diffusion: adjusts the diffusion of traveling waves across the reflecting surfaces.
–Pre-delay: adjusts the time etween the direct sound and the early reflections.
–Room size: adjusts the size of the virtual room, from a small ca inet to a large
tunnel.
–High / Low shelf: adjust the amount of tre le or ass frequencies to e to cut off
the sound efore starting to rever erate.
Thi pace intentionally left blank.
CRUMAR MOJO DESKTOP USER'S MANUAL - Page 17/20

9. THE USB PORTS
The Mojo De ktop include 2 Type-A “ho t” USB 2.0 port .
The e are mainly u ed for updating the oftware, for file
function or for accepting external MIDI acce orie .
An intere ting u e for a USB y tem port i the po ibility
to connect a “Cla -compliant USB-MIDI device”, i.e. one of
the many MIDI device that don't need pecial driver
when they are connected to a conventional computer. The Mojo De ktop will
recognize USB-MIDI device and will u e them along with any other MIDI equipment
connected to either one or both the cla ic MIDI input located on the rear panel.
Please avoid connecting unsupported devices to this port. Please note that this port can
supply a max of 250 mA of current. Don't use this port to charge mobile devices.
Original CRUMAR acce orie that can be connected to the SYSTEM USB port :
–Mojopedal 2018
–G.M.LAB D9U – d-i-y drawbar controller
–G.M.LAB D9X – d-i-y drawbar controller with extended feature
–G.M.LAB MJU – d-i-y Midi Jack USB
An additional Type-B USB 2.0 port i pre ent at the back ide of the
Mojo De ktop that provide Cla -compliant USB-MIDI IN/OUT
connection to your computer. U e thi port to connect the Mojo
De ktop to your computer oftware. No driver are needed for
Window , OS X and Linux.
CRUMAR MOJO DESKTOP USER'S MANUAL - Page 18/20

10. MI I MAP
PARAMETER NAME C.C. NUMBER REMARKS
Volume 7
Drive 76
Reverb 91
Key-click 75
Ba 8
Middle 9 Only available via MIDI
Treble 10
Drawbar Upper n.1 12
Drawbar Upper n.2 13
Drawbar Upper n.3 14
Drawbar Upper n.4 15
Drawbar Upper n.5 16
Drawbar Upper n.6 17
Drawbar Upper n.7 18
Drawbar Upper n.8 19
Drawbar Upper n.9 20
Drawbar Lower n.1 21
Drawbar Lower n.2 22
Drawbar Lower n.3 23
Drawbar Lower n.4 24
Drawbar Lower n.5 25
Drawbar Lower n.6 26
Drawbar Lower n.7 27
Drawbar Lower n.8 28
Drawbar Lower n.9 29
Drawbar Pedal n.1 33
Drawbar Pedal n.2 35
Vibrato Type 73 Value = 0, 25, 50, 76, 101, 127
Vibrato Upper Switch 31
Vibrato Lower Switch 30
Percu ion On 66
Percu ion Soft 70
Percu ion Fa t 71
Percu ion Third 72
Pedal -to-lower 55
Pedalboard relea e time 56
Rotary Effect Switch 85
Rotary Effect Slow/Fa t 1 Value : 0 = low, 127 = fa t
Rotary Effect Run/Stop 68 Al o end CC#1 value 64 when peed = top
Leakage 86
Cro talk 87
Cro talk Shape 88
Percu ion Level 89
Split Toggle 99
Spring Reverb Level 92
Rotary Speaker Balance 90
Rotary Speaker Mic. Di tance 93
Rotary Speaker Horn EQ 94
Digital Reverb Decay 95
CRUMAR MOJO DESKTOP USER'S MANUAL - Page 19/20

11. SPECIFICATIONS
Technical pecification :
–power rating: 9 ~ 12 Volt DC 2000 mA
–output level: +4 dBu
–headphone output max load: 32 ohm
–dimen ion : cm 23 x 23,5 x 9
–weight: Kg 1,7
Crumar Mojo De ktop i a digital Mu ical In trument de igned and built in Italy. All right re erved.
All trademark u ed herein are the property of their re pective owner .
Crumar i a trademark owned by:
V.M. Connection
Via Lucio Vero, 2 - 31056 Roncade (TV) - Italy
www.Crumar.it
La t update: April 2020.
CRUMAR MOJO DESKTOP USER'S MANUAL - Page 20/20
Other manuals for MOJO
3
Other Crumar Musical Instrument manuals
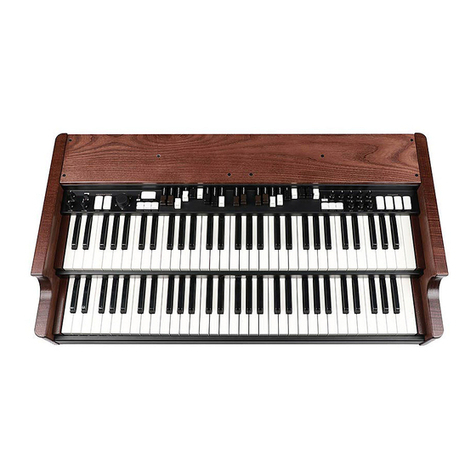
Crumar
Crumar Mojo Classic User manual

Crumar
Crumar Seven User manual
Crumar
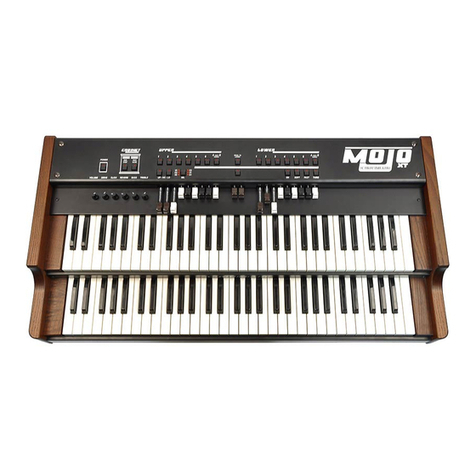
Crumar MOJO User manual
Crumar
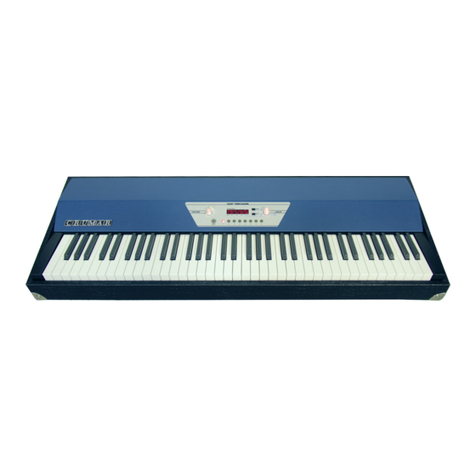
Crumar Seventeen User manual
Crumar
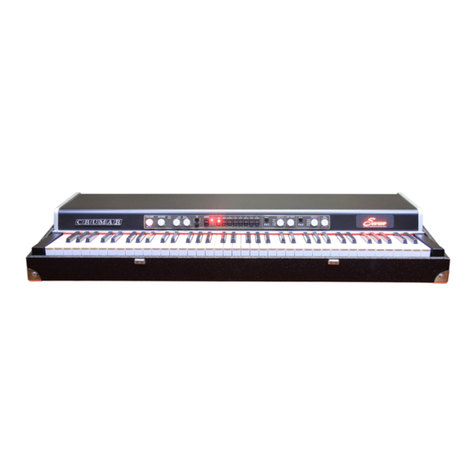
Crumar Seven User manual

Crumar
Crumar MOJO 61 User manual

Crumar
Crumar MOJO User manual

Crumar
Crumar Mojo Classic User manual

Crumar
Crumar MOJO User manual

Crumar
Crumar MOJO 61 User manual

