Crux USB-AV User manual

• Playback of audio and video files from USB-media up to 2TB
• NTFS and FAT32 multi partition capable
• Support of all common Audio & Video formats (e.g. MP3, AVI, VOB, MOV, RMVB, JPG,
FLV, MKV, H.264)
• Last position memory
• Controllable by IR-sensor and remote control
• Visualization via ON-Screen display
• Search in Audio + Video files during playback possible
• Scroll page by page possible in Audio + Video files
IR Extension Cable
Remote
control
Power and
AV Harness
1
rev060215

Audio-Video output
Cable colour
Assignment
●Yellow
Video signal
●Red
Audio signal right
●White
Audio signal left
Connection for power supply
Cable colour
Assignment
● black
Ground
●red
+12V Constant
●pink
ACC
●blue
Cable for connection of IR-control cable
Remote control battery installation
Before attempting to operate your remote control, install the
battery as described below.
1. Turn the remote control face down.
2. Twist the battery cover with a coin to open.
3. Put battery in making sure of the right polarity.
Battery
Compartment
2 / 7
rev060215

Remote control operations
Button Function
POWER Select power-on or stand-by
1,2,3-0 No function
MUTE Mute control
SOURCE No function
PREVIEW No function
AUDIO No function
RECALL No function
ENTER Select the highlighted item
INFO Select OSD menu (only in menu Movie/Photo)
▲
Up (+ previous file in menu Movie/Music/Photo)
Left (+ scroll page by page in menu Movie/Music/Photo)
Right (+ scroll page by page in menu Movie/Music/Photo)
Down (+ next file in menu Movie/Music/Photo)
OK Select the highlighted item
HOME Select main menu
EPG No function
MANUAL No function
AUTO SCAN No function
EXIT One level back
MENU Select Options menu (only in menu Movie/Music/Photo)
Fast backward
Select play or pause
Fast forward
REC Delete file (in menu Music); Subtitle (in menu Movie)
REPLAY Activate/deactivate repeat (only in menu Movie/Photo)
TTX No function
F1 Previous file (only in menu Movie/Music/Photo)
F2 Volume down
F3 Volume up
F4 Next file (only in menu Movie/Music/Photo)
3 / 7
rev060215

System Setting Menu
In the “System Setting” menu you can configure the
settings. You can use [▲] and [▼] buttons to highlight
the item, you can use [] and [] buttons to change
the adjustment and press [OK] to set the setting.
Leave out the menu by pressing the [EXIT] button.
HDMI
No function.
Version/Upgrade
Display of the hardware and
software version.
OSD Language
Select language. Choose
between English and German
and 24 more languages.
Display Setting
Select display settings. Choose
between e.g. output resolution, hue,
saturation, TV-system: PAL/NTSC.
Monitor Port Setting
No function.
Reset default
Reset of the factory settings.
4 / 7
rev060215

Movie Menu
1. In menu mode, select “Movie“.
2. Press [OK] button to show all of the stored movie files.
3. Press [▲] and [▼] buttons to select a movie file and press the [OK] button to start the
movie file.
4. Press [ ] button to pause or start.
5. Press the [HOME] button to leave out the menu item.
Press [MENU] button while the movie is playing to get an
Options menu on the display. Some settings can be
changed, e.g. playing mode, repeat mode, and equalizer.
Press [MENU] button again to remove the OSD menu.
Press [INFO] button while the movie is playing to get an OSD
menu on the display with information to the stored movie.
Press [INFO] button again to remove the OSD menu.
5 / 7
rev060215

Music Menu
1. In menu mode, select “Music“.
2. Press [OK] button to show all of the stored music files.
3. Press [▲] and [▼] buttons to select a movie file and press the [OK] button to start the
music file.
4. Press [ ] button to pause or start.
5. Press the [HOME] button to leave out the menu item.
Press [MENU] button while the music is playing to get an
Options menu on the display. Some settings can be
changed, e.g. playing mode, repeat mode, and equalizer.
Press [MENU] button again to remove the OSD menu.
6 / 7
rev060215

Photo Menu
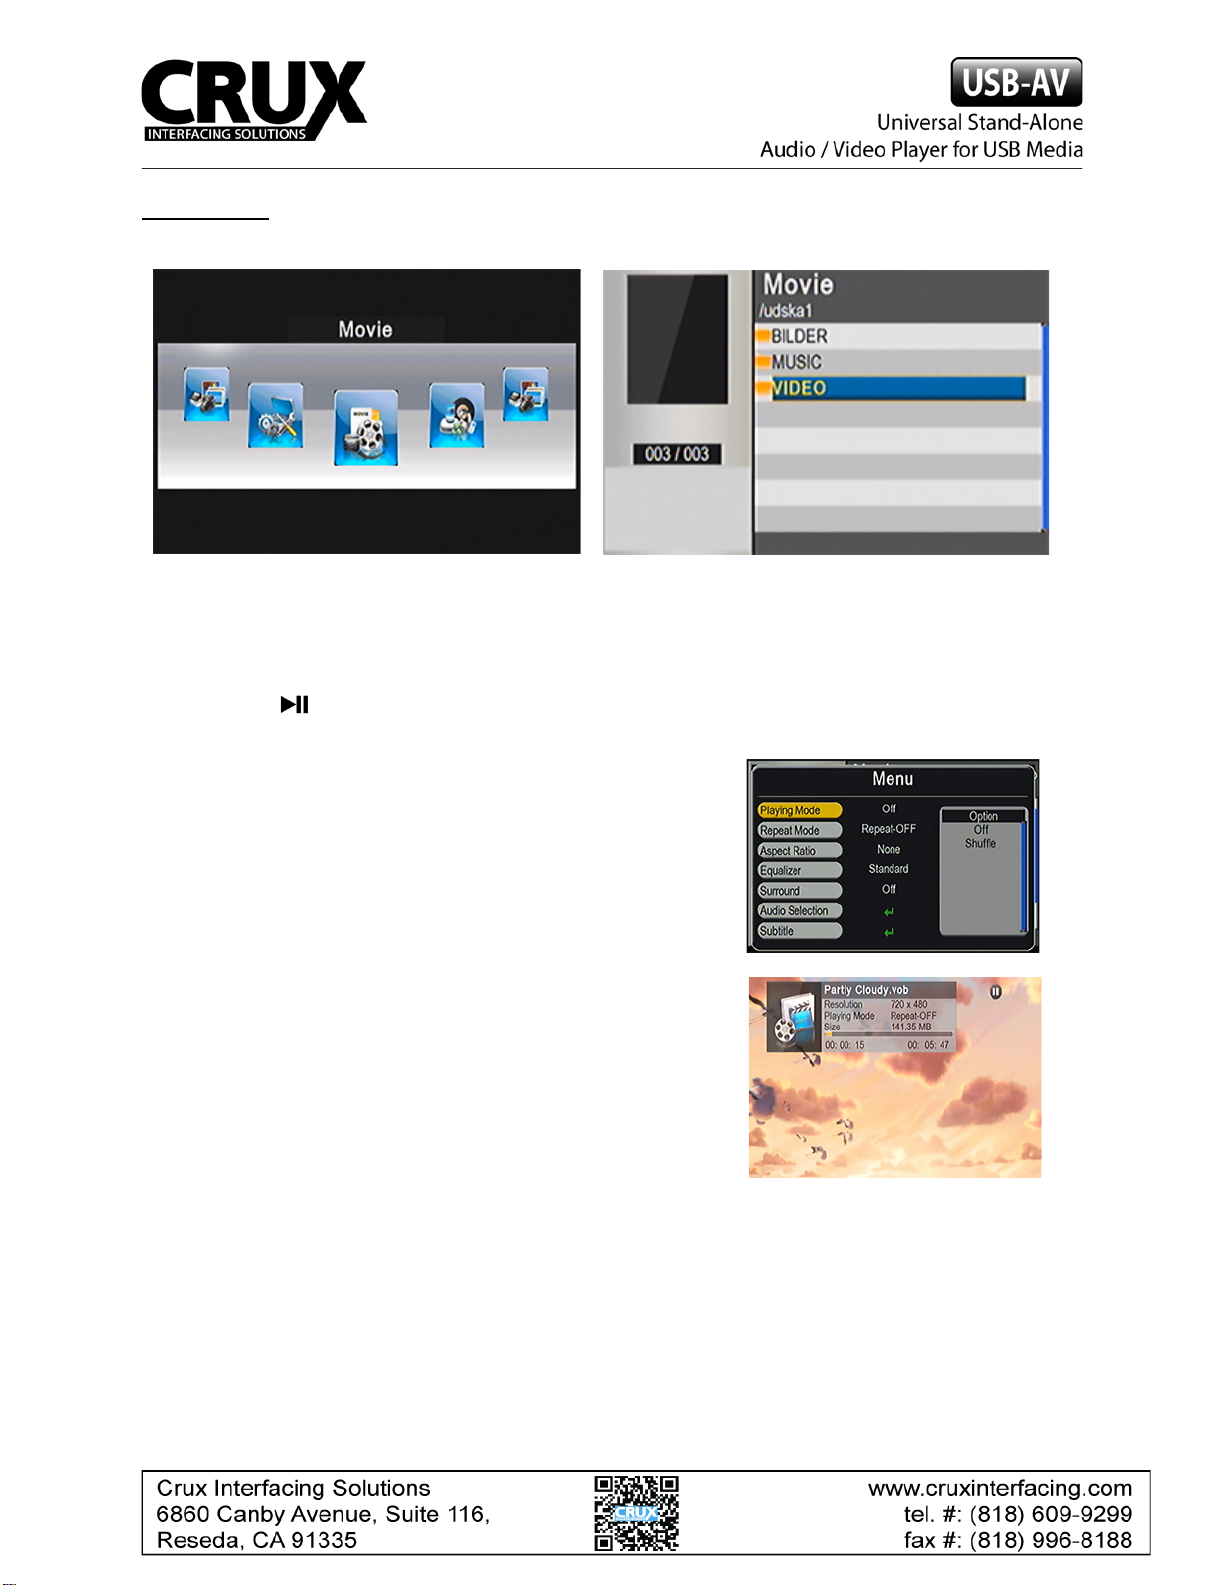
1. In menu mode, select “Photo“.
2. Press [OK] button to show all of the stored photos.
3. Press [▲] and [▼] buttons to select a photo and press the [OK] button to display it.
Slideshow will start automatically.
4. Press [ ] button to pause or start.
5. Press the [HOME] button to leave out the menu item.
Press [MENU] button while watching photos to get an
Options menu on the display. Some settings can be
changed, e.g. playing mode, repeat mode, and slideshow
time. Press [MENU] button again to remove the OSD menu.
Press [INFO] button while watching photos to get an OSD menu on the display with information
to the stored photo. Press [INFO] button again to remove the OSD menu.
Operation voltage 10.5 – 14.8V
Stand-by power drain <1mA
Operation power drain <1000mA
Power consumption <13W
Temperature range -30°C to +80°C
Weight 295g
Dimensions (box only) W x H x D140 x 30 x 105 mm
.
7 / 7
rev060215
Table of contents