Ctl NL6 series User manual

Education Chromebook
USER MANUAL
May 2014
ENGLISH
NL6 series

2
CONTENTS
BEFORE YOU START ........................................................................................... 4
Make sure you have everything ...................................................................................4
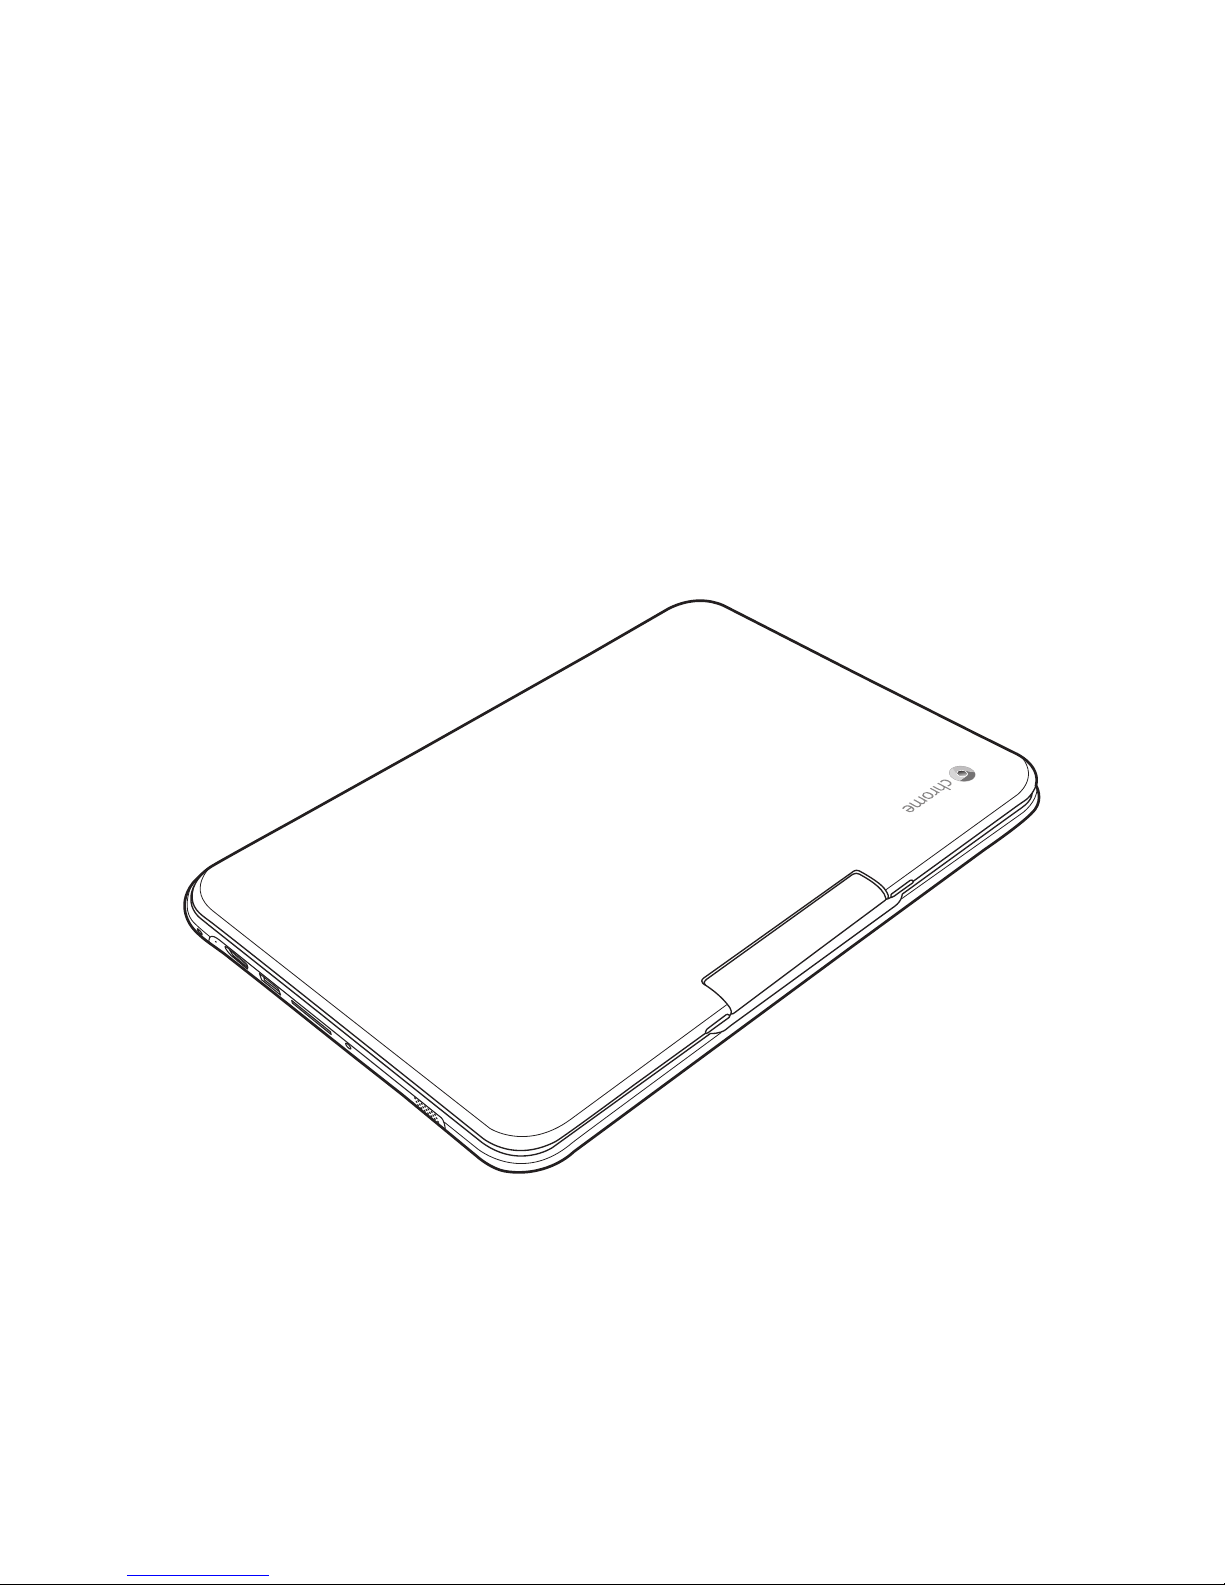
Familiarize yourself with the computer .......................................................................5
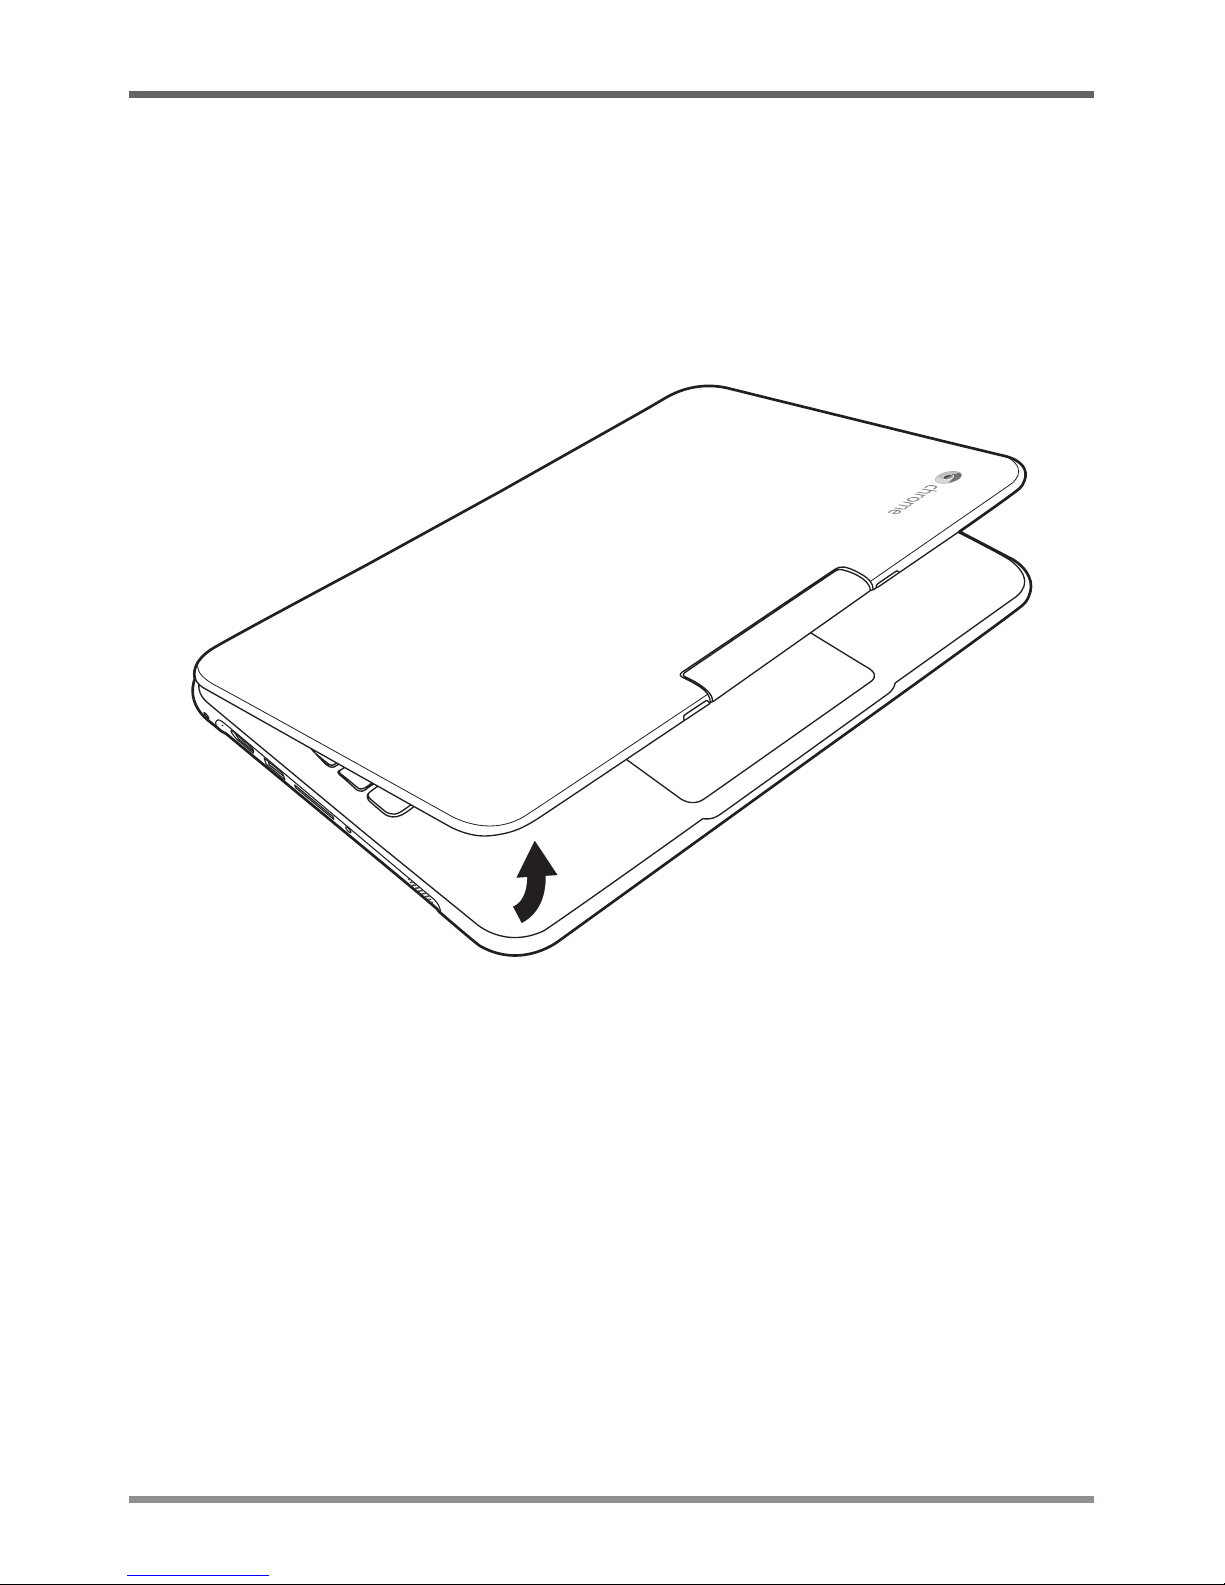
OPENING THE DISPLAY PANEL ..............................................................................5
FRONT OVERVIEW...................................................................................................6
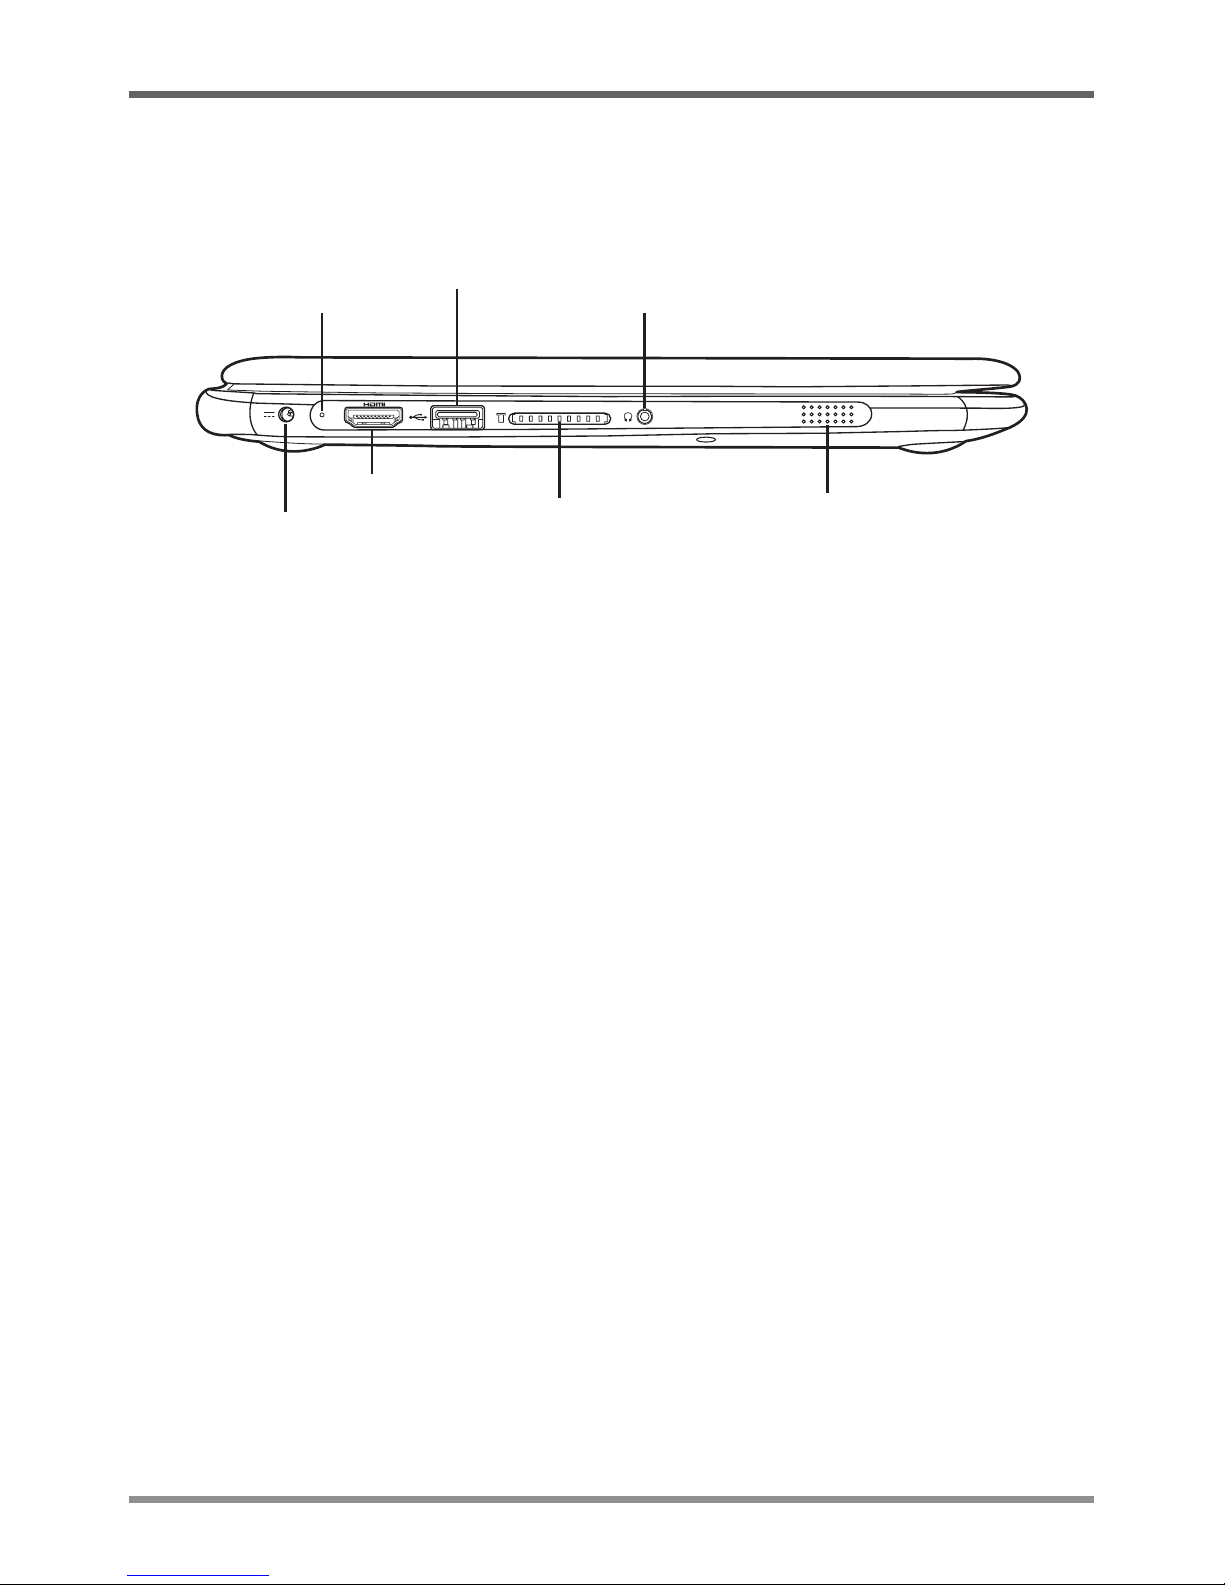
LEFT SIDE OVERVIEW.............................................................................................8
RIGHT SIDE OVERVIEW ........................................................................................10
BACK OVERVIEW ...................................................................................................12
BOTTOM OVERVIEW..............................................................................................13
GETTING STARTED............................................................................................ 14
Power Sources.............................................................................................................14
CONNECTING THE POWER ADAPTERS ..............................................................14
RECHARGING THE BATTERY ...............................................................................15
Starting Your Chromebook .........................................................................................16
POWER ON .............................................................................................................16
POWER OFF ...........................................................................................................16
USING SHORTCUT KEYS ......................................................................................17
USING THE TOUCHPAD.........................................................................................18
OPTIONAL SNAP-ON MAGNIFICATION LENS ......................................................20
TROUBLESHOOTING......................................................................................... 21
Identifying the Problem...............................................................................................21
REGULATORY NOTICES.................................................................................... 22
SPECIFICATIONS................................................................................................ 26

3
TAKING CARE OF YOUR COMPUTER
• To prevent possible overheating of the computer’s processor, make sure you don’t block the
openingsprovidedforventilation.
• DO NOTpressortouchthedisplaypanel.
• DO NOTplaceonunevenorunstableworksurfaces.
• DO NOT useyourcomputerunderharshconditions.
• DO NOT placeordropobjectsonthecomputerandDO NOTapplyheavypressureonit.
• DO NOTsubjectthecomputertomagneticfields.
• DO NOTexposetodirectsunlight.
• DO NOTuseorstoreinextremetemperatures.
• AvoidsuddenchangesintemperatureorhumiditybykeepingitawayfromA/Candheatingvents.
• Avoidexposingthecomputertorainormoisture.
• DO NOTplacenearfireorothersourcesofheat.
• DO NOTtamperwiththebatteries.Keepthemawayfromyoungerchildren.
• DO NOTexposetodustand/orcorrosivechemicals.
• DO NOTslamyourcomputershutandneverpickuporholdyourcomputerbythedisplay.
• DO NOTspraywateroranyothercleaningfluidsdirectlyonthedisplay.
• Ifyouaretravelingwithyourcomputer,remembertocarryitashandluggage.Donotcheckit
inasbaggage.

4
BEFORE YOU START
Make sure you have everything
WhenyoureceiveyourChromebook,unpackitcarefully,andchecktomakesureyouhaveallthe
itemslistedbelow.Forapre-configuredmodelyoushouldhavethefollowing:
• Chromebook
• ACadapterwithpowercord
• UserManual
• Snap-onmagnificationlens(optional)
OnceyouhavecheckedandconfirmedthatyourChromebooksystemiscomplete,readthrough
thefollowingpagestolearnaboutallofyourChromebookcomponents.
Depending on the model you purchased, the actual appearance of your Chromebook
may vary from that shown in this manual.
NOTE

BEFORE YOU START
5
Familiarize yourself with the computer
OPENING THE DISPLAY PANEL
Toopenthedisplaypanel,simplyliftthelidup.
Whenclosingit,besurenottoslamitshut.

BEFORE YOU START
6
FRONT OVERVIEW
ThefollowingisanoverviewofthefrontoftheChromebook.
Display Panel
Keyboard
Touchpad
Pointing Device
Suspend/
Power On Button
Camera
Microphone
Camera
The720pHDrotatablecameraallowsyoutosnapaphotoorcreateavideochatorvideoconference
fromdifferentanglesorindifferentsizeswithjustaclick.(SeeOptionalSnap-onMagnification
Lenssectionformoreinformation.)
Microphone
Thebuilt-inmicrophoneallowsforthereceptionandtransmissionofvoiceand/orotheraudiodata
toanyprogramcapableofacceptingsuchinput.
Display Panel
ThedisplaypanelisacolorLCDpanelwithbacklightingforthedisplayoftextandgraphics.

BEFORE YOU START
7
Suspend/Power On Button
ThisbuttonturnsyourChromebookonandoff.(SeePowerOnsectionformoreinformation.)
Touchpad Pointing Device
Thetouchpadpointingdeviceisamouse-likecursorcontrolwithatouchsensitivemovementpad.
Keyboard
ThestandardChromebookkeyboardisequippedwithspecialshortcutkeyswhichhelpyouaccess
commonactionsquickly.Itisalsospillresistanttoofferusersprotectionfromaccidentalliquidspills.

BEFORE YOU START
8
LEFT SIDE OVERVIEW
ThefollowingisabriefdescriptionoftheleftsideoftheChromebook.
Speaker
Memory Card Reader
Audio Combo Jack
(Headphone & Microphone)
Battery Charging
Status Indicator
Power Adapter
Port
HDMI Port
USB 3.0 Port
Power Adapter Port
ThepoweradapterportallowsyoutoplugintheACadaptertopoweryourChromebookand
chargetheinternalbattery.
Battery Charging Status Indicator
Thebatterychargingstatusindicatorshowsthesystembatterystatusinthefollowingmanner:
• Amberlight-Thebatteryischarging.
• Greenlight-Thebatteryisfullycharged.
HDMI Port
TheHDMIportallowsyoutoconnectavideodevicesuchasatelevision,aprojector,oraVCR
toyourcomputer.
USB 3.0 Port
TheUSB3.0portallowsyoutoconnectUniversalSerialBusdevices.Itsupportsv3.0oftheUSB
standard,whichallowsdataexchangeratesashighas4.8Gb/s.USB3.0isbackwardscompatible
withUSB2.0.

BEFORE YOU START
9
Memory Card Reader
Thememory cardreader offers afast andeasy wayto transferdigitalphotos, musicand data
betweenyourChromebookandflashcompatibledevicessuchasdigitalcameras,portableMP3
players,mobilephones,tablets,andhandhelddevices.
Audio Combo Jack (Headphone & Microphone)
The audio combo jack allows you to connect headphones, external speakers, amplifiers or an
externalmonomicrophone.
Speaker
Thespeakerprovidesaudiooutputforvideoandmusicplayback.

BEFORE YOU START
10
RIGHT SIDE OVERVIEW
ThefollowingisabriefdescriptionoftherightsideoftheChromebook.
Speaker USB 2.0 Port Kensington
Lock Slot
Speaker
Thespeakerprovidesaudiooutputforvideoandmusicplayback.
USB 2.0 Port
TheUSB2.0portallowsyoutoconnectUniversalSerialBusdevices.Itsupportsv2.0oftheUSB
standard,whichallowsdataexchangeratesashighas480Mb/s.

BEFORE YOU START
11
Kensington Lock Slot
TheKensingtonlockslotallowsyoutosecureyourChromebooktoanimmovableobjectwithan
optionalsecuritycable.

BEFORE YOU START
12
BACK OVERVIEW
ThefollowingisanoverviewofthebackoftheChromebook.

BEFORE YOU START
13
BOTTOM OVERVIEW
ThefollowingisanoverviewofthebottomoftheChromebook.
Handle
Drainage Holes
Handle
TheintegratedretrackablehandleallowsyoutocarrytheChromebookconveniently.
Drainage Holes
Thedrainageholespreventtheaccumulationofliquidinsidethekeyboardbyreleasinganyliquid
thathasenteredthekeyboard,suchasliquidfromcondensationoraccidentalspillage.
To prevent the accumulation of liquid inside the keyboard, make sure you do not
block the drainage holes.
CAUTION

14
GETTING STARTED
Power Sources
Yourcomputerhastwotypesofpowersource:aLithium-PolymerbatteryoranACadapter.
CONNECTING THE POWER ADAPTERS
TheACadapterprovidespowerforoperatingyourChromebookandchargingthebattery.
Connecting the AC Adapter
1. PlugtheDCoutputcableintotheDCpowerjackofyourChromebook.
2. PlugtheACadapterintoanACelectricaloutlet.
Switching from AC Adapter Power to Battery Power
1. Besurethatyouhaveatleastonechargedbatteryinstalled.
2. RemovetheACadapter.YourChromebookwillautomaticallyswitchtobatterypower.
The Lithium-Polymer battery is not charged upon purchase. Initially, you will
need to connect the AC adapter to use your Chromebook.
NOTE

GETTING STARTED
15
RECHARGING THE BATTERY
TheLithium-PolymerbatteryisrechargedinternallyusingtheACadapter.Torechargethebattery,
makesurethebatteryisinstalledandthecomputerisconnectedtotheAC.
Thereisno“memoryeffect”inLithium-Polymerbatteries;thereforeyoudonotneedtodischarge
thebatterycompletelybeforerecharging.Thechargetimeswillbesignificantlylongerifyour
Chromebookisinusewhilethebatteryischarging.Ifyouwanttochargethebatterymorequickly,
putyourcomputerintoSuspendmode,orturnitoffwhiletheadapterischargingthebattery.
Low Battery State
Whenthebatterychargeislow,anotificationmessageappears.Ifyoudonotrespondtothelow
batterymessage,thebatterycontinuestodischargeuntilitistoolowtooperate.Whenthishappens,
yourChromebookgoesintoSuspendmode.Thereisnoguaranteeyourdatawillbesavedonce
theChromebookreachesthispoint.
To protect your computer from damage, use only the power adapter that came
with it because each power adapter has its own power output rating.
OnceyourChromebookgoesintoSuspendmodeasaresultofadeadbatteryyouwillbeunable
toresumeoperationuntilyouprovideasourceofpowerfromanadapter.Onceyouhaveprovided
power,youcanpresstheSuspend/PowerOnbuttontoresumeoperation.InSuspendmode,your
dataismaintainedforsometime,butifapowersourceisnotprovidedpromptly,thepowerindicator
stopsflashingandthepowergoesout,inwhichcaseyouhavelostthedatathatwasnotsaved.Once
youprovidepower,youcancontinuetouseyourcomputerwhileanadapterchargesthebattery.
CAUTION

GETTING STARTED
16
Starting Your Chromebook
POWER ON
Thesuspend/poweronswitchisusedtoturnonyourChromebookfromitsoffstate.Forfirsttime
use,youmustconnectyourACadaptertotheChromebookandfullychargetheinternalLithium-
Polymerbattery,oncethebatterychargingstatusindicatorhasturnedgreen,youcanpoweron
yourChromebookbypressingthesuspend/poweronbuttonlocatedattheupper-rightcornerof
thekeyboard.
TopoweronyourChromebookafterfirstuse,justopenthelidoftheChromebook.Ifthedisplay
panelisopenedandyourChromebookisnotpoweredon,pressthesuspend/poweronbutton.
POWER OFF
Ifyouneedtotakeanextendedbreak,pressthesuspend/poweronbuttontolockthescreenor
simply close the lid of the Chromebook.To power off your Chromebook, press and hold the
suspend/poweronbuttonorclickthe buttoninthelower-leftcornerofthescreentocompletely
shutdownyourChromebook.
WhenyoupoweronyourChromebook,itwilldisplaythemainsign-inscreen.AllGoogleAccounts
thathavebeenaddedtoyourChromebookwillbedisplayed.ClicktheGoogleAccountyouwant
tosign-inwithandenteryourpassword,thiswilltakeyoutoyourbackgroundwallpaper.Ifafault
isfound,yourcomputerwillautomaticallytakeyoutotherecoveryscreen.

GETTING STARTED
17
USING SHORTCUT KEYS
YourChromebookhas11shortcutkeysalongthetoprowofthekeyboardthathavevariousfunctions.
Gotothepreviouspageinyourbrowserhistory
Gotothenextpageinyourbrowserhistory
Reloadyourcurrentpage
EnterImmersivemode,whichhidesthetabsandlauncher
EnterOverviewmode,whichshowsallwindows
Decreasescreenbrightness
Increasescreenbrightness
Mute
Decreasethevolume
Increasethevolume
Searchyourappsandthewebatthesametime.OnyourChromebook,thiskey
islocatedontheleftside,whereyounormallyfindtheCapsLockkeyona
traditionalkeyboard.ToenabletheCapsLockkey,pressAlt+ key.

GETTING STARTED
18
USING THE TOUCHPAD
Atouchpadpointingdevicecomesbuiltintoyourcomputer.Itisusedtocontrolthemovementof
thepointertoselectitemsonyourdisplaypanel.
Thetouchpadconsistsofacursorcontrol,andaclickingarea.Thecursorcontrolworksthesame
wayamousedoes,andmovesthecursoraroundthedisplay.Itonlyrequireslightpressurefrom
thetipofyourfinger.Theclickingareaisonthelowerhalfofthetouchpadthatfunctionsasmouse
button.Iftap-to-clickisenabled,youcanquicklytapthetouchpadtoperformtheclickfunction.
Toright-click,clickthetouchpadwithtwofingers.Theactualfunctionalityoftheclickingarea
mayvarydependingontheapplicationthatisbeingused.
Clicking
Clickingmeanspushingandreleasingabutton.Toleft-click,movethecursortotheitemyouwish
toselect,presstheclickingareaonce,andthenimmediatelyreleaseit.Toright-click,movethe
mousecursortotheitemyouwishtoselect,taponthetouchpadwithtwofingers.Youalsohave
theoptiontoperformtheclickingoperationbytappinglightlyonthetouchpadonce.
Double-Clicking
Double-clicking means pushing and releasing the clicking area twice in rapid succession. To
double-click,movethecursortotheitemyouwishtoselect,presstheclickingareatwice,andthen
immediatelyreleaseit.Youalsohavetheoptiontoperformthedouble-clickoperationbytapping
lightlyonthetouchpadtwice.

GETTING STARTED
19
Dragging
Draggingmeanspressingandholdingtheclickingarea,whilemovingthecursor.Todrag,move
thecursortotheitemyouwishtomove.Pressandholdtheclickingareawhilemovingtheitem
toitsnewlocationandthenreleaseit.Draggingcanalsobedoneusingonlythetouchpad.First,
tapthetouchpadonceovertheitemyouwishtomovewithonefinger.Next,withasecondfinger
movetheobjecttoitsnewlocationbymovingthesecondfingeracrossthetouchpad,andthen
releasebothfingers.
Scrolling
Scrollingmeansnavigatingthroughadocumentorweb-pagesquicklywithouthavingtousethe
on-screencursortomanipulatetheupanddownscrollbars.Toscroll,simplyplacetwofingerson
thetouchpadandmovethemupanddowntoscrollvertically,leftandrighttoscrollhorizontally.
Thisisparticularlyusefulwhenyouarenavigatingthroughon-linepages.

GETTING STARTED
20
OPTIONAL SNAP-ON MAGNIFICATION LENS
YourChromebookcomeswithanoptionalsnap-onmagnificationlenswhichaddsamagnifying
effecttotherotatablecamera.
Toattachthemagnificationlenstothecamerafollowthesesteps:
1. Openthedisplaypaneltoa90-degreeangle.
2. Flipthecameraaround180-degrees.
3. Placethemagnificationlensontothecameralensandpressdownuntilitclicksintoplace.
Table of contents
Other Ctl Laptop manuals