manuals.online logo
Brands
  1. Home
  2. •
  3. Brands
  4. •
  5. Cub Cadet
  6. •
  7. Lawn Mower
  8. •
  9. Cub Cadet 764 User manual

Cub Cadet 764 User manual

Safety • Set-Up • Adjustments • Operation • Maintenance • Troubleshooting • Warranty • Parts Lists
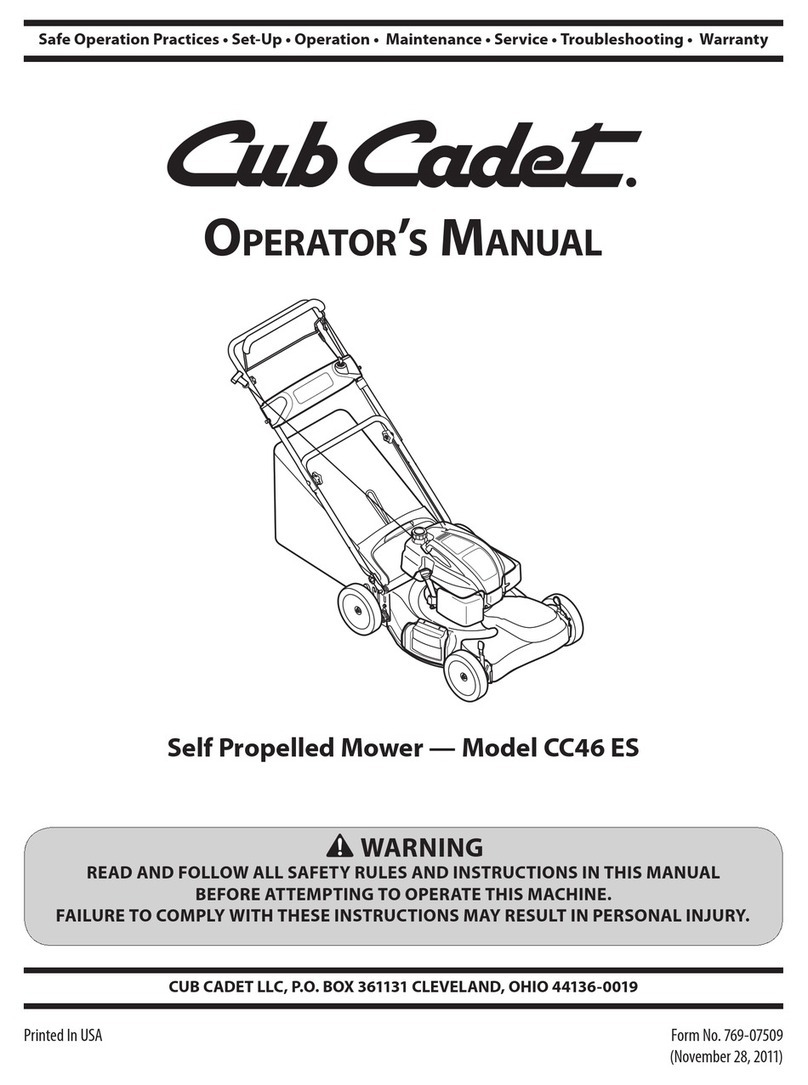
OPERATOR’S MANUAL
PRINTED IN U.S.A.
IMPORTANT:
READ SAFETY RULES AND INSTRUCTIONS
CAREFULLY BEFORE OPERATING EQUIPMENT.
P. O. Box 1386, 97 Kent Avenue, KITCHENER, ONTARIO N2G 4J1 3.28.08
769-03869
Wide Cut Mower — Model 764
2
Finding and Recording Model Number
Table of Contents
BEFORE YOU START ASSEMBLING
YOUR NEW EQUIPMENT,
please locate the model plate on the equipment and copy the
the model number and the serial number to the sample model
plate provided to the right. You can locate the model plate by
standing at the operating position and looking down at the rear
of the machine.
This Operator’s Manual is an important part of your new equipment. It will help you assemble,
prepare and maintain the unit for best performance. Please read and understand what it says.
Please do
NOT
return the unit to the retailer from which it was purchased,
without first contacting Customer Support.
Customer Support
If you have difficulty assembling this product or have any questions regarding the controls, operation or maintenance of this unit,
you can seek help from the experts. Choose from the options below:
1. Visit www.cubcadet.ca for many useful suggestions, click on Customer Support button.
2. Call a Customer Support Representative at 1-800-668-1238.
3. The engine manufacturer is responsible for all engine-related issues in terms of performance, power-rating, specifications,
warranty, and service. Depending on the engine manufacturer, more information is included in this publication or packed
separately with this product.
Please have your unit’s model number and serial number ready when you call. See previous section to locate this information.
You will be asked to enter the serial number in order to process your call.
Slope Gauge........................................................ 3
Safe Operation Practices................................... 4
Set-Up & Adjustments........................................ 6
Operation............................................................. 8
Maintenance & Off-Season Storage................ 10
Trouble Shooting .............................................. 12
Safety Labels .................................................... 13
Engine Operation.............................................. 14
Engine Maintenance......................................... 16
Warranty ............................................................ 19
Illustrated Engine Parts Lists.......................... 20
Illustrated Parts Lists....................................... 22
Emission Control System
Warranty Statement ..................................... 24
The SureStart Guarantee™ ............................. 26
3
1
Slope
Gauge
WARNING
Do not mow on inclines
with a slope in excess
of 15 degrees (a rise
of approximately
2-1/2 feet every 10
feet). A riding mower
could overturn and
cause serious injury.
If operating a walk-
behind mower on such
a slope, it is extremely
difficult to maintain your
footing and you could
slip, resulting in serious
injury.
Operate RIDING
mowers up and down
slopes, never across
the face of slopes.
Operate
WALK-BEHIND
mowers across the
face of slopes, never
up and down slopes.
Sight and hold this level with a vertical tree...
or a corner of a building...
or a fence post
Fold along dotted line (represents a 15° slope)
15°
Use this page as a guide to determine slopes where you may not operate safely. Do not operate
your lawn mower on such slopes.
4
2
Safe
Operation
Practices
General Operation
1. Read this operator’s manual carefully in its entirety before
attempting to assemble this machine. Read, understand, and
follow all instructions on the machine and in the manual(s)
before operation. Keep this manual in a safe place for future
and regular reference and for ordering replacement parts.
2. Be completely familiar with the controls and the proper use of
this machine before operating it.
3. This machine is a precision piece of power equipment, not a
plaything. Therefore, exercise extreme caution at all times.
Your unit has been designed to perform one job: to mow grass.
Do not use it for any other purpose.
4. Never allow children under 14 years old to operate this
machine. Children 14 years old and over should read and
understand the instructions in this manual and should be
trained and supervised by a adult.
5. Only responsible individuals who are familiar with these rules
of safe operation should be allowed to use this machine.
6. Thoroughly inspect the area where the equipment is to be
used. Remove all stones, sticks, wire, bones, toys and other
foreign objects which could be tripped over or picked up
and thrown by the blade. Thrown objects can cause serious
personal injury.
7. Plan your mowing pattern to avoid discharge of material toward
roads, sidewalks, bystanders and the like. Also, avoid discharg-
ing material against a wall or obstruction which may cause
discharged material to ricochet back toward the operator.
8. To help avoid blade contact or a thrown object injury, stay
in the operator zone behind the handles and keep children,
bystanders, helpers and pets at least 75 feet from the mower
while it is in operation. Stop machine if anyone enters the area.
9. Always wear safety glasses or safety goggles during operation
and while performing an adjustment or repair to protect your eyes.
Thrown objects which ricochet can cause serious injury to the
eyes.
10. Wear sturdy, rough-soled work shoes and close-fitting slacks
and shirts. Shirts and pants that cover the arms and legs
and steel-toed shoes are recommended. Never operate this
machine in bare feet, sandals, slippery or light weight (e.g.
canvas) shoes.
11. Do not put hands or feet near rotating parts or under the cutting
deck. Contact with the blade can amputate hands and feet.
12. A missing or damaged discharge cover can cause blade
contact or thrown object injuries.
13. Many injuries occur as a result of the mower being pulled
over the foot during a fall caused by slipping or tripping. Do
not hold on to the mower if you are falling; release the handle
immediately.
14. Never pull the mower back toward you while you are walking. If
you must back the mower away from a wall or obstruction first
look down and behind to avoid tripping and then follow these
steps:
a. Step back from the mower to fully extend your arms.
b. Be sure you are well balanced with sure footing.
c. Pull the mower back slowly, no more than half way toward you.
d. Repeat these steps as needed.
15. Do not operate the mower while under the influence of alcohol or
drugs.
16. Do not engage the self-propelled mechanism on units so
equipped while starting engine.
17. The blade control handle is a safety device. Never attempt
to bypass its operation. Doing so makes the safety device
inoperative and may result in personal injury through contact with
the rotating blade. The blade control handle must operate easily
in both directions and automatically return to the disengaged
position when released.
18. Never operate the mower in wet grass. Always be sure of your
footing. A slip and fall can cause serious personal injury. If you
feel you are losing your footing, release the blade control handle
immediately and the blade will stop rotating within three seconds.
19. Mow only in daylight or in good artificial light. Walk, never run.
20. Stop the blade when crossing gravel drives, walks or roads.
21. If the equipment should start to vibrate abnormally, stop the
engine and check immediately for the cause. Vibration is gener-
ally a warning of trouble.
22. Shut the engine off and wait until the blade comes to a complete
stop before removing the grass catcher or unclogging the chute.
The cutting blade continues to rotate for a few seconds after the
engine is shut off. Never place any part of the body in the blade
area until you are sure the blade has stopped rotating.
23. Never operate mower without proper trail shield, discharge cover,
grass catcher, blade control handle or other safety protective
devices in place and working. Never operate mower with
damaged safety devices. Failure to do so, can result in personal
injury.
24. Muffler and engine become hot and can cause a burn. Do not
touch.
25. Never attempt to make a wheel or cutting height adjustment while
the engine is running.
26. Only use parts and accessories made for this machine by the
manufacturer. Failure to do so can result in personal injury.
27. When starting engine, pull cord slowly until resistance is felt, then
pull rapidly. Rapid retraction of starter cord (kickback) will pull
hand and arm toward engine faster than you can let go. Broken
bones, fractures, bruises or sprains could result.
28. If situations occur which are not covered in this manual, use care
and good judgment. Call customer assistance for the name of
your nearest servicing dealer.
Slope Operation
Slopes are a major factor related to slip and fall accidents which can
result in severe injury. Operation on slopes requires extra caution.
If you feel uneasy on a slope, do not mow it. For your safety, use
the slope gauge included as part of this manual to measure slopes
before operating this unit on a sloped or hilly area. If the slope is
greater than 15 degrees, do not mow it.
Do:
1. Mow across the face of slopes; never up and down. Exercise
extreme caution when changing direction on slopes.
2. Watch for holes, ruts, rocks, hidden objects, or bumps which can
cause you to slip or trip. Tall grass can hide obstacles.
WARNING: Engine Exhaust, some of its constituents, and certain vehicle components contain
or emit chemicals known to the State of California to cause cancer and birth defects or other
reproductive harm.
WARNING
This symbol points
out important safety
instructions which, if
not followed, could
endanger the personal
safety and/or property
of yourself and others.
Read and follow all
instructions in this
manual before at-
tempting to operate
this machine. Failure
to comply with these
instructions may result
in personal injury. When
you see this symbol.
HEED ITS WARNING!
Your Responsibility
Restrict the use
of this power machine
to persons who read,
understand
and follow the warnings
and instructions
in this manual
and on the machine.
DANGER: This machine was built to be operated according to the rules for safe operation in this manual. As with
any type of power equipment, carelessness or error on the part of the operator can result in serious injury. This
machine is capable of amputating hands and feet and throwing objects. Failure to observe the following safety
instructions could result in serious injury or death.
5
3. Always be sure of your footing. A slip and fall can cause serious
personal injury. If you feel you are losing your balance, release
the blade control handle immediately, and the blade will stop
rotating within 3 seconds.
Do Not:
1. Do not mow near drop-offs, ditches or embankments, you could
lose your footing or balance.
2. Do not mow slopes greater than 15 degrees as shown on the slope
gauge.
3. Do not mow on wet grass. Unstable footing could cause slipping.
Children
Tragic accidents can occur if the operator is not alert to the presence
of children. Children are often attracted to the mower and the mowing
activity. They do not understand the dangers. Never assume that
children will remain where you last saw them.
1. Keep children out of the mowing area and under the watchful
care of a responsible adult other than the operator.
2. Be alert and turn mower off if a child enters the area.
3. Before and while moving backwards, look behind and down for
small children.
4. Use extreme care when approaching blind corners, doorways,
shrubs, trees, or other objects that may obscure your vision of a
child who may run into the mower.
5. Keep children away from hot or running engines. They can suffer
burns from a hot muffler.
6. Never allow children under 14 years old to operate a power
mower. Children 14 years old and over should read and under-
stand the operation instructions and safety rules in this manual
and should be trained and supervised by a parent.
Service
Safe Handling Of Gasoline:
1. To avoid personal injury or property damage use extreme care
in handling gasoline. Gasoline is extremely flammable and the
vapors are explosive. Serious personal injury can occur when
gasoline is spilled on yourself or your clothes which can ignite.
Wash your skin and change clothes immediately.
2. Use only an approved gasoline container.
3. Never fill containers inside a vehicle or on a truck or trailer bed
with a plastic liner. Always place containers on the ground away
from your vehicle before filling.
4. Remove gas-powered equipment from the truck or trailer and
refuel it on the ground. If this is not possible, then refuel such
equipment on a trailer with a portable container, rather than from
a gasoline dispenser nozzle.
5. Keep the nozzle in contact with the rim of the fuel tank or
container opening at all times until fueling is complete. Do not
use a nozzle lock-open device.
6Extinguish all cigarettes, cigars, pipes and other sources of
ignition.
7. Never fuel machine indoors because flammable vapors will
accumulate in the area.
8. Never remove gas cap or add fuel while the engine is hot or run-
ning. Allow engine to cool at least two minutes before refueling.
9. Never over fill fuel tank. Fill tank to no more than ½ inch below
bottom of filler neck to provide for fuel expansion.
10. Replace gasoline cap and tighten securely.
11. If gasoline is spilled, wipe it off the engine and equipment. Move
unit to another area. Wait 5 minutes before starting the engine.
12. Never store the machine or fuel container near an open flame,
spark or pilot light as on a water heater, space heater, furnace,
clothes dryer or other gas appliances.
13. To reduce fire hazard, keep mower free of grass, leaves, or
other debris build-up. Clean up oil or fuel spillage and remove
any fuel soaked debris.
14. Allow a mower to cool at least 5 minutes before storing.
General Service:
1. Never run an engine indoors or in a poorly ventilated area.
Engine exhaust contains carbon monoxide, an odorless and
deadly gas.
2. Before cleaning, repairing, or inspecting, make certain the
blade and all moving parts have stopped. Disconnect the spark
plug wire and ground against the engine to prevent unintended
starting.
3. Check the blade and engine mounting bolts at frequent
intervals for proper tightness. Also, visually inspect blade for
damage (e.g., bent, cracked, worn) Replace blade with the
original equipment manufacture’s (O.E.M.) blade only, listed
in this manual. “Use of parts which do not meet the original
equipment specifications may lead to improper performance
and compromise safety!”
4. Mower blades are sharp and can cut. Wrap the blade or wear
gloves, and use extra caution when servicing them.
5. Keep all nuts, bolts, and screws tight to be sure the equipment
is in safe working condition.
6. Never tamper with safety devices. Check their proper operation
regularly.
7. After striking a foreign object, stop the engine, disconnect the
spark plug wire and ground against the engine. Thoroughly
inspect the mower for any damage. Repair the damage before
starting and operating the mower.
8. Never attempt to make a wheel or cutting height adjustment
while the engine is running.
9. Grass catcher components, discharge cover, and trail shield
are subject to wear and damage which could expose moving
parts or allow objects to be thrown. For safety protection,
frequently check components and replace immediately with
original equipment manufacturer’s (O.E.M.) parts only, listed
in this manual. “Use of parts which do not meet the original
equipment specifications may lead to improper performance
and compromise safety!”
10. Do not change the engine governor setting or overspeed the
engine. The governor controls the maximum safe operating
speed of the engine.
11. Check fuel line, tank, cap, and fittings frequently for cracks or
leaks. Replace if necessary.
12. Do not crank engine with spark plug removed.
13. Maintain or replace safety labels, as necessary.
14. Observe proper disposal laws and regulations. Improper
disposal of fluids and materials can harm the environment.
Do not modify engine
To avoid serious injury or death, do not modify engine in any way.
Tampering with the governor setting can lead to a runaway engine
and cause it to operate at unsafe speeds. Never tamper with
factory setting of engine governor.
Average Useful Life
According to the Consumer Products Safety Commission (CPSC)
and the U.S. Environmental Protection Agency (EPA), this product
has an Average Useful Life of seven (7) years, or 60 hours of
operation. At the end of the Average Useful Life, buy a new
machine or have the machine inspected annually by an authorized
service dealer to ensure that all mechanical and safety systems
are working properly and not worn excessively. Failure to do so can
result in accidents, injuries or death.
2
Safe
Operation
Practices
WARNING
This machine is equipped
with an internal combus-
tion engine and should
not be used on or near
any unimproved forest-
covered, brushcovered or
grass-covered land unless
the engine’s exhaust
system is equipped with a
spark arrester meeting ap-
plicable local or provincial
laws (if any).
If a spark arrester is used,
it should be maintained in
effective working order by
the operator.
A spark arrester for the muf-
fler is available through your
nearest engine authorized
service dealer.
Notice regarding Emis-
sions
Engines which are certified
to comply with California
and federal EPA emission
regulations for SORE (Small
Off Road Equipment) are
certified to operate on regu-
lar unleaded gasoline, and
may include the following
emission control systems:
Engine Modification (EM)
and Three Way Catalyst
(TWC) if so equipped.
6
3Shipping Brace Removal
WARNING: Make sure the
lawnmower’s engine is off.
Remove the ignition key before
removing the shipping brace.
• Locatetheshippingbrace,ifpresent,foundonthe
rightsideofthecuttingdeck.SeeFigure3-1.
• Whileholdingthedischargechutewithyourleft
hand,removetheshippingbracewithyourright
handbygraspingitbetweenyourthumbandindex
fingerandrotatingitclockwise.
WARNING: The shipping brace,
used for packaging purposes
only, must be removed and
discarded before operating your
lawnmower.
WARNING: The mowing deck
is capable of throwing objects.
Failure to operate the mower
without the discharge cover in
the proper operating position
could result in serious personal
injury and/or property damage.
Attaching the Negative Battery
Cable
NOTE:ThepositivebatteryterminalismarkedPos.(+).
ThenegativebatteryterminalismarkedNeg.(–).
Thepositivecable(heavyredwire)issecuredtothe
positivebatteryterminal(+)withahexboltandhexnut
atthefactory.
Thenegativecable(heavyblackwire)maybesecured
tothenegativebatteryteminalatthefactory.Ifithasnot
beenattached,proceedasfollows:
• Removethehexboltandwingnut(hexnut)fromthe
negativecable.
• Removetheblackplasticcover,ifpresent,fromthe
negativebatteryterminalandattachthenegative
cable(heavyblackwire)tothenegativebattery
terminal(–)withtheboltandnut.SeeFigure3-2.
• Makecertaintheretainingrodisinpositionoverthe
battery,securingitinplaceandmakesurethered
rubberbootcoversthepositivebatteryterminalto
helpprotectitformcorrosion.SeeFigure3-1.
NOTE:Ifthebatteryisputintoserviceafterthedate
shownonthebattery,chargethebatteryasinstructed
intheMaintenanceSectionofthismanualpriorto
operatingtheunit.
Figure 3-2
Figure 3-1
Disconnect and
ground the spark
plug wire as instruct-
ed in the separate
engine manual.
IMPORTANT
This unit is shipped
WITHOUT GASOLINE
or OIL. After assem-
bly, service engine
with gasoline and
oil as instructed in
the separate engine
manual packed with
your unit.
Assembly
and Set-Up
WARNING
Unfolding the Handle
1. Removethestarknobsandcarriagescrewsfromthe
lowerhandle.SeeFigure3-3.
2. Pivottheupperhandleintooperatingposition.Be
carefulnottocrimpcables.SeeFigure3-4.
3. Reinstallthecarriagescrewsandknobsremoved
earlier.
4. Tightentheupperandlowerstarknobsandcarriage
screwstosecuretheupperhandletothelower
handle.SeeFigure3-4.
5. Thehandleheightcanbeadjustedtoanyofthree
positions.Forinstructions,refertoHandleHeightinthe
MaintenanceandAdjustmentssectionofthismanual.
7
Figure 3-3 NOTE: Be careful not to
crimp cables when unfold-
ing the upper handle.
3
Figure 3-4 Figure 3-6
Use extreme care
when handling
gasoline. Gasoline is
extremely flammable
and the vapors are
explosive. Never fuel
machine indoors
or while the engine
is hot or running.
Extinguish cigarettes,
cigars, pipes, and
other sources of
ignition.
All mowers are
equipped with a rear
protective guard. The
guard helps eliminate
projectiles thrown
by the blade from
injuring the operator.
DO NOT REMOVE
THIS GUARD.
WARNING
Setup and
Adjustments
Attaching the Shift Lever
1. Remove the screw and the lock nut that secures the
shift lever to the shift lever plate. See Figure 3-5.
2. Remove the remaining screw and nut from the lower
shift lever plate. See Figure 3-5.
3. Position the upper shift lever into a vertical position
aligning the holes in the lever with the holes in the
shift plate. See Figure 3-6.
4. Secure the lever to the plate using the two screws and
two nuts removed earlier. See Figure 3-6, inset.
Tire Pressure
WARNING: Maximum tire pressure un-
der any circumstances is 30 psi. Equal
tire pressure should be maintained at
all times.
The rear tires on your unit may be over-inflated for
shipping purposes. Reduce the tire pressure before
operating the mower. Recommended operating tire
pressure is approximately 20 p.s.i . Check sidewall of tire
for maximum p.s.i
Figure 3-5
Gas and Oil Fill-up
The gasoline tank has a capacity of either two gallons.
Do not overfill.
WARNING: Use extreme care
when handling gasoline. Gaso-
line is extremely flammable and
the vapors are explosive. Never
fuel machine indoors or while
the engine is hot or running.
Extinguish cigarettes, cigars,
pipes, and other sources of
ignition.
Service the engine with gasoline and oil as instructed
in the separate Engine Operator/Owner Manual packed
with your unit. Read instructions carefully.
IMPORTANT: Your unit is shipped with motor oil in the
engine. However, you MUST check the oil level before
operating. Be careful not to overfill.
8
4
Operating
Your Lawn
Mower
Throttle / Choke Control
NOTE: When operating the mower with the cutting deck
engaged, be certain that the throttle/choke control is in
the fast position.
The throttle / choke control is used to adjust engine
speeds, to activate the engine choke and to stop the en-
gine. Always run engine with the throttle / choke control
lever in the fast position for best mower performance.
Choke: Use when starting a cold engine
Fast: Use during mower operation.
Slow: Use when idling engine.
Stop: Stops the engine.
Refer to Starting The Engine in the Operation section of
this manual for detailed starting instructions.
Engine
Service the engine with gasoline and oil as instructed in
the separate engine manual.
Deck Height Lever
Use this lever to adjust the mowing deck’s cutting
height. T use, move the lever to the left, then place the
lever in the notch best suited for your application.
Ignition Switch
WARNING: Never leave a running
machine unattended. Always disengage
PTO, move shift lever into neutral
position, set parking brake, stop engine
and remove key to prevent unintended
starting.
To start the engine, insert the key into the ignition switch
and turn clockwise to the START position. Release the
key into the RUN position once the engine has started.
To stop the engine, turn the ignition key counterclockwise
to the STOP position. See Figure 4-2.
CAUTION: Never move the key into the
Start position while the engine is running;
doing so may cause damage to the
engine’s starter.
WARNING
Figure 4-1
Know Your Lawn Mower
Read and follow
all instructions in
this manual before
attempting to operate
this machine. Failure
to comply with these
instructions may
result in personal
injury.
Use extreme care
when handling
gasoline. Gasoline is
extremely flammable
and the vapors are
explosive. Never fuel
the machine indoors
or while the engine
is hot or running.
Extinguish cigarettes,
cigars, pipes and
other sources of
ignition.
Blade
Control
Deck Height
Lever
Ignition Switch
Systems
Indicator Monitor
Throttle/Choke
Control
Drive Control
Gear Shift Lever
Fuel Tank
Cap
HL
Stop
Position Start
Position
Run
Position
Figure 4-2
9
4
Operating
Your Lawn
Mower
WARNING
The operation of any
lawn mower can result
in foreign objects
being thrown into
the eyes, which can
damage your eyes
severely. Always wear
safety glasses while
operating the mower,
or while performing
any adjustments or
repairs on it.
Be sure no one other
than the operator is
standing near the lawn
mower while starting
engine or operating
mower. Never run
engine indoors or
in enclosed, poorly
ventilated areas. En-
gine exhaust contains
carbon monoxide, an
odorless and deadly
gas. Keep hands, feet,
hair and loose clothing
away from any moving
parts on engine and
lawn mower.
42.0
Drive Control
The drive control is located on the
left handle. Squeeze the control grip
against the handle grip to engage the
wheel drive. Release to stop.
CAUTION: Always
release the drive control
before changing speeds.
Failure to do so may
result in serious damage
to your transmission.
Blade Control
The blade control handle is located
on the right handle. See Figure 4-1.
Squeeze the control grip against the
handle grip to engage the blades.
Release to stop.
WARNING: Never
attempt to start the
engine with the blade
control engaged.
CAUTION: Always
release the blade
control when starting
the engine. Failure to
do so may result in premature wear to
your engine’s electric starter.
Gear Shift Lever
Use this lever to select any of four forward ground
speeds, neutral, or reverse.
FORWARD
Four forward speeds are available. Positon one (1) is the
slowest and position four (4) is the fastest.
REVERSE
To select reverse, put the lever in the Reverse (R)
position.
WARNING: Look behind the mower
before and during reverse operaiton.
Stop the mower blades before operating
in reverse.
NEUTRAL
Place the lever in neutral (N) before starting the mower,
and when the mower is not in use. In addition, the mower
can be manually pushed or pulled by placing the gear
shift lever into N (neutral) position and pressing the drive
control against the handle grip.
Systems Indicator Monitor/Hour Meter
LCD
When the ignition key is rotated out of the STOP
position but not into the START position, the systems
indicator monitor displays the battery’s output, in volts,
on its LCD for approximately five seconds, after which it
displays the hours of tractor operation. Once the tractor
is started, the monitor continually displays the hours of
tractor operation on its LCD.
Hours of tractor operation are recorded any time the
ignition key is rotated out of the STOP position, regard-
less of whether the engine is started.
The Indicator Monitor will also remind the operator of
maintenance intervals for changing the engine oil. The
LCD will alternately flash the recorded hours, “CHG”
and “OIL” for five minutes, after every 50 hours of
recorded operation elapse. The maintenance interval
lasts for two hours (from 50-52, 100-102, 150-152, etc.).
The LCD will also flash as described above for five
minutes every time the tractor’s engine has been started
during this maintenance interval. Before the interval
expires, change the crankcase oil level as instructed in
this Operator’s Manual.
Battery
It is normal for the Battery light to illuminate while the
engine is cranking during start-up, but if it illuminate’s
during operation, while the engine is running, the
battery is in need of a charge or the engine’s charging
system is not generating sufficient amperage. Refer
to the MAINTENANCE section of this manual for the
proper battery charging procedure or have the charging
system checked by your service dealer.
10
4
Operating
Your Lawn
Mower
WARNING
If you strike a foreign
object, stop the
engine, disconnect
the spark plug
wire(s) and ground
against the engine.
Thoroughly inspect
the machine for any
damage. Repair
the damage before
restarting and operat-
ing.
Use extreme care
when handling
gasoline. Gasoline is
extremely flammable
and the vapors are
explosive. Never fuel
the machine indoors
or while the engine
is hot or running.
Extinguish cigarettes,
cigars, pipes and
other sources of
ignition.
Starting the Engine
Service the engine with gasoline and oil as in-
structed in the separate engine manual packed with
your unit. Read instructions carefully.
1. Release all controls on the mower.
2. Move the gear shift lever into the neutral (N) posi-
tion.
3. Insert the tractor key into the ignition switch.
4. If starting a cold engine, place the throttle/choke
control all the way forward, into the CHOKE position.
If restarting a warm engine, place the throttle/choke
control into the Fast (rabbit) position.
5. Turn the ignition key clockwise to the START position.
After the engine starts, release the key. It will return
to the RUN position.
CAUTION: Do NOT hold the key in the START position
for longer than five seconds at a time. Doing so may
cause damage to your engine’s electric starter.
6. Move the throttle/choke control into the Fast (rabbit)
position.
NOTE: Never leave the thorttle/choke control in the
CHOKE while operating the mower. Doing so will result
in a “rich” fuel mixture and cause the engine to run
poorly.
Stopping the Engine
WARNING: If you strike a foreign
object, stop the engine, disconnect
the spark plug wire(s) and ground
against the engine. Thoroughly
inspect the machine for any damage.
Repair the damage before restarting
and operating.
1. Release the blade control.
2. Move the throttle/choke control in the STOP position.
3. Turn the ignition key coutnerclockwise to the STOP
position.
4. Remove the key from the ignition switch to prevent
unintended starting.
Engaging the Drive
WARINNG: Avoid sudden starts, exces-
sive speed and sudden stops.
1. To travel FORWARD:
a. With the engine running near top speed, move the
shift lever to one of the four forward speeds. Select
a speed appropriate for the conditions that exist.
b. Squeeze drive control against the left handle grip
and the mower will move. Release it and the drive
motion will stop.
2. To travel REVERSE:
a. Check that the area behind is clear.
b. Place the gear shift lever in Reverse (R).
c. Squeeze drive control against the left handle grip
and the mower will move. Release it and the drive
motion will stop.
Engaging the Blades
WARNING: To help avoid blade contact
or a thrown object injury, keep bystand-
ers, helpers, children and pets at least
75 feet from the machine while it is
in operation. Stop machine if anyone
enters the area.
1. Move the throttle/choke control in the FAST position
2. Squeeze blade control against the right handle grip
and the blade will engage. Release it and the blades
will stop.
Driving On Slopes
Refer to the SLOPE GAUGE on page 3 to help determine
slopes where you may operate the tractor safely.
WARNING: Do not mow on inclines
with a slope in excess of 15 degrees (a
rise of approximately 2-1/2 feet every
10 feet). The tractor could overturn and
cause serious injury.
• Mow across the face of slopes, NEVER up and down.
• Exercise extreme caution when changing direction on
slopes.
• Watch for holes, ruts, bumps, rocks, or other hidden or
bumps which can cause you to slip or trip. Tall grass
can hide obstacles.
•Always be sure of your footing. A slip and fall can
cause serious personal injury. If you feel you are
losing your balance, release the blade control handle
immediately and the blade will stop rotatin within three
(3) seconds.
•Do not mow near drop-offs, ditches or embankments,
you could lose your footing or balance.
• Do not mow slopes greater than 15 degrees as shown
on the slope gauge.
• Do not mow on wet grass. Unstable footing could
cause slipping.
11
Using the Deck Height Lever
To raise or lower the cutting deck, move the deck height
lever to the left, then place it in the notch best suited for
your application.
Mowing
The following information will be helpful when using the
cutting deck with your tractor:
• Do not mow at high ground speed, especially if a
mulch kit or grass collector is installed.
• Do not cut the grass too short. Short grass invites
weed growth and yellows quickly in dry weather.
• Mowing should always be done with the engine at full
throttle.
• For best results it is recommended that the first two
laps be cut with the discharge thrown towards the
center. After the first two laps, reverse the direction to
throw the discharge to the outside for the balance of
cutting. This will give a better appearance to the lawn.
• Do NOT attempt to mow heavy brush and weeds and
extremely tall grass. Your tractor is designed to mow
lawns, NOT clear brush.
• Keep the blades sharp and replace the blades when
worn. Refer to Cutting Blades on page 16 of this
manual for proper blade sharpening instructions.
WARNING: If you strike a foreign object,
stop the engine, disconnect the spark
plug wire(s) and ground against the
engine. Thoroughly inspect the machine
for any damage. Repair the damage
before restarting and operating.
Mulching
The mower is equipped with a mulch kit which incorpo-
rates special blades, already standard on your mower,
in a process of recirculating grass clippings repeatedly
beneath the cutting deck. The ultra-fine clippings are
then forced back into the lawn where they act as a natural
fertilizer. Observe the following points for the best results
when mulching:
• Never attempt to mulch if the lawn is damp. Wet grass
tends to stick to the underside of the cutting deck
preventing proper mulching of the clippings.
• Do NOT attempt to mulch more than 1/3 the total
height of the grass. Doing so will cause the clippings
to clump up beneath the deck and not be mulched
effectively.
• Maintain a slow ground speed to allow the grass
clippings more time to effectively be mulched.
• Always position the throttle control lever in the FAST
(rabbit) position and allow it to remain there while
mowing. Failing to keep the engine at full throttle
places strain on the mower’s engine and does not
allow the blades to properly mulch the grass clippings.
Installing / Removing Mulch Baffle
WARNING: Before installing or remov-
ing the mulch plug, disengage blades,
stop the engine and remove key to
prevent unintended starting.
1. Stop the engine and wait for all parts to stop moving.
Installing the Mulch Baffle
1. Insert the right-side tab (A) of the baffle into the
bracket on the deck. See Figure 4-3.
Insert the mulch baffle into the discharge opening (B),
See Figure 4-3.
3. Once it’s positioned in the deck opening, push the
baffle towards the rear of the mower (C) to secure it
in place. See Figure 4-3.
Removing the Mulch Baffle
1. Slide the baffle to the right (toward the front of the
mower) to disengage the slot from the mower deck
and then pry the left-side of the baffle outward.
4
Operating
Your Lawn
Mower
WARNING
Plan your mowing
pattern to avoid
discharge of materi-
als toward roads,
sidewalks, bystand-
ers and the like. Also,
avoid discharging
material against a
wall or obstruction
which may cause
discharged mate-
rial to ricochet back
toward the operator.
Before installing or
removing the mulch
plug, disengage
blades, stop the
engine and remove
key to prevent
unintended starting.
A
B
C
Figure 4-3
12
5
WARNING
Figure 5-1
Figure 5-2
Engine
Refer to the Engine Operator/Owner Manual for
engine maintenance instructions.
Check engine oil level before each use as instructed
in the Engine Operator/Owner Manual packed with your
unit. Follow the instructions carefully.
NOTE: Maintenance, repair, or replacement of the emis-
sion expense may be performed by any engine repair
establishment or individual. Warranty repairs must be
performed by an authorized dealer.
WARNING: If the engine has been
recently run, the engine, muffler and
surrounding metal surfaces will be
hot and can cause burns to the skin.
Exercise caution to avoid burns.
1. Run the engine for a few minutes to allow the oil in
the crankcase to warm up. Warm oil will flow more
freely and carry away more of the engine sedi-
ment which may have settled at the bottom of the
crankcase. Use care to avoid burns from hot oil.
2. Remove the upper star knob and carriage screw on
the right side of the handle. See Figure 6-1.
3. Pivot the support tube forward to allow room to
connect the oil drain hose to the oil drain valve. See
Figure 6-1.
4. Pop open the protective cap on the end of the oil
drain valve to expose the drain port. See Figure 6-1.
5. Remove the oil fill cap/ dipstick from the oil fill tube.
6. Push the oil drain hose (packed with this manual)
onto the oil drain port. Route the opposite end of the
hose into an appropriate oil collection container with
a capacity great enough to collect the used oil.
7. Pinch the tabs on the oil drain valve, then pull
outward to begin draining oil. See Figure 6-1.
A
B
Oil Drain Valve
Oil Fill Cap/Dipstick
Before performing
any maintenance,
lubrication or
repairs, disengage
blades, stop engine
and remove key to
prevent unintended
starting.
Maximum tire
pressure under any
circumstances is
30 p.s.i. Equal tire
pressure should be
maintained at all
times.
Cutting grass in
sandy soil condition
causes abrasive wear
to the blade.
8. After the oil has finished draining, push the oil drain
valve back in, until the tabs click into place. Re-cap
the end of the oil drain valve to keep debris from
entering the drain port.
9. Refill the engine with new motor oil as instructed in the
Engine Operator/Owner Manual packed with your unit.
Air Cleaner
Service the pre-cleaner, if so equipped, and cartridge/air
cleaner element as instructed in the Engine Operator/
Owner Manual packed with your unit.
Spark Plug(s)
The spark plug(s) should be cleaned and the gap reset
once a season. Spark plug replacement is recommended
at the start of each mowing season. Refer to the Engine
Operator/Owner Manual for correct plug type and gap
specifications.
Tire Pressure
WARNING: Maximum tire pressure un-
der any circumstances is 30 p.s.i. Equal
tire pressure should be maintained at
all times.
Periodically check the pressure on both your mower’s
rear tires. Uneven tire pressure could cause the cutting
deck to mow unevenly and may result in mower veering
right or left during operation. The recommended operat-
ing tire pressure is approximately 20 psi for the rear tires .
Check the sidewall of tire for maximum p.s.i.
Cleaning the Engine And Deck
Any fuel or oil spilled on the machine should be wiped off
promptly. Do NOT allow debris to accumulate around the
cooling fins of the engine, the transmission cooling fins or
on any other part of the machine, especially the belts and
pulleys.
Maintenance
and
Adjustments
13
5
WARNING
Figure 5-3
Smart Jet™
Your mower deck is equipped with a water port on its
surface as part of its deck wash system.
Use the Smart Jet™ to rinse grass clippings from the
deck’s underside and prevent the buildup of corrosive
chemicals. Complete the following steps AFTER EACH
MOWING:
WARNING: Before using the deck wash
system, always disengage blades,
stop engine and remove key to prevent
unintended starting.
1. Position the mower to a level, clear spot on your lawn,
near enough for your garden hose to reach.
IMPORTANT: Make certain the mower’s discharge chute
is directed AWAY from your house, garage, parked cars,
etc.
2. Thread the hose coupler (packaged with your mower’s
Operator’s Manual) onto the end of your garden hose.
3. Attach the hose coupler to the water port on your
decks surface. See Figure 5-3.
4. Turn the water on.
5. Start the engine and place the throttle lever in the
FAST (rabbit) position.
7. While in the operator’s position behind the mower,
move the Blade Control into the ON position.
8. Remain in the operator’s position with the cutting deck
engaged for a minimum of two minutes, allowing the
underside of the cutting deck to thoroughly rinse.
10.Move the Blade Control into the OFF position.
11. Turn the ignition key to the STOP position to turn the mower’s
engine off.
12. Turn the water off and detach the hose coupler from the
water port on your decks surface.
After cleaning your deck with the Smart Jet™ system,
start the mower’s engine, return to the operator’s position
and engage the blades. Keep the cutting deck running for
a minimum of two minutes, allowing the underside of the
cutting deck to thoroughly dry.
Lubrication
WARNING: Before lubricating, repair-
ing, or inspecting, always move shift
lever into neutral position, stop engine
and remove key to prevent unintended
starting.
Engine
Lubricate the engine with motor oil as instructed in the
Engine Owner Manual packed with your unit.
Pivot Points & Linkage
Lubricate all the pivot points on the drive system, and lift
linkage at least once a season with light oil.
Rear Wheels
The rear wheels should be removed from the axles once
a season. Lubricate the axles and the rims well with an
all-purpose grease before re-installing them.
Front Wheels
Each of the front wheel axles and casters is equipped
with a grease fitting. See Figure 5-4. Lubricate with a
No. 2 multi-purpose grease applied with a grease gun
after every 50 hours of mower operation.
Before using the
deck wash system,
always disengage
blades, stop engine
and remove key to
prevent unintended
starting.
Before lubricat-
ing, repairing, or
inspecting, always
move shift lever into
neutral position,
stop engine and
remove key to
prevent unintended
starting.
Maintenance
and
Adjustments
Figure 5-4
14
WARNING
Do not operate mower
without the belt cover
installed. Failure to
follow this instruc-
tion could result in
personal injury or
property damage.
Periodically inspect
the blade spindles for
cracks or damage,
especially if you strike
a foreign object.
Replace immediately
if damaged.
5
Deck Spindle
Grease fittings can be found on each deck spindle.
See Figure 5-5. Lubricate with 251H EP grease or an
equivalent No. 2 multi-purpose lithium grease. Using a
grease gun, apply two strokes (minimum) or sufficient
grease to the spindle shaft.
Blade Timing Belt
The cutting deck spindles are driven by timing (cogged)
belt, assuring that the deck blades are always perpen-
dicular to each other. At least once a season, or after
striking any foreign object, check the timing belt as
follows:
1. Remove the belt cover by removing the three screws
and washers which secure it to the frame. See
Figure 5-6.
WARNING: Do not operate mower
without the belt cover installed. Failure
to follow this instruction could result
in personal injury or property damage.
2. The top of each spindle pulley is marked with
an arrow. See Figure 5-7. The arrows should be
perpindicular (at a 90˚ angle) to each other.
If the arrows on the surface of each spindle pulley
are not perpindicular (at a 90˚ angle) to each other,
see your authorized dealer.
WARNING: Do not operate the
machine without the deck’s timing
belt properly set. Failure to follow this
instruction could result in personal
injury or property damage.
Figure 5-5
Maintenance
and
Adjustments
Adjustments
WARNING: Shut the engine off and
remove the ignition key before making
adjustments.
Handle Height
The upper handle is secured to two support bars that can
be adjusted to raise or lower the handle height. Adjust if
necessary as follows:
1. Remove the upper star knob and carriage screw from
both sides of the upper handle. See Figure 5-8.
2. Align one of the three holes on each support bar with
the holes on the handle and secure with previously
removed carriage bolt and star knob.
Cutting Deck Removal
WARNING: Before performing any
maintenance, lubrication or repairs, dis-
engage blades, stop engine and remove
key to prevent unintended starting.
Figure 5-6
Figure 5-7
15
5
WARNING
Before using the
deck wash system,
always disengage
blades, stop engine
and remove key to
prevent unintended
starting.
Before lubricat-
ing, repairing, or
inspecting, always
move shift lever into
neutral position,
stop engine and
remove key to
prevent unintended
starting.
Maintenance
and
Adjustments
To remove the cutting deck, proceed as follows:
1. Remove the belt cover by removing the three screws
and washers which secure it to the frame. See Figure
5-6.
WARNING: Do not operate mower
without the belt cover installed. Failure
to follow this instruction could result in
personal injury or property damage.
2. Place the deck height lever in the highest position.
3. Position wood blocks at various places under the
deck’s edge. These will temporaily support the deck
as you unmount it.
4. Use the deck height lever to lower the deck, so that it
rests on the wood blocks.
5. Remove the screw and flange nut which secures the
belt keeper rod to the left side of the mower’s frame.
See Figure 5-9.
6. Remove the belt keeper rod and remove the deck belt
from around the mower’s engine pulley.
7. Looking at the cutting deck from the left side, locate
and carefully remove the hairpin clips that secure the
deck supports on the rear left side and front left side
of the deck. See Figure 5-10.
8. Repeat the previous step on the mower’s right side.
9. Carefully remove the front deck supports from the
deck lift arms. See Figure 5-11.
10.Carefully unhook the mower’s lift assembly from the
rear deck supports.
11. Use the deck height lever to raise the lift assembly to
its highest position.
12. Remove the wooden blocks from under the deck and
gently slide the cutting deck toward the rear of the
machine.
13. Pull the click pin out and unhook the drve spring cable
from the idler arm assembly. See Figure 5-12.
14. Gently slide the cutting deck to the right, out from
beneath the mower.
Figure 5-8 Figure 5-10
Figure 5-11
Lift Arm
Figure 5-12
To install the cutting, deck follow the above steps in
reverse order to reattach deck and bel tcover.
16
Cutting Blades
WARNING: Be sure to shut the engine
off, remove ignition key, disconnect
the spark plug wire(s) and ground
against the engine to prevent unin-
tended starting before removing the
cutting blade(s) for sharpening or
replacement. Protect your hands by
using heavy gloves or a rag to grasp
the cutting blade.
WARNING: Periodically inspect the
blade spindles for cracks or damage,
especially if you strike a foreign object.
Replace immediately if damaged.
The blades may be removed as follows.
1. Remove the deck from beneath the mower, (refer to
Cutting Deck Removal on page 14) then gently flip
the deck over to expose its underside.
2. Place a block of wood between the center deck
housing baffle and the cutting blade to act as a
stabilizer. See Figure 5-13.
3. Remove the hex flange nut that secures the blade to
the spindle assembly.
4. To properly sharpen the cutting blades, remove
equal amounts of metal from both ends of the blades
along the cutting edges, parallel to the trailing edge,
at a 25° to 30° angle. See Figure 5-14.
IMPORTANT: If the cutting edge of the blade has
already been sharpened or if any metal separation is
present, replace the blades with new ones.
• It is important that each cutting blade edge be
ground equally to maintain proper blade balance.
• A poorly balanced blade will cause excessive
vibration and may cause damage to the mower and
result in personal injury. The blade can be tested
by balancing it on a round shaft screwdriver. Grind
metal from the heavy side until it balances evenly.
• When replacing the blade, be sure to install the
blade with the side of the blade marked ‘‘Bottom’’ (or
with a part number stamped in it) facing the ground
when the mower is in the operating position.
IMPORTANT: Use a torque wrench to tighten the blade
spindle hex flange nut to between 70 foot-pounds and
90 foot-pounds.
The cutting blades must be installed perpendicular to
each other. If the blades cannot be installed perpendicu-
lar to each other, the blade timing belt must be reset.
See your authorized dealer to have the deck’s timing
belt reset.
Figure 5-13
WARNING
Do not operate mower
without the belt cover
installed. Failure to
follow this instruc-
tion could result in
personal injury or
property damage.
Periodically inspect
the blade spindles for
cracks or damage,
especially if you strike
a foreign object.
Replace immediately
if damaged.
5
Maintenance
and
Adjustments
Figure 5-14
Rear Flap Replacement
WARNING: Never operate the mower
without the trail shield in place and
working. Failure to do so can result in
personal injury.
The rear flap is attached to the back of the mower deck,
and is designed to minimize the possibility that objects
will be thrown from the rear of the mower toward the
operator. If the rear flap becomes damaged, replace as
follows.
1. Remove screw and press flap in on either side to
remove from hole. See Figure 5-15.
2. Remove screw and flap from opposite hole and replace
with new flap following these steps in reverse order.
Figure 5-15
17
Battery
The battery is sealed and is maintenance-free. Acid levels
cannot be checked.
• Always keep the battery cables and terminals clean
and free of corrosive build-up.
• After cleaning the battery and terminals, apply a light
coat of petroleum jelly or grease to both terminals.
• Always keep the rubber boot positioned over the
positive terminal to prevent shorting.
IMPORTANT: If removing the battery for any reason,
disconnect the NEGATIVE (Black) wire from it’s terminal
first, followed by the POSITIVE (Red) wire. When
reinstalling the battery, always connect the POSITIVE
(Red) wire to its terminal first, followed by the NEGATIVE
(Black) wire. Be certain that the wires are connected to
the correct terminals; reversing them could change the
polarity and result in damage to your engine’s alternating
system.
Charging
WARNING: Batteries give off an explo-
sive gas while charging. Charge battery
in a well ventilated area and keep away
from an open flame or pilot light as on
a water heater, space heater, furnace,
clothes dryer or other gas appliances.
If the mower has not been put into use for an extended
period of time, set your battery charger to deliver a max of
10 amperes.
Jump Starting
WARNING: When removing or installing
the battery, follow these instructions to
prevent the screwdriver from shorting
against the frame.
IMPORTANT: Never jump your mower’s dead battery with
the battery of a running vehicle.
1. Connect end of one jumper cable to the positive
terminal of the good battery, then the other end to the
positive terminal of the dead battery.
2. Connect the other jumper cable to the negative
terminal of the good battery, then to the frame of the
unit with the dead battery.
CAUTION: If the jumper battery is installed on a vehicle
(i.e. car, truck), do NOT start the vehicle’s engine when
jump starting your mower.
WARNING: Failure to use this procedure
could cause sparking, and the gas in
either battery could explode.
Cleaning
Clean the battery by removing it from the mower and
washing with a baking soda and water solution. If neces-
sary, scrape the battery terminals with a wire brush to
remove deposits. Coat terminals and exposed wiring with
grease or petroleum jelly to prevent corrosion.
Changing the Deck Belt
WARNING: Be sure to shut the engine
off, remove ignition key, disconnect
the spark plug wire(s) and ground
against the engine to prevent unin-
tended starting before removing the
belt.
All belt on your mower are subject to wear and should
be replaced if any signs of wear are present.
IMPORTANT: The V-belt found on your mower are
specially designed to engage and disengage safely. A
substitute (non-OEM) V-belt can be dangerous by not
disengaging completely. For a proper working machine,
use factory approved belts.
To change or replace the deck belt on your mower,
proceed as follows:
1. Remove the cutting deck from the mower as
instructed earlier in this section.
2. Remove the belt keeper as instructed earlier in this
section.
3. Loosen, but not remove, the nut and bolt which
secures each deck idler pulley. See Figure 5-16.
4. Remove the deck belt from around all pulleys.
5. Route the new belt as shown in and Figure 5-16.
6. Reattach the belt keeper and belt cover.
Changing the Deck Timing Belt
NOTE: Several components must be removed and
special tools (i.e. air/impact wrench) in order to change
the deck timing belt. See an authorized service dealer.
Changing the Transmission Drive Belt
NOTE: Several components must be removed and
special tools (i.e. air/impact wrench) in order to change
the tractor’s drive belt. See an authorized service
dealer.
Fuse
WARNING: Before performing any
maintenance, lubrication or repairs,
disengage blades, stop engine and
remove key to prevent unintended
starting.
A 20 Amp fuse is installed in your mower’s wiring
harness to protect the mower’s electrical system from
damage caused by excessive amperage.
If the electrical system does not function, or your
mower’s engine will not crank, first check to be certain
that the fuse has not blown. It is located near the
battery.
CAUTION: Always use a replacement fuse with the
same amperage capacity as the boown fuse.
Before performing
any maintenance,
lubrication or repairs,
disengage blades,
stop engine and
remove key to prevent
unintended starting.
Be sure to shut the
engine off, remove ig-
nition key, disconnect
the spark plug wire(s)
and ground against
the engine to prevent
unintended starting
before removing
the cutting blade(s)
for sharpening or
replacement. Protect
your hands by using
heavy gloves or a rag
to grasp the cutting
blade.
WARNING
5
Maintenance
and
Adjustments
18
5
Maintenance
and
Adjustments
Maintenance Schedule
Before
Each use
Every
10 Hours
Every
25 Hours
Every
50 Hours
Every
100 Hours
Prior
to Storing
Clean Mower P P
Check Engine Oil Level P
Check Air Filter for Dirty, Loose or Damaged Parts P
Replace Air Filter Element P
Change Engine Oil P
Lube Deck Spindles P P
Clean Battery Terminals P P
Lube Front Deck Wheels and Casters P P
Clean Engine Cooling Fins P P
Lube Pivot Points P P
Check Spark Plug Condition & Gap P P
Replace Fuel Filter P
General Recommendations
1. Always observe safety rules when performing
any maintenance.
2. The warranty on this lawn mower does not cover
items that have been subjected to operator abuse
or negligence. To receive full value from warranty,
operator must maintain the lawn mower as
instructed here.
3. Changing of engine-governed speed will void
engine warranty.
4. All adjustments should be checked at least once each
season.
5. Periodically check all fasteners and make sure these
are tight.
Off-Season Storage
The following steps should be taken to prepare your lawn
mower for storage.
1. Clean and lubricate mower thoroughly as described in
the lubrication instructions.
2. We do not recommend the use of a pressure washer
or garden hose to clean your unit.
3. Refer to engine manual for correct engine
storage instructions.
4. Coat mower’s cutting blade with chassis grease to
prevent rusting.
5. Store mower in a dry, clean area. Do not store next to
corrosive materials, such as fertilizer.
NOTE: When storing any type of power equipment in
a poorly ventilated or metal storage shed, care should
be taken to rust-proof the equipment. Using a light oil or
silicone, coat the equipment, especially cables and all
moving parts of your lawn mower before storage.
19
For repairs beyond
the minor adjust-
ments listed here,
contact an autho-
rized service dealer.
6
Trouble
Shooting
CauseProblem Remedy
Engine fails to start 1. Choke not activated.
2. Spark plug wire disconnected.
3. Fuel tank empty or stale fuel.
4. Blocked fuel line.
5. Faulty spark plug.
6. Engine flooding.
7. Burnt fuse (Electric Start Only)
1. Place throttle/choke control in CHOKE
position.
2. Connect wire to spark plug.
3. Fill tank with clean, fresh gasoline.
4. Clean fuel line.
5. Clean, adjust gap, or replace.
6. Wait a few minutes to restart, but do not
prime.
7. Replace fuse. (See Maintenance Section.
Engine runs erratic 1. Move throttle/choke control out of CHOKE
position.
2. Connect sprak plug wire(s).
3. Clean fuel line; fill tank with clean, fresh
gasoline and replace fuel filter.
4. Clear vent.
5. Drain fuel tank and carburetor. Refill with
fresh fuel.
6. Refer to engine manual.
1. Engine running with CHOKE
activated.
2. Spark plug wire(s) loose.
3. Blocked fuel line or stale fuel.
4. Gas cap vent plugged.
5. Water or dirt in fuel system.
6. Dirty air cleaner.
Engine overheats 1. Fill crankcase with proper oil.
2. Refer to the engine manual packed with
your unit.
3. Remove blower housing and clean.
4. Refer to engine manual.
1. Engine oil level low.
2. Dirty air filter.
3. Air flow restricted.
4. Carburetor not adjusted properly.
Occasional skip
(hesitates) at high speed
1. Adjust gap to .030”. Refer to engine
manual.
2. Refer to engine manual.
1. Spark plug gap too close.
2. Carburetor idle mixture adjustment
improperly set.
Idles poorly 1. Reset gap to .030” or replace spark plug.
Refer to engine manual.
2. Refer to engine manual.
3. Refer to engine manual.
1. Spark plug fouled, faulty or gap too
wide.
2. Carburetor improperly adjusted.
3. Dirty air cleaner.
1. Cutting Blade loose or unbalanced.
2. Bent cutting blade.
1. Tighten blade and adapter. Balance blade
2. Replace blade.
Excessive vibration
1. Wheels not positioned correctly.
2. Dull blade.
Uneven cut 1. Place all four wheels in same height
position.
2. Sharpen or replace blade.
1. Wet grass.
2. Excessive high grass.
3. Dull blade.
1. Do not mow when grass is wet;
wait until later to cut.
2. Mow once at a high cutting height, then
mow again at desired height or make a
narrower cutting path.
3. Sharpen or replace blade.
Mower will not mulch
grass
20
B
B
C
C
1
2
3
4
4
4
5
6
6
7
7
8
9
11
11
12
12
13
17
14 15
16
18
19
20
21
21
22
23
24
25
26
27
28
4
4
30
31
32
33
34
35
36
37
38
39
40
41
42
42
43
44
45
45
46
46
A
A
47
48
49
50
50
51
52
53
7
54
55
56
7
57
58
59
60
61
63
64
65
66
67
68
69
70
71
72
73
62
10
74
75

Other Cub Cadet Lawn Mower manuals

Cub Cadet SLT1550, SLT1554 User manual

Cub Cadet

Cub Cadet SLT1550, SLT1554 User manual

Cub Cadet L20 User manual

Cub Cadet

Cub Cadet L20 User manual

Cub Cadet SC 100 User manual

Cub Cadet

Cub Cadet SC 100 User manual

Cub Cadet E18M3 User manual

Cub Cadet

Cub Cadet E18M3 User manual

Cub Cadet 23HP Z-Force 48 w/ Fabricated Deck Operating manual

Cub Cadet

Cub Cadet 23HP Z-Force 48 w/ Fabricated Deck Operating manual

Cub Cadet 24HP Tank 53AB5ETW150, 19HP Ta Operating manual

Cub Cadet

Cub Cadet 24HP Tank 53AB5ETW150, 19HP Ta Operating manual

Cub Cadet 148 User manual

Cub Cadet

Cub Cadet 148 User manual

Cub Cadet 2206 User manual

Cub Cadet

Cub Cadet 2206 User manual

Cub Cadet GT1554 User manual

Cub Cadet

Cub Cadet GT1554 User manual

Cub Cadet RZT 42 w/42" Mower Deck User manual

Cub Cadet

Cub Cadet RZT 42 w/42" Mower Deck User manual

Cub Cadet 1863 Reference manual

Cub Cadet

Cub Cadet 1863 Reference manual

Cub Cadet 1882 User manual

Cub Cadet

Cub Cadet 1882 User manual

Cub Cadet 13WZ92AK056 User manual

Cub Cadet

Cub Cadet 13WZ92AK056 User manual

Cub Cadet LT1042LE User manual

Cub Cadet

Cub Cadet LT1042LE User manual

Cub Cadet 833E Series User manual

Cub Cadet

Cub Cadet 833E Series User manual

Cub Cadet 13AF91AP010 User manual

Cub Cadet

Cub Cadet 13AF91AP010 User manual

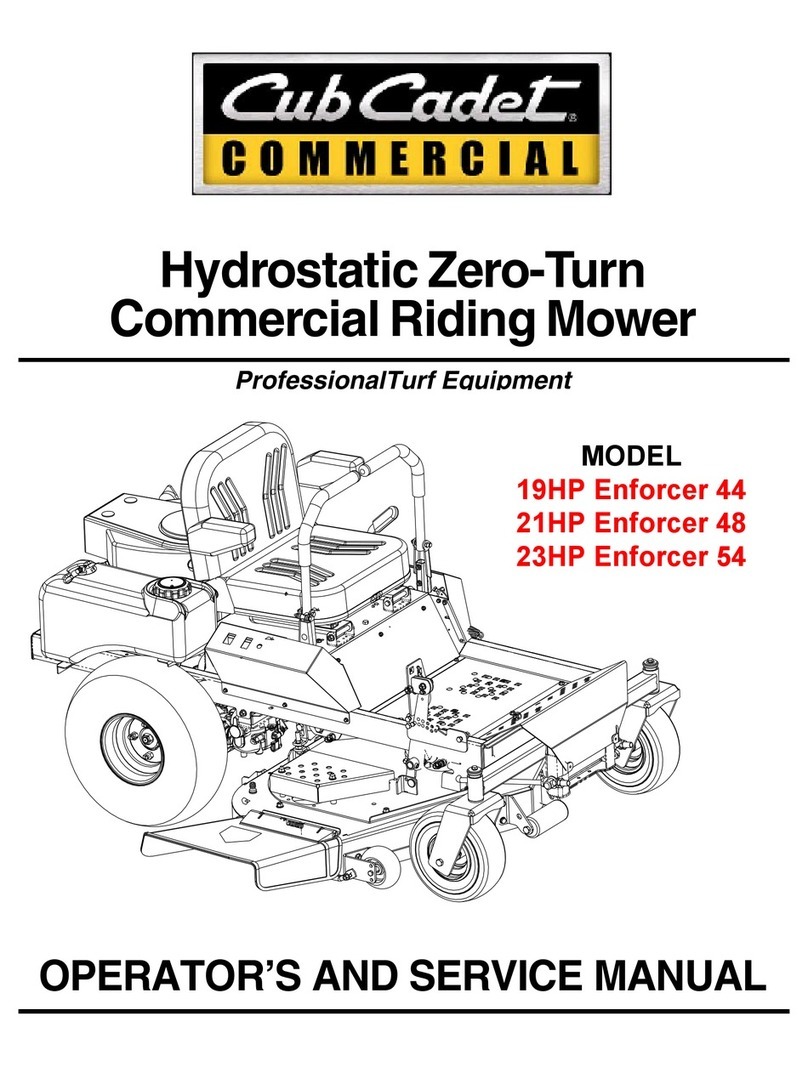
Cub Cadet Zero-Turn Commercial Riding Mower Operating manual

Cub Cadet

Cub Cadet Zero-Turn Commercial Riding Mower Operating manual

Cub Cadet Z-Force 48 User manual

Cub Cadet

Cub Cadet Z-Force 48 User manual

Cub Cadet 2150 User manual

Cub Cadet

Cub Cadet 2150 User manual

Cub Cadet THE TANK S6031 Operating manual

Cub Cadet

Cub Cadet THE TANK S6031 Operating manual

Cub Cadet P418 User manual

Cub Cadet

Cub Cadet P418 User manual

Cub Cadet TANK 60 User manual

Cub Cadet

Cub Cadet TANK 60 User manual

Cub Cadet 53AH8CT4050 Setup guide

Cub Cadet

Cub Cadet 53AH8CT4050 Setup guide

Cub Cadet 1525 User manual

Cub Cadet

Cub Cadet 1525 User manual

Popular Lawn Mower manuals by other brands

Craftsman 917.271635 owner's manual

Craftsman

Craftsman 917.271635 owner's manual

Husqvarna Rider 213C Workshop manual

Husqvarna

Husqvarna Rider 213C Workshop manual

Flymo TURBO LITE Turbo Lite 330 Important information

Flymo

Flymo TURBO LITE Turbo Lite 330 Important information

Scag Power Equipment GC-4D Operator's manual

Scag Power Equipment

Scag Power Equipment GC-4D Operator's manual

Toro 30150 Operator's manual

Toro

Toro 30150 Operator's manual

Craftsman 917.273642 owner's manual

Craftsman

Craftsman 917.273642 owner's manual

Exmark METRO Operator's manual

Exmark

Exmark METRO Operator's manual

Stihl RMA 765.0 V instruction manual

Stihl

Stihl RMA 765.0 V instruction manual

Progressive Turf Equipment TDR-X Operator's manual & parts list

Progressive Turf Equipment

Progressive Turf Equipment TDR-X Operator's manual & parts list

Toro 20995 Operator's manual

Toro

Toro 20995 Operator's manual

Sealey GL111 instructions

Sealey

Sealey GL111 instructions

Walker H27i Operator's manual

Walker

Walker H27i Operator's manual

Great Dane GDWG17KAE Operator's manual

Great Dane

Great Dane GDWG17KAE Operator's manual

Troy-Bilt 31/2 HP Owner's/operator's manual

Troy-Bilt

Troy-Bilt 31/2 HP Owner's/operator's manual

Swift E137CD Operation manual

Swift

Swift E137CD Operation manual

Swisher ZT2452A Repair manual

Swisher

Swisher ZT2452A Repair manual

Jayu QC-240 owner's manual

Jayu

Jayu QC-240 owner's manual

Yard-Man 13504-8 owner's manual

Yard-Man

Yard-Man 13504-8 owner's manual

manuals.online logo
manuals.online logoBrands
  • About & Mission
  • Contact us
  • Privacy Policy
  • Terms and Conditions

Copyright 2025 Manuals.Online. All Rights Reserved.