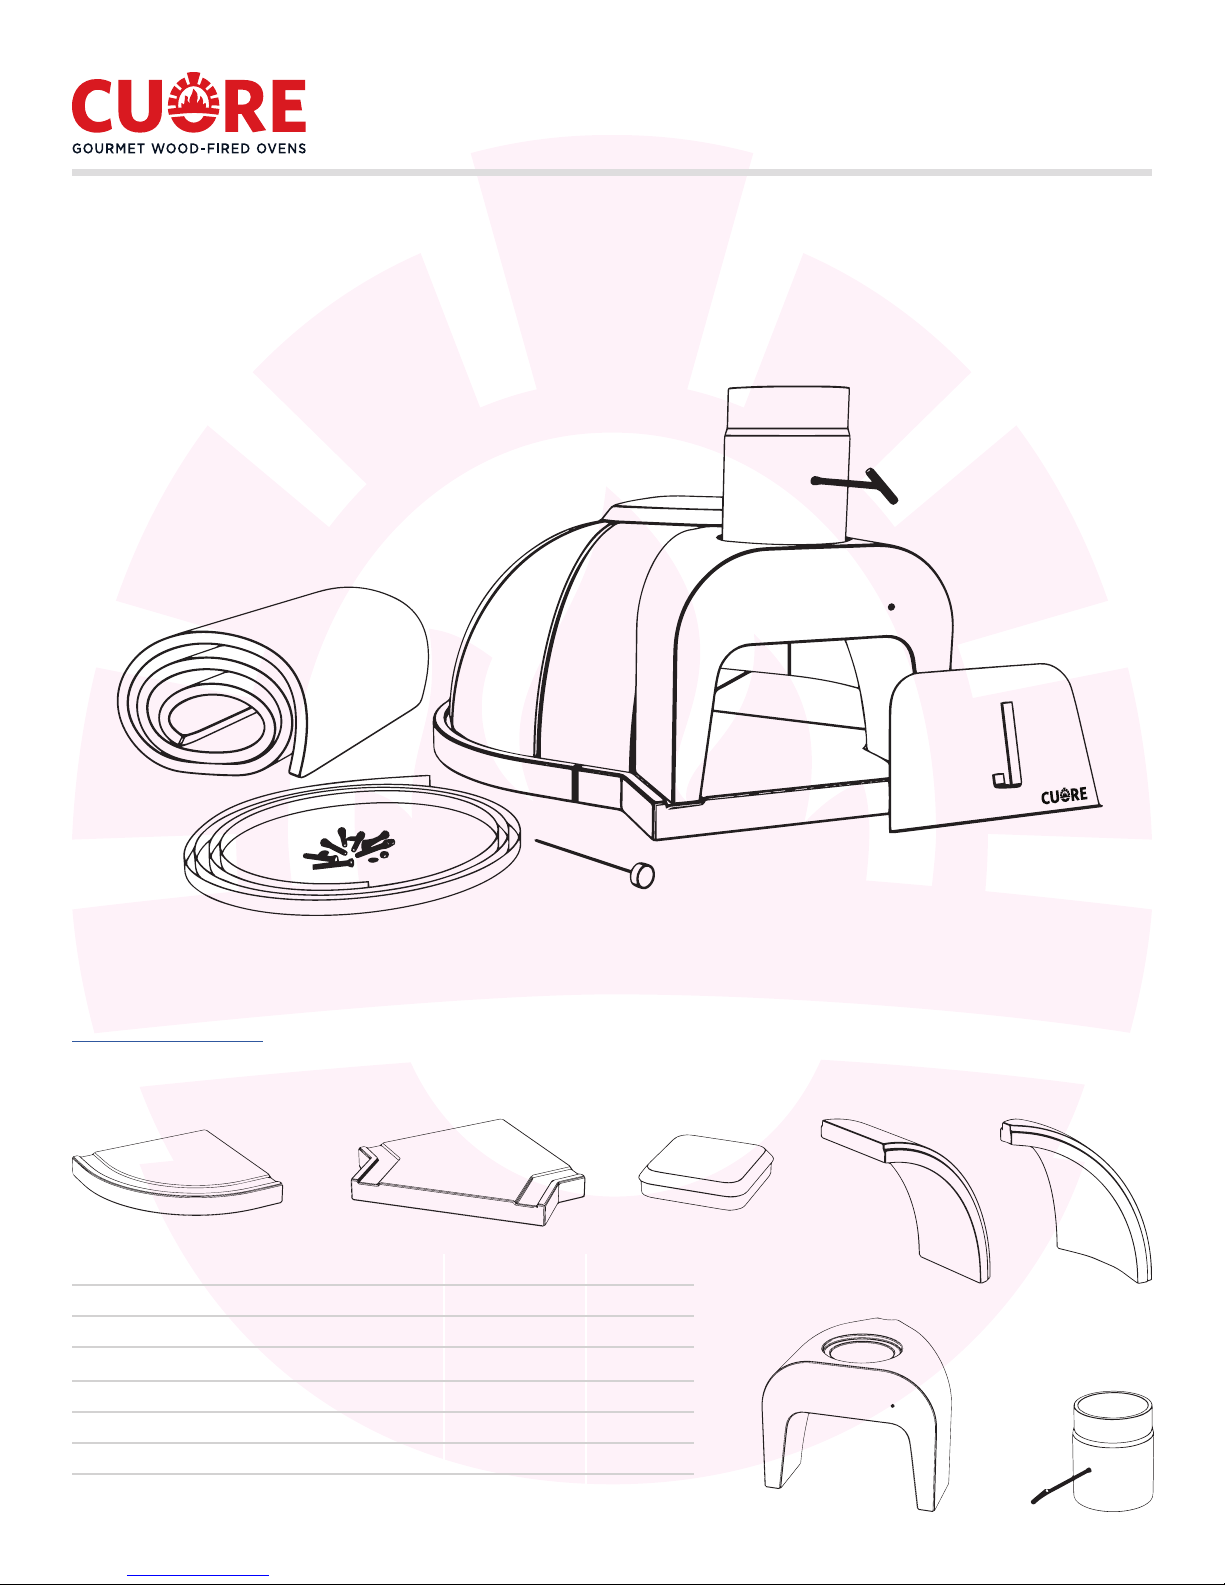
Cuore 1000+ User manual

a
2
15
c
17
b
14 13 12
2
1
8 3
Congratulations!
Your Cuore
1000
+
Wood-Fired Oven Kit is the heart and core around which to build your home gourmet wood-red oven. It
can be nished in practically any imaginable way, always blending perfectly with your home style and decor. Designed for easy
assembly indoors or outdoors and excellent performance throughout a very long service life, it will provide endless hours of fun
and great food to share with your family and friends.
Model
1000
+
Assembly Manual
The Cuore
1000
+
Wood-Fired Oven Kit consists of the refractory numbered oven parts (a), including the chimney tube with incor-
porated ue damper (2), the three steel belts and related hardware (7 bolts measuring ¼”x 2.1/2”, 7 washers, 3 nuts) (17), the oven
door (15), a rock wool thermal blanket (b), a thermometer (c) and this Assembly Manual, which is available online on
www.cuoreovens.com so you can always have the most up-to-date revision.
The refractory numbered ovens parts are:
Quantity Description Part number Part code
03 Base module 14 01.07.1021
01 Front base 13 01.07.1022
01 Capstone 12 01.07.1023
04 Arch extension 801.07.1011
06 Arch 301.07.1010
01 Chimney with ue damper 201.07.1017
01 Mouth 101.07.1012

IMPORTANT! Safety always comes rst!
Before unpacking the kit, please take notice:
•First of all, check the kit visually for integrity. In the unfortunate event that one ore more parts arrive chipped, cracked or broken,
please refuse delivery! If possible, take photos of the damage and overall oven condition and send them to
[email protected]om. We will take it back and arrange for a new unit to be sent to you in no time.
•Read this manual thoroughly and keep it for future reference.
•This is a very heavy product, with a total weight of 300 kg /660 lbs! Always exert good judgment and correct posture before
attempting to lift or move the parts. If a part falls on you or someone else it may cause serious injury, and mishandling may cause
back injury. Do not handle the parts all by yourself, always use a strong helping hand.
•Be careful when handling the rock wool thermal blanket. Rock wool can irritate the eyes, the skin and the respiratory tract. Use
of protection goggles, a respirator and gloves is mandatory. The thermal blanket should be stored inside a sealed bag and kept
away from children and pets until it is ready to use.
•Be careful when unpacking the steel belts, because it´s possible they may have developed tension during packing and transpor-
tation and they might unspring suddenly.
•Last but not least, do not allow children and pets near the oven during assembly and nishing, as well as during operation.

Assembling the refractory parts
Before starting the assembly, be sure to comply with the building codes in your area!
You will need a bag of good quality refractory cement to grout the spaces between the oven parts. We don´t include it in the kit
because it´s important to use the freshest cement for best results.
The rst step is building or preparing a base for the kit to rest upon. The base should be able to support at least a recommended
50% or more safety factor over the oven weight of 300 kg/660 lbs, ideally 1000 kg/2200 lbs. The base must be perfectly at and
level. When planning the base, don’t forget to leave enough clearance around the oven kit for erecting the future oven walls or
any other enclosing and nishing method of your preference, including the mandatory air spaces for insulation. In our website
(www.cuoreovens.com) you will nd instructions and tips for building a suitable base, if needed, as well as suggestions for
suitable enclosures.
For the best thermal performance, the base should receive a layer of insulating material ate least 5 cm/2" thick, such as concrete
mixed with vermiculite, vermiculite boards, refractory tiles or any other available material.
After the base is ready, if necessary, lay a thin bed of dry, ne sand over the base to help level the bottom plates. Position the
bottom plates. The at, projected area on the front base part (13) corresponds to the front of the oven. The base modules (14) are
identical and there´s no special order to place them. Check the leveling carefully and adjust if needed. Then grout between the
bottom plates with the refractory cement (gures ato d below).
Important! Never use a mallet or hammer to nudge the parts in position! Always do it by hand and gently!
Now begin to place the dome parts, starting with the mouth and proceeding sequentially with the dome parts (8-3-3-8-3-3-8-3-
3-8). The dome parts t inside the groove that runs around the bottom assembly. After positioning the mouth part, apply grout
between it and the bottom plate. You will have to support the curved parts with wood pieces cut to appropriate size until nally
placing the cap (12) that acts as a keystone or capstone for locking the dome parts in place (gures eto p below). Don't forget to
grout the cap as well. You can now remove any temporary support for the oven parts.
As you position each part, use a thin layer of refractory mortar (3 mm/1/8" thick) on the sides that touch other parts, including the
bottom plates. This will help ensure a good seal between the parts. Then grout each seam as you place each part, but only from
the outside. Important! Don't grout on the inside of the dome!
Fit the chimney tube with the included ue damper and grout the joints (gure q below). Be careful with the ue damper handle
alignment.
You should now have grouted joints just like shown in gure r below.
a b c d e f
g h i j k l
m n o p q r

Installing the steel belts
Attention! The steel belts are packed in a roll and may develop tension, unrolling suddenly when freed! Also, belt edges can
be sharp. To avoid injury, please be careful when unpacking. Use of protective gear such as safety glasses and safety gloves is
highly recommended! Don't allow pets or children near the belts.
There are three steel belts with associated bolts, nuts and washers. The rst to be installed is the longest one and is used around
the perimeter of the oven to hold the bottom parts rmly together. The remaining two are used to lock the capstone along with
the dome parts that are held by it, as shown on gure s1 below. Refer to gure s2 for the bolts and belts placement.
s1 s2
On each bottom part (13 & 14) there are embedded nuts to receive the bolts that hold the dome belts. The perimeter belt should
be tted below these embedded nuts as shown in gure s below.
After positioning the perimeter belt, it should be properly tensioned. To do that, bend the ends of the belt at a 90 degree angle
and insert a bolt through one end, then through the other end, then place a washer and a nut on the bolt as shown in gure s
below. Using two ¼" wrenches, hold the bolt with one wrench and tighten the belt by turning the nut with the other one. The
location of the tensioning bolt along the oven perimeter is not important. The result should be similar to gure s5.
Now t the two dome belts according to gure s2. The tensioning method is the same, but the belt is not split, as in gure s6.
Attention! Be careful and exert good judgment when tensioning the belts. Avoid overtightening the bolts or the bottom parts
might be damaged.
s3 s4 s5 s6

Insulating the oven
After all is set, it is time to unpack the rock wool blanket and fully cover the oven shell (except for the mouth, naturally) on the
outside with it, especially if you are opting for a dome ("igloo") enclosure. This blanket serves to conserve heat and to allow for
expansion and contraction of the oven refractory parts independently of the outer walls, thus minimizing the chances of cracks
and ssures. You may cut the blanket as needed, but be sure to use all of it and allow some overlap between the pieces where
possible, so as to leave no part of the shell uncovered. You may nd it easier to keep in place by tying it with some thin wire. Again,
always use adequate protection for handling the rock wool.
If you are going to use a walled enclosure (as in gure t2 below), the space between the rock wool and the outer walls must be
lled with vermiculite or a suitable refractory material, so as to minimize heat transfer to the outer walls of the enclosure.
It's very important to keep the minimum recommended gaps between the oven shell and the enclosure walls. Please refer to
cutaway gures t1 and t2 below.
t1 - igloo enclosure t2 - walled enclosure
The chimney
The chimney is not included in this kit because it will depend on your particular project - long or short, straight or bent. It can
be made of many dierent materials, from steel tubes to ceramic pipes or masonry. If you use steel tubes, place a conical ange
around the tube at the point where it exits the oven, so as to avoid debris falling inside the oven trough the gap. You should
always install a ue damper to help regulate airow and temperature. The chimney should be exclusive to the oven (avoid sharing
the outlet with other appliances) and as straight as possible for better ventilation. A chimney cap is also mandatory, for water
should never get inside the oven. There are also excellent modular chimney solutions on the market, ask your dealer or contractor
for information and suggestions. It’s also a good idea to install a thermometer near the chimney’s inlet for better temperature
control - between 300 °F and 750 °F (150 °C and 400 °C) - during operation, but you may prefer an infrared thermometer instead.
Before installing the chimney, be sure it will comply with your local codes.
Now enclose and nish it!
After all is done, it’s time to enclose the oven kit and nish it. There are basically two ways to do the enclosing and nishing: by
building walls around the oven kit or by covering the thermal blanket itself with cement or mortar, following the shell shape
(the wire mesh will hold the cement or mortar in place) and then nishing it as you prefer - the “igloo”style. Whichever style you
choose, be sure to make the oven completely sealed from the elements, especially water.
Remember, always comply with the building codes in your area!
Outer shell
5 cm / 2" thick
minimum rock wool 5 cm / 2" thick
minimum rock wool
Oven chamber
Base
Outer wall
Vermiculite or other
suitable insulation
Oven chamber
Base

Enclosures
Walled enclosures.
A walled enclosure is a classic and very beautiful way to nish your oven. Whatever style you choose, be sure to observe the
following safety rules:
1- Never use any combustible material in the enclosure. Wooden studs, plywood, drywall or any other combustible materials are
expressly forbidden, for they are a sure way to cause a re. The safest method is to build masonry walls with completely non-
combustible materials such as cement or ceramic blocks, bricks or stone.
2- Only completely non-combustible materials should be allowed to touch the oven kit. Metal studs and concrete boards are also
perfectly suitable, but then spaces between the oven kit (or any completely non-combustible material that touches it) and the
enclosure walls are mandatory. The minimum spacings should be 10 cm /4” from all sides, except the oven mouth and 35.5 cm
/ 14” from the top. Around the oven mouth, only completely non-combustible materials should be used, keeping a distance of
0.5 cm / 0.2” from it. That space may then be lled with weatherproof stucco. As to the hearth extension around the oven mouth,
keep a minimum of 76 cm / 30” to the sides of the mouth and 91 cm / 36” to the front of the mouth free from any combustible
material.
3- If you keep the wood in a space below the oven, be sure to leave at least 21.5 cm / 8½” between the bottom of the oven and
the top of the wood storage space. A covered container for the wood is better for avoiding any contact with ember or stray sparks.
Igloo enclosures.
If you opt for a smaller igloo-style enclosure, there are basically two ways of doing it:
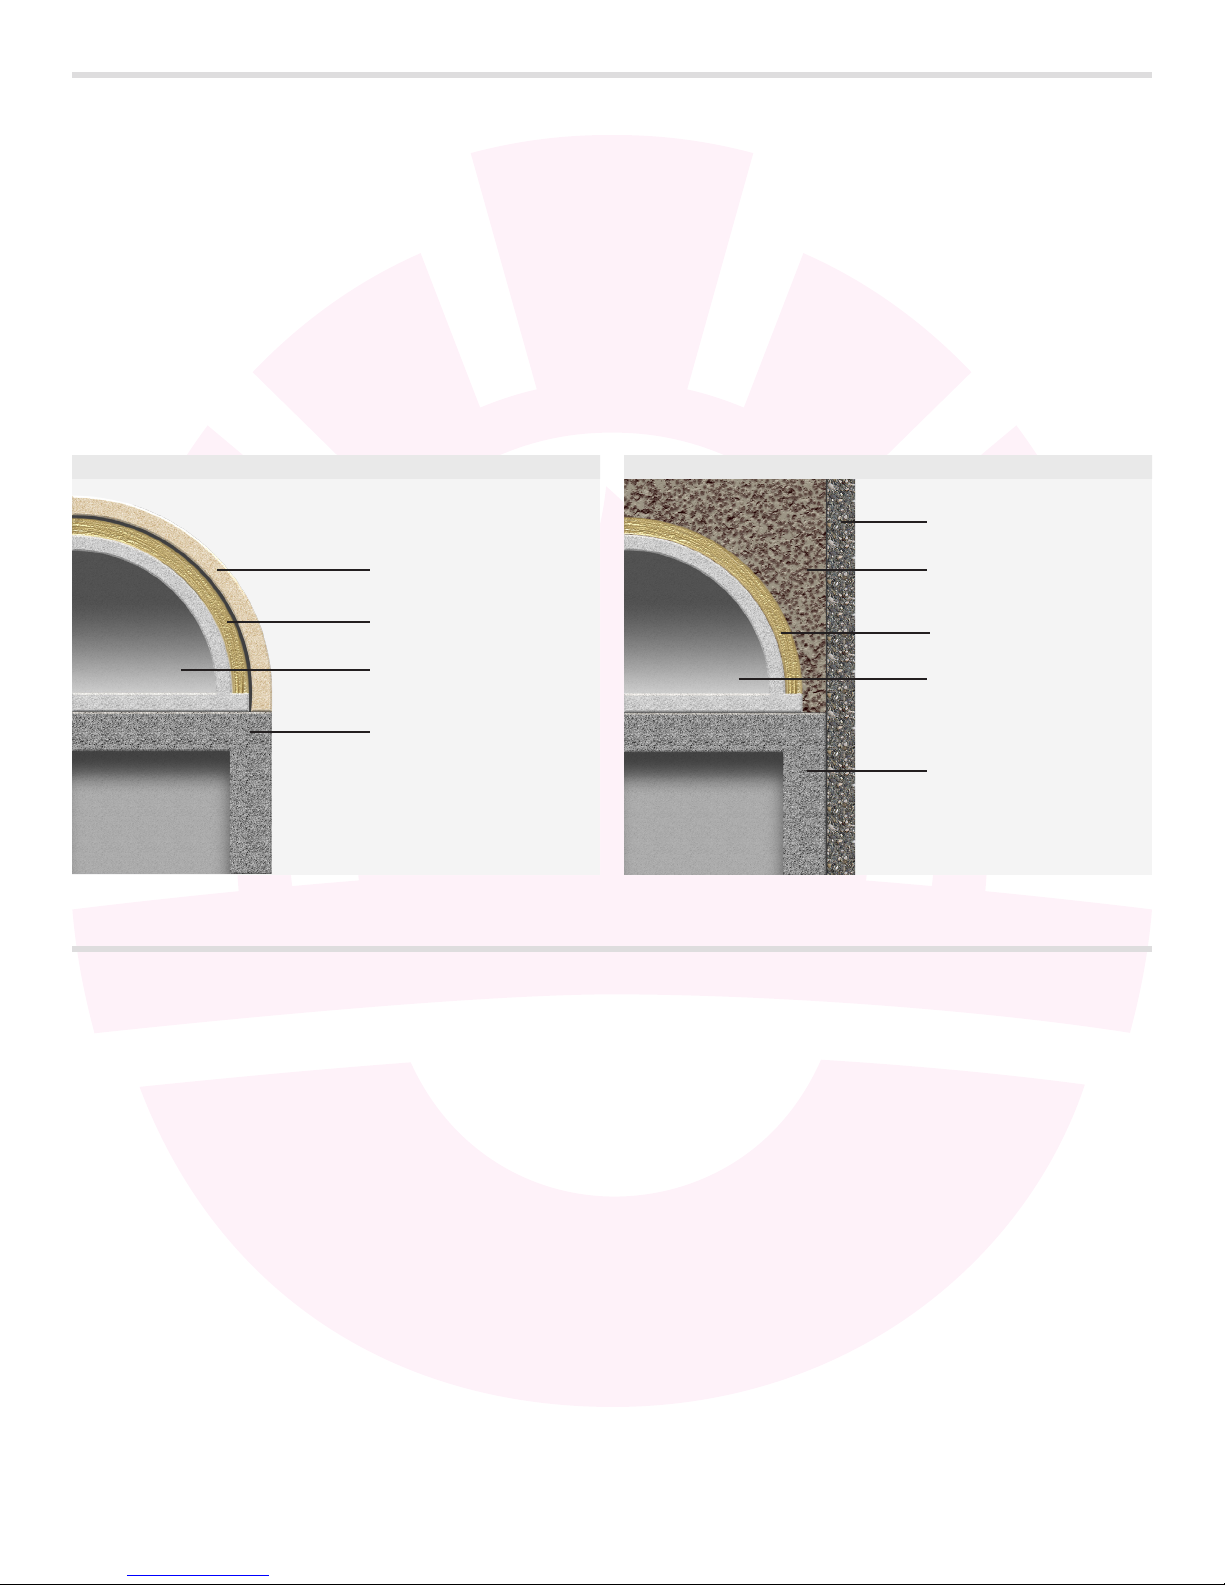
1- You can cover the oven with a layer or two of insulating cement, spreading it directly on top of the insulation (the wire mesh
will hold the cement in place) or on top of a stucco lath layer. Proceed with a nishing layer of weatherproof stucco.
2- You can build a rebar frame around the oven kit and cover it with tied stucco lath, then cover the whole structure in a layer of
stucco 1.3 cm / ½” to 1.8 cm / ¾” thick. Follow with another layer of weatherproof stucco or paint.
Remember, these are general rules of thumb. Always comply rst to your local building codes!
The thermometer
Your Cuore
1000
+
Wood-Fired Oven comes with a bimetallic analog thermometer. It should be placed in the appropriate hole
above the oven mouth. For proper operation, the thermometer stem should protrude at least 4 cm / 1.5" inside the re chamber.
You may have to build an appropriate recess on the oven nishing so as to keep this recommended distance.
The thermometer needle will lock in place if the oven is heated above the maximum temperature. This will void the warranty.
IMPORTANT! Never try to bend the thermometer stem. This will ruin the thermometer.
If you do not wish to use this thermometer, simply ll the thermometer hole with refractory cement.
IMPORTANT! This oven should never, under any circumstances, be operated unnished and/or without a chimney. Remember,
water (by way of thermal shock) is a mortal enemy of wood-red ovens. So, if your oven is installed outdoors, it should be very
well encased and protected from rain and seeping water. For the same reason, never wash the inside of the oven. It is largely self-
cleaning.
Attention! Very important information! After the oven is nished, there must be a minimum 21-day curing time before
starting any re in the oven. Failure to do so may damage the oven and will result in loss of the warranty.
For additional tips and information on base and enclosure building, visit www.cuoreovens.com.
The Cuore
1000
+
operation manual is available for download from our website, under the Resources tab. Please be sure to read it
thoroughly before attempting to use the oven.

Cuore
1000
+
Wood-Fired Oven Kit - Limited Product Warranty
Cuore Ovens Co. warrants this product (the Cuore
1000
+
Wood-Fired Oven Kit) to be free from materials or craftsmanship
defects for a period of 12 (twelve) months from the shipping date.
The Product Warranty stated above will be considered void and not valid if one ore more of these circumstances have occurred:
1 - The installation of this product did not follow the instructions specied in this manual and the local building codes.
2 - This product has been used in any way other than for home cooking, or used with any burning fuels other than the ones
specied in this manual, or used with fuels expressly forbidden by this manual, and thus subjected to temperatures above the
recommended ones, causing damage to the product.
3 - This product has been damaged due to thermal shock by water or any other liquid, or by neglecting the warm-up period
before each operation.
4 - This product has been damaged by over-ring or lack of a proper heat-conditioning sequence as specied in this manual.
5 - Normal wear and tear of parts that would be normally worn or replaced under normal operating conditions. Normal wear and
tear includes small ssures and cracks resulting from the expansion and contraction of the oven parts, either from the shell or the
refractory bricks. These are not defects and will not aect the oven operation and performance in any way.
On limitation of liability.
It is understood and expressly agreed that the sole obligation of Cuore Ovens and the purchaser’s only and exclusive
compensation under this Product Warranty or any other implied or expressed warranty will be limited to replacement, repair
or refund as specied above. Such liability shall not include, and the purchaser renounces specically to any rights to recover,
consequential, incidental, special or any other damages of any kind whatsoever, including, but not limited to, damage to property,
injuries to persons, loss of prots or anticipated prots, or loss of use of the product. Cuore Ovens shall not be responsible, in
no event, for any incidental or consequential damages caused by defects in its products, whether such damage occurs or is
discovered before or after replacement or repair, and whether or not such damage is caused by Cuore Oven’s negligence. As some
states do not allow the exclusion or limitation of incidental or consequential damages, the above limitations or exclusions may
not apply to you. The duration of any implied warranty with respect to this Product is limited to the duration of the foregoing
warranty. As some states do not allow limitations on how long an implied warranty lasts, the above may not apply to you.
On investigation of claims against this Product Warranty.
Cuore Ovens Co. reserves the right to investigate all claims against this Product Warranty and to deliberate and decide upon the
method of settlement.
Our employees and dealers do not have the authority to modify or supplement this Product Warranty in any way, nor authorize
any remedies in addition to, or inconsistent with the terms of this Product Warranty.
On registering a claim against this Product Warranty.
For any claim against this Product Warranty to be valid, it must be notied to Cuore Ovens in written form (support@cuoreovens.
com) or by phone (954-805-0050). Written claims should include a description of the defect and the installation date.
Other Cuore Oven manuals
Popular Oven manuals by other brands

Siemens
Siemens HN678G4.1 User manual and installation instructions

Cleveland
Cleveland Convotherm OEB-20.20 Service and parts manual

Electrolux
Electrolux B5705-5 user manual

NEFF
NEFF E 1452 Series Instructions for use

VOX electronics
VOX electronics EBB1000IX XL operating instructions

NEFF
NEFF B16P52.3GB instruction manual