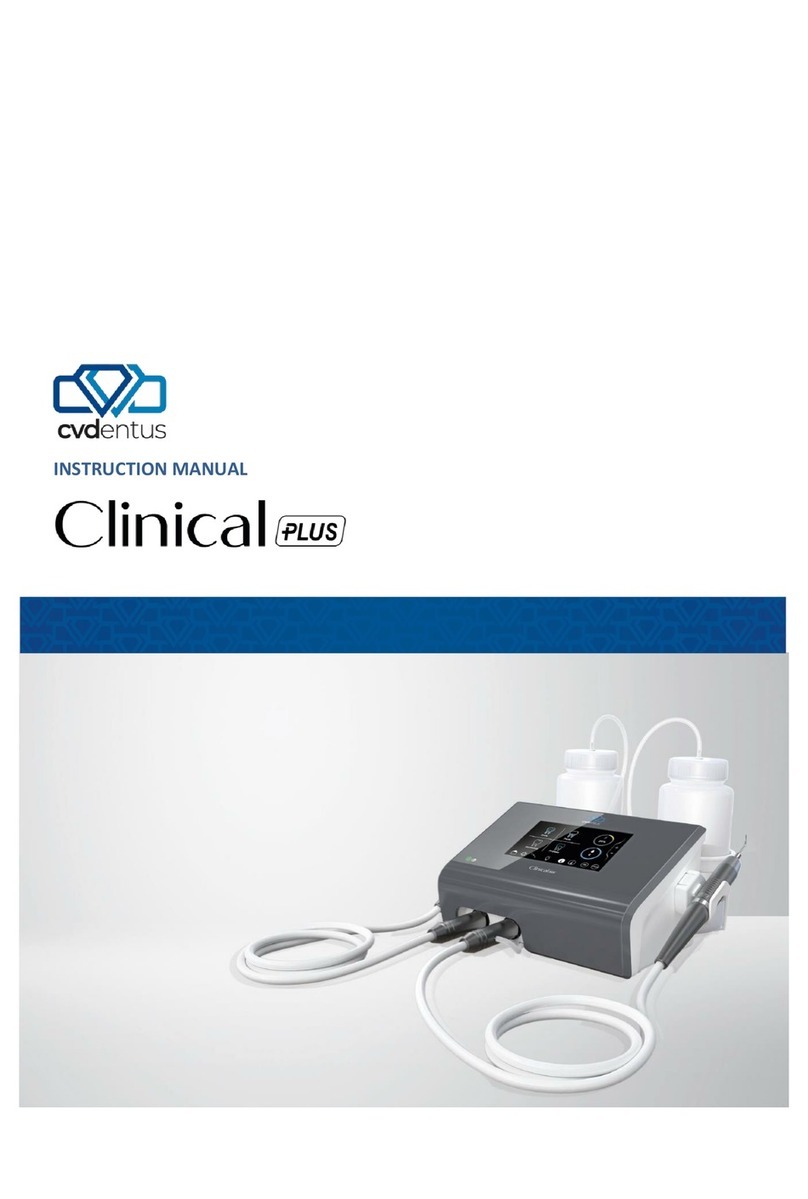
cvdentus DentSurg PRO User manual

Rev. 13
INSTRUCTION MANUAL

DT-MI DentSurg Pro - Rev.16
2
This User’s Guide contains the information necessary for correctly handling the DentSurg
Pro ultrasound equipment.
Manufacturer
Clorovale Diamantes Ind. e Com. LTDA
Estrada José Augusto Teixeira, 500 –Torrão de Ouro II
São José dos Campos / SP - Brazil
CEP: 12229-840
Phone: +55 (12) 3944-1126
website: www.cvdentus.com.br
email: [email protected]
CNPJ: 65.478.018/0001-49
Person in charge
LUIS FRANCISCO BONETTI
CPF: 270.664.418-42
CREA: 5061621860
Registration of the Product with the Brazilian Health Department
Technical name: DentSurg Pro
Trade name: DentSurg Pro
ANVISA/MS Registration number: 80179329001

DT-MI DentSurg Pro - Rev.16
3
Preface...................................................................................................................................4
Introduction.............................................................................................................................4
Application..............................................................................................................................5
Principles of Operation of DentSurg Pro.................................................................................6
Classification of the equipment...............................................................................................6
Contraindications for use........................................................................................................8
Notes before use.....................................................................................................................9
Note to the dental surgeon......................................................................................................9
Details of the ultrasonic motion of the insert..................................................................10
Description of the components..............................................................................................10
Installation guide...................................................................................................................16
Before the first use................................................................................................................18
Expected distances...............................................................................................................18
Period of contact...................................................................................................................19
Instructions for use and operation........................................................................................19
Control panel and main unit connectors...............................................................................20
Identification of the applied parts...........................................................................................26
Operation procedures...........................................................................................................29
Preventive maintenance and inspection................................................................................31
Extending equipment life.......................................................................................................32
Cleaning and sterilization......................................................................................................32
Essential performance..........................................................................................................34
Electromagnetic compatibility...............................................................................................34
Identifying defects.................................................................................................................39
Warranty...............................................................................................................................40
List of symbols......................................................................................................................42
Index

DT-MI DentSurg Pro - Rev.16
4
The DentSurg Pro equipment was designed to achieve maximum performance of the
handpiece along with high precision mechanical elements, causing the insert to vibrate axially
to the handpiece.
The high frequency to which the insert is subjected enables the more resistant calculus to be
removed more easily.
DentSurg Pro can conveniently and quickly clean your teeth, and it is electrically safe.
The electromechanical efficiency of this piezoelectric system is much higher than that of
traditional magnetostrictor systems. Piezoelectric systems release reduced amounts of heat,
making it possible to work with lower volumes of water for cooling, ensuring excellent
cavitation, resulting in a more comfortable use for both the patient and the dentist.
The equipment enables control over the power and water flow operation modes. There are 3
operation modes: a constant frequency, suitable for Endodontic procedures; another suitable
for Periodontics and Cavity Preparation; and, finally, one with intermittent power, suitable for
bone cutting processes. This allows a very fine adjustment for each clinical procedure.
The DentSurg Pro configuration is especially appropriate for the use of clinical and surgical
CVDentus tips. The circuit operates in a self-tuning frequency mode, which always provides
the required power for each insert. Never apply too much pressure because the best
protection and best cutting and wear efficiency come from the vibration of the tips.
The DentSurg Pro equipment, along with the CVDentus tips, are intended for dental
treatments using ultrasound. It enables a wide range of dental interventions with ultrasound,
including procedures in Endodontics, Periodontics, Dentistry, Cavitary Preparation, besides
small bone cuts.
DentSurg Pro includes two handpieces that enable self-tuning in a range of 27 to 32KHz.
Along with the CVDentus ultrasonic tip technology, it has the following advantages:
•Eliminates the noise of the traditional high-speed motor, improving the dentist’s working
condition and inhibiting the patient's most common fear;
•It is a painless treatment, eliminating the need for anesthesia in most dental treatments,
and ensuring greater precision, protecting the original structure of the tooth;
•Because it enables dental treatment without pain, a larger portion of the population might
seek preventive treatments;
•It does not cut the soft tissue, that is, it enables subgingival treatment without anesthesia
and without bleeding;
•Better finish with a single tip. There is no need for frequently changing the tips;
•Enables access to hard-to-reach regions when compared to conventional high-rotation
tips, or any other techniques;
•Enables better visibility during treatment, guaranteeing a procedure with lower risks,
preserving healthy tissue;
Introduction
Preface

DT-MI DentSurg Pro - Rev.16
5
•Much greater durability (if used correctly), because it is a single diamond stone
chemically bonded to the metal rod;
•Brand-new bone-cutting mode allows bone windows to be made without affecting
adjacent tissues, such as the sinus membrane, nerves, and blood vessels.
•Indication:
Procedures:
oEndodontics
oPeriodontics
oCavity Preparation
oSmall bone cuts
•Intended Population (Patients): Patients of all ages. Because it does not cut soft
tissue and does not require anesthesia in most procedures, it can be used in children,
special patients and patients who have some type of allergic reaction to anesthetics.
•Contraindications: It is suggested that patients that have pacemakers avoid treatment
with the DentSurg Pro equipment.
•Body part: Used in the oral cavity for dental treatment.
•Characteristics of the intended patient: The DentSurg Pro equipment must be
operated exclusively by a dental professional, familiar with the risks and benefits currently
known for the use of electromedical equipment in dental offices. No specific training is
required. Reading the manual is mandatory before use.
•Intended conditions for use: DentSurg Pro should be used in dental offices that follow
the ANVISA sanitary standards. The office must have adequate electrical installations of
the right size and equipped with a ground rod. The office must follow the requirements for
hygiene and sterilization as well as itsfurniture, utensils and other equipment. The lighting,
ventilation and temperature must meet the health requirements of a dental office.
The equipment is NOT intended for use in an oxygen-rich environment.
DentSurg Pro is a piezoelectric ultrasound equipment for use in dental treatments. Inside
the handpieces are piezoelectric pads that, with an electric stimulus, vibrate at an ultrasonic
frequency (between 27 and 32 kHz). This vibration is amplified by the handpiece and
transmitted to the insert, which vibrates with high intensity. Ultrasonic vibration is used for
various endodontic and periodontal cleaning and disinfection procedures. With the addition
of CVDentus tips made of CVD diamond, this vibration is used for cutting hard materials such
as dentin, enamel, bone material and dental restorative materials.
Application
Principle of operation of DentSurg Pro

DT-MI DentSurg Pro - Rev.16
6
WARNING
The DentSurg Pro equipment may cause electromagnetic interference to other
equipment or electronic devices.
WARNING: This equipment is not suitable for use in the presence of anesthetic
mixtures that are flammable when in contact with air, oxygen or nitrous oxide.
The equipment must be connected to the power network from an individual
outlet with grounding plug (third prong).
WARNING
Do not dispose of the equipment along with household waste. Use the
appropriate disposal system, following the laws of your country.
If not disposed of properly, electrical equipment poses a serious threat to the
health of nature and humans.
At http://www.e-lixo.org/, collection and recycling points can be found all over
Brazil. If you prefer, please contact CVD Vale.
WARNING –ULTRASOUND ENERGY NOISE:
Prolonged exposure to the noise can cause physiological effects such as stress,
loss of concentration and hearing loss.
The use of earplugs is recommended.
The DentSurg Pro ultrasound equipment and its parts, including the APPLIED PARTS, are
classified as follows.
Technical Specifications:
•PROTECTION AGAINST ELECTRIC SHOCKS:
oElectromedical Equipment (CLASS I).
•MAIN UNIT:
oInput: 100 –240V ~ 50/60Hz 52VA –61VA;
oSource protected by fuses (not accessible to the user);
oPower cable length: 2 meters;
oMaximum ultrasound power: 20W; at60Hz (cortical mode)and 30Hz (medullary
mode);
oDimension: width = 200 mm, height = 210 mm, and depth = 250 mm;
Classification of the equipment

DT-MI DentSurg Pro - Rev.16
7
oWeight: 2,5 kg;
oMicroprocessor circuit with PWM power controller;
oHardware version: 2.0 (Oct/2017) / Software version: 2.1 (Oct/2017).
oInitial search of the resonance frequency from 27 to 32 Khz and with auto-power
adjustment under normal operating conditions.
oAutomatic power limiter for power control in case of excessive pressure on the
active tip.
•ACTIVATION PEDAL:
oMicroswitch activation pedal with standard opening, that is, it closes contact
when it is activated;
oCable length: 2 meters;
oDimensions: 75 x 75 x 30 mm;
oWeight: 0.075 kg.
•SURGICAL HANDPIECE:
oPiezoelectric with 6 PZT ceramic pads;
oInsulation for 3000V;
oRated frequency: 32 Khz;
oApproximate length: 114 mm;
oMaximum diameter: 20 mm; approximate weight: 20 g.
oAutoclavable.
•CLINICAL HANDPIECE:
oPiezoelectric with 5 PZT ceramic pads;
oInsulation for 3000V;
oRated frequency: 27 Khz;
oApproximate length: 114 mm;
oMaximum diameter: 20 mm; approximate weight: 20 g.
oAutoclavable.
•PROTECTION AGAINST HARMFUL PENETRATION OF WATER OR PARTICLES:
oMain unit - degree of protection: IP21;
oActivation pedal - degree of protection: IP21;
•STERILIZING METHODS:
oMoist heat sterilization (autoclave), temperature of 134°.
oCheck procedure: Cleaning and Sterilization.
WARNING: Must not be performed in Oven.
•OPERATION MODE:
oNon-continuous operation: “On” 10min / “Off” 5min;

DT-MI DentSurg Pro - Rev.16
8
•ENVIRONMENTAL CONDITIONS:
oTemperature - Operation: +10°C to +30ºC. Storage: +10°C to +40ºC;
oHumidity - Operation: 30% - 80% without condensation;
oStorage: 10% - 90% without condensation.
oAtmospheric Pressure –Storage: 860-1060 hPa.
Operation/ use: 860-1060 hPa
Transport: 860-1060 hPa
•EQUIPMENT WITH TYPE B APPLIED PARTS.
This equipment is NOT intended for use in an oxygen-rich environment.
Note that electronic devices and electromedical equipment may interfere with the normal
operation of pacemaker devices. It is suggested that patients with pacemakers avoid
treatment with the DentSurg Pro equipment.
For additional literature on the subject, please see:
- "Advances in Cardiac Pacemaker", The New York Academy of Sciences, Vol. 167,
Article 2, pp. 515-1075.
- "Electromagnetic Radiation Interference with Cardiac Pacemaker", U.S.
Department of Health, Education and Welfare.
- "The Individual with a Pacemaker in the Dental Environment" Journal of the
American Dental Association, Vol. 91, No. 6 pp. 1224-1229.
IMPORTANT
DentSurg Pro must be operated exclusively by dental professionals, familiar with the risks
and benefits currently known for the use of electromedical equipment in dental offices. No
specific training is required. Reading the User’s Guide is mandatory before use.
WARNING: Cardiac pacemaker patients must not be treated with DentSurg
Pro, or even approach the equipment when it is in operation.
Contraindications for use

DT-MI DentSurg Pro - Rev.16
9
We advise the dental professional to instruct their patients or others with access to the
equipment regarding care during handling.
Do not attempt to repair or assemble defective or inoperative components or replace with
parts from other appliances. The original technical specifications and the safety of the
appliance can be guaranteed only with the use of original parts.
To ensure the electrical safety of the unit during its lifetime, we recommend that the
equipment be checked by authorized service personnel at regular intervals of at least once
a year.
There are no other contraindications, however, there is the possibility of people being
sensitive to the use of ultrasound in dental treatments. The professional should always
observe the patient's reactions on the first use and assess their applicability.
1. Electrical outlets must have grounding prongs. Failure to meet this requirement may
result in damage to the equipment and, in particular, to the patient.
2. The equipment must NOT be placed in a dusty environment.
3. Direct contact with water should be avoided.
4. Do not use the equipment in the presence of flammable gases.
5. The equipment should be placed on a constant and stable platform or table. Placing
the equipment on an unstable and/or inclined table may degrade performance and/or
accidentally cause damage to the system.
6. The equipment may only be disassembled by certified technicians. Violation of this
requirement will cause immediate loss of warranty, harm to the user and/or damage to
the equipment.
7. For electrical safety, equipment cables should not be placed under heavy objects, and
should also avoid high-temperature heat sources.
If you notice any abnormal occurrences when the equipment is in use, unplug the power cord
from the wall outlet.
For a better use of all functions and to maximize the performance of the DentSurg Pro
equipment, it is suggested that before using on patients, dental surgeons should practice on
artificial models to become familiar with the use of the tips, with the movement and the ideal
force to be applied to the inserts.
A piezoelectric handpiece, such as the DentSurg Pro, causes an anteroposterior vibration
movement at the end of the insert. This movement, despite the low amplitude, has a high
Notes before use
Note to the dental surgeon
Details of the ultrasonic motion of the insert

DT-MI DentSurg Pro - Rev.16
10
speed, which causes a strong impact on the front, back and top of the insert. Due to the high
precision of the movement, the impact is much smaller on the sides of the insert. This
characteristic movement defines the use of the insert.
For the CVDentus tips, the strong impact is very useful, since it cuts the dental structure
during a Cavity Preparation, however, for other applications with calculus-removal inserts,
periodontal inserts and endodontic inserts, great care must be taken to avoid direct impact of
the insert on the tooth to avoid cracking and fissures.
There are two forms of use for removing calculus:
•Tangential application - touch the side of the insert to the tooth, so the impact of the
anterior and posterior parts is directly on the calculus and not on the tooth. Apply the tip
firmly, but without pressure. Let the handpiece follow a "forward" and "backward"
movement, slow and regular.
•Frontal application –touch the front or back of the insert directly to the calculus, but never
directly against the tooth. This situation is only recommended when the layer of calculus
is thick and resistant, so that there is no risk of acting directly on the tooth. Whenever the
thickest and most resistant calculus is removed, proceed to the tangential application.
Press lightly and use a "forward" and "backward" movement, slow and regular.
For application in periodontics and endodontics, in addition to these procedures,lowand safe
potencies, recommended for the technique and for the power of each insert, should be used.
More details about these applications are available in the material sent along with the inserts
CVDentus, website (www.cvdentus.com.br) or contact the customer service (+55 (12) 3944-
1126, asking for more information).
Figure 1 shows the main components of the DentSurg Pro equipment, identified by letters
A, B, C, D, E and F .
*saline not included
Description of the components
A

DT-MI DentSurg Pro - Rev.16
11
Figure 1: Components of the DentSurg Pro equipment: A- Main Unit, B- Handpiece, C-
Peristaltic pump, D- Activation pedal, E- Holder, F- Bottle.
Functionally, the main unit sends the necessary signal for operation around 32kHz and
transmits it to the handpiece, inducing enough power to excite the piezoelectric ceramics
inside. This action vibrates the end of the insert at an ultrasound frequency.
Its state-of-the-art circuit detects variations in the resonance frequency of the handpiece with
different shapes and folds of the work inserts, adjusting so that the handpiece always
operates at an optimum condition between 27 and 32 kHz.
The high efficiency of the circuit resulted in a compact, lightweight, ergonomic and low power
consumption equipment.
The main unit also controls the water flow to the handpiece by directly controlling the
peristaltic pump. All controls are digital and shown on a liquid crystal display.
The handpiece consists of an ultrasonic actuator and insert. The ultrasonic actuator is
composed of piezoelectric elements that, when excited, move the tip "forward" and "back" in
A –Main Unit
B –Handpiece
D
C
B
B
B
E
F

DT-MI DentSurg Pro - Rev.16
12
the axial direction at high speed, based on the change of control signal waveform from the
main unit. According to the movement of the insert, there is a flow of water leaving it, which
is necessary for, for example:
(a) Washing the calculus and tartar of the tooth;
(b) Cooling the insert (heat generated by the vibration of the insert);
(c) Washing the waste from the cavity preparation;
(d) Cooling the area undergoing treatment.
(e) This handpiece enables exclusive use of CVDentus tips.
The handpieces are connected to the main unit through an electrical connector, as shown
in Fig. 1.
Figur1e 1: Detail of the electrical connector of the handpiece.
The connectors are planned to couple with the handpiece, making it impossible to use it
incorrectly.
CVDentus handpieces are completely autoclavable at 134ºC, including the cable and the
electrical connector.
WARNING
It is recommended that the handpiece be sent for revision/inspection every 12 months or
whenever the operator notices a reduction in cutting speed.
The DentSurg Pro equipment has two independent peristaltic pumps for supplying water to
each of the two handpieces. The peristaltic pumps are easily accessible through the back of
the main unit. It is not necessary to remove the peristaltic pumps attached to the
appliance. It has a "locking" part that can be disengaged to release the silicone tube. The
goal of easy access and water connections in a simple way is to allow the disassembly and
assembly of the entire water circuit for autoclaving.
C –Peristaltic Pump

DT-MI DentSurg Pro - Rev.16
13
The water circuit of the DentSurg Pro is entirely external and is fully autoclavable, including
the water bottles, hoses and fittings.
WARNING: Only the items that make up the cooling circuit (bottle, silicone tube
and handpiece) can be autoclaved.
The autoclave temperature must not exceed 134°C.
Ovens must not be used.
INSTRUCTIONS FOR USING THE PERISTALTIC PUMPS:
The peristaltic pump head is attached to the device; therefore, it does not need to be
removed. The peristaltic pump is composed of the pump head, attached to the device; a
silicone tube that can be removed, substituted and/or replaced whenever it is necessary; and
a locking part, responsible for keeping the silicone tube attached to the pump. See Figure 2.
Figure 2: Items that compose the peristaltic pump.
The following figure shows the assembled peristaltic pumps.
Figure 3: Peristaltic pump assembled to the DentSurg Pro equipment
To remove the silicone tube, simply remove the peristaltic pump lock and release it, as
described in Figure 4.

DT-MI DentSurg Pro - Rev.16
14
Figure 4: Press the tabs located on the locking part (one against the other) and pull them,
removing the lock and allowing free access to the silicone tube.
After the silicone tube is removed, it can be autoclaved or simply replaced, if necessary.
WARNING: The silicone tube should be loosened and cleaned before each
procedure so that no debris build up during continuous use for a long period.
To replace the silicone tube, simply replace it inside the pump head and press the tabs on
the locking part again. Push it until it is rests against the head of peristaltic pump, as shown
in Figure 5.
Figure 5: Reposition the silicone tube, press the tabs of the locking part and push it towards
the pump head, until it reaches the ideal fit.
IMPORTANT CONSIDERATIONS:
•When switching on your appliance after cleaning (autoclaving) the cooling system,
ensure that the initial flow is adjusted to the maximum (100%) during the first 10 to 30
seconds. This parameter is important so the motor delivers more power to the pump
and breaks the initial post-assembly inertia.
•Wait for the coolant to reach the tip used in the handpiece, and, as soon as it starts
operating, adjust the flow according to the use of each tip and/or to the procedure.
•If the pump does not rotate initially, remove the locking part and check that the silicone
tube is clean and unobstructed; then, reassemble the system and continue the normal
procedure for use.
•Make sure that the silicone hose spigot is connected above the peristaltic pump, i.e.
between the pump and the bottle.
•Make sure that the tip on the handpiece that is going to be used is firmly attached.
•Check if the water flow in your equipment is not turned off.

DT-MI DentSurg Pro - Rev.16
15
•Do not make any changes or exchanges by any product that is not supplied by the
manufacturer.
•The autoclave temperature must not exceed 134°C.
•The hoses should be exchanged after 10 autoclaving processes.
The pedal activates the DentSurg Pro equipment without interrupting the ongoing treatment.
The activation pedal:
(a) energizes the handpiece, causing the insert to vibrate;
(b) activates the peristaltic pump by releasing a cooling flow to the handpiece and the
insert.
In the rear part of the main unit there is a compartment for positioning the bottle that is coupled
and protected by the cover-holder. This compartment must not be autoclaved.
Figure 6: Bottle holder.
Two high-quality, completely non-toxic and autoclavable polypropylene bottles accompany
the DentSurg Pro equipment.
D –Activation pedal
E –Holder for the water bottle.
F –Bottles

DT-MI DentSurg Pro - Rev.16
16
Figure 7: Bottle
1. Removing the packaging
When unpacking, check the unit for any damage. If damaged, please contact the dealer or
manufacturer immediately. When sending the product to the authorized technical assistance,
send it inside the packaging, protected and with a copy of the invoice.
2. Storage
The unit should bestored in a clean, dry environment. The following environmental limitations
apply to storage and transport:
•Temperature: +10ºC to +40ºC;
•Humidity: from 10% to 90% without condensation;
•Atmospheric pressure: 860 to 1060 hPa.
SAFETY INSTRUCTION: Before anything is connected to the equipment (main
unit), make sure that the local power network is properly grounded. The power
plug can only be plugged into a wall socket if the ground prong is connected.
3. List of Materials and Accessories
Inside the package, you will find:
•01 Main unit (CVDentus)
•02 Peristaltic pumps (attached to the rear panel) (CVDentus –Model BP1)
•02 Handpieces (clinical and surgical) (CVDentus –Handpiece model PM and cover
COM)
•01 Activation pedal (CVDentus)
•01 Bottle holder
•01 Bottle
•02 Silicon hose
•01 ratchet (CVDentus –Model CT4)
•01 Saline holder
•01 Power cable (Linetek –Model HO3VV-F)
Other accessories:
•CVDentus Inserts (Check our website www.cvdentus.com.br or call our consultants
on +55 (12) 3944-1126 and ask for a catalogue, to get to know our models available
for use on the DentSurg Pro);
4. Installation
Installation guide

DT-MI DentSurg Pro - Rev.16
17
After unpacking, note that the handpieces are disconnected from the main unit, and that the
peristaltic pumps are in place, but disconnected from the water circuit. The activation pedal
is permanently connected to the main unit. To perform the installation, follow these steps:
a. Place the main unit in the position that is most convenient for use. It is small, so it will
be easily integrated to your office, and should be installed as close as possible to
where it will be used, firmly supported or fixed;
b. Check if the “on-off” switch ( ) is turned off (switch turned to ( );
c. Install the handpieces in their respective connectors (H);
d. Install the water tubes (silicone tubes), connecting the peristaltic pumps output to the
water connector of the handpiece. Connect the water input of the peristaltic pumps to
the output connector of the bottles to use the clinical handpiece, or connect the saline
output to use the surgical handpiece.
e. Unwind the pedal wire and place it on the floor ina convenient position for its activation
while using the DentSurg Pro;
f. Unwind the power cord and connect the plug. Check for a socket with a grounding pin
within reach of the length of the power cord. It is not necessary to check the voltage,
since the power supply is automatic bivolt;
g. Run the “Clean” procedure without attaching the insert to the handpiece, pressing the
key for 3 seconds and waiting for up to 10 seconds until it automatically stops, thus
clearing the hose, the irrigation speed and avoiding breaking the insert due to
excessive heat.
h. Place a CVDentus tip on the handpiece;
i. With the aid of a ratchet, tighten the chosen CVDentus tip;
j. Turn on the main unit, moving the “on-off” switch to the position ( I) and watch
the touchscreen display be activated and show the CVDentus logo.
k. Choose a procedure;
l. Before engaging the pedal, turn the handpiece towards a sink;
m.Engage the pedal so the CVDentus tip vibrates in the ultrasound frequency;
n. Adjust the water flow if needed, through the corresponding command on the
touchscreen display. Engage the pedal again and observe the flow. Repeat this
procedure until reaching the desired flow;
o. There you go, the machine is up and running.
5. Special Recommendations for the installation
Since patients may experience some tissue trauma during treatment, it is suggested that
the operator use purified or distilled water. This will significantly reduce the possibility of
infection. In some procedures, the use of a sterile liquid, such as saline, for example, may
be desirable.
After installation, the entire extra length of the power cable must be arranged neatly to
avoid accidents.
The activation pedal should be placed in a position where operators can easily reach it.
All extra cable of the activation pedal must also be arranged neatly to avoid any kind of
accidents.
Before the first use

DT-MI DentSurg Pro - Rev.16
18
To better use all functions and maximize the performance of your DentSurg Pro, we suggest
that, before treating patients, operators/dentists should practice on models/plaques to
become familiar with the system. For standard tartar-removal tips, use an aluminum plate.
For the others, whose objective is to test the diamond cut of the active tip, it is recommended
that a hard material be used, which can be a piece of ceramic floor type CP1, CP2 or CP3.
In either case, maneuver the tip with gentle touches on the test material. Familiarize yourself
and observe the subtleties of the application of pressure under the different angles of the tips,
the main working positions etc. Look closely at the scratches left on the aluminum plate after
each session and try to combine each scratch with the angles and positions that caused it.
Additionally, adjust the ultrasonic power intensity using the corresponding keys. Familiarize
yourself with the differences when theintensityof ultrasound power is changed. Finally, adjust
the water flow using the water flow control key in the display. Familiarize yourself and observe
the subtleties between different water flow situations. Observe the change in temperature of
the handpiece according to the water flow. Do not overheat the handpiece. Perform the above
training procedures several times to prepare for treating patients.
The DentSurg Pro equipment has some symbols and important information on the main unit,
moveable parts and accessories. The operator's distance is important so they can read the
signals. From all signals, reading the symbols marked on the handpiece and the handpiece
cover depends on the position of the operator, as shown below:
Figure 08: For a perfect readability, the recommended distance is approximately 30cm, as
shown in the figure.
The handpiece must be at approximately 10cm from the patient’s ear.
Other distances must be observed for the safety of the operator (distance considered up to
the operator’s ear):
•Minimum distance between the equipment and the operator (≥ 30 cm);
•Minimum distance between the handpiece and the operator (≥ 30 cm).
Expected distances
Period of contact

DT-MI DentSurg Pro - Rev.16
19
Below are the specified periods for contact with the cabinet parts and applied parts:
•Cabinet parts: 1 s ≤ t < 10 s;
•Applied parts: t < 1 min.
FREQUENTLY USED FUNCTIONS
•Connecting the equipment to the power network;
•Turning the equipment power switch on;
•Emptying and filling the bottles with coolant;
•Placing and removing the CVDentus tips (applied parts);
•Selecting the handpiece;
•Reading the display and the LEDs;
•Cleaning;
•Handling/holding the handpiece;
•Turning off the power.
FUNCTIONS RELATED TO PRODUCT SAFETY
•Selecting the proper function and power for the CVDentus tips (applied parts);
•Correctly attaching the CVDentus tips (applied parts);
•Cleaning and disinfecting the parts that come in contact with the patient;
•Cleaning the equipment;
•Always make sure there is coolant inside the bottles. Ensure irrigation.
The functions of the touchscreen display on the main unit are detailed here, according to the
following figures.
1- Touchscreen Display:
Figure 09: Language selection screen
1.1 Initial display:
Instructions for use and operation
Control panel and main unit connectors

DT-MI DentSurg Pro - Rev.16
20
Figure 10: Main screen of the DentSurg Pro ultrasound equipment
Selection key for the specialty
SURGERY
Selection key for the
specialty PERIO
Selection key for the specialty
ENDO
Selection key for the
specialty CAVITY
Indicator for adjusted power
Indicator for adjusted
irrigation intensity
Selector of intensity of power and irrigation
Activates the LED function of
the pen and the intensity can
be disabled or changed in up
to 3 stages.
Go back to the main menu
Favorite procedures
Settings
Table of contents
Other cvdentus Dental Equipment manuals
Popular Dental Equipment manuals by other brands

Sirona
Sirona ORTHOPHOS XG 5 installation instructions

KERR
KERR elements IC Instructions for use

Eighteeth
Eighteeth Fast-Fill user manual

NSK
NSK Ti-max Z45L Operation manual

Guilin Woodpecker Medical Instrument
Guilin Woodpecker Medical Instrument MT2 instructions

Coltene
Coltene DIATECH Z-Rex Diamond Instructions for use