D-CUT TA-070 User manual

S
SERIES
This saw can be operated safely only when the operating instructions
have been completely read and strictly adhered to. It is recommended
Operation Manual
TA-070 Wet Tile Saw
FOR YOUR SAFETY

to receive practical instruction before using the saw for the first time.
Always inspect cable and plug before using the saw. The outlet must
be grounded. Ground Fault Circuit Interrupter (GFCI) protection should
be provided on the circuit(s) or outlet(s) to be used for this saw.
Have damage repaired only by a qualified professional.
Do not use the saw in standing water or expose rain.
Wear hearing protection and safety goggles.
zAlways remove the plug from the power supply socket before removing
saw from work area, when interrupting work and when not using the
saw.
zInsert the plug into the power socket only when the saw is
switched off.
zAlways place the cable away from the saw towards the outside
of the saw table.
zDo not carry the saw by the cable.
zWear sturdy footwear.
zDo not use the saw when the blade is not installed properly.
zAlways switch off the saw before lifting the table for cleaning.
zOnly use original D-Cut accessories.
zNever leave the saw running unattended.
zKeep guards in place. Adhere to safety guidelines: (ANSI)
American Safety Standards Institute.
zNever stand or lean on equipment. Serious injury could occur
if the machine is tipped or is unintentionally contacted.
zDo not over reach. Keep footing and balance at all times.
zDisconnect tools. Before servicing, and when changing
accessories such as blades or profile tools. Turn off equipment!
zUse the correct tools. Do not force the equipment or accessory
to do a job for which it was not designed
zUse proper extension cord. Improper cord length and/or gauge
are the leading cause of premature electric motor failure! When
in doubt use heavier gauge cord.
FOR YOUR SAFETY
zCluttered areas and benches invite injuries
2

zKeep work area well lit.
zAvoid body contact with earthed or grounded surfaces (e.g. pipes,
radiators, ranges, refrigerators).
zDo not let persons, especially children, not involved in the work
touch the tool or the extension cord and keep them away from the
work area.
zWhen not in use, tools should be stored in a dry locked-up place,
out of reach of children.
zDo not force small tools to do the job of a heavy-duty tool.
zDo not use tools for purposes not intended; for example do not
use circular saws to cut tree limbs or logs.
zDo not wear loose clothing or jewelry; they can be caught in moving
parts.
zNon-skid footwear is recommended when work out doors
zWear protective hair covering to contain long hair.
zWhere possible use clamps or a vice to hold the work. It is safer
than using your hand.
zKeep cutting tools sharp and clean for better and safer
performance.
zFollow instruction for lubricating and changing accessories.
zInspect tool cords periodically and if damaged have them repaired
by an authorized service facility.
zKeep handles dry, clean and free from oil and grease.
zWhen not in use, before servicing and when changing accessories
such as blades, bits and cutters, disconnect tools from the power
supply.
zForm the habit of checking to see that keys and adjusting wrenches
are removed from the tool before turning it on.
zWatch what you are doing, use common sense and do not operate the
tool when you are tired.
zBefore further use of tool, it should be carefully checked to
determine that it would operate properly and perform its intended
function.
zCheck for alignment of moving parts, binding of moving parts,
breakage of parts, mounting and any other conditions that may
affect its operation.
zA guard or other part that is damaged should be properly repaired
or replaced by an authorized service centre unless otherwise
indicated in the instruction manual.
zHave defective switches replaced by an authorized service centre.
zDo not use the tool if the switch does not turn it on and off.
zThis electric tool complies with the relevant safety rules.
Qualified persons using original spare parts should only carry
out repairs, otherwise this may result in considerable danger to
the user.
3

FOR YOUR SAFETY
zTo avoid the possibility of the appliance plug or receptacle getting
wet, position tile saw to one side of a wall-mounted receptacle to
prevent water from dripping onto the receptacle or plug. The user
should arrange a trip loop in the cord connecting the saw to a
receptacle. The drip loop is that part of the cord below the level
of the receptacle, or the connector if an extension cord is used,
to prevent water traveling along the cord and coming in contact with
the receptacle.
zIf the plug or receptacle does get wet, DON’T unplug the cord.
Disconnect the fuse or circuit breaker that supplies power to the
tool. Then unplug and examine for the presence of a circuit faults.
zUse only extension cords that are intended for outdoor use. These
extension cords are identified by marking2Acceptable for use with
outdoor appliances; store indoors while not in use. Use only
extension cords having an electrical rating not less than the rating
of the product. Do not use damaged cords. Examine extension cords
before using and replace if damaged. Do not abuse extension cords
and do not yank on any cord to disconnect. Keep cords away from heat
and sharp edges. Always disconnect the extension cord from the
receptacle before disconnecting the product from the extension
cord.
zWARNING – To reduce the risk of electrocution, keep all connections
dry and off the ground. Do not touch plug with wet hands.
zGround Fault Circuit Interrupter (GFCI) protection should be
provided on the circuit(s) or outlet(s) to be used for the tile saw.
Receptacles are available having built-in GFCI protection and may
be used for this measure of safety.
4

INNOVATION PUT TO WORK
Here at D Cut Products, Inc. We are always looking
to come out with new innovative products.
Check out Our Website for Updates at
www.dcutproducts.com
Or contact us at
FOR YOUR (90 DAY)
WARRANTY TO BE EFFECTIVE ON ALL ELECTRICAL MOTOR
AND PARTS SUCH AS THE SWITCH AND THE CONTROL DEVICE,
GAS ENGINE, AND PARTS, ALSO FOR YOUR (1) ONE YEAR
WARRANTY ON ALL OTHER PARTS, EXCLUDING ABOVE
COMPLETE THE WARRANTY CARD (PLEASE INCLUDE THE
SERIAL NUMBER) AND MAIL IT IN AS SOON AS POSSIBLE.
The serial number of your saw
is located on the front side
the gearbox of the motor.
5

6
Fig.1
Fig.
2
Fig.
3
0-90°Attachment----1P
Press
mechanism------2P
Operation manual--- 1P
Warranty card-------
--1P
Steel Stand
Open folded stand in
a flat area.
Contents In the Box:
Wench-------------- - -
----1P
Installation
Press down wheel
brakes as shown. Set
the saw onto the
4pins of the stand
and use provided
screw to lock the saw
to the stand.
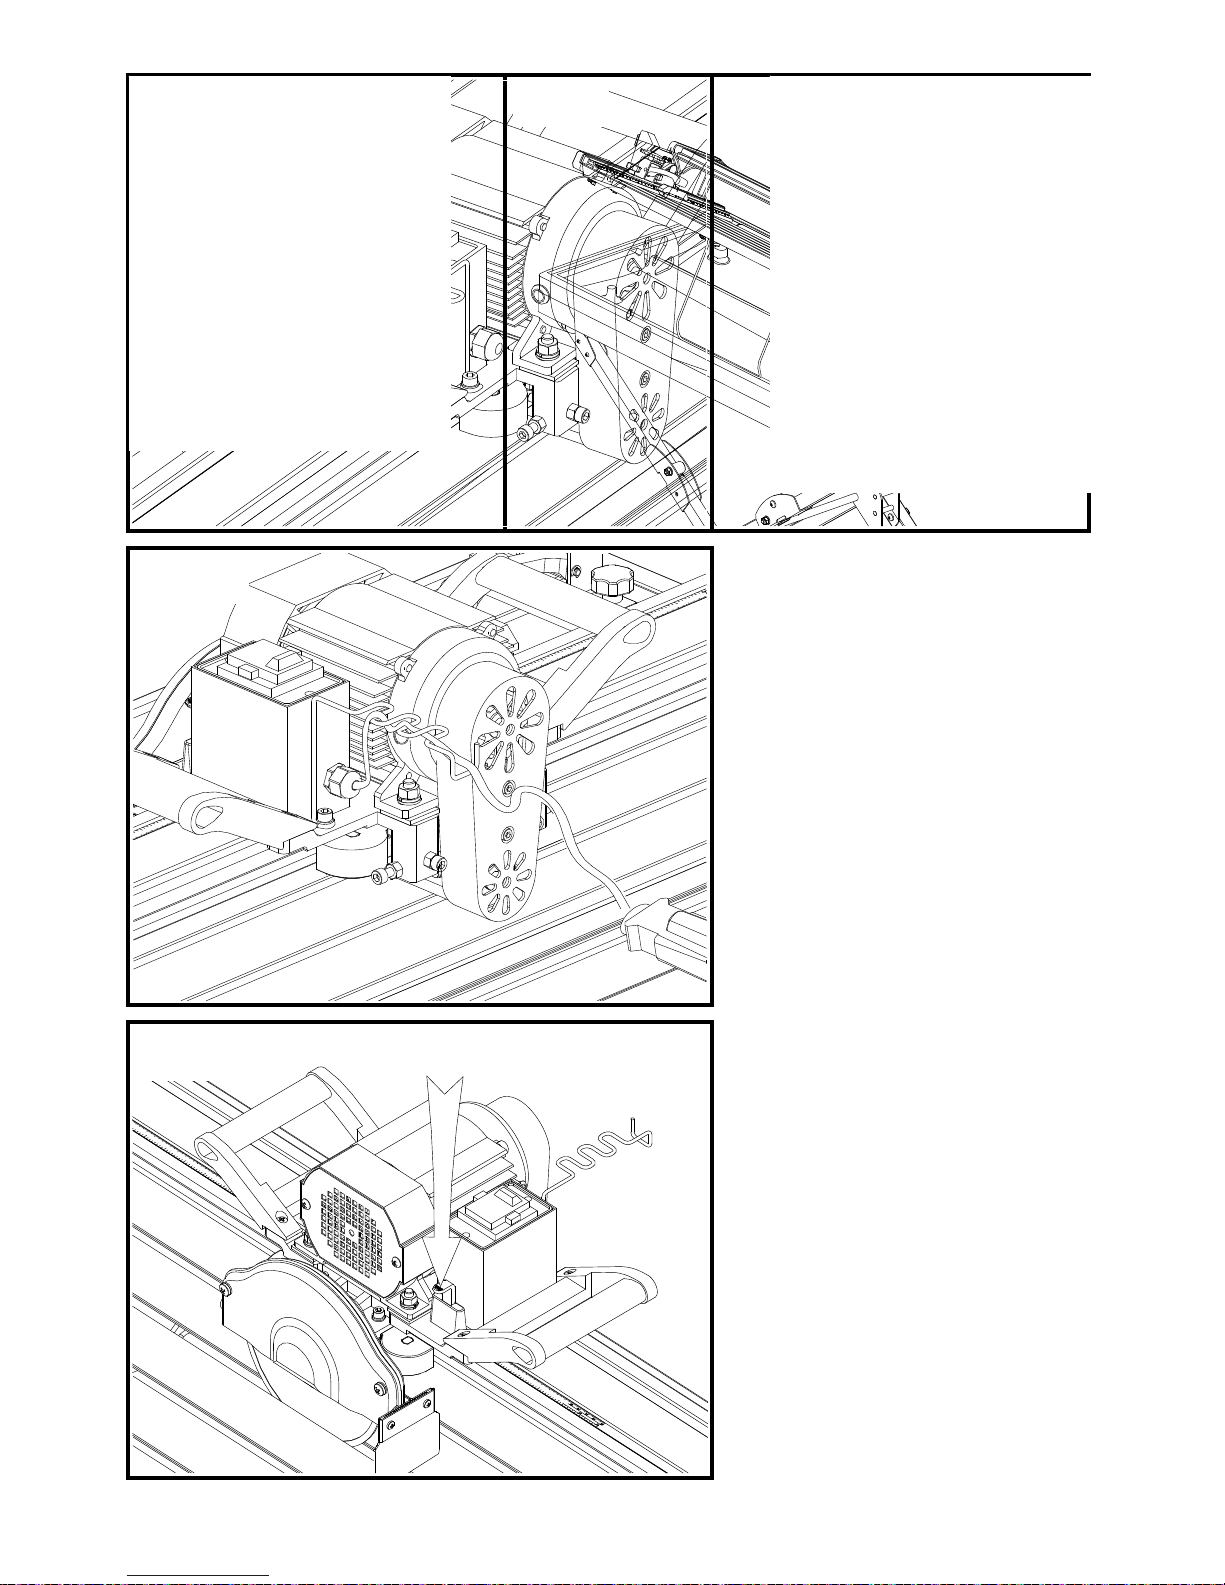
Fig.4
Open the table
Remove all tools,
debris etc. from the
saw table. Lock the
side plate in
position and lift the
table allowing the
rod from the concave
recesses molded into
the tray. This
enables the saw table
to remain in the open
When storing the saw
always turn the stand
90 degree to keep it
inside of the working
table area.
Core Stand
The cord stand is for
the support of the
electrical cord in a
safe manner.
Fig.
7
Please enlace the
electrical cord on
the cord stand.
Electrical Cord
Fig.5
Fig.
6
Pull up the slide
plate Lock as shown
in Fig.6 before
operation. For safe
transportation or
when storing the saw,
always lock the slide
plate.
Slide Plate Locking
7

Fig.1
0
图
8
Fig.
9
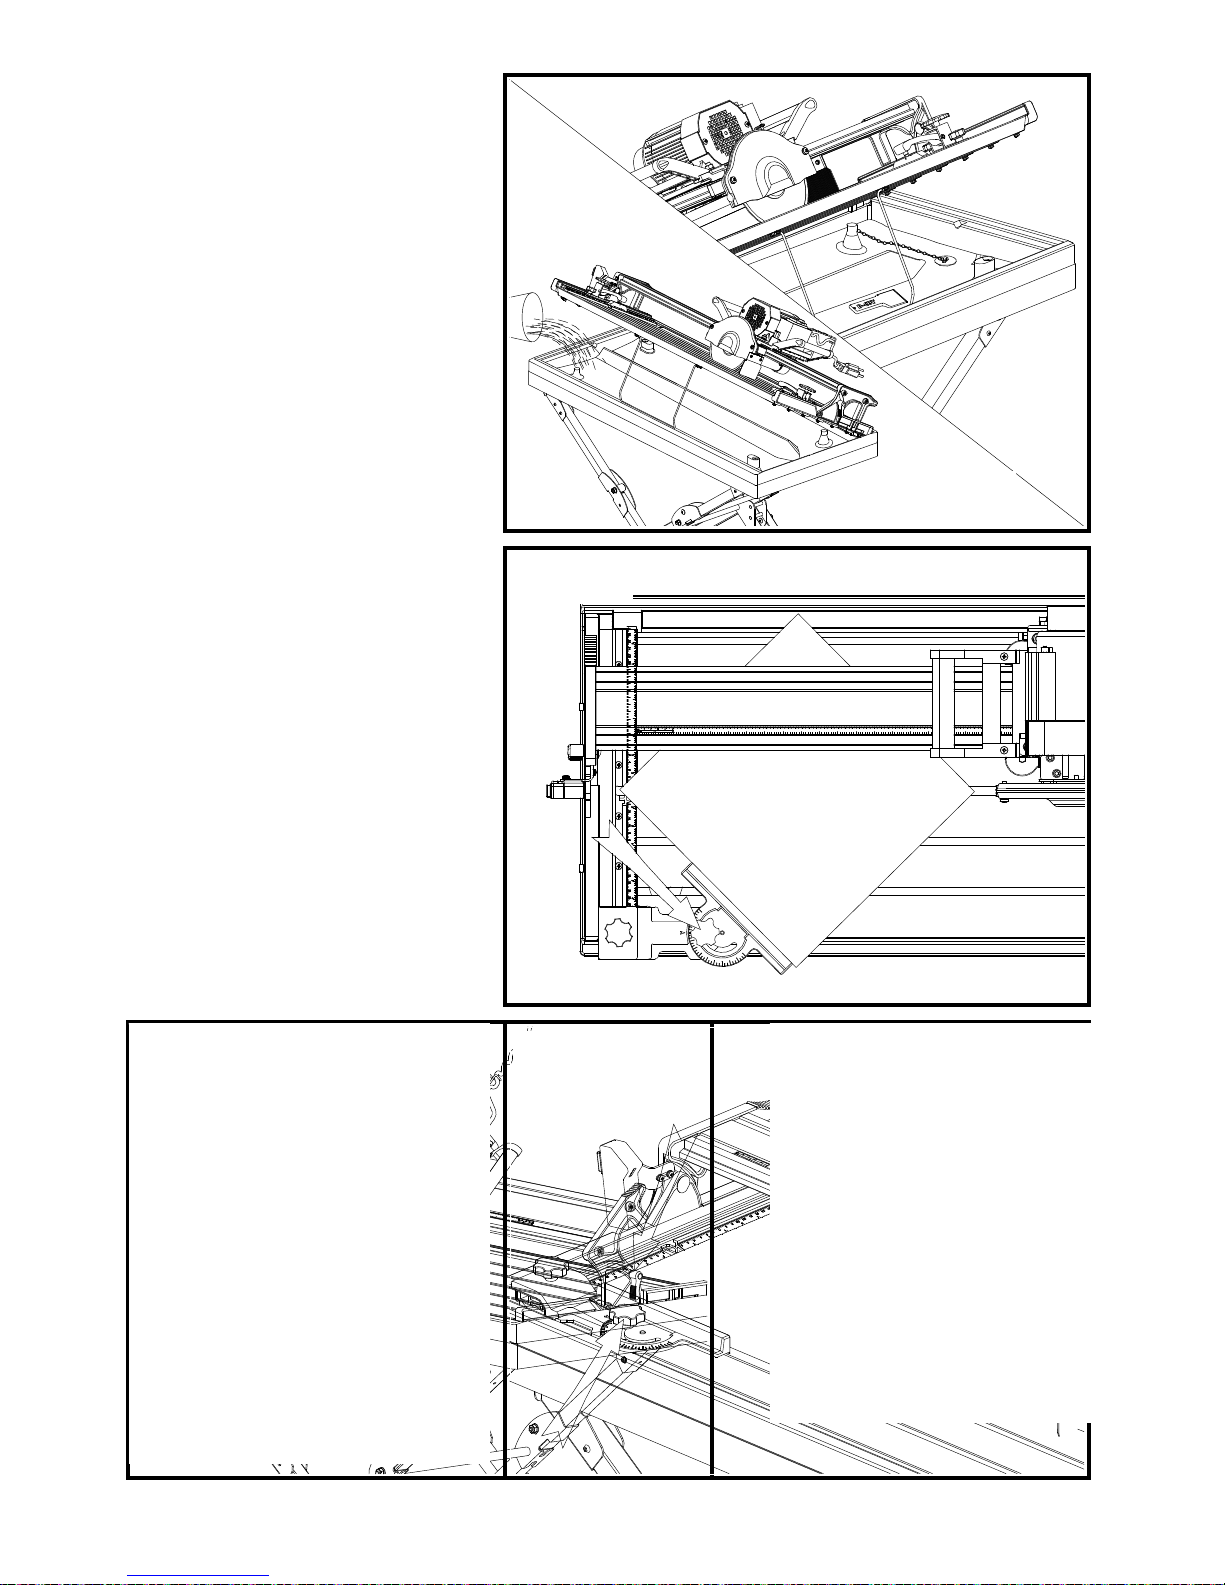
Cutting:
Insert a piece of tile
under the guide rails
and keep a flat and
straight side against
the gauge. Use the
clap to hold the tile.
Stand along the
saw/table comfortably
and start the saw and
push the saw towards
the tile.
Fill the water tray
with approx.5 gallons
(23liters) of clean
water to the indicated
water level. Water can
be added or refilled
as needed during the
operation of the saw.
Fill Water Pull-Push Operation
Two handles are built
within the slide plate
/ motor mechanism. The
saw can be saw can be
either pushed to cut,
or pulled to cut, based
on the operator’s
comfort level or
preference.
Fig.
8
Fig.1
1
Pul
l
Push
Laser Scriber
Pull down the switch
as shown in Fig.9.
The laser will be
opened.
8
Clean
Drain the water by
pulling the chain
attached to the plug
on the bottom of the
water tray. Use the
provided scraper to
clean and remove the
cutting debris and
slurry and pour a
bucket of clean water
throughout the water
reservoir tray.
Fig.1
3
Fig.1
2
0-90°Attachment (1)
Unlock the screw on the
attachment shown in
Fig.14 and set it to the
proper angle between
0-90°, and then lock the
degree setting screw.
Warning:
Remove this attachment
from the table when not
needed.
Fig.1
4
0-90°Attachment (2)
Use the attachment
shown in Fig.15 as a
limitation stopper when
repeatedly cutting same
size of the tile.
Warning:
Remove this attachment
from the table when not
needed.
Fig.1
5
Shown and lift the
motor-end to 45°for 45
°beveling cutting.
Unlock two screws as
45°Cutting
9
Warning: If it is not
needed please don’t
adjustment the twos
screws.
Setting Accuracy(1)
Adjustment the two
screws as shown in
Fig.16 the verticality
of the gauge and the
blade can be regulated
if it is needed.
Fig.1
6
Fig.1
7
Warning: If it is not
needed, please don’t
adjustment the twos
screws.
Setting Accuracy (2)
Adjustment the two
screws as shown in
Fig.16 the gap of the
wheel and the guide rail
can be regulated if it is
needed.
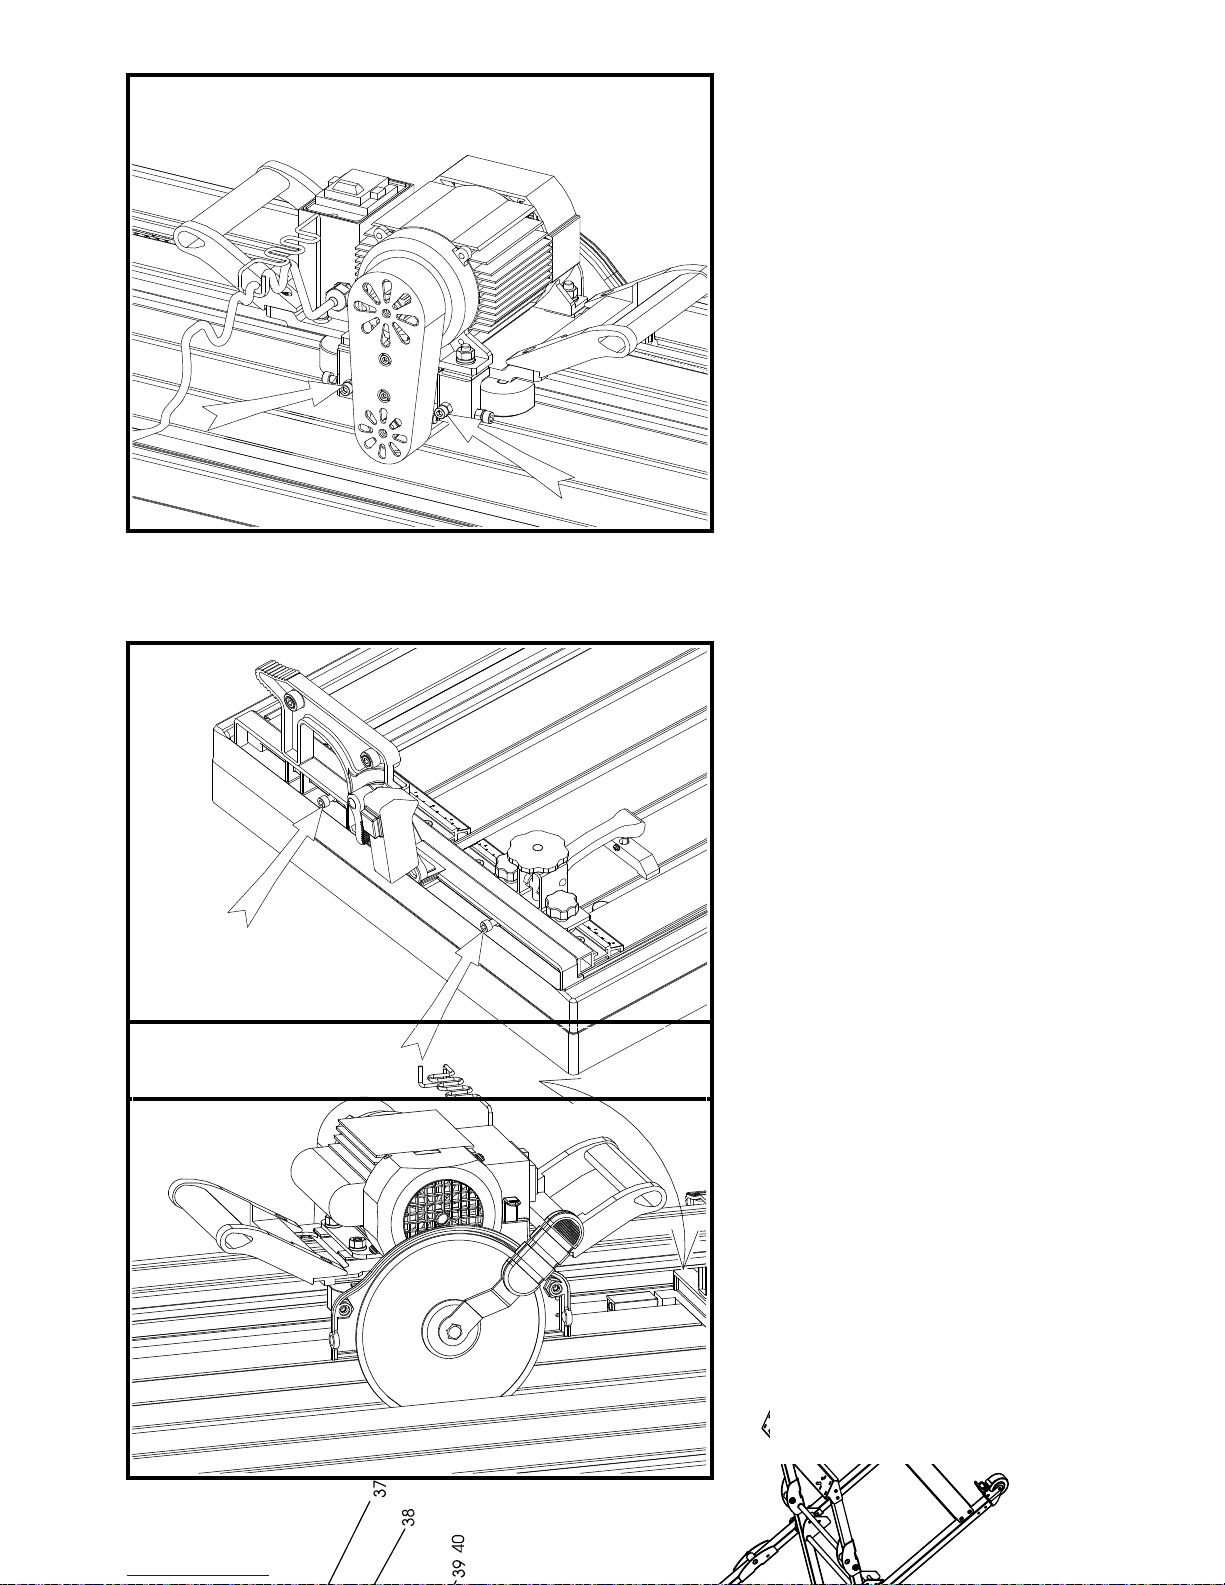
Chang Blade
Remove the front
blade guard and use
the provided wench
loosens the flange to
change the blade.
Fig.1
8
10

11

Parts Description Q’t Parts Description Q’t
1 Water Tray
1
35 Inner Hex screw M5×25
1
2 Inner Hex screwM6×20
2
36 Flat washer 5mm
2
3 Hex Nut M6
2
37 Inner Hex screw M5×40
1
4 Laser head assembly
1
38 Belt cover
1
5 Cross screw M4×10
2
39 Inner Hex screw M6×20
2
6 Flat washer 4mm
2
40 Big Flat washer
2
7 Left revolving bracket
1
41 Small pulley
1
8 Left bracket
1
42 Cord stand
1
9 Cross screwM5×35
6
43 Handle
2
10 Gauge base
1
44 Capacitance
1
11 Rail
1
45 ST-Screw 4.2×20
2
12 Cross screw M6×20
2
46 Hex screw M8×20
4
13 Front blade guard
1
47 Shaft cover
1
14 Hex bolt M8×20
1
48 Shaft for blade
1
15 7"blade
1
49 Wheel ping
4
16 Inner flange
1
50 Wheel base
2
17 Cross screw M6×20
2
51 Sleeve
4
18 Rear blade guard
1
52 Bearing 619/6-2Z
8
19 Hex nut M6
2
53 Wheel
4
20 Bearing base
2
54 Hex screw nut M6
4
21 Bearing 6202-2RZ
2
55 Water stop assembly
1
22 Cross screw M4×5
4
56 Outer flange
1
23 Spring washer 4mm
4
57 Square neck bolt M8×25
2
24 Rubber
4
58 Right revolving
bracket
1
25 Inner Hex screw M6×20
4
59 Inner Hex scre
w
M6×20
4
26 Stop water board
1
60 Spring washer 6mm
4
27 Inner Hex screw M6×16
4
61 Lock screw
2
28 Slide panel
1
62 Flat washer 6mm
2
29 Motor
1
63 Pin
2
30 Hex screw M8
4
64 Open ring 6mm
2
31 Spring washer 8mm
4
65 Right gauge base
1
32 Switch
1
66 Working table
1
33 Big pulley
1
67 Steel stand
1
34 Timing belt 150L050
1
Trouble shooting:
1. Not cutting straight
a. Check blade to make sure it’s on tight
12

b. Make sure working piece is flush against the gauge.
2. Motor doesn’t work
a. Check power source connection.
b. Check power cords for damage.
3. Table vibration during cutting process
a. Check blade installation.
b. Check blade-wearing status.
4. Losing cutting speed
a. Stop work and allow the motor to cool off for at least 20
minutes.
b. Change a new blade and try again.
*Problem still exists contact your authorized D Cut Service Center
Specifications:
110-120v, 60Hz, 1.3HP/220-240v, 50-60Hz,
1000W
Motor
Rip Cut 34 ” /860mm
Diagonal Cut
18 ” /450mm
Cutting Depth 1-1/4 ” / 32mm
Arbor
7/8 ” , 1 ” / 22.2mm, 25.4mm
Size (L×W×H) 44 ” ×20 ”×18 ” /1125mm×504mm×450mm
Weight
33Lb /15kg
13

ENVIRONMENTAL PROTECTION
Waste electrical products should not be disposed of with household
waste. Please recycle where facilities exit. Check with your local
Authority or retailer for recycling advice.
D CUT PRODUCTS, INC.
1041N. Lombard Road
Lombard, IL 60148 USA
Tel: 630-916-9100 Fax:
630-916-9101
www.dcutproducts.com
14
Table of contents
Other D-CUT Saw manuals


