manuals.online logo
Brands
  1. Home
  2. •
  3. Brands
  4. •
  5. Danby
  6. •
  7. Range
  8. •
  9. Danby DER200W Assembly instructions

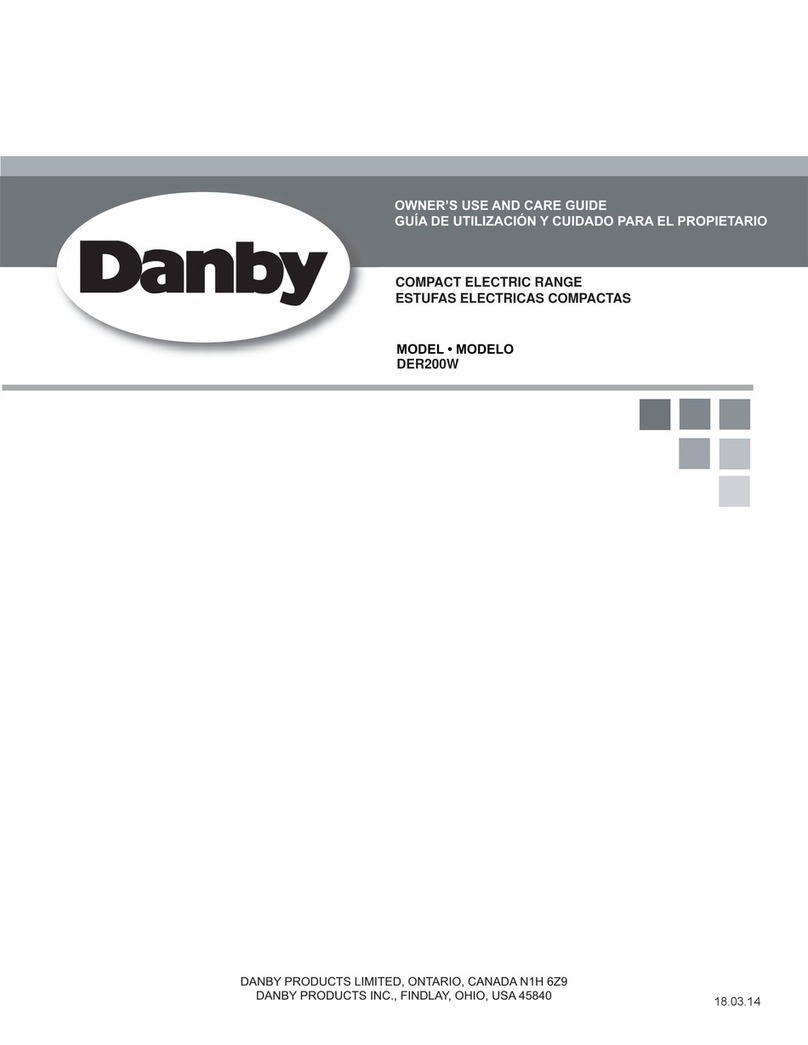
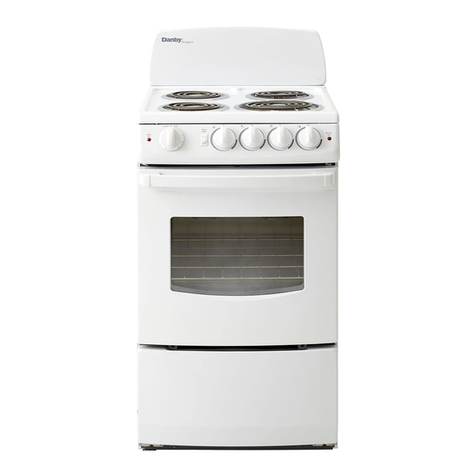
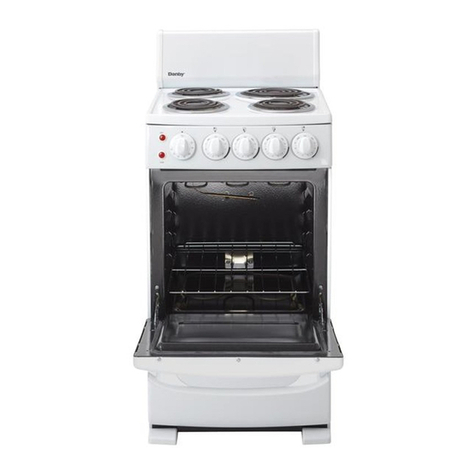
Danby DER200W Assembly instructions

Other manuals for DER200W

1

This manual suits for next models

1

Other Danby Range manuals

Danby DER2099W Assembly instructions

Danby

Danby DER2099W Assembly instructions

Danby DER240W Assembly instructions

Danby

Danby DER240W Assembly instructions

Danby DRCA240BSS User manual

Danby

Danby DRCA240BSS User manual

Danby DR240WGLPC Assembly instructions

Danby

Danby DR240WGLPC Assembly instructions

Danby DER202 User manual

Danby

Danby DER202 User manual

Danby DRCA240BSS User manual

Danby

Danby DRCA240BSS User manual

Danby DER241WC Assembly instructions

Danby

Danby DER241WC Assembly instructions

Danby DGR546W User manual

Danby

Danby DGR546W User manual

Danby DER202BSS User manual

Danby

Danby DER202BSS User manual

Danby DR200WGLP Assembly instructions

Danby

Danby DR200WGLP Assembly instructions

Danby DR3099BLGLP Assembly instructions

Danby

Danby DR3099BLGLP Assembly instructions

Danby DER243BSSC Assembly instructions

Danby

Danby DER243BSSC Assembly instructions

Danby DER245BSS User manual

Danby

Danby DER245BSS User manual

Danby DR299BLSGLP Assembly instructions

Danby

Danby DR299BLSGLP Assembly instructions

Danby DRCA240BSS2 User manual

Danby

Danby DRCA240BSS2 User manual

Danby Designer DR399BLSGLP Assembly instructions

Danby

Danby Designer DR399BLSGLP Assembly instructions

Danby DR3009WGLP Assembly instructions

Danby

Danby DR3009WGLP Assembly instructions

Danby DER202W User manual

Danby

Danby DER202W User manual

Danby DR201WGLP Assembly instructions

Danby

Danby DR201WGLP Assembly instructions

Danby DER200W Assembly instructions

Danby

Danby DER200W Assembly instructions

Danby DER201BSS Assembly instructions

Danby

Danby DER201BSS Assembly instructions

Danby DER244BSSC User manual

Danby

Danby DER244BSSC User manual

Danby DER202W User manual

Danby

Danby DER202W User manual

Danby DER3009W Assembly instructions

Danby

Danby DER3009W Assembly instructions

Popular Range manuals by other brands

Maytag MGR5875QDW - 30 Inch Gas Range Use and care guide

Maytag

Maytag MGR5875QDW - 30 Inch Gas Range Use and care guide

Frigidaire FFGF3024SS use & care

Frigidaire

Frigidaire FFGF3024SS use & care

Capital Precision Series GCR484W Specifications

Capital

Capital Precision Series GCR484W Specifications

Officine Gullo GGS8P Installation and use instruction

Officine Gullo

Officine Gullo GGS8P Installation and use instruction

LG LSD4913 Series owner's manual

LG

LG LSD4913 Series owner's manual

Kenmore 4101 - Elite 30 in. Slide-In Electric Range installation instructions

Kenmore

Kenmore 4101 - Elite 30 in. Slide-In Electric Range installation instructions

Moffat Blue Seal Evolution G576 Technical data sheet

Moffat

Moffat Blue Seal Evolution G576 Technical data sheet

CornuFé C1NF user guide

CornuFé

CornuFé C1NF user guide

GE JGS650SEFSS Dimensions and installation information

GE

GE JGS650SEFSS Dimensions and installation information

LG LDG3015ST Manual De Propietario

LG

LG LDG3015ST Manual De Propietario

Whirlpool RF350PXP Use and care guide

Whirlpool

Whirlpool RF350PXP Use and care guide

Samsung FCQ321HTUW Service manual

Samsung

Samsung FCQ321HTUW Service manual

Kenmore 790.45712 Use & care guide

Kenmore

Kenmore 790.45712 Use & care guide

Wolf CHR CHSSR owner's manual

Wolf

Wolf CHR CHSSR owner's manual

Smeg Built-in Microwave Oven Instructions for the user

Smeg

Smeg Built-in Microwave Oven Instructions for the user

Zanussi ZCG054G user manual

Zanussi

Zanussi ZCG054G user manual

GE JCSS630 quick start guide

GE

GE JCSS630 quick start guide

Samsung NX58M9960P series installation manual

Samsung

Samsung NX58M9960P series installation manual

manuals.online logo
manuals.online logoBrands
  • About & Mission
  • Contact us
  • Privacy Policy
  • Terms and Conditions

Copyright 2025 Manuals.Online. All Rights Reserved.

Model • M odèle • Modelo
OWNER’S USE AND CARE GUIDE
GUÍA DE UTILIZACIÓN Y CUIDADO PARA EL PROPIETARIO
MODEL • MODELO
DANBY PRODUCTS LIMITED, ONTARIO, CANADA N1H 6Z9
DANBY PRODUCTS INC., FINDLAY, OHIO, USA 45840 06.06.14
ELECTRIC RANGE
ESTUFAS ELECTRICAS
DER200W / DER242W
www.goedekers.com
TO OBTAIN WARRANTY SERVICE YOU MUST PROVIDE A VALID PROOF OF
PURCHASE. PLEASE STAPLE YOUR RECEIPT TO THIS PAGE FOR FUTURE
REFERENCE.
-------------------------------------------------------------------------------------------------------------------
PARA OBTENER SERVICIO DE GARANTÍA, DEBE PROVEER UN RECIBO
ORIGINAL. POR FAVOR ENGRAPE SU RECIBO A ÉSTA PÁGINA EN CASO QUE
NECESITE HACER UN RECLAMO.
ELECTRIC RANGE
Owner’s Use and Care Guide ................................1-25
• Welcome
• Important Safety Information
• Operation Instructions
• Care and Maintenance
• Installation Instructions
• Troubleshooting
• Warranty
ESTUFAS ELECTRICAS
Guía de utilización y cuidado para el propietario..26-52
• Bienvenido
• Instrucciones de seguridad importantes
• Operación
• Cuidado y mantenimiento
• Instrucciones de instalación
• Diagnósticos de problemas
• Garantía
Model • Modelo
DER200W / DER242W
CAUTION:
Read and follow all safety rules and operating
instructions before first use of this product.
PRECAUCIÓN:
Lea y observe todas las relgas de seguridad y
las instrucciones de operación antes de usar
este producto por la primera vez.
CONTENTS / ÍNDICE
www.goedekers.com
WELCOME
1
Welcome to the Danby family. We’re proud of our quality products, and we believe in dependable service, like you will find
in this Owner’s Use and Care Guide, and like you will receive from our friendly customer service department. Best of all,
you will experience these values each and every time you use your Danby appliance. That’s important, because your new
appliance will be a part of your family for a long time.
Note the information below; you will need this information to obtain service under warranty.
To receive service, you must provide the original receipt.
Model No:
Serial No:
Date Purchased:
NEED HELP?
Before you call for service, here are a few things you can do to
help us serve you better:
Read this Owner’s Use and Care Guide:
It contains instructions to help you use and maintain your
appliance properly.
If you received a damaged appliance:
Immediately contact the retailer (or builder) that sold you the
appliance.
Save time and money:
Check the Troubleshooting section at the end of the guide
before calling. This section helps you solve common problems
that may occur.
If you do need service, you can relax, knowing help is only a
phone call away.
1-800-26-
(1-800-263-2629)
WARNING
Read all safety instructions before using the product.
Failure to follow these instructions may result in fire,
electric shock, serious injury or death.
www.goedekers.com
ANTI-TIP DEVICE
To reduce the risk of tipping the range, the range must be secured by a properly installed anti-tip bracket. See installation
instructions shipped with the bracket for complete details before attempting to install.
For Freestanding Ranges:
To check if the bracket is installed and engaged properly, look underneath the range to see that the anti-tip arm attached
to the side panel is engaged in the bracket. On some models, the storage drawer or kick panel can be removed for easier
inspection. If visual inspection is not possible, slide the range forward, confirm the anti-tip bracket is securely attached to
the floor or wall, and slide the range back so the anti-tip arm slides just under the anti-tip bracket. If the range is pulled
from the wall for any reason, always repeat this procedure to verify the range is properly secured by the anti-tip bracket.
2
IMPORTANT SAFETY INFORMATION
READ ALL INSTRUCTIONS BEFORE USING
WARNING
Tip-Over Hazard
A child or adult can tip the range and be killed. Verify the anti-tip bracket has been
properly installed and engaged to the floor or wall. Ensure the anti-tip bracket is re-
engaged when the range is moved by sliding the anti-tip arm just under the bracket.
Do not operate the range without the anti-tip bracket in place and engaged. Failure
to follow these instructions can result in death or serious burns to children or
adults.
Rear wall
Adjacent cabinet or
nal location of right
range side panel
Right side
panel
Rear wall
READ AND FOLLOW THIS SAFETY INFORMATION CAREFULLY
SAVE THESE INSTRUCTIONS
www.goedekers.com
IMPORTANT SAFETY INFORMATION
3
READ ALL INSTRUCTIONS BEFORE USING
GENERAL SAFETY INSTRUCTIONS
• Use this appliance for its intended purpose as described in this Owner’s Manual.
• Be sure your appliance is properly installed and grounded by a qualified installer in accordance with the provided
installation instructions.
• Do not attempt to repair or replace any part of your range unless it is specifically recommended in this manual. All
other servicing should be referred to a qualified technician.
• Before performing any service, unplug the range or disconnect the power supply at the household distribution panel
by removing the fuse or switching off the circuit breaker.
• Do not leave children alone - children should not be left alone or unattended in an area where an appliance is in use.
They should never be allowed to climb, sit or stand on any part of the appliance.
• CAUTION: Do not store items of interest to children above a range or on the backguard of a range - children
climbing on the range to reach items could be seriously injured.
• Use only dry potholders - moist or damp pot holders on hot surfaces may result in burns from steam. Do not let the
potholders touch hot heating areas. Do not use a towel or other bulky cloth in place of pot holders.
• Never use your appliance for warming or heating the room.
• Do not touch surface elements, areas near the elements or interior surfaces of the oven. These surfaces may be
hot enough to burn even though they are dark in color. During and after use, do not touch, or let clothing or other
flammable materials contact the surface elements, areas nearby the surface units or any interior area of the oven;
allow sufficient time for cooling first. Other surfaces of the appliance may become hot enough to cause burns.
Potentially hot surfaces include the cooktop, areas facing the cooktop, oven vent opening, surfaces near the opening
and crevices around the oven door.
• Do not heat unopened food containers. Pressure could build up and the container could burst, causing an injury.
• Do not use aluminum foil to line drip pans or anywhere in the oven, except as described in this manual. Foil can trap
heat or melt, resulting in damage to the product and a shock or fire hazard.
• Avoid scratching or impacting glass doors, cook tops or control panels. Doing so may lead to glass breakage. Do not
cook on a product with broken glass. Shock, fire or cuts may occur.
• Cook meat and poultry thoroughly - meat to at least an internal temperature of 160°F and poultry to at least an internal
temperature of 180°F. Cooking to these temperatures usually protects against foodborne illness.
• Do not store or use flammable materials in an oven or near the cooktop, including paper, plastic, pot holders, linens,
wall coverings, curtains, drapes and gasoline or other flammable vapors and liquids.
• Never wear loose-fitting or hanging garments while using the appliance. These garments may ignite if they contact
hot surfaces causing severe burns.
• Do not let cooking grease or other flammable materials accumulate in or near the range. Grease in the oven or on the
cooktop may ingnite.
• Clean ventilating hoods frequently. Grease should not be allowed to accumulate on the hood or filter.
WARNING
WARNING
KEEP FLAMMABLE MATERIALS AWAY FROM THE RANGE
READ AND FOLLOW THIS SAFETY INFORMATION CAREFULLY
SAVE THESE INSTRUCTIONS
www.goedekers.com
4
IMPORTANT SAFETY INFORMATION
READ ALL INSTRUCTIONS BEFORE USING
• Do not use water on grease fires. Never pick up a flaming pan. Turn the controls off. Smother a flaming pan on a
surface element by covering the pan completely with a well-fitting lid, cookie sheet or flat tray. Use a multi-purpose dry
chemical or foam-type fire extinguisher.
• If there is a fire in the oven during baking, smother the fire by closing the oven door and turning the oven off, or by
using a multi-purpose dry chemical or foam-type fire extinguisher.
WARNING
IN THE EVENT OF A FIRE, TAKE THE FOLLOWING STEPS
TO PREVENT THE FIRE FROM SPREADING
• Never leave the range unattended while a surface element is ON. Boilovers cause smoking and greasy spillovers that
may catch on fire.
• Never leave oil unattended while frying. If allowed to heat beyond its smoking point, oil may ignite resulting in fire that
may spread to surrounding cabinets. Use a deep fat thermometer whenever possible to monitor oil temperature.
• To avoid oil spillover and fire, use a minimum amount of oil when shallow pan-frying and avoid cooking frozen foods
with excessive amounts of ice.
• Use proper pan size - select cookware having flat bottoms large enough to cover the surface heating element.
The use of undersized cookware will expose a portion of the element to direct contact and may result in ignition of
clothing. Proper relationship of cookware to surface heating element will also improve efficiency.
• Only certain types of glass, glass/ceramic, earthenware or other glazed containers are suitable for cooktop service;
others may break because of the sudden change in temperature.
• To minimize the possibility of burns, ignition of flammable materials and spillage, the handle of a container should be
turned toward the center of the range without extending over nearby heating elements.
• When preparing flaming foods under a hood, turn the fan on.
• If power is lost to an electric cooktop while a surface element is ON, the surface element will turn back on as soon as
power is restored. In the event of power loss, failure to turn all surface element knobs to the OFF position may result
in ignition of items on or near the cooktop, leading to serious injury or death.
WARNING
COOKTOP SAFETY INSTRUCTIONS
READ AND FOLLOW THIS SAFETY INFORMATION CAREFULLY
SAVE THESE INSTRUCTIONS
www.goedekers.com
5
READ ALL INSTRUCTIONS BEFORE USING
IMPORTANT SAFETY INFORMATION
• Use care when touching the cooktop. The glass surface of the cooktop will retain heat after the controls have been
turned off.
• Do not cook on a broken cooktop. If glass cooktop should break, cleaning solutions and spillovers may penetrate the
broken cooktop and create a risk of electric shock. Contact a qualified technician immediately.
• Avoid scratching the glass cooktop. The cooktop can be scratched with items such as knives, sharp instruments,
rings or other jewelry, and rivets on clothing.
• Do not place or store items that can melt or catch fire on the glass cooktop, even when it is not being used. If the
cooktop is inadvertently turned on, they may ignite. Heat from the cooktop or oven vent after it has been turned off
may also cause them to ignite.
• Use a ceramic cooktop cleaner and a ceramic cooktop cleaning pad to clean the cooktop. Wait until the cooktop cools
and the indicator light goes out before cleaning. A wet sponge or cloth on a hot surface can cause steam burns. Some
cleaners can produce noxious fumes if applied to a hot surface. Note: Sugar spills are an exception. They should be
scraped off while still hot using an oven mitt and a scraper. See the Cleaning the glass cooktop section for detailed
instructions.
• Read and follow all instructions and warnings on the cleaning cream label.
WARNING
RADIANT COOKTOP SAFETY INSTRUCTIONS (Some models)
• Do not immerse or soak the removable surface cooking elements. Do not put them in a dishwasher. Doing so may
cause them to fail, resulting in a burn hazard or fire hazard.
• To avoid the possibility of a burn or an electric shock, always be certain that the controls for all surface elements are
at the OFF position, and that all coils are cool before attempting to lift or remove a coil cooking element.
• Be sure the drip pans are not covered and are in place. Their absence during cooking could damage range parts and
wiring.
• Do not use aluminum foil to line drip pans. Foil can trap heat or melt, resulting in damage to the product and a shock
or fire hazard.
WARNING
COIL COOKTOP SAFETY INSTRUCTIONS (Some models)
READ AND FOLLOW THIS SAFETY INFORMATION CAREFULLY
SAVE THESE INSTRUCTIONS
www.goedekers.com
6
READ ALL INSTRUCTIONS BEFORE USING
IMPORTANT SAFETY INFORMATION
• Stand away from the range when opening the oven door. Hot air or steam which escapes can cause burns to hands,
face and/or eyes.
• Keep the oven vent unobstructed.
• Keep the oven free from grease build-up. Grease in the oven may ignite.
• Place oven racks in desired location while oven is cool. If rack must be moved while oven is hot, do not let potholder
contact the hot heating element in the oven.
• When using cooking or roasting bags in the oven, follow the manufacturer’s directions.
• Pull the oven rack to the stop-lock position when loading and unloading food from the oven. This helps prevent burns
from touching hot surfaces of the door and oven walls.
• Do not leave items such as paper, cooking utensils or food in the oven when not in use. Items stored in an oven can
ignite.
• Do not use aluminum foil to line the oven bottom. Foil can trap heat or melt, resulting in damage to the product and a
shock hazard or fire hazard.
WARNING
OVEN SAFETY INSTRUCTIONS
READ AND FOLLOW THIS SAFETY INFORMATION CAREFULLY
SAVE THESE INSTRUCTIONS
• The purpose of the warming drawer is to hold hot cooked foods at serving temperature. Bacteria will grow in food
while it is below 140 °F. Do not put cold food in warming drawer. Do not heat food for more than 2 hours. Failure to
follow these instructions may result in foodborne illness.
• Do not leave paper products, plastics, canned food or combustible materials in the drawer. They may ignite.
• Do not touch the heating element or the interior surface of the drawer. These surfaces may be hot enough to cause
burns.
• Use care when opening the drawer. Open the drawer a crack and let hot air or steam escape before removing or
replacing food. Hot air or steam that escapes can cause burns to hands, face and/ or eyes.
• Do not use aluminum foil to line the lower drawer. The foil will trap heat below, and upset the performance of the oven.
Foil can melt and permanently damage the drawer bottoms.
WARNING
WARMING DRAWER/ LOWER OVEN DRAWER
SAFETY INSTRUCTIONS (Some Models)
www.goedekers.com
OPERATION INSTRUCTIONS
USING THE SURFACE COOKING ELEMENTS
7
Throughout this manual, features and appearance may vary from your model.
SURFACE COOKING CONTROLS
• Your surface elements and controls are designed to give you a variety of heat settings for surface element cooking.
• At both LO and HI positions, there is a slight niche, so the control clicks at those positions. HI marks the highest
setting; LO marks the lowest setting.
• In a quiet kitchen, you may hear slight clicking sounds during cooking, indicating heat settings selected are being
maintained.
• Switching heats to higher settings always shows a quicker change in temperature than switching to lower settings.
HOW TO SET THE CONTROLS
1. Push the control knob in.
2. Turn either clockwise or counterclockwise to the desired heat setting.
• The control must be pushed in to set only from the OFF position.
• When the control is in any position other than OFF, you can turn it without pushing in.
• Be sure you turn the control to OFF when you finish cooking. An indicator light will glow
when ANY surface element is on.
HEAT SETTING GUIDE
• HI - Quick start for cooking; bring water to a boil.
• MEDIUM HIGH - Fast fry, pan broil; maintain a fast boil on a large amount of food.
• MED - Saute and brown; maintain a slow boil on a large amount of food.
• MEDIUM LOW - Cereal; maintain the serving temperature of most foods.
• LO - Cook after starting at HI; cook with little water in a covered pan. Use to steam rice.
NOTE:
1. At HI or MEDIUM HIGH, never leave food unattended. Boil-overs cause smoking; greasy
spillovers may catch fire.
2. At LO, melt chocolate, butter on a small element.
COOKING TIPS
• Use medium- or heavyweight cookware. Aluminum cookware conducts heat faster than other metals. Cast-iron and
coated cast-iron cookware is slow to absorb heat, but generally cooks evenly at low or medium heat settings. Steel
pans may cook unevenly if not combined with other metals.
• Do not overfill cookware with fat that may spill over when adding food. Frosty foods bubble vigorously. Watch foods
frying at high temperatures. Keep range and hood clean from accumulated grease.
• To conserve the most cooking energy, pans should be flat on the bottom, have straight sides and tight-fitting lids.
Match the size of the saucepan to the size of the surface element. A pan that extends more than an inch beyond the
edge of the drip pan, traps heat, which causes “crazing” (fine hairline cracks) on porcelain, and discoloration ranging
from blue to dark gray on chrome drip pans.
www.goedekers.com
OPERATION INSTRUCTIONS
USING THE OVEN
The OVEN TEMP knob is located on the control panel on the front of the range.
OVEN TEMPERATURE CONTROLS
• To use the oven, simply turn the knob to the desired cooking temperatures, which are
marked in 25°F increments on the dial. OVEN TEMP maintains the temperature you set,
from 200°F to BROIL.
• The Oven Cycling Light glows until the oven reaches your selected temperature, then
goes off and on with the oven unit(s) during cooking.
OVEN TEMP
OVEN SHELVES
• The shelves are designed with stop-locks so when placed correctly on the shelf supports,
they will stop before coming completely out of the oven and will not tilt when you are
removing food from them or placing food on them.
• When placing cookware on a shelf, pull the shelf out to the bump on the shelf support.
Place the cookware on the shelf, then slide the shelf back into the oven. This will
eliminate reaching into the hot oven.
• To remove the shelves from the oven, pull them toward you, tilt front end upward and
pull them out.
• To replace, place the shelf on the shelf support with stop-locks (curved extension of
shelf) facing up and toward the back of the oven. Tilt up the front and push the shelf
toward the back of the oven until it goes past the bump on the shelf support. Then lower
the front of the shelf and push it all the way back.
OVEN SHELF POSITIONS
• The oven has four shelf supports - A (bottom), B, C, and D (top).
• Shelf positions for cooking are suggested on Baking and Roasting pages.
• Do not use aluminum foil to line oven bottoms. The foil will trap heat below and upset the performance of the oven.
Foil can melt and permanently damage the oven bottom. Damage from improper use of aluminum foil is not covered
by the product warranty.
• Foil may be used to catch spills by placing a sheet on a lower rack, several inches below the food. Do not use more
foil than necessary, and never entirely cover an oven rack with aluminum foil. Keep foil at least 1 1/2” from oven walls
to prevent poor heat circulation.
USE OF ALUMINUM FOIL
8
www.goedekers.com