15
stop, select ONE PUSH and press
the SET button to confirm. Increase
or decrease optical zoom or digital
zoom positions using the directional
buttons, focus is automatically adjusted
once after the zoom is completed,
then you willcatch the image that
ZOOM/FOCUS POS SETUP
Press SET to Returm
:TELE
:WIDE
:NEAR
:FAR
Focus
1. press the SET button to access the main setup menu and position
the indicator overFOCUS using the UP or DOWN button.
2. press theSET button
Mode: you can select the most suitable zoom mode, Move the
14
MAIN SETUP
CAM TITLE
WHIET BA
BACKLIGHT
MOTION DET
FOCUS
EXPOSURE
SPECIAL
OFF
OFF
OFF
ATW
Auto: Select AUTO and press the
SET button to confirm, increase
or decrease optical zoom positions
using the UP or DOWN button while
verifying the changes on screen,
Enabling digital zoom means that
digital zoom will activate once optical
zoom ends.Focusis automatically
adjusted with movingzoom.
One push: Focus is automatically
arrow indicator toMODE using UP or DOWN button.
ZOOM/FOCUS POS SETUP
Press SET to Returm
:TELE
:WIDE
adjusted just once, after zoom is
FOCUS SETUP
MOOE
ONE-PUSH
ZOOM TRK
ON
ZOOM SPEED
FAST
D-ZOOM
OFF
DISP ZOOM MAG
ON
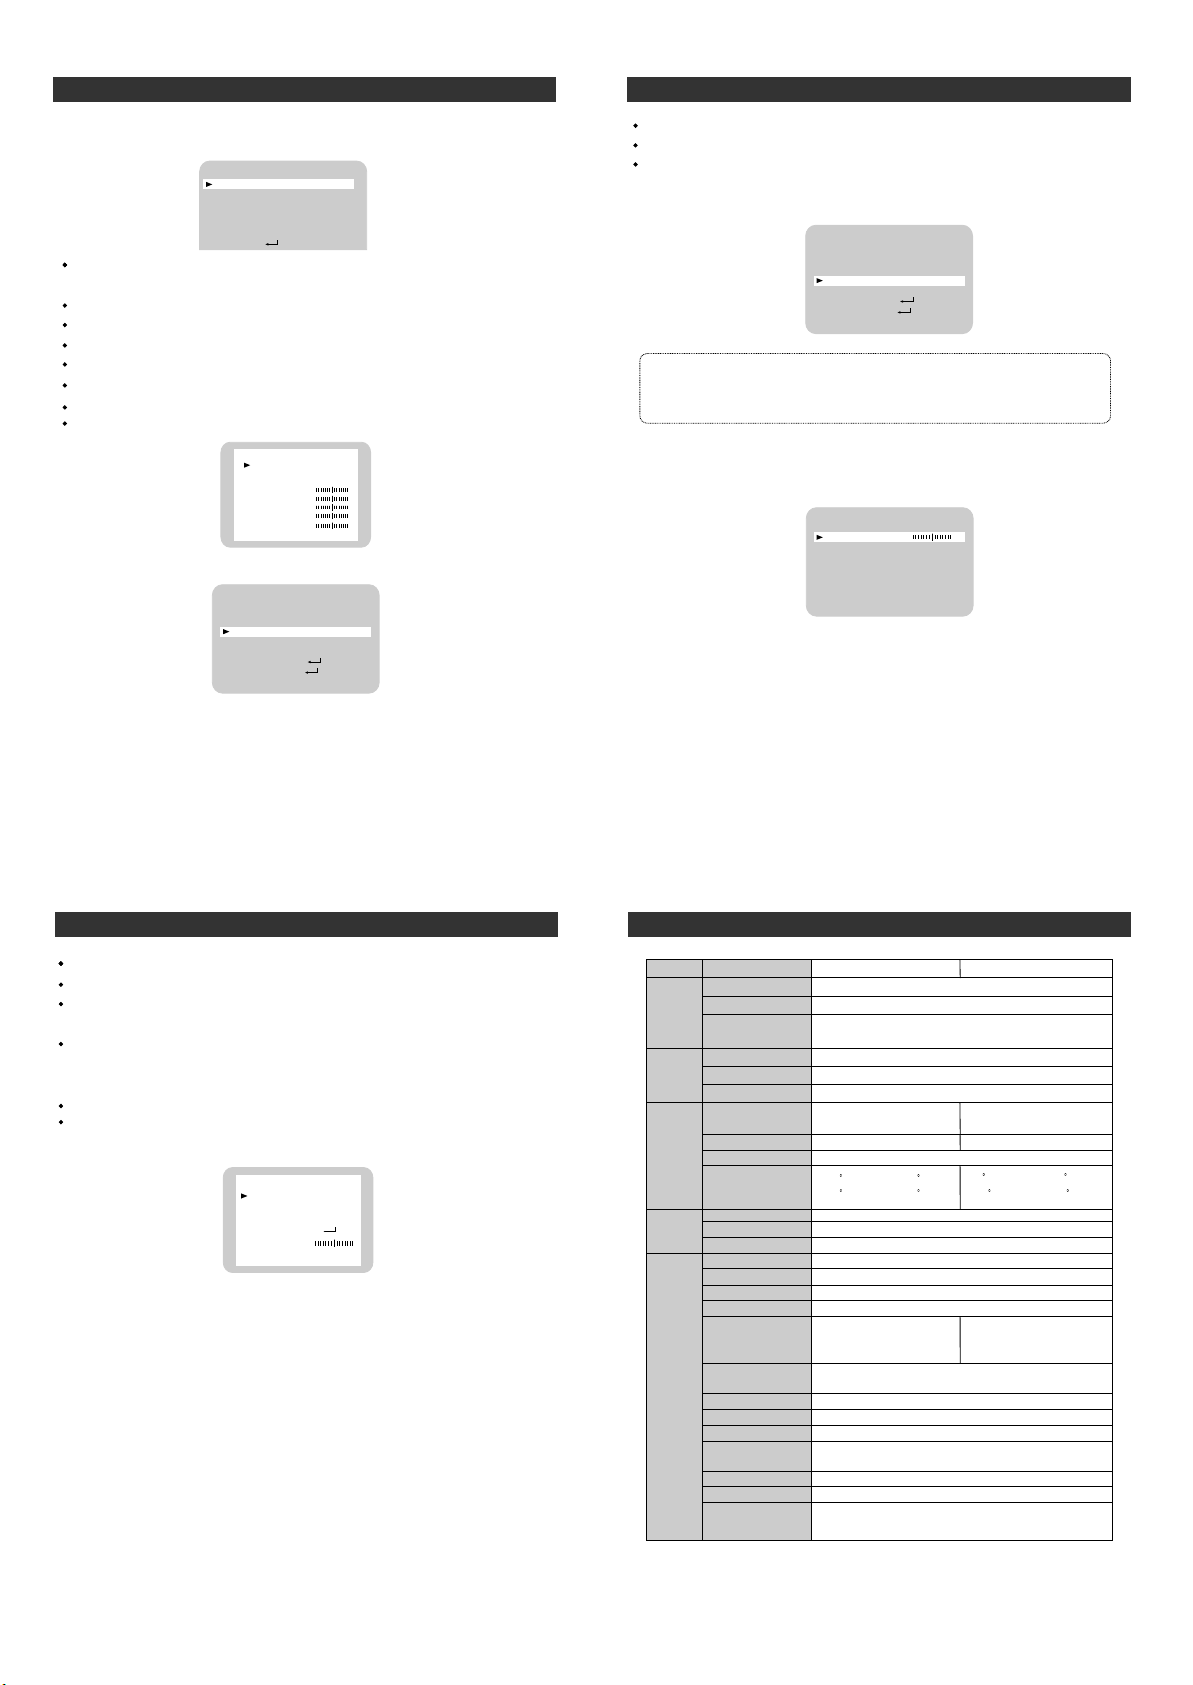
Motion Detection
This product has a feature that allows you to observe movements
of objects in 4 different area on the screen , and the words
detected; The camera detects an object's movement by sensing
disparity of outline, and level of brightness and color. The camera
receives detection signalfrom MD output terminal
Please press the SET button.
OFF: MOTION DETECTION mode is cancelled
ON: any motion in the selected areas is observed
Please select the area you wish to in the AREA SEL mode.
Please select ON mode for the choose area.
Please adjust the size of the area to be observed
by using the UP, DOWN, LEFT or RIGHT button.
Please press the SETUP button to save changes and complete the setting.
MD SETUP
DOSP ALARM OFF
AREA SEL AREAL
AREA MODE ON
TOP 10######
BOTTOM 50######
LEFT 10######
RIGHT 50######
END
Note
Tips on using the motion detection feature
The feature may not function properly
under flickering light conditions.
The camera interprets sudden changes in lighting and subsequent
change in brightness of an object as motion.
With the feature enabled, other
algorithms may require additional
time to operate than usual.
This system does not guarantee
prevention of fire or theft, the
manufacturer shall not be held
esponsible for any accident or damage incurred..
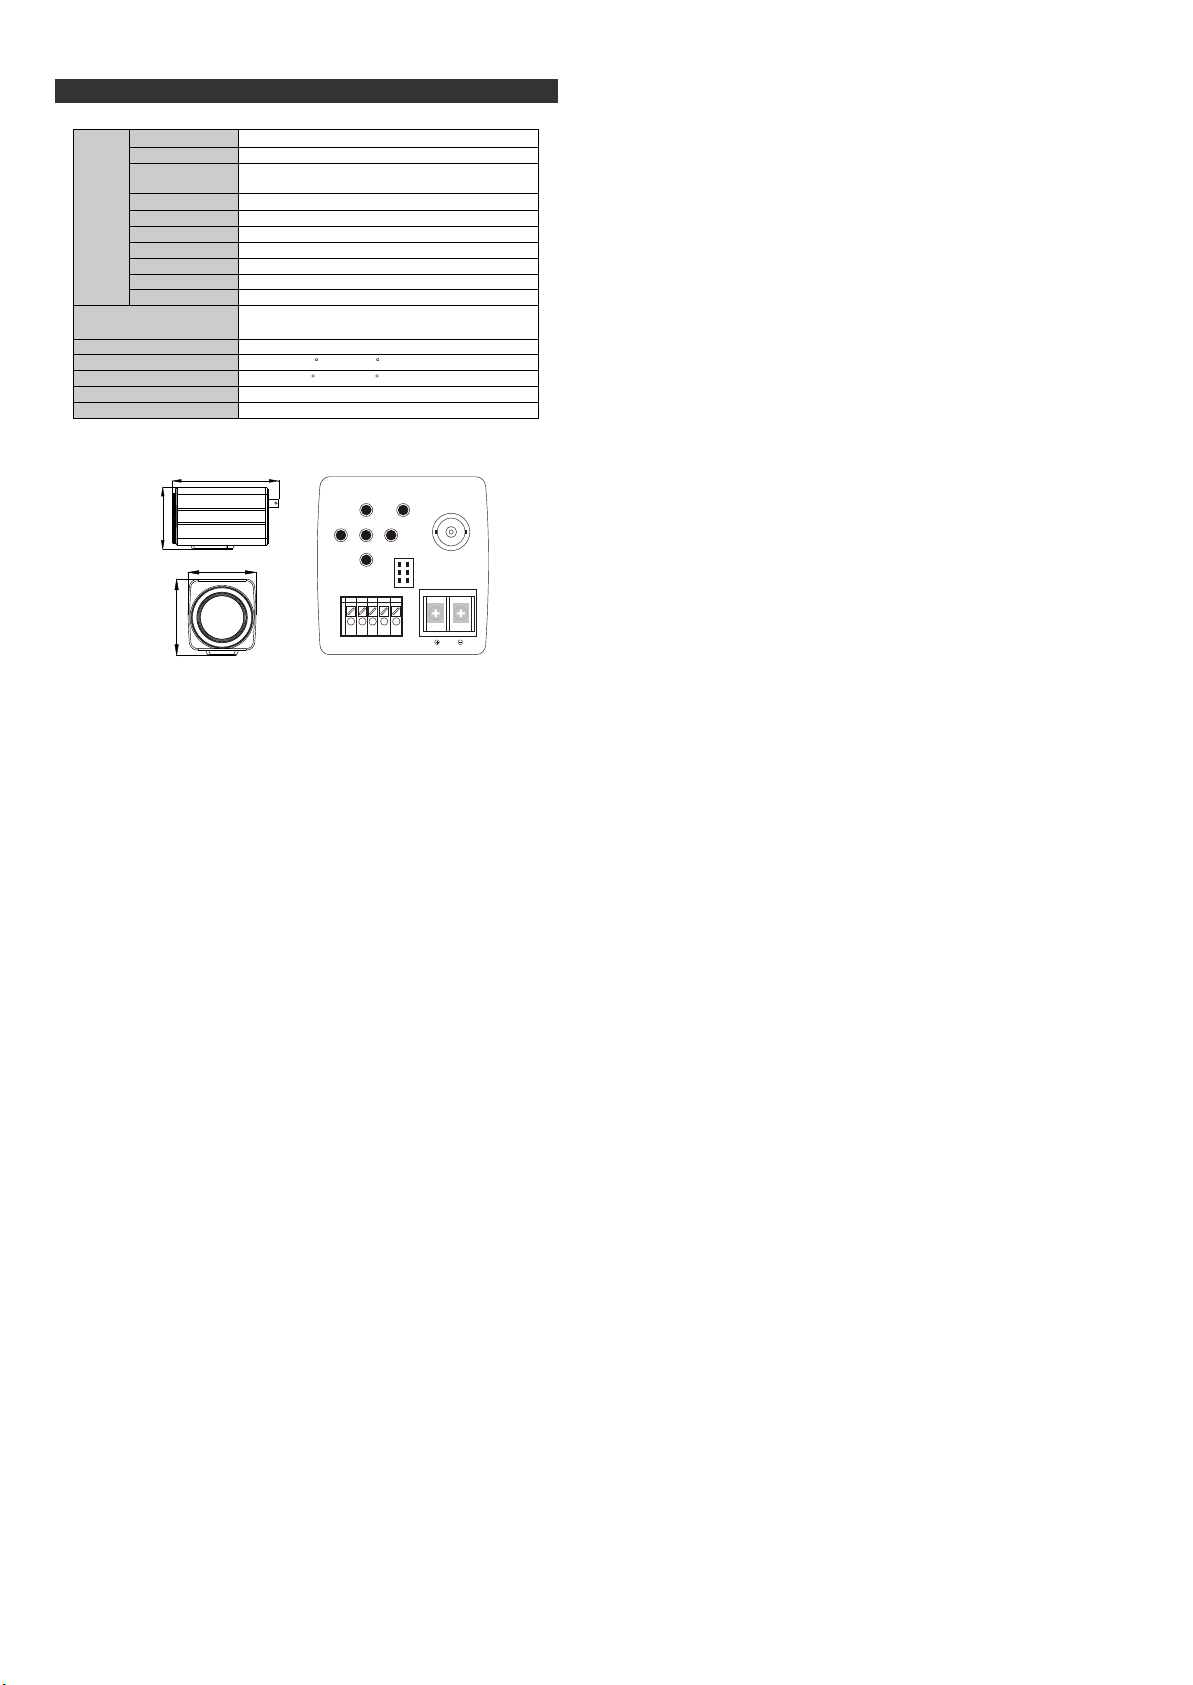
Connect an external alarm device to MD out on back of the camera.
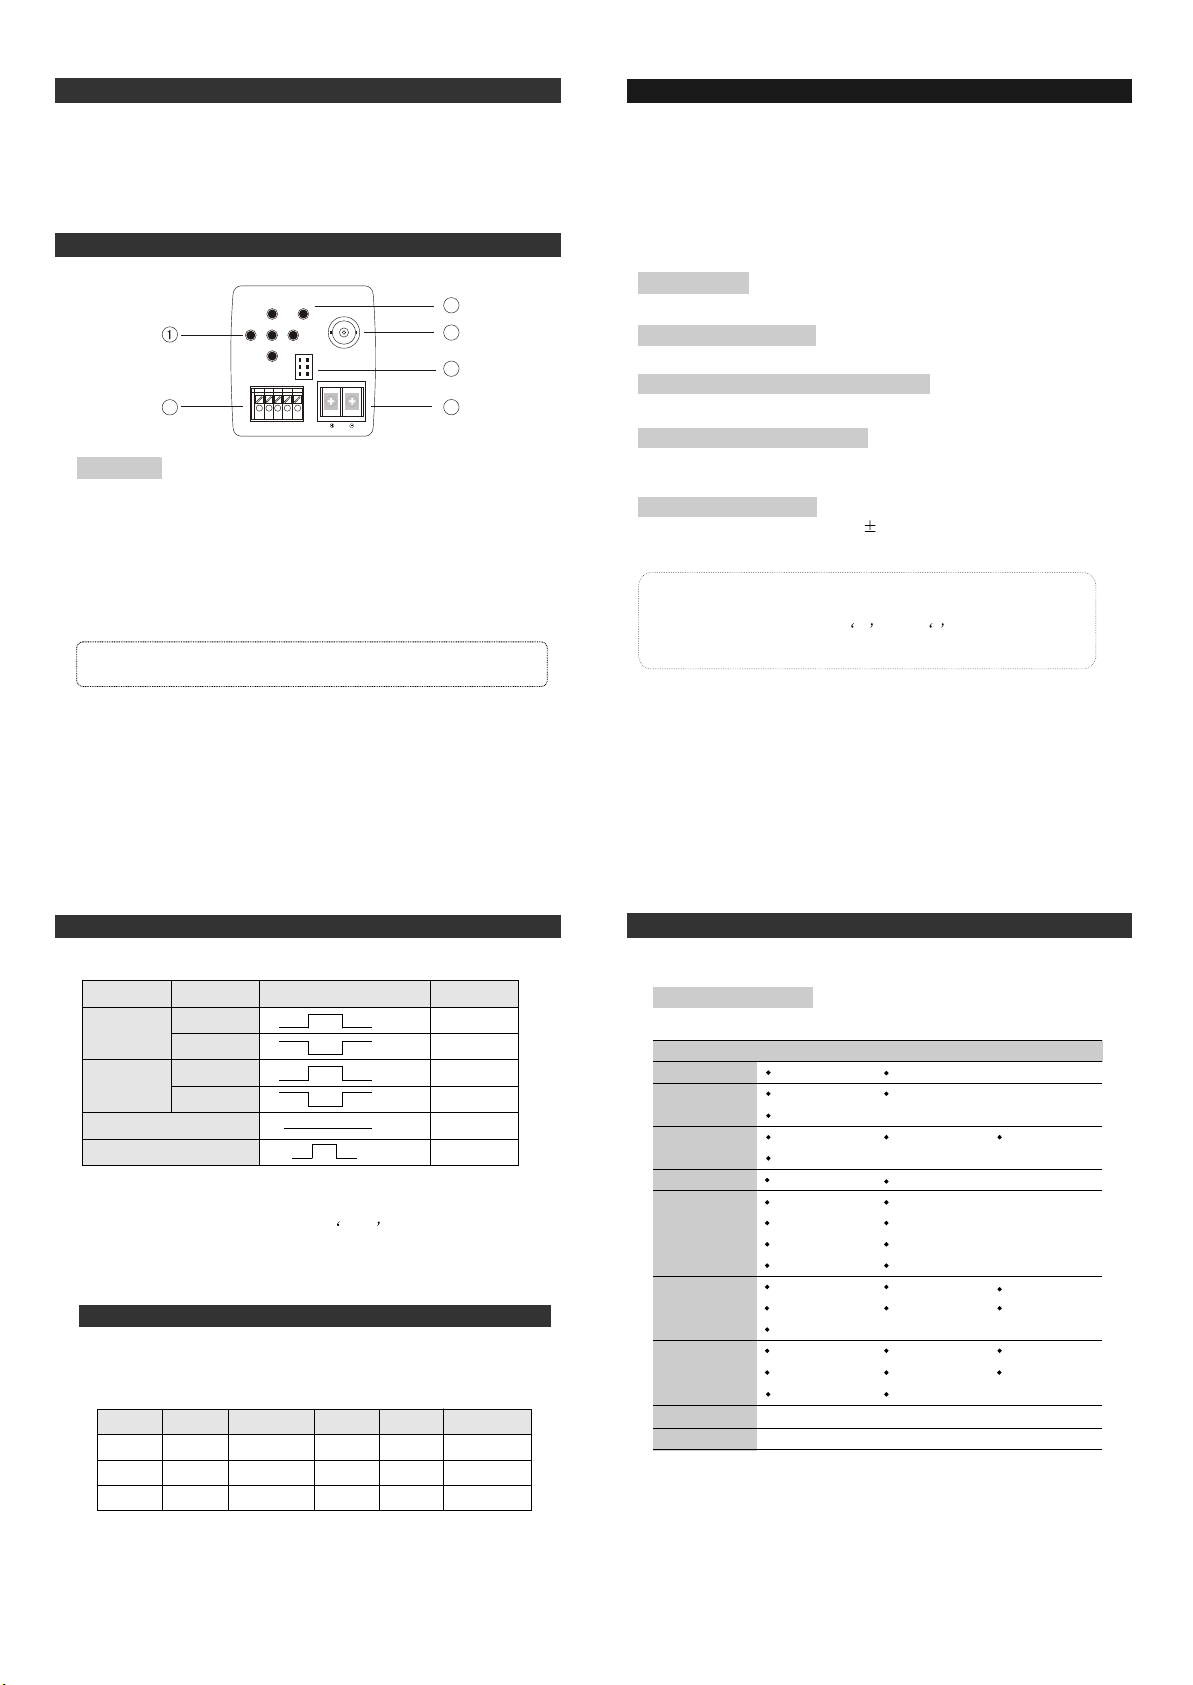
POWER
TELE
SET
WIDE
F-NEAR F-FAR
AF
VIDEO OUT
COMM
ZOOM
FOCUS
COM
MD
GND
DC 12V IN
ZOOM
FOCUS
COM
MD
GND
13
MOTION DETECTED appear on thescreen when movement is
Manual:
To fine adjust, select the manual mode, while monitoring the
decrease the value forred (R-Gain) andblue (B-Gain),watching
the color of the picture, and press the SET button when you obtain
the best color.
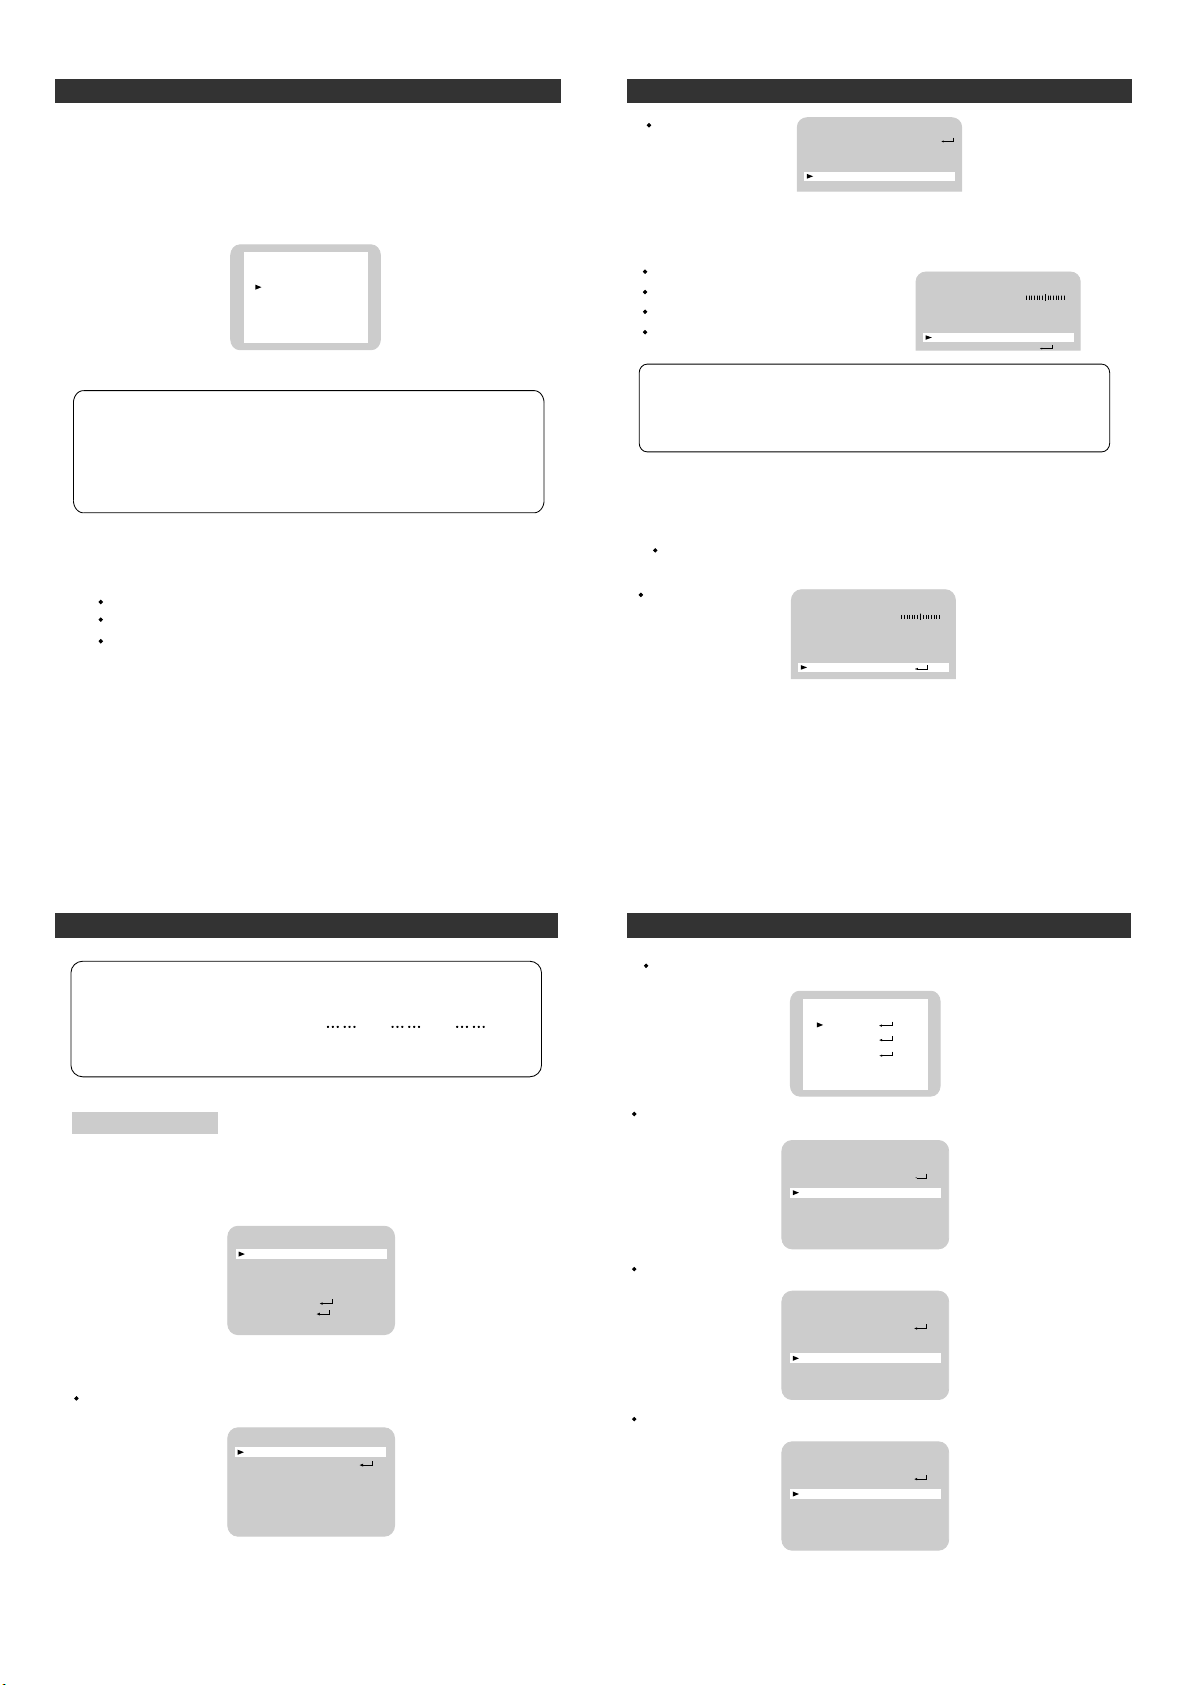
Backlight
menu by usingthe UP and DOWN buttons.
2.Please select the mode you wish to operate by pressing the LEFT
or RIGHT button.
HIGH/ MIDDLE/ LOW:You canadjust the sensitivity of backlight co-
mpensation.
OFF: Backlightfunction does not operate.
MAIN SETUP
CAM TITLE
WHIET BA
BACKLIGHT
MOTION DET
FOCUS
OFF
OFF
OFF
ATW
Note:
Proper white balance may not be obtained under the following conditions.
When the scene contains mostly high color temperature
object, such as a blue sky or sunse.
When the scene is dim.
If your camera directly faces a fluorescent lamp or is used
in an environment of varying lighting conditions.
12
1.Please position the arrow to point to BACKLIGHT on the SETUP
difference on thescreen, set to MANUAL mode, increase or
Operating Your CameraOperating Your Camera Operating Your CameraOperating Your Camera
Operating Your CameraOperating Your Camera Operating Your CameraOperating Your Camera
When there is a strong backlight behind the abject clear images
of the backgroundas well as the abject canstill be abtained by
using the BACKLIGHTfunction.
you need.