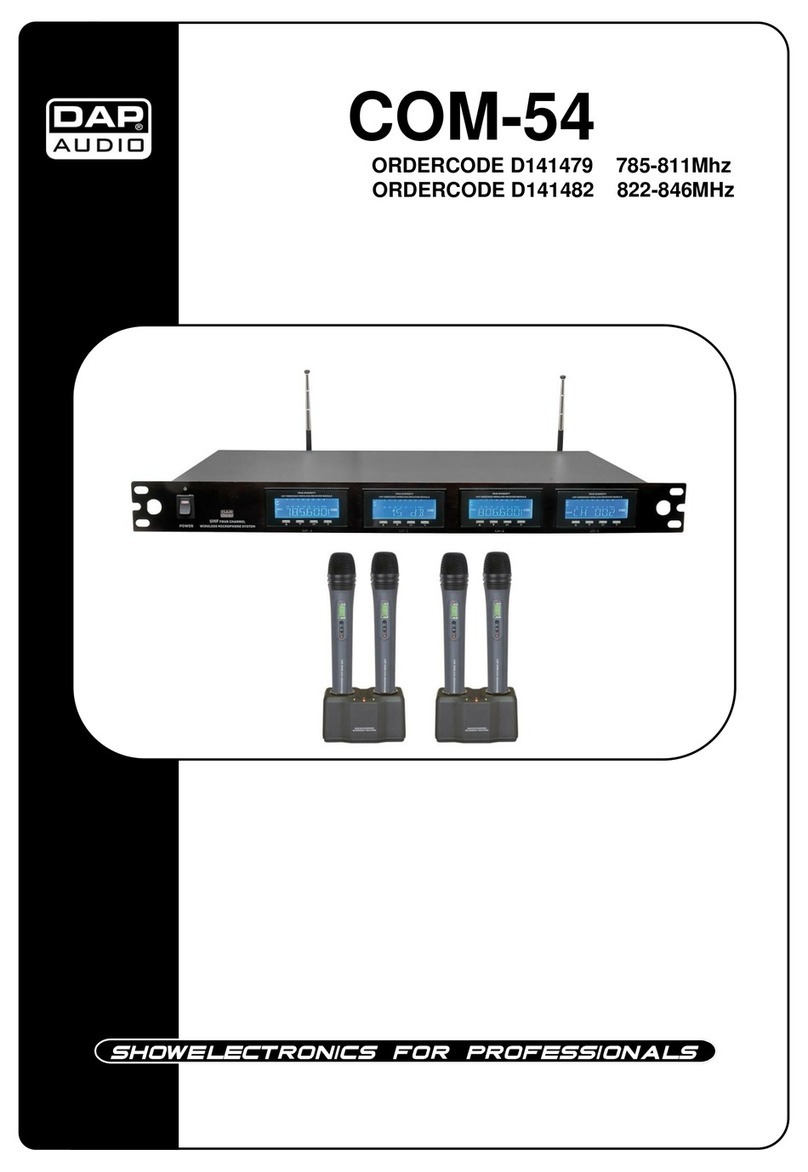
DAPAudio COM-52 User manual

COM-52 v3
ORDERCODE D141279
ORDERCODE D141282

Congratulations!
You have bought a great, innovative product from DAP Audio.
The DAP Audio COM-52 brings excitement to any venue.
You can rely on DAP Audio, for more excellent audio products.
We design and manufacture professional audio equipment for the entertainment industry.
New products are being launched regularly. We work hard to keep you, our customer, satisfied.
For more information: iwant@dap-audio.info
You can get some of the best quality, best priced products on the market from DAP Audio.
So next time, turn to DAP Audio for more great audio equipment.
Always get the best -- with DAP Audio !
Thank you!

1
2
2
3
3
3
4
4
4
5
5
5
6
6
6
7
7
8
9
10
11
12
14
15
15
15
DAP Audio
DAP Audio COM-51™Product Guide
Warning.........................................................................................................................................................................
Safety-instructions...................................................................................................................................................
Operating Determinations.....................................................................................................................................
Return Procedure....................................................................................................................................................
Claims.......................................................................................................................................................................
Description..…..............................................................................……….…………………………….………………......
Features………………………………………………………………………………….……………………………….…...
Overview ..…………………………………………………………………………………….………....................……....
Installation...............................................................................…...……………………………………………..……..……
Set Up and Operation.....................................................................……..……………………….……………….….…....
Set Up ……………….............................................…………………………………..................................………........
Menu Options…............................................................................……….…………………………………….………......
Volume Set Menu.…………………………………………………………………….…………………………….….…...
Sensitivity Adjustment Menu (SQUELCH).……………………………………………….……………………....……...
Signal Channel Solution Menu.……………………………………………….………....…………………….………....
Frequency Set Menu.….……………………………………………………….………....……………………….…..…...
System Lock Menu…………………………………………………….………....………………………………………....
Microphone............................................………………………………….........….……………........................................
Microphone Charger.......................................………………………………….........…………………………….............
Approval...................................................………………………………….........….………………………………….........
Declaration of Conformity......................………………………………….........….………………………………….........
Connection Cables..............................….......................................………..………….…….……………………….…....
Maintenance………..............................….......................................………..………….…….……………………...….....
Troubleshooting………..............................…................................………..………….…….…………………….….….....
Product Specifications.................................................................……………….…….………………………………......

2
WARNING
FOR YOUR OWN SAFETY, PLEASE READ THIS USER MANUAL CAREFULLY
BEFORE YOUR INITIAL START-UP!
SAFETY INSTRUCTIONS
Every person involved with the installation, operation and maintenance of this device has to:
-be qualified
-follow the instructions of this manual
Before your initial start-up, please make sure that there is no damage caused by transportation. Should
there be any, consult your dealer and do not use the device.
To maintain perfect condition and to ensure a safe operation, it is absolutely necessary for the user to
follow the safety instructions and warning notes written in this manual.
Please consider that damages caused by manual modifications to the device are not subject to
warranty.
This device contains no user-serviceable parts. Refer servicing to qualified technicians only.
IMPORTANT:
The manufacturer will not accept liability for any resulting damages caused by the non-
observance of this manual or any unauthorized modification to the device.
Never let the power-cord come into contact with other cables! Handle the power-cord and all
connections with the mains with particular caution!
Never remove warning or informative labels from the unit.
Never use anything to cover the ground contact.
Never leave any cables lying around.
Do not open the device and do not modify the device.
Do not insert objects into air vents.
Do not connect this device to a dimmerpack.
Do not switch the system on and off in short intervals, as this would reduce the system’s life.
Only use device indoor, avoid contact with water or other liquids.
Avoid flames and do not put close to flammable liquids or gases.
Always disconnect AC adapter from the mains, when device is not used or before cleaning! Only
handle the AC adapter by the plug. Never pull out the AC adapter by tugging the power-cord.
Make sure you don’t use the wrong kind of cables or defective cables.
Make sure that the available voltage is not higher than stated on the rear panel.
Make sure that the power-cord is never crimped or damaged. Check the system and the power-
cord from time to time.
If system is dropped or struck, disconnect mains power supply immediately. Have a qualified
engineer inspect for safety before operating.
If the system has been exposed to drastic temperature fluctuation (e.g. after transportation), do
not switch it on immediately. The arising condensation water might damage your system. Leave
the system switched off until it has reached room temperature.
CAUTION!
Keep this device away from rain and moisture!
CAUTION! Be careful with your operations.
With a dangerous voltage you can suffer
a dangerous electric shock when touching the wires!

3
If your Dap Audio device fails to work properly, discontinue use immediately. Pack the unit
securely (preferably in the original packing material), and return it to your Dap Audio dealer for
service.
Repairs, servicing and electric connection must be carried out by a qualified technician.
For replacement use fuses of same type and rating only.
WARRANTY: Till one year after date of purchase.
OPERATING DETERMINATIONS
If this system is operated in any other way, than the one described in this manual, the product may suffer
damages and the warranty becomes void.
Any other operation may lead to dangers like short-circuit, burns, electric shock, etc.
Return Procedure
Returned merchandise must be sent prepaid and in the original packing, call tags will not be issued.
Package must be clearly labelled with a Return Authorization Number (RMA number). Products returned
without an RMA number will be refused. Highlite will not accept the returned goods or any responsibility.
Call Highlite 0031-455667723 or mail aftersales@highlite.nl and request an RMA prior to shipping the fixture.
Be prepared to provide the model number, serial number and a brief description of the cause for the
return. Be sure to properly pack fixture, any shipping damage resulting from inadequate packaging is the
customer’s responsibility. Highlite reserves the right to use its own discretion to repair or replace
product(s). As a suggestion, proper UPS packing or double-boxing is always a safe method to use.
Note: If you are given an RMA number, please include the following information on a piece of paper
inside the box:
1) Your name
2) Your address
3) Your phone number
4) A brief description of the symptoms
Claims
The client has the obligation to check the delivered goods immediately upon delivery for any short-
comings and/or visible defects, or perform this check after our announcement that the goods are at their
disposal. Damage incurred in shipping is the responsibility of the shipper; therefore the damage must be
reported to the carrier upon receipt of merchandise.
It is the customer's responsibility to notify and submit claims with the shipper in the event that a fixture is
damaged due to shipping. Transportation damage has to be reported to us within one day after receipt
of the delivery.
Any return shipment has to be made post-paid at all times. Return shipments must be accompanied with
a letter defining the reason for return shipment. Non-prepaid return shipments will be refused, unless
otherwise agreed in writing.
Complaints against us must be made known in writing or by fax within 10 working days after receipt of the
invoice. After this period complaints will not be handled anymore.
Complaints will only then be considered if the client has so far complied with all parts of the agreement,
regardless of the agreement of which the obligation is resulting.
4
Description of the device
Features
The Com-52 is a Dual Wireless Microphone Set from Dap Audio.
• 2 Frequencies available: 785-811 MHz: ordernr: D141279
822-846 MHz: ordernr: D141282
• 2 channel wireless microphone system
• UHF diversity receiver with 1280 selectable frequencies
• Included 2 dynamic hand-held microphones
• Phase locked loop (PLL) circuitry synthetically technology
• Automatic selectable receiving system
• max. 75m receiving distance
• LCD display
• Free and easy operation with clear and pure sound.
Overview
Fig. 1
Fig. 2
1) CH A LCD 6) Power ON/OFF
2) CH A Function-button 7) CH B Function-button
3) CH A Down 8) CH B Down
4) CH A Up 9) CH B Up
5) Power LED 10) CH B LCD

5
Fig. 3
11) Antenna B
12) Unbalanced 1/4” jack plug
13) Balanced XLR Connector
14) Mixed Channels Audio Output Connector: Unbalanced 1/4” jack plug connector mixes both
channels into a single output.
15) Power Input Connector 12V 600mA
16) Balanced XLR Connector
17) Unbalanced 1/4” jack plug
18) Antenna A
Installation
Remove all packing materials from the Com-52. Check that all foam and plastic padding is removed. Put
the 2 antennas into socket A and B at the backside in a vertical angle. Remove the rubber protection
caps at the underside of the microphones that covers the recharge inputs (See Fig 4).
Fig. 4
When connecting the powersupplies, assure yourself that the right supplies are connected to the right
devices. Look at the red/green sticker at the bottom of the microphone.
Always disconnect from electric mains power supply before cleaning or servicing.
Damages caused by non-observance are not subject to warranty.

6
Set Up and Operation
Before plugging the unit in, always make sure that the power supply matches the product specification
voltage. Do not attempt to operate a 120V specification product on 230V power, or vice versa.
Press the powerswitch to turn the COM-52 on. Turn volume down, by pressing SET. The display shows AF
out, then the display shows VR1. Adjust the Functions to the desired position.
Fig. 4
18) RF Indicator
19) Audio Frequency Indicator
20) Signal Channel Indicator
21) A Receiving Channel Indicator
22) B Receiving Channel Indicator
23) MUTE Indicator
MENU Options
1. AF OUT VR1-10
2. SQUELCH 0-40 dB, in 5 dB steps
3. DISPLAY FREQU / CHANNL
4. TUNE 785.100 –811.000, in steps of 0.025 Hz
5. LOCK LOC OFF / LOC ON
Volume Set Menu
Press SET, the LCD shows:
after a second the display shows:
The menu function is for adjusting the volume. Press UP / DOWN to change the volume from 01-10. The
minimum is 0 dB; the display will show MUTE.
After changing, please press SET to confirm.

7
Sensitivity Adjustment Menu (SQUELCH)
Press SET, the LCD shows:
after a second the display shows:
This menu is for adjusting the sensitivity (Mute Control). It is used to stregthen the system’s capacity of
preventing disturbing: The range is from 0 –40 dB. The greater the value, the lower the sensitivity is. Nearer
distance, stronger capacity of preventing disturbance. On the other hand, a lower value (Minimum
15dB), higher sensitivity and farther distance, but the capacity of preventing disturbance will reduce.
Usually, the normal setup is 20 dB (Factory is 15dB).
Press UP/DOWN to change the settings. After changing the settings, please press the SET button to
confirm. Otherwise it won’t effect and the system will remain in the precious state.
When you have selected a new channel or frequency and you haven’t pressed SET, the LCD will flash to
remind you. When you press SET, the LCD stops flashing.
Signal Channel solution Menu
Press SET, the LCD shows:
after 3 seconds the display shows:
Note: Which screen is shown, depends on the previous setup.
When you press UP / DOWN, the LCD indicates 2 modes as Channel or Frequency. If you select channel,
CHANNL is shown as numerical value. If you select FREQU, it is shown as actual working frequency. After
selecting, you must press SET. Otherwise, your setting is not stored.
After you change and you don’t confirm, the LCD flashes as a reminder. Press SET and the LCD will stop
flashing.

8
Frequency Set Menu
Press SET, the LCD shows:
after a second the display shows:
You can now change the frequency with the UP / DOWN buttons (steps of 0.025 Hz to change the
frequency). To confirm you have to press SET. If you don’t press SET, the LCD display will keep flashing.
System Lock Menu
If the receiver is locked, all menu settings (Channels, Sensitivity, Indicator Solution and Power switch) can
not be changed.
If the receiver is in locked status LOC OFF, you can change all the menu functions.
Note: Which screen is shown, depends on your previous setup
LOCK OFF to LOCK ON
Scroll through the menu by using the SET button, until the LCD shows:
after a second the display shows:
With the UP button, you can change the original state from LOC OFF to LOC ON; the LCD will keep
flashing.
Press SET to store the setting, the device is locked. After pressing SET, the LCD will stop flashing.
LOCK ON to LOCK OFF
If the receiver is in locked status LOC ON, you can’t change the current working state and you can’t turn
off the device. The LCD shows:
When the device is in LOCK status, press the SET button to enter the lock state. Now you can change the
state to LOCK OFF by pressing the DOWN button, the LCD will keep flashing. Press SET to change the
setting, the device is unlocked. After pressing SET, the LCD will stop flashing.

9
Microphone
1) LCD screen
2) SET-button; Press this button to scroll through the menu and/or confirm your settings.
3) UP
4) Down
5) ON / OFF
Insert / Replace Batteries
1. Slide the small cap on the back of the microphone down.
2. Insert two 1.5V batteries according the correct polarity. As soon as the batteries are installed well, the
LED
on the transmitter will light up.
3. If the batteries are low the display will show: BAT LO. Change the batteries with full ones.
Press the Power-button to start up the microphone.
Use the Set-button to scroll through the menus.
There are 4 menus: 1. DISPL. Choose between FREQU / CHANNL.
2. SENSIT. Range 0 / -30 dB in steps of 10dB.
3. TUNE. Change the frequency range 785.100 / 811.000 Mhz in steps of 0.025 Mhz.
4. LOC. Choose between LOC ON / LOC OFF.
You can change your settings by pressing the UP/DOWN-buttons. Be sure to store your desired setting by
pressing the SET-button.
When you are not in the Menu set up, you can switch between FREQ/CH by using the UP/DOWN buttons.
You can choose between 4 presets, these presets are programmable.
Problem
Cause
Digital Display is not lighted
The battery is dead or has not been placed correctly .
RF indicator is not lighted
1. Transmitter frequency is different from Receiver frequency.
2. Transmitter is out of working distance
AR indicator is not lighted
1. The mute button is turned on (in the bottom of the receiver)
2. The SQ is too high.
Have noise and radio noise
1. The sensitivity of the transmitter is too low
2. The audio output of the receiver is too low (in the back of the
receiver)
AR signal distortion
1. The sensitivity of the transmitter is too low
2. The audio output of the receiver is too low (in the back of the
receiver)

10
Microphone Charger
Charge time: between 1,5 –8 hours. When using for the first time, please charge min. 12 hours.
If the batteries are charging, the indicator LED will be RED.
When the batteries are fully charged, the indicator Led will be GREEN.
When the LED flashes there is an error. Remove the microphone for a moment from the charger and then
place it back again.
1) Charge LED RED / GREEN
2) BLUE Power LED
3) Charge Indicator RED / GREEN
Use the switch to lock the frequency.
So when on stage you can not accidentally change the frequency during the
performance.

11
Approval
The DAP D141279 and the D141282 are Class II wireless devices.
D141179: 785-811 MHz for use in: Austria, Belgium, Czech Republic, Denmark, France, Germany,
Greece, Hungary, Italy, Luxemburg, Norway, Poland, Portugal,
Romania, Slovakia, Sweden, Switzerland, Turkey, United Kingdom.
D141282: 822–846 MHz for use in: Denmark, Germany, Hungary, Italy, Luxemburg, Netherlands,
Poland, Romania, Sweden, Switzerland, United Kingdom.
Exclusion of liability
The frequency tables in this publication are made according to national laws and regulations. The
frequencies are checked on a regular basis. We don’t take any responsibility for eventual discrepancies
between our listed frequencies and the frequencies actually approved in a given country. We strongly
suggest you to inform in your own country or region for any changes or adaptions regarding the allowed
frequencies.
Be aware that in some countries, you are only allowed to partly use the frequency range of the device.
Therefore, we strongly advice you to concult your authority as listed below:
Telecoms & Postal Regulatory Authorities in Europe
Austria Rundfunk und Telekom Regulierungs-GmbH www.rtr.at
Belgium Belgian Institute of postal services and telecommunications (BIPT) www.bipt.be
Czech Republic Czech Telecommunication Office www.ctu.cz
Denmark National Telecom Agency www.tst.dk
Finnland Finnish Communications Regulatory Authority (FICORA) www.ficora.fi
France Autorité de Régulation des Télécommunications (ART) www.art-telecom.fr
Germany Die Bundesnetzagenturie www.bundesnetzagentur.de
Greece National Telecommunications Commission (EET) www.eett.gr
Hungary Communication Authority (HIF) www.hif.hu
Iceland Post and Telecom Administration (PTA) www.pta.is
Ireland Commission for Communications Regulation (ComReg) www.comreg.ie
Italy Italian Communications Authority (AGC) www.agcom.it
Latvia Telecommunication State Inspection www.vei.lv
Liechtenstein Office for Communications (AK) www.ak.li
Lithuania Radio Administration www.rrt.lt
Luxembourg Institut Luxembourgeois des Télécommunications (ILT) www.etat.lu/ILT
Netherlands Onafhankelijke Post en Telecommunicatie Autoriteit (OPTA) www.opta.nl
Agentschap Telecom www.agentschap-telecom.nl
Ministry of Economic Affairs www.ez.nl
Norway Norwegian Post and Telecommunications Authority (NPT) www.npt.no
Poland Urzad Regulacji Telekomunikacji (URT) www.urt.gov.pl
Portugal Autoridad Nacional De Comunicaçòes (ICP-Anacom) www.anacom.pt
Slovenia Agencija za telekomunikacije, radiodifuzijo in pošto www.atrp.si

This certifies that the following designated product:
Name: COM-52 Double UHF Wireless Mic System 785-811MHz
Model No.: D141279
Brand Name: DAP AUDIO
Authorized by the European Union to act as Conformity Assessment
Body in accordance with the R&TTE Directive 1999/5/EC
EMC : EN 301 489-1/-9 (2005-03)
Radio : EN 300 422-1/-2 (2005-03)
Safety : EN 60065
Health : EN 50371
0678
This certificate is issued by: Highlite International B.V.
(Name/Address) Vestastraat 2, 6468 EX Kerkrade
The Netherlands
This is the result of tests carried out on those 3-March-2005
samples of the product referred to above which
were submitted for testing, in accordance with (Date)
the specification for the respective standards.
The certificate holder has the right to fix the mark
which shows the segment onto each individual
product in the series to which the inspection sample Mr. H. de la Haye, general manager
belongs, provided that the product is manufactured
in accordance with the test report. Instructions (Name / Signature)
available on demand.
(Product Identification)
CERTIFICATE
OF CONFORMITY

This certifies that the following designated product:
Name: COM-52 Double UHF Wireless Mic System 822-846MHz
Model No.: D141282
Brand Name: DAP AUDIO
Authorized by the European Union to act as Conformity Assessment
Body in accordance with the R&TTE Directive 1999/5/EC
EMC : EN 301 489-1/-9 (2005-03)
Radio : EN 300 422-1/-2 (2005-03)
Safety : EN 60065
Health : EN 50371
0678
This certificate is issued by: Highlite International B.V.
(Name/Address) Vestastraat 2, 6468 EX Kerkrade
The Netherlands
This is the result of tests carried out on those 3-March-2005
samples of the product referred to above which
were submitted for testing, in accordance with (Date)
the specification for the respective standards.
The certificate holder has the right to fix the mark
which shows the segment onto each individual
product in the series to which the inspection sample Mr. H. de la Haye, general manager
belongs, provided that the product is manufactured
in accordance with the test report. Instructions (Name / Signature)
available on demand.
(Product Identification)
CERTIFICATE
OF CONFORMITY

14
Connection Cables
Take care of your cables, always holding them by the connectors and avoiding knots and twists when
coiling them: This gives the advantage of increasing their life and reliability.
Periodically check your cables. A great number of problems (faulty contacts, ground hum, discharges,
etc.) are caused entirely by using unsuitable or faulty cables.
Headphones Unbalanced mono Balanced mono Insert

15
Compensation of interference with balanced connections
Maintenance
The DAP Audio COM-52 requires almost no maintenance. However, you should keep the unit clean.
Disconnect the mains power supply, and then wipe the cover with a damp cloth. Do not immerse in
liquid. Do not use alcohol or solvents.
Keep connections clean. Disconnect electric power, and then wipe the audio connections with a damp
cloth. Make sure connections are thoroughly dry before linking equipment or supplying electric power.
Troubleshooting
DAP Audio COM-52
This troubleshooting guide is meant to help solve simple problems. If a problem occurs, carry out the steps
below in sequence until a solution is found. Once the unit operates properly, do not carry out following
steps.
1. If the device does not operate properly, unplug the device.
2. Check power from the wall, all cables, the fuse, etc.
3. If all of the above appears to be O.K., plug the unit in again.
4. If nothing happens after 30 seconds, unplug the device.
5. Return the device to your DAP Audio dealer.

16
Product Specification
Model: DAP Audio COM-52
Power: AC 230V-50Hz (CE); Fuse 8A 250V
Dimensions: 19"x 185mm X 1HE (LxWxH)
Weight: 2,92 Kg
Receiver
Frequency stability: +/-0,005%
Image Interference rate: >80dB
S/N Ratio: >105dB
Sensitivity: -107dBM
T.H.D.: <0,5%
Output connectors: 2x3p. XLR balanced
2x 6,3mm jack unbalanced
1x 6,3mm jack mixed channel A & B
Audio output impedance: 600Ohm
Audio output level: -12dB
Frequency response: 15-20.000Hz
4 pre-programmable channels
Frequency range: 740.100 –846 MHz in steps of 0.025 MHz
Power supply: 12-18V DC 1000mA
Microphone
Dynamic range: >110dB
Freq. Range: +/-48KHz
Spurious rejection: <-50dBc
RF-output: 10mW
Power consumption: 100mA
Battery's: 2x AA 1,5V
Material: Plastic body with metal head
Dimensions: ø32xø50x280mm (LxWxH)
Design and product specifications are subject to change without prior notice.
Website: www.Dap-audio.info
Email: service@highlite.nl

2010 Dap Audio.
Table of contents
Other DAPAudio Microphone System manuals

DAPAudio
DAPAudio COM-42 User manual

DAPAudio
DAPAudio COM-31 Guitarist User manual

DAPAudio
DAPAudio EDGE EHS-2 User manual

DAPAudio
DAPAudio COM-42 User manual

DAPAudio
DAPAudio COM-2.4 User manual

DAPAudio
DAPAudio EDGE EBS-1 V2 User manual

DAPAudio
DAPAudio DM-25 User manual

DAPAudio
DAPAudio EB-16 User manual

DAPAudio
DAPAudio EDGE EBS-2 V2 User manual

DAPAudio
DAPAudio COM41 HANDHELD User manual