Data-Tronix DT-HDVD-IPSTR-CB User manual

User Manual
DT-HDVD-IPSTR-CB
IP Control Box
Version:V1.0.0

Important Safety Instructions
Warning: Toreduce the risk of fire, electric shock or product damage,
please follow the guidelines below:
5. Do not place sources ofopen
flames, such as lighted candles,
on the unit.
10. Refer all servicingto
qualified service
personnel.
3. Toprevent risk of electric
shock or fire hazard due to
overheating, do not obstruct
the unit’s ventilation openings
with newspapers, tablecloths,
curtains, and similaritems.
8. Protect the power cord
from being walked on or
pinched particularly at
plugs.
4. Do not install near anyheat
sources such as radiators, heat
registers, stoves, or other
apparatus (includingamplifiers)
that produce heat.
9. Only use attachments/
accessories specified by
themanufacturer.
2. Do not install or place thisunit
in a bookcase, built-in cabinet or
in another confinedspace.
Ensure the unit is wellventilated.
7. Unplug thisapparatus
during lightning storms or
when unused for long
periods of time.
1. Do not expose thisapparatus
to rain, moisture, dripping or
splashing and that no objects
filled with liquids, such asvases,
shall be placed on theapparatus.
6. Clean thisapparatus
only with dry cloth.

1
Table of Contents
Introduction....................................................................................................3
Overview...................................................................................................3
Features ...................................................................................................4
Package Contents ....................................................................................5
Specifications ...........................................................................................6
Panel ........................................................................................................8
Front Panel........................................................................................8
Rear Panel.........................................................................................9
Hardware Installation .................................................................................. 11
Accessing the Device..................................................................................13
Before Accessing the Device..................................................................13
Using LAN2 (C) Port........................................................................13
Using RS-232 Port...........................................................................15
Accessing the Device viaWeb................................................................17
Using the Administrator Account......................................................17
Using the Common User Account....................................................18
Accessing the Device via Telnet.................................................................... 19
Web Configuration Page.............................................................................20
Scenes Page..........................................................................................20
Setting Scenes ................................................................................21
Telnet API Command.......................................................................22
Logs.................................................................................................23
TX/RX Settings Page..............................................................................24
Configuring the IP Settings of TX/RX...............................................25
Encoder Setup.................................................................................26
Changing TX/RX's Alias...................................................................26
Restoring TX/RX to their Default Settings........................................27
Rebooting TX/RX.............................................................................27

2
System Settings Page ............................................................................28
IP Setup...........................................................................................28
IP Setup (TX and RX Communication)............................................28
IP Setup (Telnet Client and Browser Communication).....................30
Debug Logs.....................................................................................31
Web Matrix Switching......................................................................31
Importing Configuration File from PC Configurator........................31
Web Matrix Page ..............................................................................32
Operating Matrix Switching via Web........................................................34
Managing Administrator and Common User Account......................35
Changing the Administrator Password...............................................35
Creating a Common User Account ....................................................36
Device Maintenance........................................................................37
Restoring IP Control Box to its Default Settings..............................37
Rebooting IP Control Box ................................................................38
Shutting Down IP Control Box.........................................................38
Viewing API and System Version ....................................................38
FAQ........................................................................................................................... 40
Product Service ...........................................................................................42
Maintenance...........................................................................................42
Provided Service ....................................................................................42
Mail-In Service........................................................................................42
Warranty.................................................................................................43
Warranty Limits and Exclusions..............................................................43

3
Introduction
Overview
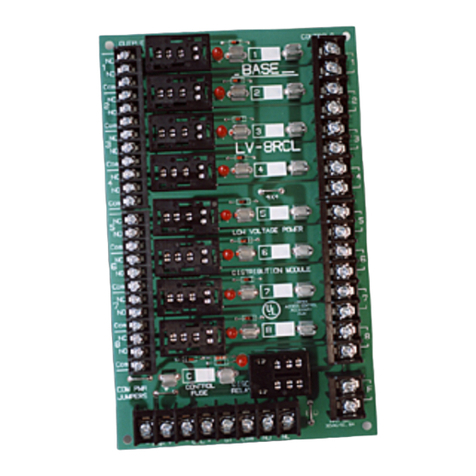
DT-HDVD-IPSTR-CB is an IPcontrol boxthat is used as anA/V control device
for managing, configuring and controlling H.264 encoders and decoders on
the local area network. It features two Ethernet ports and two RS232 ports,
offering integration-friendly control features——LAN (Telnet & Web GUI), a
third party controller (API) providing simple, flexible control and management
options. The DT-HDVD-IPSTR-CB can automatically search for and display
H.264 encoders and decoders. It is compatible with the configuration file from
a PC configurator and uses the imported configuration file to perform
operations on encoders and decoders such as matrix switching, video wall
and multi-view.

4
Features
IP control via LAN (Telnet & Web GUI) and a third party controller(API)
Features two Ethernet ports and two RS-232ports
Detects H.264 encoders and decodersautomatically
Supports matrix switching between H.264 encoders anddecoders
Compatible with the configuration file from a PC configurator to
quickly perform matrix operations on encoders anddecoders
Web based configuration
Extend the transmission distance to at least 100meters
Bonjour automatic discovery of networkdevices

5
Package Contents
1 x DT-HDVD-IPSTR-CB
1 x 12VDC 1A PowerSupply
1 x Detachable Plug
1 x Phoenix Connector (Male, 3.5 mm, 6 pins)
2 x Mounting Ears with screws
5 x Label Cards (49 mm x 15 mm)

6
Specifications
Technical
I/O Connections
1 x LAN1 (AV) (10/100 Mbps)
1 x LAN2 (C) (10/100 Mbps)
2 x RS-232
LED
LED indication for Power and Status
Button
1 x Reset Button
Power Supply
12VDC 1 A, 5.5 mm
Power Consumption
1.6 W (Max.)
Control Method
LAN (Web GUI & Telnet), RS-232 (PC and a
third party controller)
Supported Encoders
and Decoders
Encoder:
DT-HDVD-IPSTR-ENC
Decoder:
DT-HDVD-IPSTR-RX
Operating Temperature
32°F ~ 113°F (0°C ~+45°C)
10% ~ 90%, non-condensing
Storage Temperature
-4°F ~ 140°F (-20°C ~ +70°C)
10% ~ 90%, non-condensing
ESD Protection
Human Body Model:
±8kV (air-gap discharge)
±4kV (contact discharge)
Surge Protection
Voltage: ±1000V
(Tested ten times respectively for the positive
and negative voltages)

7
General
Product Dimension
(W x H x D)
5.46'' x 1.02'' x 3.67''
138.7 mm x 26 mm x 93.2 mm
Box Dimension
(W x H x D)
250 mm x 80 mm x 170 mm
10'' x 3.15'' x 6.7''
Net Weight
0.40 kg / 0.9 lbs (without accessories)
Certification
CE, FCC, RoHS compliant

8
Panel
Front Panel
1 2 3
4
No.
Name
Description
1
Label Card
Location
Use the supplied label card here to display device
information such as IPaddress.
2
STATUS
Lit blue when device is working properly.
Off when device is powered off or isbooting.
3
POWER
Lit red when device is powered on.
4
RESET
When DT-HDVD-IPSTR-CB is powered on, use a
pointed stylus to hold down the RESET button for
five or more seconds, and then release it. DT-
HDVD-IPSTR-CB will reboot and restore to its
default settings.
Note: When the default settings are restored, your
custom data is lost. Therefore, exercise caution when
using the RESET button.

9
Rear Panel
1 2 3
No.
Name
Description
1
RJ45 ports
1 x LAN1 (AV):
Connects to a switch to communicate with encoders
and decoders in the same network. In this case, you
can control and manage encoders and decoders at
the LAN2 (C) side through LAN control (Telnet &Web
GUI). The default IP parameters of this RJ45 portare
IP address 169.254.1.1 and subnet mask
255.255.0.0.
1 x LAN2 (C):
Connects to a switch or computer for configuring,
managing and controlling DT-HDVD-IPSTR-CB,
encoders and decoders through LAN control
(Telnet & Web GUI). The default IP parameters of
this RJ45 port are IP address 192.168.11.243 and
subnet mask 255.255.0.0.
Note:
When both these two LAN ports are
PoE-enabled, you can connect one of them to
PoE switches to receive power, eliminating
the need for the power supply.

10
No.
Name
Description
2
RS-232 ports
RS232:
Left (DEBUG): Pins TX, RX, GND are used for
troubleshooting only.
Middle (Control): Pins GND, RX, TX are used
for configuring, managing and controlling DT-
HDVD-IPSTR-CB, encoders and decoders
through RS-232 software or a third party
controller.
RS-232 Parameters for
this Port
Value
Baud Rate
9600 bps
Data Bits
8 bits
Parity
None
Stop Bits
1
Right: Pins GND, +12V are used for providing
a 12VDC 0.5 A output.
Note:
The IP control box can provide power
only when it is powered by a power
adapter (not PoE).
3
DC 12V
Connects to the supplied 12 VDC 1 A power adapter.

11
Hardware Installation
Warnings:
Before installation, disconnect the power supplies from all the
devices.
During the installation, connect or disconnect the cablesgently.
1. Connect a PC to IP control box's RS-232 ports through serial cablesand
to LAN 2 (C) port via an Ethernet cable.
Note:
You can also connect the LAN2 (C) port to switch A, then your PC to
this switch.
2. Connect encoders, decoders and IP control box's LAN1 (AV) to switch B
via quality, well-terminated Cat5e/6 cables. Transmission distance
between devices should not exceed 100 meters (328 feet).
3. Connect HD video source devices such as media players or a PC to
encoders and A/V output devices such as displays and audio systemsto
decoders with quality cables, ensuring firm portconnection.
4. Power on the switches first, then the other devices.
5. Use the PC to configure, manage and control the DT-HDVD-IPSTR-CB
Control Box, encoders and decoders through LAN control (Telnet & Web
GUI) or RS-232ports.
Note:
We would recommend that you use the included 12VDC 1Apower
adapter (5.5 mm) to power the IP control box. If a 3rd party power
adapter is used, ensure it is of the correct voltage and amperage.
Failure to do so may result in damage to your device.
IP control boxes can be powered by PoE. Please ensure your
switch can support PoE and supply enough power for this device

12
Video Wall
Monitor
Audio/Video Input
Multi-view
Multi-view
Media Player
Video Input
Video Output
Decoder
Audio System
Encoder
Audio Output
Data Base
Video Input
Decoder Decoder
Encoder
PC
LAN
(Switch B)
Video Wall
Video Input
Video Output
Encoder
LAN and RS-232 Control
LAN Control
RS-232Troubleshoot
RS-232 Control
PC
Single View
Video Output
IPControlBox
Decoder
Audio System
Audio Output
to operate. If the switch doesn’t support PoE or is unable to
provide enough power, connect the IP control box to the included
power supply.
The serial port on the left is for troubleshooting only and the right
one can be connected to a PC or a third party controller for
configuring, managing and controlling the DT-HDVD-IPSTR-CB,
encoders and decoders via APIcommands.

13
Accessing the Device
You can use Web, Telnet or a third party controller to access the device to
configure, manage and control DT-HDVD-IPSTR-CB, encoders and
decoders via Web GUI or APIcommands.
Before Accessing the Device
Using LAN2 (C) Port
Before accessing the device, make sure that your computer and LAN2 (C)
port are on the same subnet. The default IP parameters of this RJ45 port are
IP address 192.168.11.243 and subnet mask 255.255.0.0. Therefore, set
your computer in the 192.168.x.x range with a subnet mask of 255.255.0.0.
Todo so, you can configure a static IP on your computer. This section takes
Windows 7 as an example.
Note:
If LAN2 (C) port's IP settings have been changed using the
administrator account, make sure that your computer's IP settings are
changed accordingly. Otherwise, you may not access the device.
1. Click Start menu.
2. Choose Control Panel > Network and Internet > Network and Sharing
Center > Change Adapter Settings, right click Local Area Connection
and choose Properties.

14
3. Highlight Internet Protocol Version 4 (TCP/IPv4) then clickProperties.
4. Check Use the following IP address. After configuring the settings in the
following example, click OK.
IP address: 192.168.11.45
Subnet mask: 255.255.0.0

15
5. Click OK.
Using RS-232 Port
Before accessing the device, make sure that your computer or third party
controller is connected to RS-232 port on the rear panel. This section takes
Windows 7 and COM software Comm Uart Assit (V3.7.2) as an example. You
can also use other COM software to perform thisoperation.
1. Ensure that a computer is connected to the RS-232 port (GND, RX and
TX) in the rear panel.

16
2. Locate the connected COM port on your computer.
1) Choose Start > Run.
2) Enter devmgmt.msc, and then clickEnter.
3) In Device Manager window, locate the connected COM port COM2
below.
3. Connect COM software to IP controlbox.
1) Launch COM software.
2) Set COM2 for PortNum, 9600 for BaudR, NONE for DPaity, 8for
DataB, 1 for StopB.

17
3) Click Open.
Accessing the Device via Web
Using the Administrator Account
You can use the administrator account to access the device Web
configuration page to configure, manage and control DT-HDVD-IPSTR-CB,
encoders and decoders via Web GUI or APIcommands.
1. Launch a web browser. For optimal performance, we would recommend
use of the latest versions of Firefox, Opera, Safari, Internet Explorer 10
or Chrome.
2. In the address bar, enter the default IP address 192.168.11.243 and then
press Enter.
3. Select English for Change Language.
4. Enter admin for both the default administrator user name and password.
5. Click Login.
Note:
For easy login, you can select Remember Name and Remember
Password to set the login page to remember usernameand

18
password.
If your default login IP address or administrator password hasbeen
changed, use the new one. Administrator user name cannot be
changed. For more information, see "IP Setup (Telnet Client and
Browser Communication)" or "Changing the Administrator
Password" section.
Using the Common User Account
You can use the common user account to access the device Web
configuration page to control DT-HDVD-IPSTR-CB, encoders and decoders
via Web GUI (Scenes page available only) or API commands. Before that,
you need to create a common user account under administrator privileges.
For more information, see "Creating a Common User Account"section.
1. Launch a web browser. For optimal performance, we recommend use of
the latest versions of Firefox, Opera, Safari, Internet Explorer 10 or
Chrome.
2. In the address bar, enter the default IP address 192.168.11.243 and then
press Enter.
3. Select English for Change Language.
4. Enter the common user name andpassword.
5. Click Login.
Note:
For easy login, you can select Remember Name and Remember
Password to set the login page to remember user name and
password.
If your default login IP address, user name or password hasbeen
changed, use the new one. For more information, see "IP Setup
(Telnet Client and Browser Communication)" or "Creatinga
Table of contents
