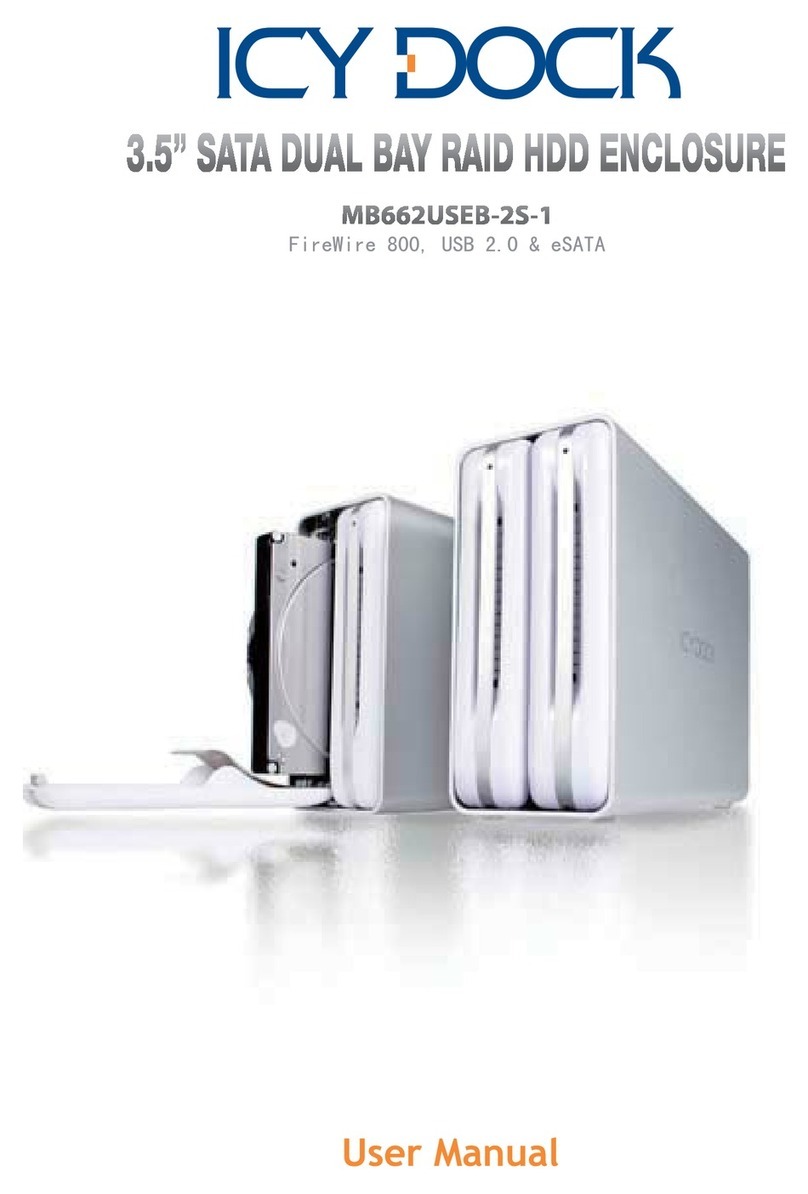
DataTale AIR User manual


Table of Contents
GENERAL INFORMATION.........................................................................................................4
COPYRIGHT................................................................................................................................................................................4
NOTICES AND CLASSIFICATIONS.....................................................................................................................................4
FCC-B Radio Frequenc Interference Statement ....................................................................................................4
CONTACT US.............................................................................................................................................................................4
Data Watch Technologies Co., Ltd.................................................................................................................................4
PRECAUTIONS FOR THE RAID UNIT .........................................................................................5
GENERAL PRECAUTIONS.....................................................................................................................................................5
RAID UNIT PRECAUTIONS..................................................................................................................................................5
INTRODUCTION.......................................................................................................................6
FEATURES..................................................................................................................................................................................6
SYSTEM REQUIREMENT......................................................................................................................................................7
PC......................................................................................................................................................................................................7
MAC..................................................................................................................................................................................................7
S STEM UNIT VIEWS................................................................................................................8
FRONT VIEW.............................................................................................................................................................................8
INSIDE VIEW.............................................................................................................................................................................8
BOTTOM VIEW.........................................................................................................................................................................9
PACKAGE CONTENTS............................................................................................................................................................9
INSERTING HARD DRIVES IN THE RAID UNIT...........................................................................10
FASTEN THE HDD PLACEMENT HOLDER ONTO THE HDDS..............................................................................11
RAID MASTER........................................................................................................................16
INSTALLATION .....................................................................................................................................................................16
RAID MASTER MENU.............................................................................................................17
RAID MASTER: OPERATION....................................................................................................18
CREATE A RAID.....................................................................................................................................................................18
CHANGING THE MOST RECENT ASSIGNED RAID MODE.....................................................................................20
DELETING AN ASSIGNED RAID MODE........................................................................................................................22
REBUILD...................................................................................................................................................................................24
MIXED RAID STATUS..........................................................................................................................................................28
DEVICE INFORMATION......................................................................................................................................................30
NUMBER OF DISKS SUPPORTING EACH RAID MODE...............................................................31
LED INDICATORS....................................................................................................................31
POWER LED............................................................................................................................................................................31
DISK LEDS................................................................................................................................................................................31
DISK VOLUME OVER 2TB........................................................................................................32
SAFE REMOVAL OF THE RAID UNIT........................................................................................32
RAID MODES..........................................................................................................................33
RAID O (STRIPING)..............................................................................................................................................................33

RAID 1 (MIRRORING).........................................................................................................................................................34
SPAN (LARGE).......................................................................................................................................................................34
JBOD (NON RAID).................................................................................................................................................................35
Q&As ....................................................................................................................................36
GENERAL.................................................................................................................................................................................36
DAISY CHAIN..........................................................................................................................................................................36
OLD HDDs................................................................................................................................................................................36
HDD SIZE..................................................................................................................................................................................36
HDD CAPACITY......................................................................................................................................................................37
DISCREPANCY IN REPORTED & ACTUAL SIZE CAPACITY...................................................................................37
REBUILD...................................................................................................................................................................................37
RAID MASTER: CONNECTION RESTRICTION...........................................................................................................37
OVER 2TB ..............................................................................................................................................................................38
LINUX........................................................................................................................................................................................39
APPENDIX..............................................................................................................................40

GENERAL INFORMATION
COPYRIGHT
Copyright @ 2010 Data Watch Technologies Co., Ltd. All rights reserved. No part of
this p blication may be reprod ced, stored in a retrieval system, or transmitted in any
form or by any means, electronic, mechanical, photocopying, recording or otherwise,
witho t the prior written consent of Data Watch Technologies Co., Ltd.
The prod ct information provided in this man al is s bject to change witho t prior
notice and does not represent a commitment on behalf of the vendor. The vendor
ass mes no liability or responsibility for any errors that may appear in this man al.
NOTICES AND CLASSIFICATIONS
FCC-B Radio Frequency Interference Statement
This device complies with Part 15 of the FCC r les. Operation is s bject to the following
two conditions:
This device may not ca se harmf l interference.
This device m st accept any interference received, incl ding interference that may
ca se ndesired operation.
This eq ipment has been tested and fo nd to comply with the limits for a Class B
digital device, p rs ant to Part 15 of the FCC r les. These limits are designed to
provide reasonable protection against harmf l interference when the eq ipment is
operated in a commercial environment. This eq ipment generates ses and can radiate
radio freq ency energy and, if not installed and sed in accordance with the instr ction
man al, may ca se harmf l interference to radio comm nications.
CONTACT US
We are committed to offer economical, high-q ality connectivity and storage enclos re
sol tions to the market. Yo r q estions, inq iries or comments are welcomed. For the
latest version of User Man al & Technical S pport, please go to o r website at
www.datawatchtech.com.
Data Watch Technologies Co , Ltd
3F, No. 60, Lane 321, Yang G ang St.,
Nei H , Taipei 114 Taiwan
Tel: +886-2-8797-8868
Fax: +886-2-8797-4801
Email: [email protected]
4

PRECAUTIONS FOR THE RAID UNIT
GENERAL PRECAUTIONS
The main circ it board of the RAID Unit is s sceptible to static electricity.
Proper gro nding is req ired to prevent electrical damage to the RAID
Unit or other connected devices, incl ding the host comp ter. Always
place the RAID Unit on a smooth s rface and avoid all dramatic
movement, vibration and perc ssion.
Do NOT allow water to enter the RAID Unit.
Do NOT place the RAID Unit close to magnetic devices (s ch as a mobile
phone), high-voltage devices (s ch as a hair dryer), or near a heat so rce
(s ch as on the dashboard of a car or any place where it will be exposed
to direct s nlight).
Use only the power s pply cable provided with the RAID Unit.
Can use both 9.5mm or 12.5mm high 2.5” SATA HDDs inside the RAID
Unit.
Do NOT attempt to service this RAID Unit yo rself. Please contact
Technical S pport regarding any parts other than ones mentioned in the
“Installation” section of this User’s Man al.
Do NOT block the ventilation. Proper airflow is req ired to ens re reliable
operation and to prevent overheating.
Do unplug the RAID Unit from the electrical o tlet when not in se to
provide an ecological friendly environment.
RAID UNIT PRECAUTIONS
Installation of RAID MASTER software in the host comp ter is req ired for
proper operation.
Any loss, corruption, or destruction of data is the sole responsibility
of the user of the RAID Unit Under no circumstances will the
manufacturer be held liable for the recovery or restoration of any
data
5

INTRODUCTION
Thank yo for p rchasing the DataTale AIR (RS-S2TJ, 2.5-inch 2-HDD RAID System).
The DataTale AIR with RAID MASTER (Graphic User Interface) provides considerable
storage capacity with general high-tech RAID config ration options in a desktop storage
device. The RAID MASTER allows easy config ration of RAID Modes: JBOD (Non
RAID), RAID 0 (Striping), RAID 1 (Mirroring), and Span (Large).
Please read thoro ghly and follow the instr ctions provided in this man al. Fail re
to do so may res lt in damage to the RAID Unit, and any or all of the connected
devices.
FEATURES
•S pports c rrent 2.5-inch (9.5mm or 12.5mm thick) SATA II compliant HDDs, f lly
backward compatible with SATA 1.0 and SATA 1.0a compliant HDDs
•S pports over 2TB storage capacity
•Connects flexibly via Hi-Speed USB (USB2.0 connection), IEEE 1394b (FireWire
800 connection), or eSata (eSATA connection)
•Combines RAID Unit and 1394 repeater f nctionality
•Provides JBOD (Non RAID), RAID 0 (Striping), RAID 1 (Mirroring), and SPAN
(Large) for effective storage management
•S pports Reb ild nder Raid 1 mode
•Config res RAID modes easily sing RAID MASTER, no IT expertise req ired
•Monitors RAID Unit stat s via LED indicators or RAID MASTER
•Powers RAID Unit via FireWire 800 b s power, or AC/DC Power Adapter
•Incl des a black po ch, easy for travel with plenty of protection
6

SYSTEM REQUIREMENT
PC
•266MHz or faster CPU (Windows Vista req ires a minim m 800MHz CPU)
•64MB of RAM (Windows Vista req ires 512MB of RAM)
•Microsoft Windows 2000, XP, 2003, Vista, 2008, 7, or higher
•One available USB 2.0, eSATA, or IEEE 1394b port
MAC
•Macintosh PowerPC or Intel processors
•64MB of RAM (Mac OS X 10.4 req ires 256MB of RAM)
•Mac OS X 10.4 (Intel) or higher
•One available USB 2.0, eSATA, or IEEE 1394b port
•Time Machine Compatible
2.5-inch SATA compatible hard drive is req ired for the RAID Unit. Once the
HDD(s) is/are formatted, the act al available storage capacity can vary depending on
the selected operating environment (normally 5-10 % less).
7

SYSTEM UNIT VIEWS
FRONT VIEW
FireWire 800
DC IN
Power Switch
eSATA
USB
LED Panel
Power
Disk1
Disk2
The stat s indication of each LED indicator is listed nder the LED INDICATORS
section.
INSIDE VIEW
HDD Placement Holder
HDD Screw
Di k1
Di k2
8

BOTTOM VIEW
PACKAGE CONTENTS
RS-S2TJ 2.5-inch RAID Unit
Power Adapter
FireWire cable
eSATA cable
USB cable
4 HDD Mounting Screws
Carr ing Case
User Guide
9

INSERTING HARD DRIVES IN THE RAID UNIT
To assemble the RAID Unit, please follow the steps listed in the instr ctions below:
1. Place the RAID Unit with its Bottom View facing yo . Unfasten all fo r (4) Casing
Screws with a Phillips screwdriver. Afterwards, t rn the RAID Unit to its Cover side.
2. Lift the Cover pward to remove it. When opened, the PCBA boards (Printed Circ it
Board) sho ld be sec rely in place inside the RAID Unit.
HDD Placement Holder
HDD Screw
Di k1
Di k2
10

FASTEN THE HDD PLACEMENT HOLDER ONTO THE HDDS
3. Unfasten the HDD Screw from the HDD Placement Holder(s) to remove from the
Bottom casing.
4. Position the HDD Placement Holder onto the HDD end, facing away from the
interface connectors and aligned with the screw hole openings. Fasten the HDD
Placement Holder onto the HDD by inserting and tightening two (2) HDD Screws on
both ends of the HDD Placement Holder.
Repeat Steps 3 and 4 for the other HDD.
11

5. Caref lly insert the SATA connector of the HDD into the slot on the PCBA board ntil
it’s firmly connected, ens ring that the hard drive and HDD Placement Holder’s
alignment are properly sit ated. Then, re-fasten and tighten the HDD Screw
previo sly removed from the HDD Placement Holder and the casing.
Repeat the same proced re for the other HDD.
6. Place the RAID Unit facing yo . Align the Cover according to the appropriate
interface opening gaps and place it on the RAID Unit.
12

7. Once the Cover is placed on the RAID Unit, se both hands to firmly hold and t rn
the RAID Unit to its Bottom View. Find the fo r (4) Casing Screws previo sly taken
o t before and re-fasten them in the appropriate screw holes.
13

CONNECTING THE RAID UNIT TO A COMPUTER
To connect the RAID Unit, please complete the following steps:
1. Connect the AC/DC Power Adapter to the RAID Unit.
If need to change the Adapter Head, press the click release to slide off the
existing Adapter Head from the AC/DC Adapter. Then, replace it with a different
Adapter Head in the same manner.
Pre here to relea e the clip
2. Insert both ends of the USB 2.0, eSATA, or FireWire 800 cable(s) into the
corresponding port of the RAID Unit and the host.
The RAID Unit sho ld only be connected to a host comp ter via one interface.
Connection of the RAID Unit to a comp ter via two or more interfaces sim ltaneo sly
is highly not recommended, especially for data transfers.
14

3. Press the Power Switch to “t rn on” the RAID Unit.
The RAID Unit can also be powered by sing only the FireWire 800 cable,
witho t the AC/DC Adapter.
Press the Power Switch for at least 3 seconds when sh tting down the RAID
Unit.
4. When connected, the Power LED light will become steadily white, and the Disk LED
lights will become bl e and flash ntil the HDDs are detected.
Power
Disk1
Disk2
There’s no need for any concerns if the Disk LEDs blink or flash in red for a very
short period of time d ring power on. When the HDDs are detected, the Disk LEDs will
become and remain in bl e.
5. Yo are now ready to begin sing yo r RAID Unit!
D e to compatibility iss es, if yo se the eSATA interface to do the data transfer,
the Silicon Image eSATA host controller is highly recommended.
When sing FireWire 800, yo can “Daisy Chain” and connect other comp ter
hardware or digital devices to yo r RAID Unit (s ch as digital video camera, another
HDD, DVD writer, and m ch more). Please see “Daisy Chain” nder “Q&As” Section
for more information.
15

RAID MASTER
The RAID MASTER is a newly-designed GUI Software specifically for o r DataTale
AIR. The RAID MASTER gives a more convenient yet modern way to manage yo r
RAID Unit.
INSTALLATION
To install the RAID Master, please download software at the following link:
Windows Users: http://oyendigital.com/tech/RAID_MASTER_WIN.zip
1. Upon completion of the download, do ble-click on the file to nzip it.
2. Drag the folder to the desktop or any preferred location.
3. Open the folder and do ble-click on RAID MASTER and the men sho ld
appear. Yo are now ready to config re yo r RAID.
Mac Users: http://oyendigital.com/tech/RAID_MASTER_MAC.zip
1. Upon completion of the download, open the file to begin the installation.
2. The RAID Master GUI will be available in the Applications folder.
3. Click on the file RAID_Master_Mac to start the GUI. Yo are now ready to
config re yo r RAID.
The RAID MASTER can only config re the RAID when connected via USB 2.0 or
FireWire 800. If yo choose to se eSATA for data transferring, please set p the RAID
config ration via USB or FireWire first.
16

RAID MASTER MENU
• CONFIGURATION & REBUILD:
oShows a single connected RAID nit, or m ltiple connected RAID Units.
oS pports RAID config rations nder Config ration and Reb ild options
oProvides HDD(s)’ c rrent RAID stat s
oIndicates individ al HDD(s)’ c rrent disk information
•DEVICE INFORMATION:
oProvides the basic information of the RAID Unit itself, once the RAID Unit
is connected to the host: the Device’s information, and serial n mber for
each inserted HDDs.
17

RAID MASTER: OPERATION
CREATE A RAID
To set p RAID f nctions for the RAID Unit, please complete the following steps:
Creating a new RAID mode will delete all data stored on the HDD(s). If yo have
important saved data in the hard drives, back p all data before formatting the RAID
Mode.
1. Under the “Config ration” option tab, select the RAID mode preferred and click
the “Create RAID/Apply” icon.
If cannot see what is/are connected as part of the RAID Unit, press the “Refresh”
b tton on top of the first s b-men (top). The information sho ld appear afterwards.
Please review the RAID mode options nder “RAID MODES” to choose the best
s itable RAID mode for yo r needs and desire. If the n mber of inserted HDDs does
not q alify the q antity needed for a partic lar RAID mode, the RAID MASTER’S
“Create RAID/Apply” icon will not be available to click (faint image).
If the OS of the host can s pport more than 2TB HDD(s) storage capacities and
18

the HDD(s) is/are over 2TB, remember to check the “Over 2TB” option nder the
“Config ration” option tab. Please see “Over 2TB” section nder Q&As for more
information. Please review the “DISK VOLUME OVER 2TB” section of the User’s
Man al for OS s pport information.
2. Once selected, the RAID MASTER will give an alert pop p window stating “all
data on disk will be lost. Proceed?”. Click on “Yes” icon to confirm.
3. Once confirmed, the RAID MASTER will begin processing the chosen RAID
Mode onto the chosen HDD(s). Once the process is completed, the “RAID
Stat s” and “Disk Information” sho ld reflect the newly assigned RAID mode.
The RAID Unit is now ready to be sed nder the preferred RAID Mode!
19

CHANGING THE MOST RECENT ASSIGNED RAID MODE
To change the most recent assigned RAID Mode for the inserted HDD(s) of the RAID
Unit, please complete the following steps:
Changing the RAID Mode will delete all data stored on the HDD(s). If yo have
important saved data in the hard drives, back p all data before changing the RAID
Mode.
1. Under the “Config ration” option tab, select the RAID mode prefer changing to
and click the “Create RAID/Apply” icon.
If the host can s pport more than 2TB HDD(s) storage capacities and the HDD(s)
is/are over 2TB, remember to check the “Over 2TB” option nder the “Config ration”
option tab. Please see “Over 2TB” section nder Q&As for more information. Please
review the “DISK VOLUME OVER 2TB” section of the User’s Man al for OS s pport
information
20
Table of contents
Other DataTale Enclosure manuals
