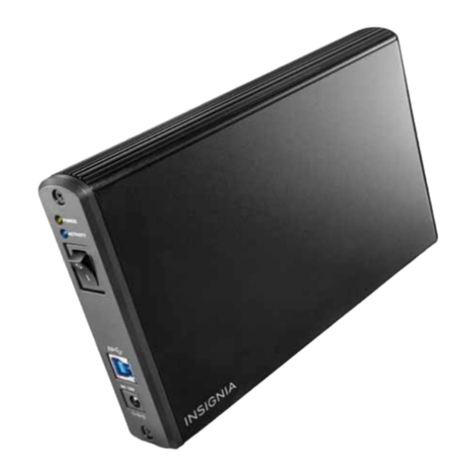
DataTale Guardian User manual

1
User’s Manual
Copyright @ 2010 ONNTO Corporation. All rights reserved.
www.onnto.com.tw
USB 2.0
AES256‐bit
2.5-inch Encrypted HDD Enclosure
dataTale

2
TableofContents
GENERALINFORMATION ............................................................................................................... 3
COPYRIGHT.................................................................................................................................................... 3
NOTICESANDCLASSIFICATIONS ......................................................................................................... 3
CONTACTUS.................................................................................................................................................. 3
PRECAUTIONSFORTHEENCLOSURE ........................................................................................ 4
GENERALPRECAUTIONS......................................................................................................................... 4
ENCRYPTEDHDDENCLOSUREPRECAUTIONS .............................................................................. 4
INTRODUCTION................................................................................................................................. 5
FEATURES .......................................................................................................................................................... 5
SYSTEMREQUIREMENT ................................................................................................................. 6
PC ........................................................................................................................................................................... 6
MAC ....................................................................................................................................................................... 6
PACKAGECONTENTS ....................................................................................................................................... 6
SYSTEMUNITVIEW.......................................................................................................................... 7
FRONTVIEW ..................................................................................................................................................... 7
ASSEMBLINGTHEHDDENCLOSURE .......................................................................................... 8
CONNECTINGTHEENCLOSURETOACOMPUTER ...............................................................11
SAFEREMOVALOFTHEUNIT.....................................................................................................13
LEDSTATUS ......................................................................................................................................13
Q&AS ...................................................................................................................................................13
HDDSTATUS ................................................................................................................................................. 13
SECUREKEYFEATURE ................................................................................................................................. 13
FILESYSTEMFORMAT.................................................................................................................................. 14
DISCREPANCYINREPORTED&ACTUALSIZECAPACITY........................................................................ 14
APPENDIX:SPECIFICATIONS ......................................................................................................15

3
GENERAL INFORMATION
COPYRIGHT
Copyright @ 2010 ONNTO Corporation. All rights reserved. No part of this
publication may be reproduced, stored in a retrieval system, or transmitted in
any form or by any means, electronic, mechanical, photocopying, recording or
otherwise, without the prior written consent of ONNTO Corporation.
The product information provided in this manual is subject to change
without prior notice and does not represent a commitment on behalf of the
vendor. The vendor assumes no liability or responsibility for any errors that
may appear in this manual.
NOTICES AND CLASSIFICATIONS
FCC-B Radio Frequency Interference Statement
This device complies with Part 15 of the FCC rules. Operation is subject to
the following two conditions:
This device may not cause harmful interference.
This device must accept any interference received, including interference that
may cause undesired operation.
This equipment has been tested and found to comply with the limits for
a Class B digital device, pursuant to Part 15 of the FCC rules. These limits
are designed to provide reasonable protection against harmful interference
when the equipment is operated in a commercial environment. This
equipment generates uses and can radiate radio frequency energy and, if not
installed and used in accordance with the instruction manual, may cause
harmful interference to radio communications.
CONTACT US
We are committed to offer economical, high-quality connectivity and storage
enclosure solutions to the market. Your questions, inquiries or comments are
welcomed. For Technical Support, software or User Manual updates, please
go to our website at www.onnto.com.tw
ONNTO Corporation
3F, No. 60, Lane 321, Yang Guang St.,
Nei Hu, Taipei 114 Taiwan
Tel: +886-2-8797-8868
Fax: +886-2-8797-4801
Email: [email protected]

4
PRECAUTIONS FOR THE ENCLOSURE
GENERAL PRECAUTIONS
♦The main circuit board of the Enclosure is susceptible to static
electricity. Proper grounding is required to prevent electrical damage
to the Enclosure or other connected devices, including the host
computer. Always place the Enclosure on a smooth surface and avoid
all dramatic movement, vibration and percussion.
♦Do NOT allow water to enter the Enclosure.
♦Do NOT place the Enclosure close to magnetic devices (such as a
mobile phone), high-voltage devices (such as a hair dryer), or near a
heat source (such as on the dashboard of a car or any place where the
Enclosure will be exposed to direct sunlight).
♦Use only the bus-powered USB cable provided with the Enclosure.
♦Use only a 9.5mm high 2.5” HDD inside the Enclosure. The Enclosure
may not function properly if a HDD with a different thickness is used.
In addition, the Enclosure and HDD may be damaged.
ENCRYPTED HDD ENCLOSURE PRECAUTIONS
♦Required to partition and format the hard drive after installing it inside
the Enclosure. Always perform partition and format of a new disk drive
with one of the provided Secure Keys inserted in the Enclosure.
♦After the Enclosure is properly connected to the host computer,
insert the Secure Key to allow proper disk enumeration. The Secure
Key may be removed after the host computer has detected the
Enclosure.
♦Keep the Secure Key with you at all times, as it is required for
authenticating the Encrypted HDD Enclosure when connected.
Without the Secure Key’s presence, the host computer will not be able
to detect the Encrypted HDD.

5
INTRODUCTION
Thank you for purchasing the DataTale Guardian (EU-S10-Y). This
Encrypted 2.5-inch SATA HDD Enclosure provides secure data access and
convenient travel for your slim 2.5-inch hard drive. Guardian is a secure-data
storage device that has adopted Enova real-time hardware AES (Advanced
Encryption Standard) cryptographic processor, making Guardian one of the
finest secure-data mobile HDD Enclosure in the world with privacy protection
on data. The hardware (AES-256) is NIST (National Institute of Standard &
Technology of USA) and CSE (Communication Security Establishment of
Canada) certified. It is utilized to encrypt all sensitive and confidential data
inside the HDD (including boot sector, temporary files, and the operating
system). Proper installation, care, and usage of the Enclosure Kit as
described in the User’s Manual will ensure trouble-free utility and prolong life
of the DataTale Guardian.
Please thoroughly read and follow the instructions provided in this
manual. Failure to do so may result in damage to the Enclosure Kit, and any
or all of the connected devices.
Features
Supports current SATA II compliant HDDs, fully backward compatible
with SATA 1.0 and SATA 1.0a compliant HDDs
Provides real-time cryptographic strength with encryption length up to
256-bit
Supports Hi-Speed USB (USB2.0 connection)
Connects to host by plug-n-play, not requiring any IT expertise or
software installation
Powers HDD via USB bus power
Indicates most-updated statuses easily via hidden LED
Supports hot-plug
Comes with Secure Keys for encrypted security function, no need to
memorize any passwords
Protects casing & HDD via copper-pillar reinforced screw guides for
constant swapping
Data Loss may occur if the Enclosure is reformatted or utilize for
regular usage without the Secure Key inserted. Please review Connecting
The Enclosure To A Computer and Q&A sections for more information.
Any loss, corruption, or destruction of data is the sole responsibility of
the user. Under no circumstances will the manufacturer be held liable for the
recovery or restoration of any data.

6
System Requirement
To use the Enclosure Kit, the minimum system configuration in the host
computer require the following:
PC 266MHz or faster CPU (800MHz or faster CPU is required for Windows
Vista)
64MB of RAM (512MB or more of RAM is required for Windows Vista)
Microsoft Windows 2000, XP, 2003, Vista, 2007 or higher
One available USB 2.0 port
MAC
Macintosh PowerPC or Intel processor
64MB of RAM (256MB or more of RAM is required for Mac OS X 10.4)
Mac OS X 10.1 or higher
One available USB 2.0 port
2.5-inch SATA compatible hard drive is required for the Enclosure. Once
the HDD is formatted, the actual available storage capacity can vary
depending on the selected operating environment (normally 5-10 % less).
Package Contents
USB Type A to
mini-B Y Cable
Guardian
Secure Keys
Soft case
Screws
Please keep all package contents and packaging material in the event
that the product must be returned.

7
SYSTEM UNIT VIEW
Front View
USBMini‐Bport Secure Keyport
CaseScrews
The hidden LED on its top cover will indicate statuses for Power, Data
Access and Secure Key authentication.

8
ASSEMBLING THE HDD ENCLOSURE
To begin using the Enclosure Kit, simply install a 2.5” SATA hard drive in the
Enclosure and complete the assembly steps outlined below:
1. Firmly push the lid down from front to back and open the Enclosure. After
the lid is opened, the PCBA board (Printed Circuit Board) should be
securely in place inside the Enclosure. One package containing the two
HDD Screws and two Case Screws should be attached.
2. Carefully take out the PCBA board from the Enclosure. Align the SATA
connector of the hard drive with the PCBA board. Carefully insert the SATA
connector into the slot on the PCBA board until it’s firmly connected.

9
3. Turn the hard drive connected to the PCBA board to its backside. Locate
two larger (HDD) screws enclosed inside the package. Tighten the screws
in its appropriate holes, ensuring that the hard drive and PCBA alignment is
properly maintained.
The smaller (Case) screws are for fastening the Enclosure’s housing
and lid together.
4. Carefully align the PCBA board, with the hard drive attached, to the
Enclosure port opening(s) inside the Enclosure. The two holes of the HDD
end, where it is not attached to the PCBA, will match up to the ribs inside
the housing.

10
5. Place the lid on top of the Enclosure. Make sure the two copper screw
holes are aligned with Front View. Firmly push the lid down from back to
front and lock the lid on the Enclosure. Make sure the lid is securely in
place.
6. Find the two smaller (Case) screws enclosed inside the package and
fasten them to attach the lid onto the Enclosure (Front View).

11
CONNECTING THE ENCLOSURE TO A
COMPUTER
Complete the following steps to connect the Enclosure Kit to a host computer:
Please partition and format the hard drive first after assembling it inside
the Enclosure Kit. Always perform partition and format functions with the
Secure Key inserted. Partitioning and formatting operations will erase all
existing data on the hard disk. Remember to backup all existing data from the
hard disk before performing any partitioning or formatting operations to
prevent loss of data.
1. Power “on” the host computer.
2. Insert the Secure Key into the Secure Key port indicated by the Secure Key
icon “ ” on the Front view of the Enclosure Kit before plugging in the
USB2.0 connector.
Always plug in the Secure Key first every time the Enclosure Kit is
connected to a host. The Secure Key may be removed after the host
computer detects the Enclosure.
3. Insert the USB2.0 connector into the corresponding port in the Enclosure
Kit and the host computer. The host computer should automatically detect
the Enclosure.

12
If the LED indicator is red, it is because the host cannot access the HDD
and the Secure Key is not inserted. To solve the problem: First, completely
unplug the USB cable to power off the Enclosure Kit. Second, insert the
Secure Key. Third, re-plug the USB cable to power on the Enclosure again.
LED
WithonemainUSBtype‐A
connectorisinserted
LED
WithbothUSBtype‐A
connectorsareinserted
The USB Y-cable provides 2 USB type-A connectors and 1 USB mini-B
connector. The 2 USB type-A connectors are inserted into two available USB
ports on the computer. The USB Y-cable serves as both power supply and
data transfer cable. When the host computer doesn’t supply enough power to
start up the HDD under only one USB connector, plug in the second type-A
connector into the host computer.
4. When successfully connected, the hidden LED will light up on the lid (near
its Front View) and become steadily blue. When the HDD is being access,
the hidden LED (at the same place) will flash in blue. Now, the Enclosure
Kit is ready to be used!

13
SAFE REMOVAL OF THE UNIT
Safe removal of the Unit from the host is highly recommended. In order to
safely remove your Enclosure from the host controller, you would need to
eject the device on your host system.
LED STATUS
LED COLOR STATUS
BLUE KEY OK
FLASHING
BLUE DATA ACCESS
RED NO KEY
Q&As
HDD Status
Q: What are the indications of HDD status, reflected by the hidden LED?
A: When connected, the hidden LED will light up and one small part on the lid
toward its Front View will become steadily blue. If the HDD is being accessed,
the hidden LED at the same place will flash in blue. If the Secure Key is not
inserted, the hidden LED will become red.
Q: Can I use my old HDD for this new Enclosure Kit?
A: Yes, as long as it is a SATA interface HDD. Because installation involves
reformatting/partitioning of the HDD, all previous data stored on your HDD will
be lost. First, make sure that you’ve kept a good copy of the data from your
HDD prior to installation. Then, copy this data onto the Enclosure Kit once
installation has been completed.
Secure Key Feature
Q: What are the limitations or precaution for the Secure Key feature?
A: Every time after the Enclosure Kit is properly connected to the host
computer, insert the Secure Key to allow proper disk enumeration. The
Secure Key may be removed after the host computer has detected the
Enclosure Kit. The Secure Key feature is only utilized for “data protection”,
not “HDD thief protection”.

14
Q: I have 2 sets of Guardian HDD Enclosures. If I mixed up the Secure Keys
and plug in the wrong one, what will happen?
A: When the wrong Secure Key is inserted into the Enclosure Kit, the host
will detect the Enclosure Kit as a new device until the correct Secure Key (the
key which was inserted when performing partitioning and formatting at the
beginning) is plugged in.
Note: This is only referring to same product models. Results may vary
depending on each product model.
File System Format
Q: I would like to format my hard drives with the FAT (a.k.a. File Allocation
Table) format, which can be read and written by both Mac and PC. Is there
any limitation on its capacity?
A: Yes, please check the table below for reference.
File System NTFS FAT32 FAT (Format by
Win2000 /
WinXP)
FAT16
Capacity
Limitation Vista:
16384TB
XP: 2TB
Windows: 32GB
Mac: 2TB 4GB 2GB
Discrepancy in Reported & Actual Size Capacity
Q: If I have a 320GB HDD, why does the Enclosure only recognizes the HDD
available space as to be less than 320GB?
A: Many customers are confused by their host systems when it reports a
discrepancy between reported capacity and actual capacity. Several factors
can come into play when your host system views and reports the capacity of a
hard drive. There are actually two different numbering systems used to
express units of storage capacity:
Binary, which says that a kilobyte is equal to 1024 bytes; and
Decimal, which says that a kilobyte is equal to 1000 bytes.
Most commonly used to display storage capacity is in Decimal. The
surprising fact is that even though it seems like you will have more bytes
under Binary, the Decimal calculation system actually presents a greater
storage capacity. More information on capacity issues can be found at the
Seagate website under FAQs.
http://www.seagate.com/ww/v/index.jsp?locale=en-
US&name=Storage_Capacity_Measurement_Standards_-
_Seagate_Technology&vgnextoid=9493781e73d5d010VgnVCM100000dd040
90aRCRD

15
APPENDIX: SPECIFICATIONS
Model Name EU-S10-Y
Interface USB 2.0 x 1
HDD Support 2.5” SATA HDD
Encryption Type AES 256-bit
Data Transfer Speed USB 2.0: up to 480Mbit/sec
System Material Plastic casing
Status Indicator Power On / Access / Power Off / Key
Insertion
Power Supply Bus power from host via mini USB cable
Security Secure Keys
Dimension 123 (L) x 80 (W) x 16 (H) mm
Weight (without HDD) 86 G
Certification CE, FCC
Table of contents
Other DataTale Enclosure manuals
Popular Enclosure manuals by other brands

Antec
Antec Sonata user manual
AAMP Global
AAMP Global PHOENIX GOLD Stinger TXTRB10BB quick start guide
Conceptronic
Conceptronic CHD2MUSB3B Multi Language Quick Guide
HK Audio
HK Audio Premium PR:O 8 A manual
Antec
Antec Sonata Designer UCC13# 0761345-08146-7 EC brochure
Conrad
Conrad 41 35 09 operating instructions
