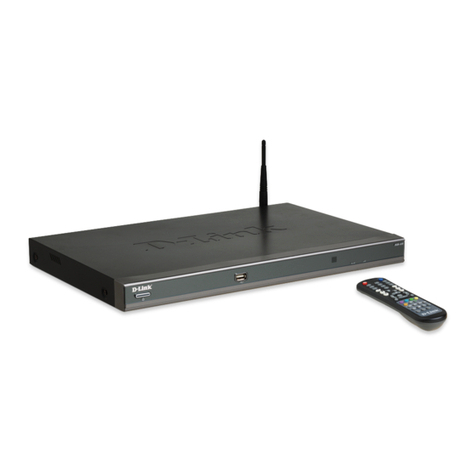
Dataton WATCHPAX User manual

WATCHPAX
WATCHPAX Art No 3362
WATCHPAX is a compact solid-state media
player optimized for best performance with
Dataton WATCHOUT multi-display production
software. WATCHPAX features built-in WATCHOUT
software and license.
WATCHPAX gives you the power of WATCHOUT
production tools without the hassle of fine-tuning computers
or running long video cables. Create your show in
WATCHOUT, and connect WATCHPAX. Add more units
as you grow your show, from a single WATCHPAX and
display to multiple units and display sources.
WATCHPAX is designed to match the demands of
distributed systems and multi-room installs, offering full
audio and video capabilities on a standard ethernet
network. In installations running in several show areas or
rooms, it keeps the hardware close to the display source.

Dual Mode Mini
DisplayPort
Audio out USB3 port Ethernet port
Power. 12V
adaptor supplied
USB3 port
USB3 port
13 2
General
»WATCHOUT pre-installed
»Field upgrades
»Includes WATCHOUT license
»Audio sync with WIRETAG
»Hardware accelerated video play
back (H.264)
»Zero configuration
»Clean shut-down and power-up
»Dimensions:127x148x22mm
»Two-year warranty
»Line voltage 100 - 240 V
»Windows 7
Specifications
»Approx. 20W power consumption
at full operation
»Active cooling
»SSD (Solid State Disk), 64 GB
»Dual Mode Mini DisplayPort
version 1.2. Resolutions up to 2560
x 1600 (WQXGA) per output
»Processor: AMD G series GX
420CA, 2.0 GHz Quadcore
»RAM: 4 GB
»3.5 mm stereo audio out
»Two USB3 ports
»Gigabit Ethernet – Optional WiFi
External WATCHOUT features
»Network video and Dynamic Image
Server
»Control and interactivity via MIDI
(USB), DMX (via ArtNet),TCP/IP
»DMX output (via ArtNet)
IMPORTANT
Install WATCHOUT version 5.5 or
higher on the production computer
before you connect the WATCHPAX.
www.dataton.com/downloads
WATCHPAX Art No 3362

WATCHPAX Art No 3362
Getting started
»1 Connect the display
»2 Connect the network
»3Connect to power
(use adapter supplied)
Start WATCHOUT on the production
computer (version 5.5 or higher). The
WATCHPAX and any WATCHOUT
display computers on the local
network will be listed in Window >
Network. You can assign display and
cluster names by double-clicking an
item in the list, see screenshot.
IP number assignment
WATCHPAX automatically retrieves
an IP address via a DHCP server.
If no DHCP server is available, the
WATCHPAX will get a self-assigned
IP address in the range 169.254.x.y
If you are using a control system,
you may want to use a fixed IP ad-
dress for WATCHPAX. Assign a fixed
IP through the WATCHOUT protocol
command “setIP” in the Startup Script
as shown below:
authenticate 2
setIP 192.168.0.32
Make sure you choose an IP address
in the correct subnet range. To
remove the fixed IP number, use the
same command but with an empty
string parameter, as below:
authenticate 2
setIP
For more information, see the section
on “Auto Start” on page 4.
Resolution
Double-click the display in the Stage
window and set the native resolu-
tion of your screen or projector, see
screenshot.
Note: If you want to use WATCHPAX with-
out a display, e.g., as a sound server, set
a “dummy” resolution of 640x480 pixels
in WATCHOUT. In that case you need to
use an active MiniDisplayPort adapter
to DVI/VGA/HDMI to ensure that the
correct EDID infomation is transferred to
WATCHPAX.

WATCHPAX Art No 3362
Auto start
A WATCHOUT production computer
has to be connected when you com-
pose or create your show. Once that’s
done, you can replace the production
computer with an external control
system, or auto start the WATCHPAX
by using the built-in Startup Script.
Hint: Use Edit Startup Script in
WATCHOUT to define initial WATCH-
PAX settings. This lets you load shows
and perform other WATCHOUT pro-
tocol commands. For more informa-
tion, please see the WATCHOUT
User’s Guide, Command Line Op-
tions, “Display Software”.
Delete files
To remove unused files from the
WATCHPAX:
Stage > Manage Display Computer
> Delete Other Shows
This deletes files from online display
computers for all shows, with the ex-
ception of the current (open) show.
Stage > Manage Display Computer
> Re-build Show Cache
This removes and rebuilds all cached
data associated with the current
(open) show. Note that the cache is
usually managed automatically by
WATCHOUT, but in some rare cases
you may want to force it to rebuild.
Active or passive adapters
Both active and passive MiniDisplay-
Port adapters to DVI/VGA/HDMI can
be used with WATCHPAX.
Use a passive adapter if you can
guarantee continuous power-on for
the projector/display or know the
projector/display will already be
powered up when you connect and
power up the WATCHPAX. If that
is not the case, or if there is a risk
that the projector/display might shut
down while connected to a powered
WATCHPAX, use an active adaptor.
EDID managers
If you do not have a stable connec-
tion to a projector/display or there is
a risk of sudden disconnection, add
an external EDID manager to all out-
puts. This ensures WATCHPAX will
always see a correct display load re-
gardless of display state.
Copyright 2017 Dataton AB. Art. no: 3997 Specifications subject to change without prior notice. Rev: 1.3
Stage > Manage Display Computer > Remote Access > File > Edit Startup Script

3360 – 1301
127,00
148,00
97,00
R 10,00
51,00
RUBBER DUMPERS
118,00
FASTENING
HOLES
THREADED
M4 x 6,00
QR CODE
SERIAL NO
AIR OUTLET, DO NOT BLOCK!
CONNECTORS LOCATED ON THIS SIDE,
SEE SEPARATE DRAWING!
FRONT
VIEW
SIDE
VIEW
REAR
VIEW
AIR INLET, DO NOT BLOCK!
2,00
Ø 10,00
22,00
2,30
R 5,50
11,00
R 2,00
28,00
Air outlet, do not block!
Connectors located on this side.
Air inlet, do not block!
Threaded
fastening
holes
Serial no.
Rubber feet
WATCHPAX Art No 3362
Measurements in mm
This manual suits for next models
1
Table of contents

