manuals.online logo
Brands
  1. Home
  2. •
  3. Brands
  4. •
  5. DAYCO
  6. •
  7. Bathroom Fixture
  8. •
  9. DAYCO 0909 User manual

DAYCO 0909 User manual

GENERAL DESCRIPTION
+ Toilet waste units made with stainless steel 304 S.S
0.70 ( the dispenser) & 0.80 mm.
+ Available in only finish satine.
+ Useful for the public areas.
+ It is mounted with six steel 4 mm screws (provided in
0909 / 0910 / 0911
Toilet Waste Units
0909
1/3
TECHNICAL DATA SHEET
0909 / 0910 / 0911
0910 0911
100 cm
39,37"
32 cm
12,5984"
27 cm
10,6299"
28 cm
11,0236"
22,5 cm
8,8582"
8,6614"
22 cm
13,7795"
35 cm
100 cm
39,37"
32 cm
12,5984"
27 cm
10,6299"
28 cm
11,0236"
,85
22,5 cm
8 82"
22 cm
618,6 4"
13,7795"
35 cm
100 cm
39,37"
35 cm
13,7795"
14,5 cm
5,7086"
32 cm
12,5984"
27 cm
10,6299"
28 cm
11,0236"
15 cm
5,9055"
0909 0910 0911
the box) with their 8 mm plastic plugs (also provided)
+ Metal lock system is exist to protect the paper inside
clean and safe.
+ e capacity of the z fold paper that used for the
toilet waste unit is 400 pieces.
+ e bin capacity is 23 Lt.
2/3
TECHNICAL DATA SHEET
0909 / 0910 / 0911
207
155
830
207
COMPONENTS AND MATERIAL
+ 0909 -Stainless Steel 304 satine finish
+ 0910- Stainless Steel 304 satine finish
+ 0911 -Stainless Steel 304 satine finish
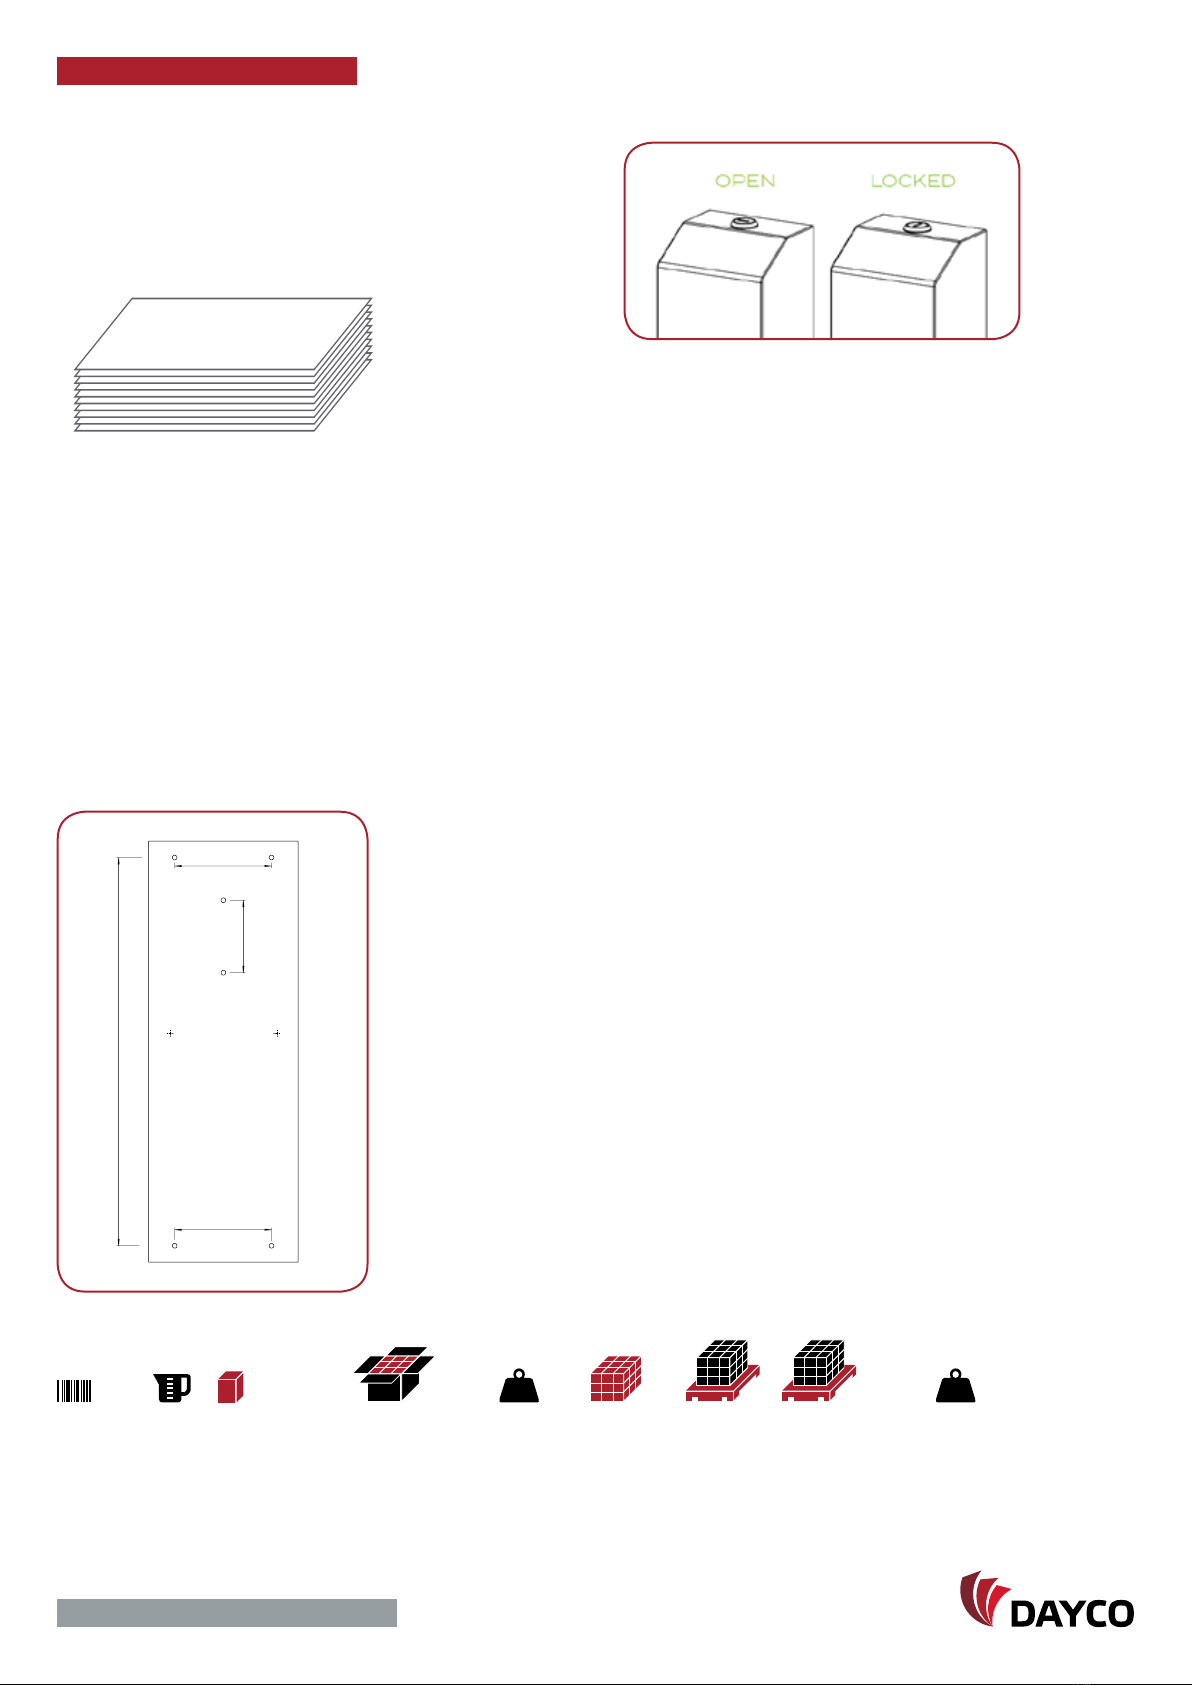
INSTALLATION
+ First measure out where the dipenser will be placed,
mark six holes and drill into the wall.
+ Insert the provided wall plugs and screw in the top
two screws, then the other vertical two screws leaving
a slight gap for the dispenser to slot onto.
+ Open the dispenser lock before mounting the
dispenser to the wall.
+ Slot the dispenser onto the two previously fixed
screws and then screw final two screws.
+ Once the dispenser is secure, you can close the lid.
Max 25 cm
Z Fold Paper
Max 8 cm
MOUNTING TEMPLATE
Should be minimum 100 cm high from the floor.
DISPENSER REPLACEMENT REQUIREMENTS
AND RECOMMENDATIONS
e following recommendations are intended to
provide guidelines on the best possible placement
of the dispensers. Because every location a dispenser
is to be mounted is different, depending on customer
site, physical size limitations, and available space,
these recommendations may not always be entirely
possible to follow.However, when placing a dispenser
installation must meet ADA requirements and
should promote ease of use and be in union with its
surroundings.Upon installation, the dispenser should
be level and the job results professional,presentable
and fully functional.
AFTERCARE INSTRUCTIONS
+ Regular cleaning with a soft cloth will keep the
surface of your product looking new. Soapy water
can be used to remove stubborn marks. Dont use
abrasive or chemical cleaners as these may damage
the surface finish over time.
+ Don’t expose to sunlight.
+ Don’t respond to the product with force against
the possibility of damnification, deformation.
+ Don’t throw any cigarettes and flammable materials
into the product.
Kg Kg
X
Y
Z
X
Y
Z
X
Y
Z
PRODUCT LITER PRODUCT CARTON CARTON INBOX PALLET GROSS PALLET GROSS PALLET
CODE DIMEN. DIMEN. WEIGHT QUANTITY QUANTITY DIMEN. WEIGHT
0909 23 L 35x15x100 cm 26x36x100 cm 7 kg 1 14 80x120x200 cm 115 kg
0910 23 L 35x15x100 cm 26x36x100 cm 6 kg 1 14 80x120x200 cm 100 kg
0911 23 L 35x15x100 cm 26x36x100 cm 13,5 kg 2 28 80x120x200 cm 205 kg
0909 / 0910 / 0911

This manual suits for next models

2

Popular Bathroom Fixture manuals by other brands

A&E Bath and Shower Fusion 200020 installation guide

A&E Bath and Shower

A&E Bath and Shower Fusion 200020 installation guide

Helvex AF-2 installation guide

Helvex

Helvex AF-2 installation guide

Gerber Danze D225525 manual

Gerber

Gerber Danze D225525 manual

Hans Grohe Croma 3L 28503 Series manual

Hans Grohe

Hans Grohe Croma 3L 28503 Series manual

Zline BLISS Series Installation and user manual

Zline

Zline BLISS Series Installation and user manual

Gessi RETTANGOLO K instructions

Gessi

Gessi RETTANGOLO K instructions

Hans Grohe Croma 75 1-Jet 26730000 Instructions for use/assembly instructions

Hans Grohe

Hans Grohe Croma 75 1-Jet 26730000 Instructions for use/assembly instructions

KEUCO Royal Reflex 34040 0000 Series installation instructions

KEUCO

KEUCO Royal Reflex 34040 0000 Series installation instructions

VINNOVA 704160M manual

VINNOVA

VINNOVA 704160M manual

SINED DOCCIA-LUNA-BIANCA Operation and maintenance manual

SINED

SINED DOCCIA-LUNA-BIANCA Operation and maintenance manual

Hans Grohe Logis 110 Fine 71251000 Instructions for use/assembly instructions

Hans Grohe

Hans Grohe Logis 110 Fine 71251000 Instructions for use/assembly instructions

BELLOSTA Via Montenapoleone B3-097 Installation instruction

BELLOSTA

BELLOSTA Via Montenapoleone B3-097 Installation instruction

CAHABA ELLIS CA101008 quick start guide

CAHABA

CAHABA ELLIS CA101008 quick start guide

Kohler K-8013 Installation and care guide

Kohler

Kohler K-8013 Installation and care guide

Lefroy Brooks FLEETWOOD M2-1122 Installation, operating,  & maintenance instructions

Lefroy Brooks

Lefroy Brooks FLEETWOOD M2-1122 Installation, operating, & maintenance instructions

Kohler K-8215 Homeowner's guide

Kohler

Kohler K-8215 Homeowner's guide

Better Bathrooms BeBa 26153 user manual

Better Bathrooms

Better Bathrooms BeBa 26153 user manual

AREBOS AR-HE-SDTSS60 manual

AREBOS

AREBOS AR-HE-SDTSS60 manual

manuals.online logo
manuals.online logoBrands
  • About & Mission
  • Contact us
  • Privacy Policy
  • Terms and Conditions

Copyright 2025 Manuals.Online. All Rights Reserved.