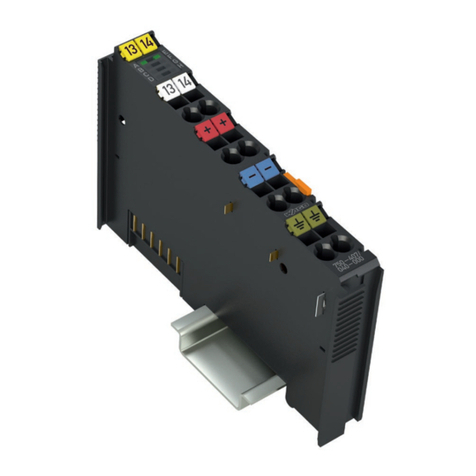
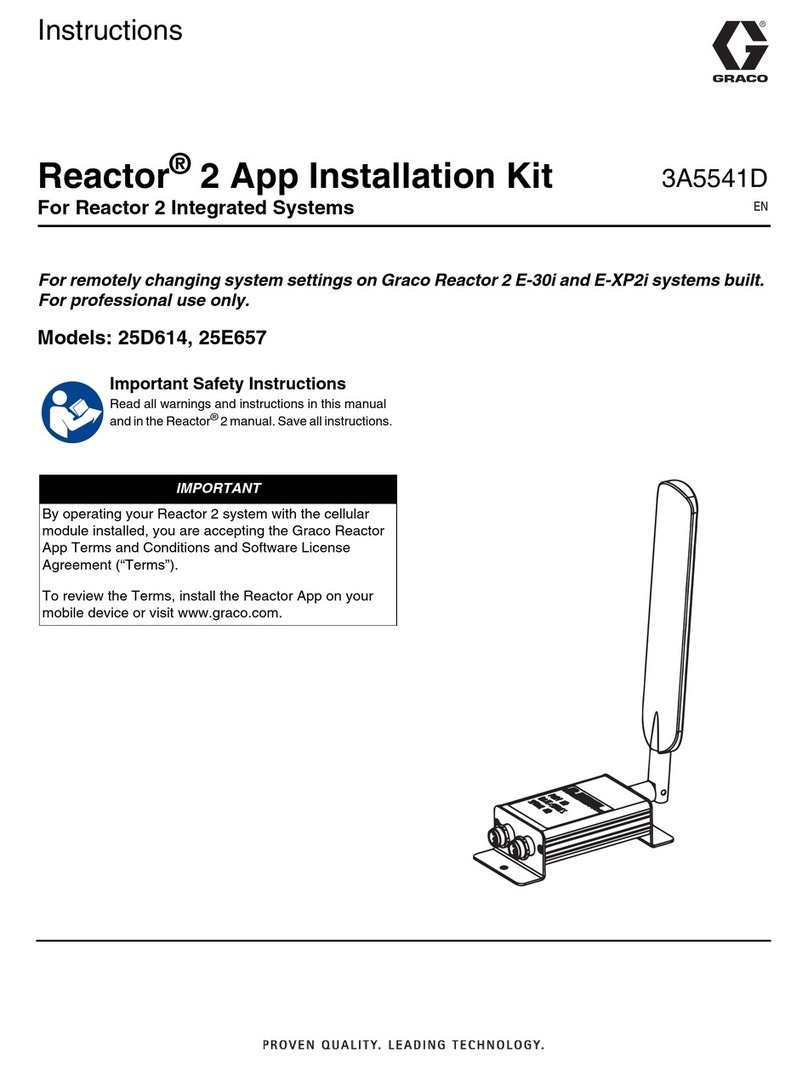
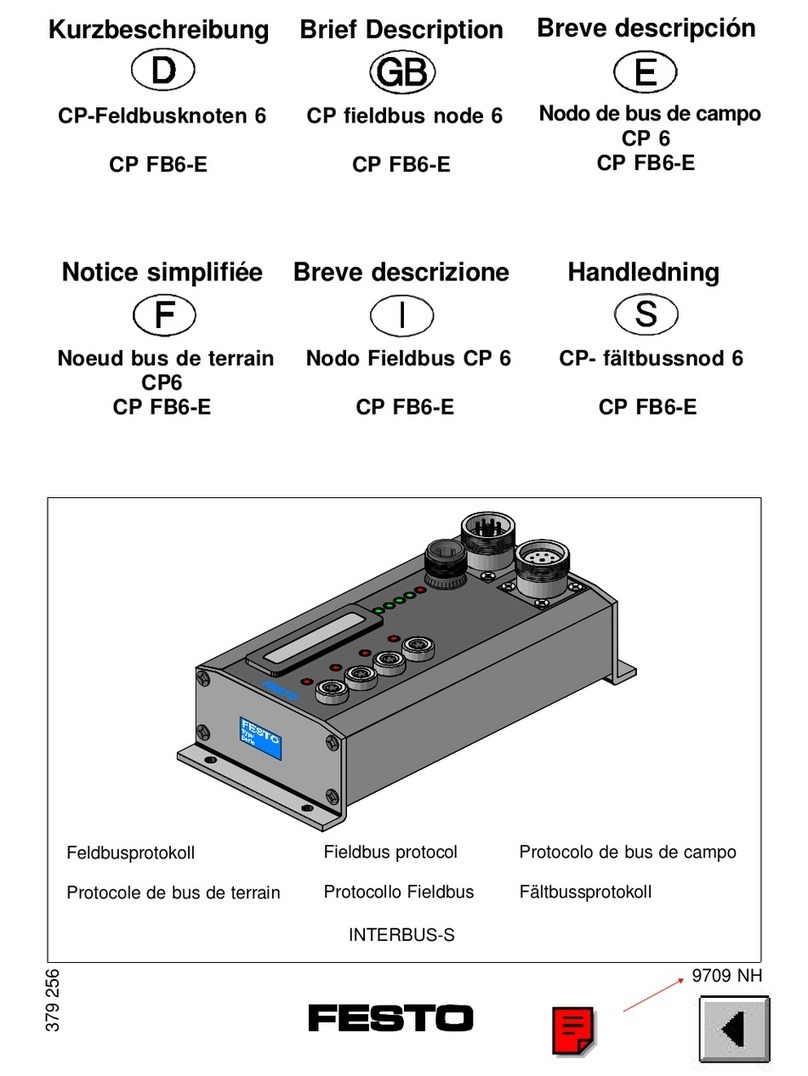
DayTronic 5M78 User manual

The Model 5M78 is a single-channel conditioner of phase-sensitive carrier-amplifier
design. Intended for applications involving transformer-coupling to the transducer
bridge (as with rotary-transformer torque sensors), this conditioner can also be used in
conventional installations when high sensitivity is required or where the electrical
environment is especially noisy.Responding only to the modulated carrier frequency,
the 5M78 rejects extraneous voltages that can cause errors in DC systems,
particularly when there is a need to “blow up” a portion of the transducer range.
User-adjustable phase and symmetrycontrols are provided.
calibration resistor is 59 kilohms, 1% which is located internally to the 5M78 case.
1GENERAL DESCRIPTION AND SPECIFICATIONS
Model 5M78 AC Strain Gage Module
Access switch settingsvia the front
panel of the 5M78 by gently pulling the
clear plastic cover (from the bottom
side) so the cover rotates open from
DIN AC Strain Gage Conditioner
MODEL 5M78
AC Strain Gage
CONDITIONERModule
5M78 1.A.1.5M78
GENERAL DESCRIPTIONAND SPECIFICATIONS 5M78.1
or without power to the unit. Once
completed, return the cover to the
View of Side Label of the Model 5M78 AC Strain Gage Module
the top. Use a small tool or finger to
place the switches to the left or right
position as you face the front of the
module. This process can be done with
original position.
AC Strain Gage Phase Operation
Due to the AC modulated aspects of the
5M78 AC Voltage excitation circuit, the 5M78
contains a "PHASE" adjustment which
aligns the transducer's return output signal
to the conditioner's demodulator. When
the demodulator is aligned properly through
calibration, maximum amplitude and
accuracy are achieved.
The Model 5M78's is calibrated by means of a “two-point (dead-weight)” or
shunt-calibration technique, which are outlined in section three. The supplied shunt
92342.00

WARNING
Death, serious injury, orfire hazard could result from improper connection of this instrument. Read and understand this
manual before connecting this instrument. Follow allinstallation andoperating instructions while using this instrument.
Connection of this instrument must be performed in compliance with the National Electrical Code (ANSI/NFPA 70-2014) of
USA and any additional safety requirements applicable toyour installation.
Installation, operation, and maintenance ofthis instrument must be performed by qualified personnel only. The National
Electrical Code defines a qualified person as “one who hasdemonstrated the skills and knowledge related to theconstruction
and operation of the electrical equipment and installations, and who hasreceived safety training on the hazards involved.”
Qualified personnel who work on or near exposed energized electrical conductors must follow applicable safety related
work practicesand procedures including appropriate personal protective equipment incompliance with the Standard for
Electrical Safety Requirements forEmployee Workplaces (ANSI/NFPA 70E-2012)of USA andanyadditional workplace safety
requirements applicable toyour installation.
ADVERTENCIA
Una conexión incorrecta de este instrumento puede producir lamuerte, lesiones graves y riesgo de incendio. Lea y entienda
este manual antes de conectar. Observe todas las instrucciones de instalación y operación durante elusode este
instrumento.
La conexión deeste instrumento a unsistema eléctrico se debe realizar enconformidad conelCódigo Eléctrico Nacional
(ANSI/NFPA 70-2014)de los E.E.U.U., además de cualquier otra norma de seguridad correspondiente a su
establecimiento.
La instalación, operación y mantenimiento de este instrumento debe ser realizada por personal calificado solamente. El
Código Eléctrico Nacional define a una persona calificada como "una que esté familiarizada con la construcción y operación del
equipo y con los riesgos involucrados."
El personal cualificado que trabaja encendido o acerca a los conductores eléctricos energizados expuestos debe seguir
prácticas y procedimientos relacionados seguridad aplicable deltrabajo incluyendo elequipo protector personal apropiado
en conformidad con elestándar para los requisitos deseguridad eléctricos para los lugares de trabajo del empleado (ANSI/
NFPA 70E-2012)de los E.E.U.U. y cualquier requisito de seguridad adicional dellugar de trabajo aplicable a suinstalación.
AVERTISSEMENT
Si l'instrument est mal connecté, lamort, desblessures graves, ou un danger d'incendie peuvent s'en suivre. Lisez
attentivement cemanuel avant de connecter l'instrument. Lorsque vous utilisez l'instrument, suivez toutes les
instructions d'installation etdeservice.
Cet instrument doit être connecté conformément auNational Electrical Code (ANSI/NFPA 70-2014)des Etats-Unis et à
toutes les exigences desécurité applicables à votre installation.
Cet instrument doit être installé, utilisé et entretenu uniquement par un personnel qualifié. Selon le National Electrical
Code, une personne est qualifiée si "elle connaît bien la construction et l'utilisation de l'équipement, ainsi que les dangers
que cela implique".
Le personnel qualifié qui travaillent dessus ou s'approchent desconducteurs électriques activés exposés doit suivre des
pratiques en matière et des procédures reliées par sûreté applicable de travail comprenant le matériel de protection
personnel approprié conformément à lanorme pour desconditions de sûreté électriques pour les lieux de travail des
employés (ANSI/NFPA 70E-2012)des Etats-Unis ettoutes les conditions de sûreté additionnelles de lieu de travail
applicables à votre installation.

WARNUNG
Der falsche Anschluß dieses Gerätes kann Tod, schwere Verletzungen oder Feuer verursachen. Bevor Sie dieses Instrument
anschließen, müssen Sie dieAnleitung lesen und verstanden haben. Bei derVerwendung dieses Instruments müssen alle
Installation- und Betriebsanweisungen beachtet werden.
Der Anschluß dieses Instruments muß in Übereinstimmung mit den nationalen Bestimmungen für Elektrizität (ANSI/NFPA
70- 2014)der Vereinigten Staaten, sowie allen weiteren, inIhrem Fall anwendbaren Sicherheitsbestimmungen, vorgenommen
werden.
Installation, Betrieb und Wartung dieses Instruments dürfen nur von Fachpersonal durchgeführt werden. In dem nationalen
Bestimmungen fürElektrizität wird einFachmann als eine Person bezeichnet, welche "mit der Bauweise und dem Betrieb des
Gerätes sowie den dazugehörigen Gefahren vertraut ist."
Qualifiziertes Personal, das anbearbeiten oder herausgestellte angezogene elektrische Leiter sich nähern, mußanwendbare
Sicherheit bezogener Arbeit Praxis und Verfahren einschließlich passende persönliche schützende Ausrüstung gemäß dem
Standard für elektrische Sicherheitsauflagen für Angestellt-Arbeitsplätze (ANSI/NFPA 70E-2012)derVereinigten Staaten
und alle zusätzlichen Arbeitsplatzsicherheitsauflagen folgen, dieauf Ihre Installation anwendbar sind.
Safety Precautions
The following safety precautions must be followed whenever any type of voltage or current connection is being made to the
instrument.
oBefore connecting to electric circuits or pulse initiating equipment, open their related breakers or disconnects. It is
recommended NOT TO install any connection of the instrument on live power lines. Only Qualified Service personnel that
have demonstrated the abilities and received the proper safety training are capable of connecting to live circuits.
oConnections must be made to the instrument first, then connect to the circuit to be monitored.
oWear proper personal protective equipment, including safety glasses and insulated gloves when making connections to
power circuits.
oHands, shoes and floor must be dry when making any connection to a power line.
oBefore each use, inspect all cables for breaks or cracks in the insulation. Replace immediately if defective.
oIf the equipment is used in a manner not specified in this user’s guide, the protection provided by the equipment may be
impaired.

Medidas de seguridad
Las medidas de seguridad siguientes deberán observarse cuando serealice cualquier tipo de conexión al instrumento.
οCuando se haga conexiones a circuitos eléctricos o a equipo de activación por pulso, deberá abrirse sus respectivas cajas
de seguridad. NO deberá hacerse ninguna conexión del instrumento en líneas eléctricas bajo tensión.
οLas conexiones deberán hacerse primero al instrumento y, luego, al circuito a ser monitorizado.
οAl hacer conexiones a circuitos eléctricos, deberá utilizar anteojos y guantes protectores.
οSus manos, zapatos y elpiso deberán estar secos entodo momento en que sehaga una conexión a un cable eléctrico.
οVerifique que launidad esté DESACTIVADA antes de conectar sondas en el panel posterior.
οPrevio a cada uso, deberá verificarse que los cables no estén rotos y que elmaterial aislante no tenga rajaduras.
Reemplace de inmediato cualquier parte defectuosa.
Mesures de Sécurité
Les mesures de sécurité suivantes doivent être prises chaque fois qu’un type de connexion quelconque est effectué
sur l’instrument.
οOuvrir les disjoncteurs correspondants lors d’une connexion à descircuits électriques ou à deséquipement de génération
d’impulsions. NE PAS effectuer de connexion d’instrument sur deslignes électriques sous tension.
οUne fois toutes les connexions de l’instrument effectuées, connecter aucircuit à contrôler.
οPorter deslunettes de protection et desgants isolants pour effectuer desconnexions aux circuits électriques.
οS’assurerque les mains, les chaussures et le sol soient secs lors de connexions à une ligne électrique.
οS’assurer que l’unité est ÉTEINTE avant de connecter les sondes au panneau arrière.
οInspecter tous les câbles, avant chaque utilisation, pour s’assurer que les isolants ne sont pascoupés ou fendus.
Remplacer immédiatement tous les équipements défectueux.

Sicherheitsvorkehrungen
Die folgenden Sicherheitsvorkehrungen sind immer dann zu befolgen, wenn eine Verbindung zum Instrument hergestellt wird.
οÖffnen Sie beim Anschluß an elektrische Stromkreise oder Impulsauslösungseinrichtungen die entsprechenden
Unterbrecher. Es dürfen KEINE Anschlüsse an das Instrument unter stromführenden Spannungsleitungen montiert
werden.
οDie Verbindungen müssen zuerst am Instrument und danach an der zu überwachenden Schaltung hergestellt werden.
οTragen Sie Schutzbrillen und Isolierhandschuhe, wenn Sie Anschlüsse an den Stromkreisen vornehmen.
οHände, Schuhe und Fußboden müssen trocken sein, wenn Sie Anschlüsse an den Stromkreisen durchführen.
οStellen Sie sicher, daß das Gerät AUSgeschaltet ist, bevor Sie an der rückwärtigen Konsole Meßfühler anschließen.
οPrüfen Sie vor jedem Gebrauch alle Kabel auf Bruchstellen und Risse in der Isolierung. Wechseln Sie schadhafte Kabel
sofort aus.
Standard Accessories
Standard
accessories The following table lists the 5M standard accessories.
Description Part Number
Manual & Operating instruction Resource CD

5M78 SPECIFICATIONS
Measurement Range:
Adjustable 0.5 mV/V to 5.0 mV/V; nominal full-scale
Excitation: 3.28 kHz; Nominal 2.77 Vac rms, sensed
Transducer Types:
Conventional 4-arm strain gage bridges, typically transformer
Amplifier
Normal - Mode Range : ±1.5 Vrms operating; ± 8V without instrument damage
Input Impedance : Differential > 10 MΩ
Offset : vs. Temperature: ±30 ppm/°C; vs. Time: ±10 ppm/month
Gain Accuracy
: Limited only by calibration accuracy
Gain Stability
: vs. Temperature: ±30 ppm/°C; vs. Time: ±10 ppm/month
Filter
:3-pole modified Butterworth; 3 dB down at 10 Hz, 100 Hz or 650 Hz; selectable
Step-Response Settling Time (Full-Scale Output @ 10 Hz)
:
To 1% of final value: 0.08 sec; (0.008 sec @ 100 Hz) (0.0011 sec @ 650 Hz)
To 0.1% of final value: 0.095 sec; (0.0095 sec @ 100 Hz) (0.0016 sec @ 650 Hz)
To 0.02% of final value: 0.10 sec; (0.01 sec @ 100 Hz) (0.0014 sec @ 650 Hz)
5M78.1GENERAL DESCRIPTIONAND SPECIFICATIONS
5M78 AC Strain Gage Module
coupled - 120 to 10 k ohm
Analog Ouput
: selectable; ± 0 to 5, ± 0 to 10 Vdc, 4-12-20 or 4-20mA (20% over-range, voltage only)
Power Supply
: 11 - 28 Vdc regulated; 100 mAmax.
Operating Temperature
: -10 to +70 Degrees C, 5 to 95% relative humidity, non-condensing
Dimensions
Linearity
: better than ± 0.03% of full scale
Housing height [A] : 114.5 mm
Housing depth [B] : 99 mm
Housing width [C] :22.5 mm
7 ,
2 , 2
0 , 3
2 0
,
2 2
3 6
3 ,
Optional DIN Power Rail Connector Model 5M-PCON
A
BC7
Dimensional drawing
N/A
N/A
N/A
DC POWER
5
4
3
2
1
POWER COMMON
N/C
N/C
N/C
DC POWER
5
4
3
2
1
POWER COMMON
DIN Power Connection (top)

2TRANSDUCER CONNECTIONS
The Model 5M78 I/O CONNECTIONS are via non-removable screw terminals which will
accept wire sizes from AWG 12 to 26. NOTE: The recommended transducer
cabling would be eight wire, individually shielded, twisted pair - wired as indicated (Fig. 1)
Sense lines must be connected at the transducer (as recommended) or at the 5M78
screw terminals - as a minimum. Table 2 denotes screw terminal assignments
Table 2 Model 5M78 Pin Assignments
I/O Connector Conditioner
PinScrewTerminal Line
Number Terminal Label Function
Top Rear 1 1 + EXC +EXCITATION
Top Rear 2 2+ SEN + SENSE
Top Rear 3 3 - EXC - EXCITATION
Top Rear 4 4 - SEN - SENSE
Top Front 1 1+ SIG +SIGNAL Input
Top Front 2 2-SIG –SIGNAL Input
Top Front 3 3 CAL SEN CALIBRATION SENSE
Top Front 4 4
/// SHIELD
Bottom Front 1 1 Ano Out ANALOG Output
Bottom Front 2 2 SHP Shunt Positive
Bottom Front 3 3 SHN Shunt Negative n
Bottom Front 4 4 SYC SYNC - MASTER/SLAVE
TRANSDUCER CONNECTIONS 5M78.2
AC Strain Gage Conditioner Module 5M78
Bottom Rear 1 1 Acom Analog Common
Bottom Rear 2 2 Pcom Power Common
Bottom Rear 3 3 24 V 24 Vdc Power
Bottom Rear 4 4 /// SHIELD
SHIELD
Fig. 1 Model 5M78 Transducer Cabling
Top Input Connectors
(viewed from front)
Rear Terminals
Front Terminals
Front Terminals
Rear Terminals
Bottom Power & Signal Connectors
Analog Common
Power Common
24 Vdc Power Input
EXTRA WIRE
(paired with "CAL SENSE,"
UNCONNECTED at
Conditioner Connector)
+EXCITATION
–EXCITATION
CAL SENSE *
–SENSE
+SENSE
–SIGNAL
+SIGNAL
SHIELD
Master/Slave
Clock Sync Line
to/from other
modules
* CAL SENSE
when used with internal transducer
shunt resistor, wire CAL SENSE
line to transducer's CAL pin.
Internal Shunt resistor
must be shorted.

3 GENERAL DESCRIPTION AND CALIBRATION
The Model 5M78 is useful in applications involving tranformer coupling to the strain gage
bridge (for example, rotary transformer torque sensors) and in certain appications that require high
sensitivity with optimum signal-to-noise characteristics. Carrier amplifiers offer higher sensitivity
than dc amplifiers and, since they respond only to the modulated carrier frequency, they reject certain
extraneous voltages that can cause error in dc systems. These error sources include thermocouple
or galvanic voltages in the cable-connector system, homopolar voltages from rotating machinery,
low-frequency pickup, and 1/f noises of various origin.
Calibration of the 5M78 is accomplished by the conventional shunt technique, using an internally
(or externally) installed calibration resistor, or via the "dead-weight" method.
Calibration Resistor. If a fixed resistor is shunted across one arm of a strain
gage bridge, it produces an unbalance equivalent to that of a particular value of
mechanical input. If this Equivalent Input value is accurately known, it can be used
as a reference point for shunt calibration of the system. Upon completion of
installation of the transducer and its associated cabling, the user can:
Perform an overall dead weight calibration using a precisely known
value of mechanical input. The calibration can then be transferred to the
installed calibration resistor for convenience in subsequent checking.
Replace the installed calibration resistor with one (or an equivalent
resistance value) supplied by the transducer manufacturer to achieve a
precisely known Equivalent Input allowing the instrument sensitivity to
be adjusted correctly.
Determine the Equivalent Input value for the installed calibration resis-
tor, knowing the transducer sensitivity, and adjust the instrument sen-
sitivity accordingly.
A one percent 59-kilohm calibration resistor is installed in the 5M78 at the factory.
The installed resistor can usually be used even though the transducer calibration
data mentions some other resistance value. In Section 4of this manual, the tech-
niques described above are demonstrated. If, however, the installed value of the
calibration resistor is not appropriate for the transducer and measurement range to
be used, the 59-kilohm resistor should be replaced at this time. The calibration
resistor is mounted on terminals located internally to the 5M78 conditioner's
printed-circuit board. It can be accessed by removing the instrument case (Fig. 5).
Note: A variety of Rotary Transformer Torque Transducers are supplied
with the appropriate calibration resistor integral to the transducer. When this type
of transducer is used it will be necessary to place a short across the 59-kilohm
resistor internal to the instrument. The transducer calibration resistor can be appropri-
ately connected to the 5M78 calibration circuit via the transducer cabling. Refer to
cabling diragam section of this manual in the area of CAL SENSE.
7
(1)
(2)
(3)
Calibration 5M78.3

3. CALIBRATION (cont.)
This section contains the instructions for calibrating the 5M78. Included is a
functional description of the instrument front-panel (see Figure 2). To perform
calibration, proceed as follows.
Turn power ON to the 5M78 DC Power input terminal (11 to 28 Vdc input)
The front-panel indicator should light green to indicate the application of
dc power. Allow 10 minutes of warmup for stabilization of transducer
characteristics. Open the protective, clear plastic, front cover of the unit.
Set the Coarse Zero and Span controls to the marked label position (<, Min>).
Position the front panel switches to the desired settings for the application.
Refer to Figure 2 for details. If using Shunt method, refer to step (k).
(b)
(a)
(c)
the Coarse and Fine SPAN controls. If not, adjust the Symmetry control
to obtain the negative Equivalent Input value.
If dead weight calibration is not practical and the transducer calibration
data is unknown, the Equivalent Input value for the factory-installed
calibration resistor can be approximated
mv/v sensitivity rating of the transducer
known.
as follows, assuming that
and the bridge resistance
the
are
13
(m)
With the transducer unloaded, adjust the Coarse Zero control and the Fine Zero
control until the desired analog output is achieved. If greater zero authority is
desired, place the front panel Switch 7 - "Zero Adj" to the extended range. This will allow
the user to obtain 100% zero offset control. The Normal postion of switch 7 allows
for approximately 25% Zero authority.
(d)
the Coarse and Fine SPAN controls. If not, adjust the Symmetry control
to obtain the negative Equivalent Input value.
If dead weight calibration is not practical and the transducer calibration
data is unknown, the Equivalent Input value for the factory-installed
calibration resistor can be approximated
mv/v sensitivity rating of the transducer
known.
as follows, assuming that
and the bridge resistance
the
are
13
(m)
Load the transducer in the positive direction with a convenient dead weight value
(greater than one half of full scale). Adjust Coarse Span for a nominal corresponding output.
Adjust the PHASE control, until a maximum output value is obtained. (Once set for your
transducer, this PHASE ADJUSTMENT step need not be repeated unless a change in
cable length – or transducer – is required). Unload the sensor and re-Zero as needed.
(e)
(f) If the calibration will utilized a known "dead-weight", re-load the sensor and adjust the
Coarse and Fine Span controls for the expected analog output value. Unload - Zero and
Load - Span operations may need to be repeated for analog output precision.
Note: With sensor unloaded, activate & record "SHP" value for furture calibration verification.
If the calibration will utilize the "Shunt" calibration method, refer to step (k).
recommended calibration resistor.
the Coarse and Fine SPAN controls. If not, adjust the Symmetry control
to obtain the negative Equivalent Input value.
If dead weight calibration is not practical and the transducer calibration
data is unknown, the Equivalent Input value for the factory-installed
calibration resistor can be approximated
mv/v sensitivity rating of the transducer
known.
as follows, assuming that
and the bridge resistance
the
are
13
(g)
(m)
Calibration 5M78.3
the Coarse and Fine SPAN controls. If not, adjust the Symmetry control
to obtain the negative Equivalent Input value.
If dead weight calibration is not practical and the transducer calibration
data is unknown, the Equivalent Input value for the factory-installed
calibration resistor can be approximated
mv/v sensitivity rating of the transducer
known.
as follows, assuming that
and the bridge resistance
the
are
13
(m) the Coarse and Fine SPAN controls. If not, adjust the Symmetry control
to obtain the negative Equivalent Input value.
If dead weight calibration is not practical and the transducer calibration
data is unknown, the Equivalent Input value for the factory-installed
calibration resistor can be approximated
mv/v sensitivity rating of the transducer
known.
as follows, assuming that
and the bridge resistance
the
are
13
(m)
If the transducer is to be also used in the negative realm, load the
transducer in the negative direction with the same dead weight value as
used in step (f) and confirm that the dead weight reading obtained is the
same, but negative polarity, as that of step (f). If not, see steps (i) thru (j).
A Symmetry adjustment is provided to compensate for transducers
that do not have symmetrical sensitivity characteristics. This
adjustment is factory set assuming symmetrical characteristics. If step
(h)indicates that a field adjustment is necessary, proceed as follows.
recommended calibration resistor.
the Coarse and Fine SPAN controls. If not, adjust the Symmetry control
to obtain the negative Equivalent Input value.
If dead weight calibration is not practical and the transducer calibration
data is unknown, the Equivalent Input value for the factory-installed
calibration resistor can be approximated
mv/v sensitivity rating of the transducer
known.
as follows, assuming that
and the bridge resistance
the
are
13
(h)
(i)
(m)

With the transducer loaded as in step (f), adjust the Symmetry control (right
above the PHASE control adjustment) to obtain a dead weight reading equal to
that obtained in step (f).
If dead weight calibration is not practical and the transducer manufac-
turer has supplied a calibration resistor (or resistor value), install the
recommended calibration resistor. See Fig. 5
(j)
(k)
Perfom steps (b) thru (e). Now activate the SHUNT POSITIVE (SHP) terminal
and adjust the SPAN controls until the instrument output is equal to the Equivalent
Input value simulated by the installed resistor. Shunt is performed at zero load.
If a negative Equivalent Input value is also provided on the calibration sheet
of the transducer under calibration, activate the SHUNT NEGATIVE (SHN) terminal.
Confirm that the negative value can also be obtained. If necessary, adust the SYMMETRY
control to obtain the negative Equivalent Input value as listed on the calibration
document. The SYMMETRY control has approximately 7% authority, full scale.
If dead weight calibration is not practical and the transducer calibration
data is unknown, the Equivalent Input value for the factory-installed
calibration resistor can be approximated
mv/v sensitivity rating of the transducer
known.
as follows, assuming that
and the bridge resistance
the
are
(l)
(m)
where X=Equivalent Input, % of full scale
R
b=bridge resistance, ohms
K =transducer sensitivity, mV/Vfull scale
R
c=calibration resistance, ohms (59 kinstalled)
Sample Calculation: Assume that K =3.000 mV/Vfor a 5000-pound loadcell
(fullscale) with a bridge resistance of 350 ohms.
49.4% of full scale =2472 pounds
X = 25000 Rb
K Rc
X = 59000 x 3
25000 x 350 =
ring, one unit can be designated the master, and the remaining units can be driven
from the oscillator contained in the master unit. The remaining units are designated
as slave instruments. To perform master/slave wiring, refer to Figure 4.
3. CALIBRATION (cont.)
Calibration 5M78.3
Note: Above calculation is useful in applications involving non - star bridge shunt calibration strain gage
bridges (for example DC bridges, and slip ring type torque sensors). Rotary transformer type sensors
which use star bridge shunt circuit will not equate properly and the sensor's published calibration
data should be referenced.

b
c
Remote Calibration Check. The instrument can be placed in the calibration mode
(positive or negative) by shorting terminals Power Common and SHP for positive or SHN for
negative on the lower I/O connector. Figure 4 indicates two methods of remotely
entering the calibration mode (external switch, or push button control). The
Remote Cal function provides a convenient method of periodically monitoring
calibration of the instrument in the positive or negative realm.
Master/Slave Connections. When more than one 5M78 is being used in a measurement
setup (instruments are closely mounted or the transducer cabling is in a common conduit
or raceway), beat frequencies may be produced from the 3-kHz oscillators used in
the instruments to develop the excitation. To prevent beat frequencies from occur-
ring, one unit can be designated the master, and the remaining units can be driven
from the oscillator contained in the master unit. The remaining units are designated
as slave instruments. To perform master/slave wiring, refer to Figure 7.
3. CALIBRATION (cont.)
Switch 1 - Mode - selects current (I) or voltage analog output
Switch 2 - Volts - selects +/- 5 or +/- 10 Vdc when mode is voltage
Switch 3 - Current - selects 4-12-20 or 4-20mA when mode is current
Switch 4 - Filter - selects 650 Hz or 100 Hz at 3 db, for 100 Hz switch 5 must be set to the right
Switch 5 - Filter - selects 10 Hz or 100 Hz at 3 db, for 100 Hz switch 4 must be set to the right
Switch 6 - Sync - selects excitaton clock to slave from a master module or to be master
Switch 7 - Zero Adj. - selects extended (100%) or normal (25%) zero authority
Switch 8 - Aux Output - selects SYNC terminal output for use by other linked modules
Coarse Zero - 16 position switch adjustment for stepped zero balance control
marked for calibration default position
Fine Zero - 18 turn potentiometer for fine zero balance control
Coarse Span - 16 position switch adjustment for stepped gain contr ol
marked for calibration default position
Fine Span - 18 turn potentiometer for fine gain - span control
Symmetry - adjust the negative output span to be equal to the positive output
Phase - adjustment for phasing the AC modulated signal to its highest level at load
Over Range - indicates when the analog output is 2% greater than mode selected
Power - indicates the power input voltage is ON
Fig. 2 Front Panel Settings and Indicators
Calibraton 5M78.3
or in the AUX position for raw - uncalibrated analog gained voltage output

4. VERIFICATION OF NORMAL OPERATION
It is the purpose of this section to aid the user in determining, in the event of a
malfunction to which the Model 5M78 is suspected of contributing, whether the
instrument is functioning normally or whether it is the source of the observed
trouble. In the event the unit requires repair, the user may also contact the
factory Service Department or the local Daytronic Representative for assistance.
Daytronic service information is located on the last page of this document.
If the instrument is suspected of faulty operation, follow the steps below.
(a) If the unit is totally inoperational (front-panel power indicator does not
light), check the primary power input terminals for proper connection.
Input power can be from 11 to 28 Vdc and will draw less than 2 watts.
If properly connected, the front panel Green LED will be illuminated. Before
reapplying power, visually inspect the power supply and the input power
connections for any discrepancy which could have caused the overload.
(b)
If the transducer has some preloading, the BALANCE controls may not
allow successful zeroing of the instrument output. This condition can be
remedied by connecting a resistor (50 k-200 krange, metal-film type)
from the +Signal terminal of the transducer to the + or –Excitation Sense
terminals. The Excitation terminal to which the connection is made is
determined by the direction of the loading or off-zero reading.
(c) The inability to balance correctly,where the instrument output reads
totally off scale and the BALANCE controls have no authority,can very
likely be the result of a damaged or defective transducer or cable. This
possibility can be confirmed (or eliminated) by substituting a transducer
and cable known to be in good condition or by simulating a balanced
transducer, using either a commercially available transducer simulator
or the simple star bridge arrangement shown in Figure 7. The star bridge
simulates a conventional four-arm bridge in an exact condition of bal-
ance. To construct a star bridge,connect four 10% carbon resistors as
shown in Figure 5. Use 180-ohm resistors to simulate a 350-ohm bridge
and use 56-ohm resistors to simulate a 120-ohm bridge. Neither the
resistor values nor temperature characteristics are critical since the
balance condition of a star bridge is not determined by the resistance
I<
Figure 7. Star Bridge Construction
20
values. Solder two resistors together, then solder the remaining two
resistors together. Next, connect the two junctions together using a
separate wire as shown. There is a good reason for this method of
construction, and it should be followed. Connect the substitute or simu-
lated transducer to the instrument I/O connector using a short 4-wire
cable configuration as shown in Figure 4. Attempt to balance the substitute
simulated transducer. If conditions now appear to be normal, the transducer
or cable is at fault. If the previous difficulties persist, the 5M78 is faulty.

Contact Switch
(NO)
NOT PUSHED = Logic 1 (Shunt not enabled)
PUSHED = Logic 0 (Shunt is enabled)
Push Button
(NO)
11 - 28VDC
POWER
SUPPLY
SHIELD
Fig. 3 Shunt Connections
Fig. 4 Star Bridge

Shunt Resistor
Fig. 5 Internal Shunt Location
The internal 59k Ohm shunt resistor is located
inside the 5M78 housing. To replace this resistor,
remove the spring and DIN Clip located on
rear of the case. Use a flat head screw driver to
separate the top and bottom of the case, typically
starting at the front connector positions. The
resistor is soldered to two terminal post as
shown in the diagram. Unsolder and resolder
the replacment shunt resistor or "short" for sensors
with internal shunt resistors. Reassemble the housing
and DIN clip. Ensure rear grounding clip and front
Master 5M78 Module
(Switch 6 to Master)
Additional 5M78 Module
(Switch 6 to Slave)
(Switch 6 to Slave)
Fig. 7 Master / Slave Wiring
Master / Slave Connections
When more than one 5M78 is being used in the
same measurment setup, beat frequencies can be
produced by the excitation clock oscillator. To
prevent this, the user should declare one of the
5M78 units as a Master via switch 6 on the front
panel. The other units should be switched to Slave
and wired as shown with the SYC terminals
connected and a separate Power Common wire.
If the units share a common power supply, the
P com terminal should be connected at the modules.
Shunt Reference
Fig. 6 Internal Shunt Reference Solder Connections
The 5M78 internal shunt resistor is referenced
from + Signal to either + Sense for Shunt positive (SHP)
or - Sense for Shunt negative (SHN) when
activated via the terminals per Fig. 3. Provisions have
been incorporated to reference Common instead of
+ Signal for sensors that require this feature. To
accomplsih this, unsolder the "S" connection and
make a solder bridge across "C" to the middle pad as
shown in adjacent layout. Reassemble the
housing and DIN clip. Ensure rear grounding clip
and front cover are in place.
cover are in place.

5M78 AC Strain Gage Conditioner Module
Product Warranty and Repair
Daytronic Corporation warrants its products to be free from defects in material and
workmanship, under normal and proper use in accordance with our instructions,
for the period of time specified below. Our liability under such warranty or in
connection with any other claim relating to the products shall be limited to, at our
option, the repair or replacement of any products or parts or components thereof
which are returned to us freight prepaid and which are defective in material or
workmanship or the refund of the purchase price to the Buyer.
Before returning a product or products for any reason, the
customer must call Daytronic Customer Support Services at
ALL EQUIPMENT TO BE REPAIRED OR REPLACED UNDER WARRANTY MUST BE
RETURNED TO THE FACTORY.
. Once the customer has provided the
necessary information and has been assigned a specific RMA, the product(s) in question
may be returned to Daytronic by shipping it
Daytronic Corp. , 1000 New Durham Road, Edison, New Jersey 08818
ANY PRODUCT FOUND TO BE DAMAGED THROUGH CUSTOMER NEGLIGENCE OR MIS-
USE MAY BE EXCLUDED FROM ANY AND ALL POLICIES CONTAINED IN THIS DOCUMENT.
(937) 866-3300
to request a
RETURN MATERIAL AUTHORIZATION (RMA)

Daytronic CorporationDayton OH USA
wwwwww..ddaayyttrroonniicc..ccoomm
Table of contents
Other DayTronic Control Unit manuals
Popular Control Unit manuals by other brands

Franke
Franke AQRM460 Installation and operating instructions

Rohl
Rohl Riobel PERRIN ROWE R46 instruction manual

CKD
CKD 3KA1 instruction manual

HomeMatic
HomeMatic HmIP-PCBS Installation instructions and operating manual

Celtic tuning
Celtic tuning eMotion installation manual

Lush Projects
Lush Projects LushOne Inca manual

Quectel
Quectel EC25 Mini PCIe Hardware design

Danfoss
Danfoss AV210 NC/NF Instruction

ASCO Valves
ASCO Valves 8263 Series Installation & maintenance instructions

Grundfos
Grundfos MIXIT manual

TriangleTube
TriangleTube PGRKIT16 quick guide

Raytheon Anschütz
Raytheon Anschütz Standard 22 GYRO COMPASS Operator's and service manual