DAZUINFO XferMax X8 User manual
XferMax X8
Memory Card Backup Device
Capacity:894.9GB
Free:692.5GB
User Manual

This equipment has been tested and found to comply with the limits for a Class B
digital device, pursuant to Part 15 of the FCC Rules. These limits are designed to
provide reasonable protection against harmful interference in a residential installation.
This equipment generates uses and can radiate radio frequency energy and, if not
installed and used in accordance with the instructions, may cause harmful interference
to radio communications. However, there is no guarantee that interference will not
occur in a particular installation. If this equipment does cause harmful interference to
radio or television reception, which can be determined by turning the equipment off
and on, the user is encouraged to try to correct the interference by one or more of the
following measures:
– Reorient or relocate the receiving antenna.
– Increase the separation between the equipment and receiver.
– Connect the equipment into an outlet on a circuit different from that to which the
receiver is connected.
-- Consult the dealer or an experienced radio/TV technician for help.

Agreement of Usage
About the responsibility of compensation for data loss
Although the data stored in the equipment is precious but the technology could not ensure 100% safety
of the data at present. The falling of equipment, computer virus, fault of equipment hard disk and the fault
of the equipment itself may result in data loss. If the data is lost by any reasons, the manufacturer or the
dealer only assumes the expenses for the repair/replacement of the hardware of this product, and will not
undertake the responsibility to the direct or indirect losses arisen from the data loss in any ways.
About the function relying on the third party
The function of data transmission between this product and the mobile phone depends on the operating
system of the mobile phone. The operating system of the mobile phone will be modified frequently. If the
transmission function becomes inoperative due to the modification of the operating system, it shall be
deemed as force majeure. The user shall not claim against the manufacturer or the dealer for
compensation in any forms on such basis.
If the user disagrees about this Agreement, he/she shall return the unused product to the
manufacturer or the dealer within 7 days after receiving the product, and meanwhile could be
refunded fully. If this product has been used, it shall be deemed that the user accepts this
Agreement.

Safety Instructions
Neither use this product in wet environment nor operate this product with wet hands.
If the liquid enters the product, it is required to turn off the power supply and take out
the battery immediately, and deliver the product to the designated repair shop. Do not
use such product that has been corroded by the liquid. Otherwise, it might lead to
short circuit of battery, and even it could cause fire hazard in serious case.
When recharging the internal battery, please confirm that the charger adapter meets the
safety standards for power supply adapter and ensure that the output power reaches 10W. If
finding peculiar smell, serious heating or smoking on the product itself or the power supply
adaptor, please turn off the power supply immediately, put the product in such places that are
dry and away from the inflammables, and deliver the product to the designated repair shop for
repair after it cools down.
The product would generate a lot of heat after operating continuously. Be sure to place
the product in a well-cooling places. It might cause fire hazard and other potential
safety hazards if the product runs continuously in the places with poor cooling
measures like bedding or sofa etc. The surface temperature of the product may be
higher than the human body temperature if the product is used to transmit data
continuously for extended period of time. Always pay attention to the high
temperature of the product surface.

Table of Contents
Know the Product
Page 1
Page 3
Page 4
Component Name
Turn on the Power Supply/Battery
Charging
Main Functions
Memory Card Backup
Page 6
Page 8
Page 9
Page 10
Full Backup
Incremental Backup
Time Backup
Dual Backup
File Management
Page 11
Page 14
Page 15
File Management
Files Copy in Batch
Connecting to Computer
Data Safety
Page 16
Page 17
Page 18
Page 19
File Synchronization
Images Recovery
Check Health Information (SMART) of
Hard Disk
Password on Boot Setting
Advanced Operations
Page 5
Page 20
Page 21
Page 22
Page 23
Time Setting
Firmware Update
Hard Disk Formatting
Mobile Phone Join WiFi
Backup Setting


Component Name
Top View
Dust Cap
Reset Key
CFast2.0(option)
CF(option)
Power Supply Switch
USB3.0 Host Interface
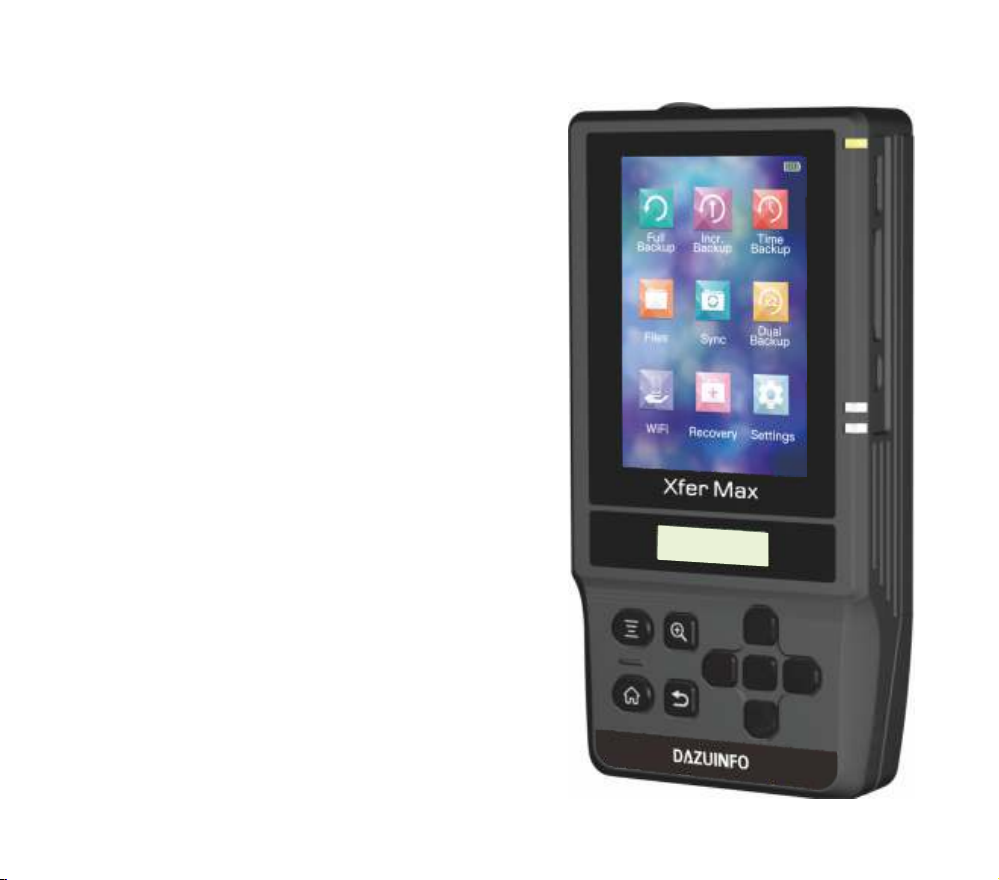
Front View
Hard Disk
Indicator Lamp
Colored LCD
Charge Indicator Lamp
Arrow Keys
Enter Key
Zoom in / Return to
Previous Page
Return to Main Menu
Back
XQD card slot(option)
MicroUSB3.0 Interface SD Slot Charger Interface Battery Compartment
Left Side Right Side
1
Capacity:894.9GB
Free:692.5GB
Monochrome LCD
Menu

Explosive View of Back Side
Replaceable HDD/SSD
Fixing Clip of Hard Disk
Detachable Battery Rear Cap
Detachable Hard Disk Rear Cap
Component Name
Please confirm that the thickness of the hard disk replaced must
be 7.5/9.5/15mm. After replacing the hard disk, ensure that the
fixing clip has been installed properly. Please use qualified 18650
Li-ion battery. The product might not operate properly if the battery
with unqualified material is used.
2

Turn on Power Supply
Push the power supply switch to the left, and hold by about 5s. After
the power supply is turned on, the LCD will display the splash screen.
After the battery is used up, the product will be in
protection state automatically , and the LCD could
not display any contents. Be sure to restart after
recharging the battery by 1 hour.
Battery Charging
If the battery level is too low, the LCD will prompt the information
about running down of battery. Please turn on the product after
charging the battery by 1 hour.
The product contains highly efficient charging chip. Please use
5V/2A charger adapter that meet the safety standard.
Charger Interface
Charge Indicator Lamp
Two yellow lamps: Both batteries are being charged
One yellow lamp and one green lamp: One battery has been fully
charged while another battery is being charged.
Two green lamps: Both batteries have been fully charged.
If the charger adapter power could not reach
5V/2A, the charging period will become
longer. During the charging process, please
ensure that the product is in off state and do
not use this product.
Push the switch by about 5s
3
Capacity:894.9GB
Free:692.5GB
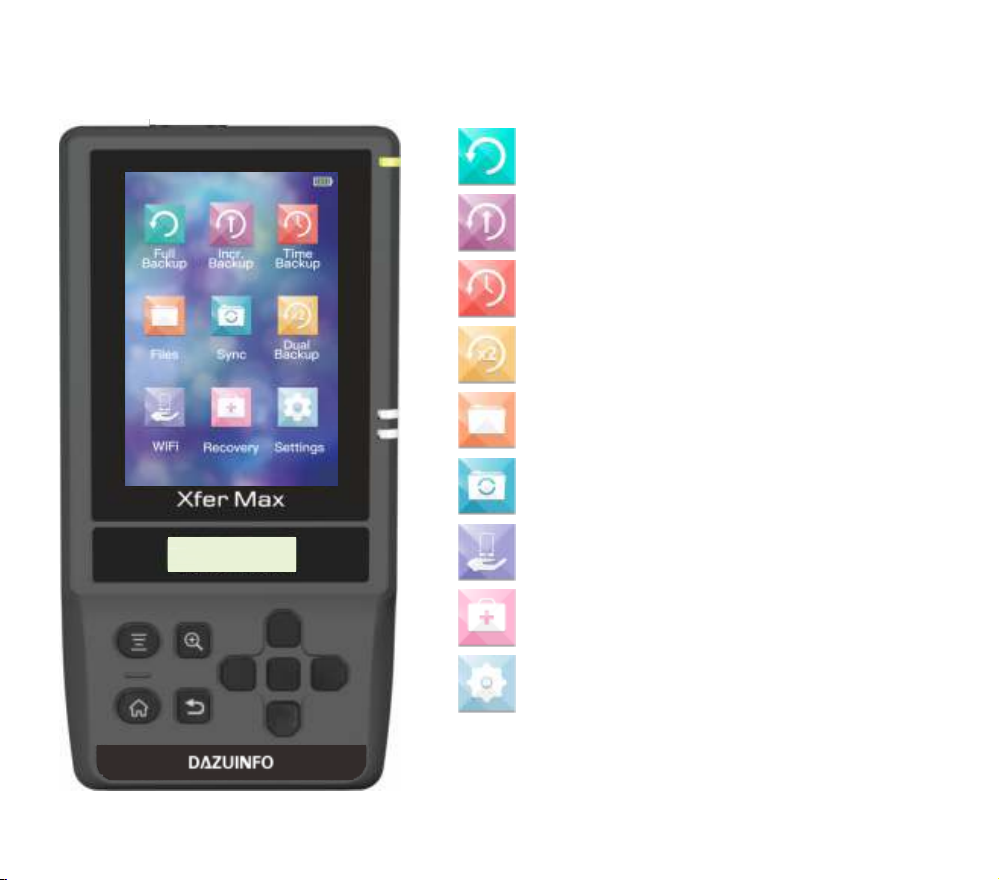
Main Functions
Backup all data in memory card to internal storage
media.
Backup only new data to internal storage media.
Backup all data in memory card to internal storage
media on time basis.
Browse/copy/delete the file
Backup all data in memory card to internal and external
storage media.
Synchronize the internal files to external hard disk
View/download the file on the mobile phone
Recover the images accidentally deleted in the memory
card
Modify system settings
4
Monochrome LCD Functions
1. Display hard disk capacity when the power supply is off or the
LCD is off.
2. Display the progress information during the backup process.
Capacity:894.9GB
Free:692.5GB

Time Setting
When starting this product for the first time, it is required to set correct time for product to operate properly.
Select ‘Settings’ Select ‘Date Time’ Press the middle key to
finish time setting.
5
Capacity:894.9GB
Free:692.5GB
Capacity:894.9GB
Free:692.5GB

Full Backup
Data stored in memory card will be copied to the hard disk completely. After full backup, system will create a folder
with specific name automatically in the hard disk.
Full Backup User Interface
In case of product works with HDD as storage media, please do
not operate during taking vehicles. And prevent it from strong
swing orcollision in the state of working. Otherwise, the HDD
might be damagedwhich would result in data loss and other
serious consequences.
3. Press Middle Key to Start Backup.
2. Select ‘Full Backup’
1. Insert Memory Card
6
Capacity:894.9GB
Free:692.5GB

Full Backup
The LCD will enter OFF state for saving battery and the backup information will be displayed in the small LCD in the
full backup process. The backup progress can be checked on the small LCD by pressing any key. When the LCD is
lit up, pressing the Return key for long time can terminate the backup operation. The files finishing backup will be
reserved. In the backup process, pressing the Menu key can modify the name of the folder. At the end of backup
operation, the power supply for this product will be turned off automatically. If any error occurs in the backup process,
the LCD will display detailed information after this product is started next time.
Backup Progress Modify Folder’s Name Backup Complete
Press Middle key to browse images
Press Menu key to change the
name of folder
Be sure to place the product in a well-cooling
place in the backup process. Do not put this
product in the camera bag or soft fabrics.
If product is in off state when
checking the backup progress, be
sure to turn on this product to verify
whether the backup operation has
been completed properly. 7

Incremental Backup
Only the newly added data in the memory card will be copied into the hard disk. If the memory card is subjected to
incremental backup for the first time, the system will create a new folder in the hard disk and carry out full backup
operation. When the memory card is inserted to incremental backup again, the system will compare the difference and
meanwhile backup the newly added file data into the product.
Second Backup Finished
Two backups will use same folder automatically
Select ‘Incr. Backup’
The system will create a log file in the memory card so as to record its
corresponding backup catalog. If the memory card has been formatted, the log
file also will be deleted and the system will implement full backup automatically.
Backup Finished
8

Time Backup
The data in the memory card will be copied into the folder of corresponding date of the hard disk according to the
time information. For example, the images shot on March 1, 2017 will be copied into the folder '/Time-based
Backup/2017-03-01'. In the time-based backup process, the existing file data will not be backed up by the product.
Select ‘Time Backup’ After backup, select 'Browser'. Browse the images on time basis.
If two images are identical on aspects of file name, shooting
time (second) and size, they shall be identified to be same
image file and will not be backed up repeatedly by the system.
If they are different image files of same name, either image file
will be renamed by the system in the backup process. 9
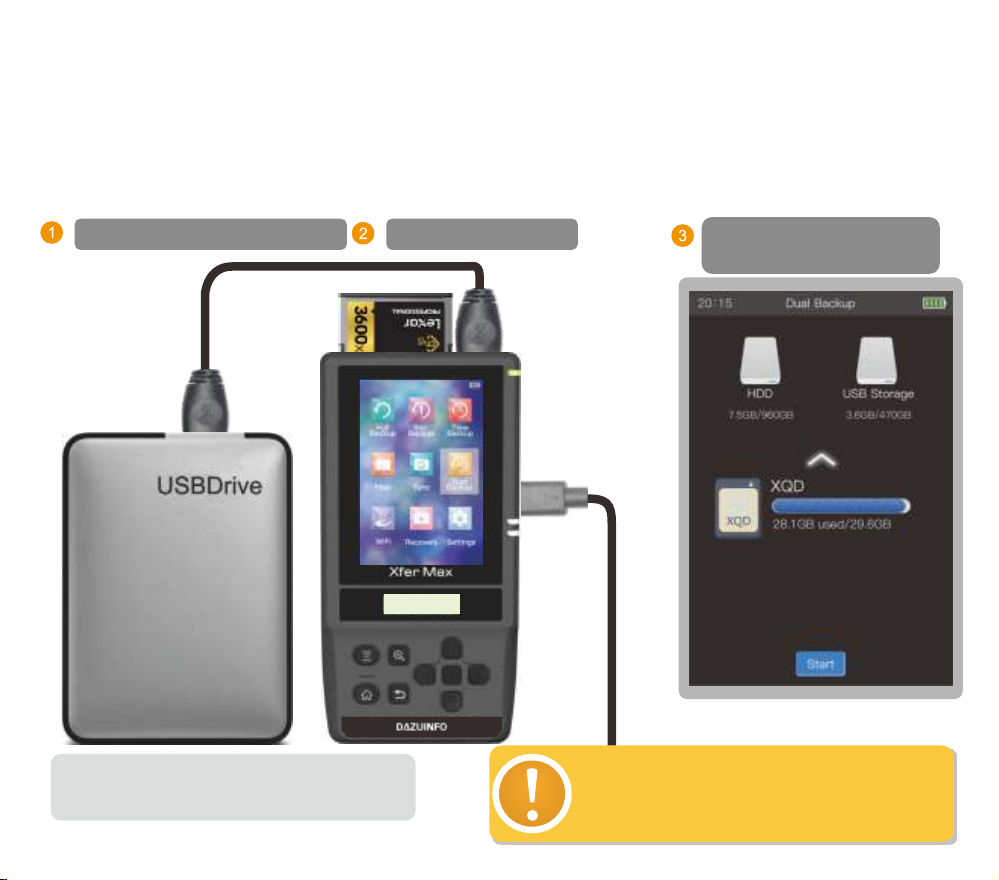
Dual Backup
The data in the memory card can be copied into the internal hard disk and the external hard disk automatically. This
function could provide double safety protection for the user with relatively low cost.
The power of internal battery of the product could not drive two hard disks at the same time. Therefore, it is
necessary to ensure that the charger adapter has been connected properly to the product when carrying out dual
backup operation.
To achieve fastest copying performance, it is necessary to format the external hard disk into ExFAT file system.
Connect hard disk to the product Select ‘Dual Backup’ Press the middle key to start
Dual Backup
5V/2A Charger
In the dual backup operation process, the
CPU and the hard disk of the product will
generate a lot of heat so that the temperature
of the product surface will increase obviously.
Please be careful.
If the battery has almost been used up, it is
necessary to start Dual Backup operation
after recharging the battery by 1h.
10
Capacity:894.9GB
Free:692.5GB
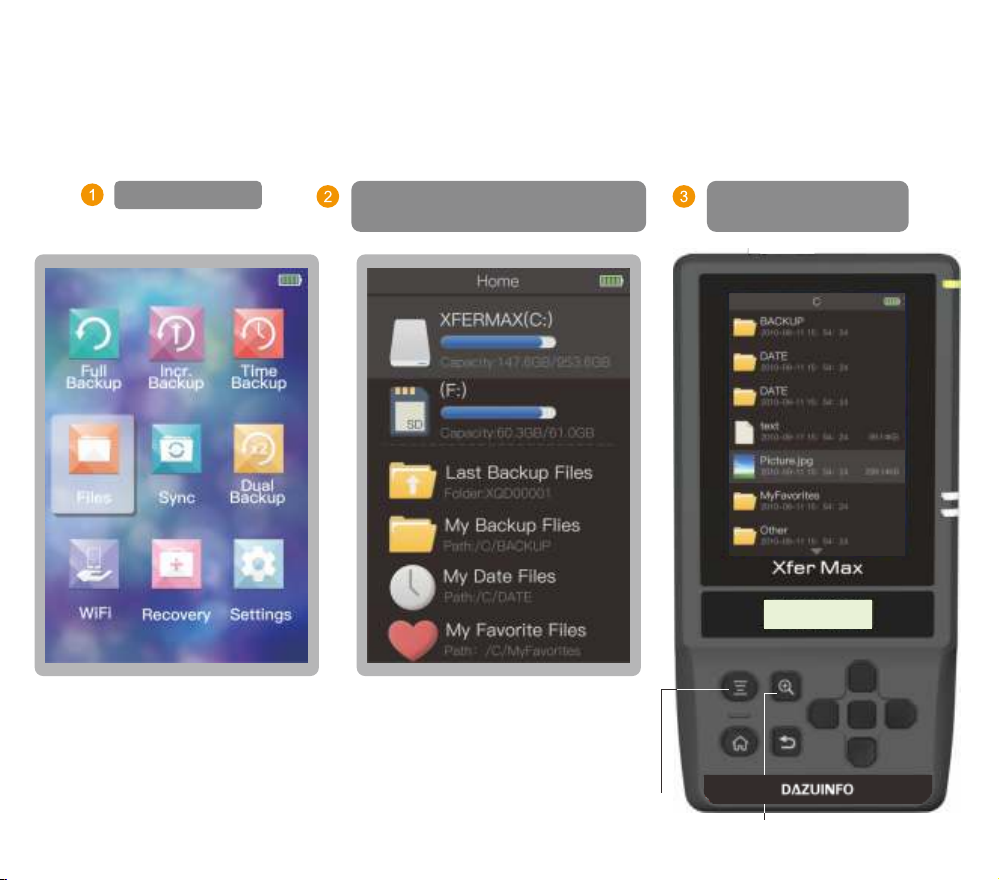
File Management
The file management enable image browse, file copy/pasting and file deletion functions. The images can be picked
up easily without computer.
Select ‘Files’ Press the middle key to open the
selected device or folder
File management in
list mode
File management interface
File management menu function
Browse the image 11
Capacity:894.9GB
Free:692.5GB

Image Browse
The product is designed with dedicated zoom up/down keys. The image may be zoomed up to 100% with single
operation. At this moment, 1 pixel of the image is just corresponding to 1 pixel of the LCD.
Press the middle key to
open the selected image
The product may identify and browse most images in RAW format such as CR2 and NEF etc. But the
resolution ratio and the color of some images in RAW format may be different from those of the computer.
Display EXIF
Zoom up to 1:1
Previous image
Display histogram
EXIF
Histogram
Return
Zoom up Next image
Image browse mode interface
12
Capacity:894.9GB
Free:692.5GB

Image Selection
After entering image browse mode, it is easy to copy the favorite images into the folder “My Favorite Files” of the
hard disk and select favorite images.
Image Browse Mode
Select Finished
Select 'Favorite'
Press Menu key to open
file management
13

Files Copy in Batch
It is allowed to select more than one files for batch copy operations.
After selecting copy
function, the selected
files will be recorded
into the clipboard of
the system.Select the
folder, and paste the
files in the clipboard
into the selected
folder- the file copy is
finished.
Press key display the
file management menu
Select ‘Edit’ Select the file
to be copied
Press key to
display menu
Select copy
function
Select the folder
to be pasted
Press key to
Select ‘Paste’
Batch copy finished
14
Table of contents
Popular Storage manuals by other brands


Thermo Scientific
Thermo Scientific Cryo 740 Series Operating and maintenance manual

Raidon
Raidon SafeTANK GR5640-SB3 user manual

Tandberg Data
Tandberg Data LTO-5 user guide

Seagate
Seagate ST980210A datasheet

Pioneer
Pioneer DE-SH9101 operating instructions

Rocstor
Rocstor ROCPRO 225 Quick installation guide