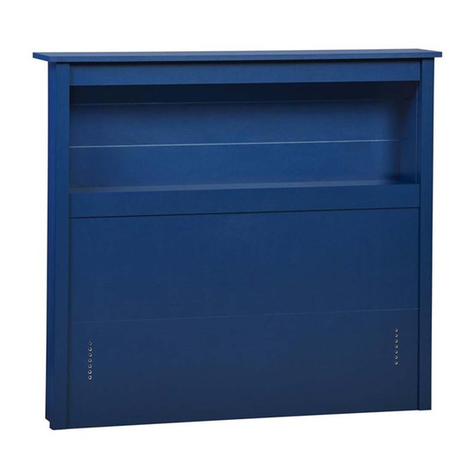
Decoro TILBURY Manual

TILBURY
v 2.0
Bed Frame with Headboard
INSTRUCTION GUIDE
121815-5210 121815-5230
121815-5250 121815-5260

2
WARNING
WARNING!
• Keep small parts out of reach of children.
• Make sure the bed frame’s legs remain in
contact with the ground.
• Do not use this product if parts are miss-
ing, damaged, or worn.
• Do not stand on the product.
• Clean with a sponge and warm soapy
water.
• Never use abrasives or chemicals to
clean.
• Do not use solvent-based cleaners or
detergents as they can bleach or damage
the product.
• For wood beds, vacuum or brush with a
soft brush on a regular basis. Spot clean
with a clean damp cloth.
• Read these instructions carefully and
retain for future reference.
• Due to the size of this product, we recom-
mend assembling it in the room intended
for use
• Check the packaging and make sure you
have all the parts listed on this sheet.
• Before use, make sure the product is fully
assembled and the screws and bolts are
tightened
• Do not tighten screws until fully assem-
bled and do not over-tighten screws or
bolts
• Additional tools not included. Do not use
power tools to construct this product.
• This product should only be used on firm,
level ground.
• Do not destroy the packaging until after
the product is fully assembled.
• To transport, please dismantle Platform
Frame.
• Do Not jump on the bed.
•If possible, use two people to assemble
frame.
¡ADVERTENCIA!
• Mantenga las partes pequeñas fuera del
alcance de los niños.
• Asegúrese de que las patas del marco de
la cama permanezcan en contacto con el
suelo.
• No utilice este producto si faltan piezas,
están dañadas o desgastadas.
• No se pare sobre el producto.
• Limpiar con una esponja y agua tibia
jabonosa.
• Nunca utilice productos abrasivos o
químicos para limpiar.
• No utilice productos de limpieza o
detergentes a base de disolventes, ya que
pueden blanquear o dañar el producto.
• Para camas de madera, aspire o cepille
con un cepillo suave regularmente. Limpiar
las manchas con un paño limpio y
húmedo.
• Lea atentamente estas instrucciones y
consérvelas para futuras referencias.
• Debido al tamaño de este producto, le
recomendamos que lo monte en la sala
para uso.
• Revise el empaque y asegúrese de tener
todas las piezas enumeradas en esta hoja.
• Antes de usar, asegúrese de que el pro-
ducto esté completamente ensamblado y
que los tornillos y pernos estén apretados.
• No apriete los tornillos hasta que estén
completamente ensamblados y no apriete
demasiado los tornillos o pernos.
• Herramientas adicionales no incluidas. No
utilice herramientas eléctricas para constru-
ir este producto.
• Este producto solo se debe utilizar en
terrenos firmes y nivelados.
• No destruya el embalaje hasta que el pro-
ducto esté completamente ensamblado.
• Para el transporte, desmonte el Marco de
Plataforma.
ATTENTION!
• Gardez les petites pièces hors de la
portée des enfants.
• Assurez-vous que les pieds du cadre du
lit restent en contact avec le sol.
• N’utilisez pas ce produit si des pièces
manquent, sont endommagées ou usées.
• Ne vous tenez pas sur le produit.
• Nettoyer avec une éponge et de l’eau
tiède savonneuse.
• N’utilisez jamais d’abrasifs ou de produits
chimiques pour nettoyer.
• N’utilisez pas de nettoyants ou de déter-
gents à base de solvants, car ils pourraient
blanchir ou endommager le produit.
• Pour les lits de bois, passez régulièrement
l’aspirateur ou une brosse douce. Net-
toyer les taches avec un chiffon propre et
humide.
• Lisez attentivement ces instructions et
conservez-les pour référence ultérieure.
• En raison de la taille de ce produit, nous
vous recommandons de l’assembler dans la
pièce destinée à être utilisée.
• Vérifiez l’emballage et assurez-vous que
toutes les pièces sont répertoriées sur cette
fiche.
• Avant utilisation, assurez-vous que le
produit est complètement assemblé et que
les vis et les boulons sont bien serrés
• Ne serrez pas les vis avant d’être com-
plètement assemblées et ne serrez pas trop
les vis ou les boulons
• Outils supplémentaires non inclus. N’uti-
lisez pas d’outils électriques pour fabriquer
ce produit.
• Ce produit ne doit être utilisé que sur un
sol ferme et plat.
• Ne détruisez pas l’emballage avant que le
produit ne soit complètement assemblé.
• Pour le transport, veuillez démonter le
cadre de la plate-forme.
Have a question? Please contact Customer Service at 877-707-7533 for the quickest service. We are open Monday -
Friday from 9:00 a.m. - 5:00 p.m. (EST) or you can email us at
¿Tengo una pregunta? Comuníquese con el Servicio al cliente al 877-707-7533 para obtener el servicio más rápido.
Estamos abiertos de lunes a viernes de 9:00 a.m. a 5:00 p.m. (EST) o puede enviarnos un correo electrónico a
Avoir une question? Veuillez contacter le service clientèle au 877-707-7533 pour obtenir le service le plus rapide. Nous
sommes ouverts du lundi au vendredi de 9h00 à 17h00. (EST) ou vous pouvez nous envoyer un email à

3
PARTS
Headboard Legs
Sideboard
Footboard Legs
Front Rail
B-3X
Support Rail
Center Rail
Center Leg
Slats
Screw
Allen Wrench
Center
Screw
J-22X
I-1X K-1X
A-2XC-2XD-1X
E-2X
F-2X
G-1XH-2X

4
ASSEMBLY INSTRUCTIONS
STEP 1
FRONT HEADBOARD ASSEMBLY:
Lay headboard legs (A & A) flat on
floor. Screw the front rail (B) and
Support rail (E) into the holes in the
side of the headboard legs. The
rails should cover the flanges on
the headboard legs. Use screws (J)
to fasten.
A
A
B
E
A
STEP 2

5
STEP 3
ASSEMBLY INSTRUCTIONS
E
C
x 2
C
C
FRONT FOOTBOARD ASSEMBLY:
Lay headboard legs (C& C) flat on
floor. Screw the support rail (E)
into the holes in the side of the
footboard. Use screws (J) to fasten.

6
STEP 4
ASSEMBLY INSTRUCTIONS
x 4
E
F
A
C
C
E
E
F
F
A
C
ASSEMBLE THE SIDEBOARD:
Attach both sideboards (F) to the assembled
headboard and footboard. Flanges on the
sideboard should face inward and velcro
should face upwards. Fasten with screws (J)

7
STEP 5
STEP 6
ASSEMBLY INSTRUCTIONS
ASSEMBLE THE
CENTER RAIL: Attach
the center leg (D) to the
center rail (G) using the
center screw Lift the
center rail (G) and push
down to lock into place
on the support rails.
Tighten with center
screw (I).
ATTACH THE SLATS:
Attach to the frame by
laying slats on the velcro
on the side rails.
G
E
G

8
10.00
MATTRESS
HEIGHT
0.56" < (3" MAX)
ENTRAPMENT
DISTANCE
4.00"
MATTRESS
HEIGHT
10.08" > (3" MAX)
ENTRAPMENT
DISTANCE
MATTRESS
HEAD BOARD
BED SAFETY GUIDE
HEADBOARD
MATTRESS
BED AND MATTRESS
ASSEMBLY
WARNING!
The Entrapment distance cannot be
greater than 3-Inches. Entrapment
Distance is the gap between the highest
point of the Mattress and the lowest
point of the Headboard. Mattress should
be sized accordingly.
BED AND MATTRESS ASSEMBLY - SIDE VIEW
BED AND MATTRESS ASSEMBLY - SIDE VIEW
¡ADVERTENCIA!
La distancia de atrapamiento no puede
ser superior a 3 pulgadas. La distancia de
atrapamiento es la brecha entre el punto
más alto del colchón y el punto más bajo
de la cabecera. El colchón debe tener el
tamaño adecuado.
ATTENTION!
La distance de piégeage ne peut pas
dépasser 3 pouces. La distance de
piégeage est la distance entre le point le
plus haut du matelas et le point le plus
bas de la tête de lit. Le matelas doit être
dimensionné en conséquence.
Other Decoro Indoor Furnishing manuals
