DEGEN DE1128 User manual
OPERATION MANUAL
FM STEREO AM SW DSP RECEIVER
MP3 PLAYER
DIGITAL RECORDER
REPEAT
LOUDSPEAKER
support firmware upgrade, please visit
http://www.degen.com.cn
DE1128
This unit is limited to Asia and Russian region

DE1128 unit
Operation Manual
Lithium Battery
USB Cable
Line-in Cable
Accessories

CONTENT
LOCATION OF CONTROLS............................................ 1
BATTERY POWER SUPPLY
........................................ 4
....................... 4
ADAPTOR CHARGING ..................................................... 5
CHARGING BY PC............................................................ 5
USING STRAPS............................................................. 6
USING BACKSTAND...................................................... 6
POWER ON/OFF........................................................... 7
FM RADIO
CHOSE BANDS.......................................................... 8
SELECT FREQUENCY RANGE.................................. 8
FM STEREO/MONO SELECTION................................ 9
VOLUME ADJUSTMENT............................................. 9
TUNE IN STATIONS
ANTENNA RECEPTION.............................................. 9
MANUAL/AUTO TUNING.......................................... 10
AUTO TUNING STORAGE(ATS)................................. 10
DIRECTLY INPUT FREQUENCY ................................ 11
STORING STATIONS MANUALLY............................... 12
LISTENING TO STORED MEMORY............................ 12
DELETE SINGLE/ALL MEMORIES............................. 13
FM RDS.................................................................. 14
RECORD RADIO....................................................... 15
LISTEN TO MP3 FILES
PLAY/PAUSE/STOP................................................. 16
SELECT REPEAT MODE.......................................... 16
SELECT EQUALIZER............................................... 16
SELECT TEMPO RATE............................................. 16
LYRICS DISPLAY..................................................... 16
LISTEN TO THE FILES IN THE SD CARD................... 17
DELETE FILES........................................................ 18
REPLACING THE BATTERY
BATTERY CONSUMPTION INDICATION
CHARGING THE BATTERY

CONTENT
A-B REPEAT
REPEAT..................................................................... 19
READ AND CONTRAST............................................... 1 9
USE AS AN ACTIVE LOUDSPEAKER(LINE-IN)........... 20
USE AS LOUDSPEAKER(MIC) ................................... 21
MIC RECORDING
SELECT REC TYPE.................................................... 22
START/PAUSE/STOP.................................................. 22
LISTEN TO RECORDED FILES.................................... 23
WORKING WITH EBOOK............................................. 24
SYSTEM SETTING
TIME SET................................................................... 26
DATE SET.................................................................. 26
CALENDAR INFO........................................................ 26
ALARM SET
NORMAL ALARM SET............................................. 27
ALARM ON............................................................ 28
(MIC RECORD/RADIO/MUSIC AUDIO/RADIO RECORD)
ALARM OFF.......................................................... 28
ALARM ACTIVATED/DEACTIVED............................ 28
BACKLIGHT TIMER.................................................... 29
LANGUAGE SELECTION............................................ 29
SLEEP TIMER............................................................ 29
POWER OFF MODE.................................................... 30
CONTRAST SETTING................................................. 30
MEMORY INFO.......................................................... 30
DATE FORMAT.......................................................... 31
TIME FORMAT........................................................... 31
FIRMWARE UPGRADE............................................... 32
KEY LOCK....................................................................... 33
SPECIFICATION.............................................................. 34
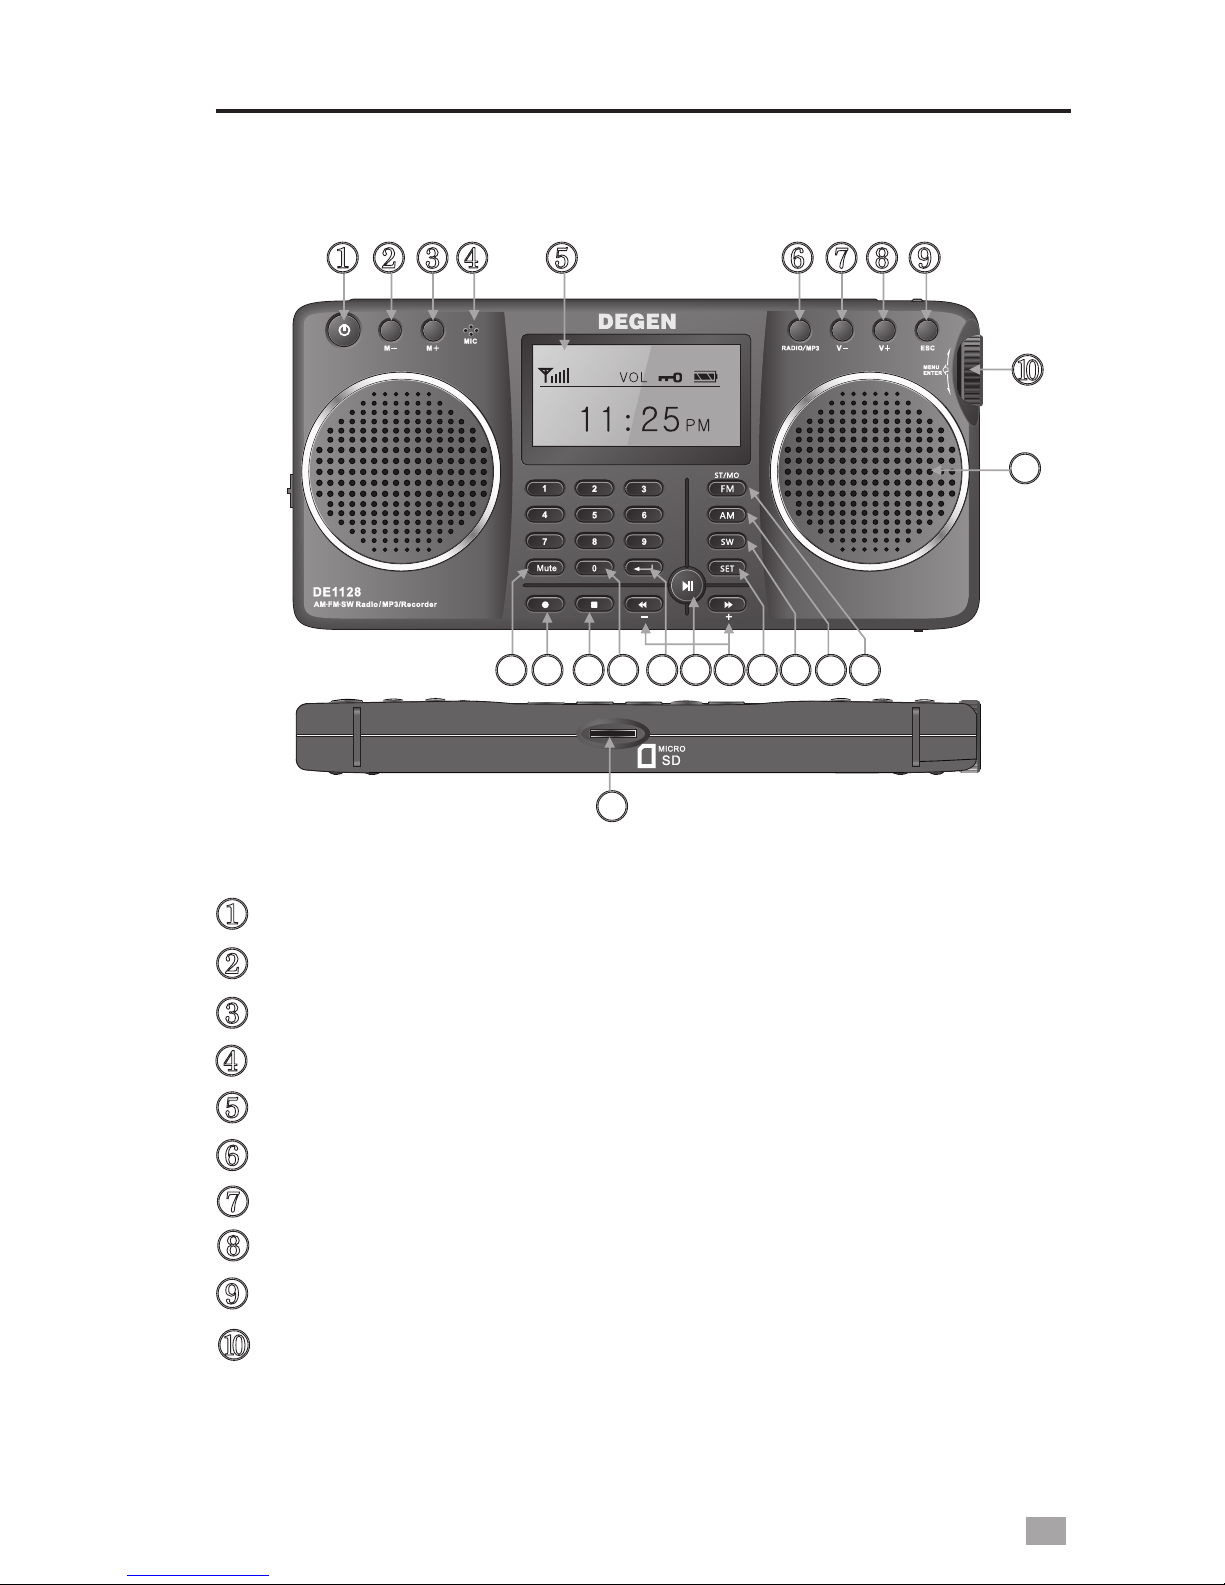
LOCATION OF CONTROLS
1
2 3
Volume -
In Radio Mode: M-
Radio/Music Mode Selection
Power On/Off
Volume +
In Radio Mode: M+
Escape/Main Menu
Tuning Knob: Rotate to Tune,
Press to Confirm/Enter
Display
Built-in MIC
1 1
1 2
1 3
1 4
1 5
1 6
1 7
1 8
1 9
2 02 12 2

2
LOCATION OF CONTROLS
1 3
1 2 FM Stereo/Mono Selection
In A-B Repeat Mode: Repeat
SW Button (press in SW mode to change M Bands)
In Music Mode: Enter Repeat Mode Selection
In A-B Repeat Mode: Contrast
Next Song/FF/Frequency +
Preview Song/REW/Frequency -
1 4
1 6
1 7
1 5
2 2
1 8
1 9
2 0
2 1
Play/Pause
2 3
Mute Button: Turn off speakers
AM Button
In Music Mode: Enter Sound Quality Mode Selection
In A-B Repeat Mode: Read
Speaker: Dual Stereo Speaker
1 1
Confirm/Enter Input
No. Buttons 0~9
Record Button
Hold: Directly Start Recording
Stop Button
MICRO SD Card Slot
Set Button: Enter Submenu
In Radio Mode: Confirm Memory Location Input
In Loudspeaker Mode: Line-in/Mic Signal Selection

3
LOCATION OF CONTROLS
Antenna
Battery Compartment
(Behind the Stand)
Back Stand
Earphone Port
Line-In Port
Tuning Knob
Mini-USB (Power In) Port
Lock/Unlock Radio
Strap Hole
External MIC Port
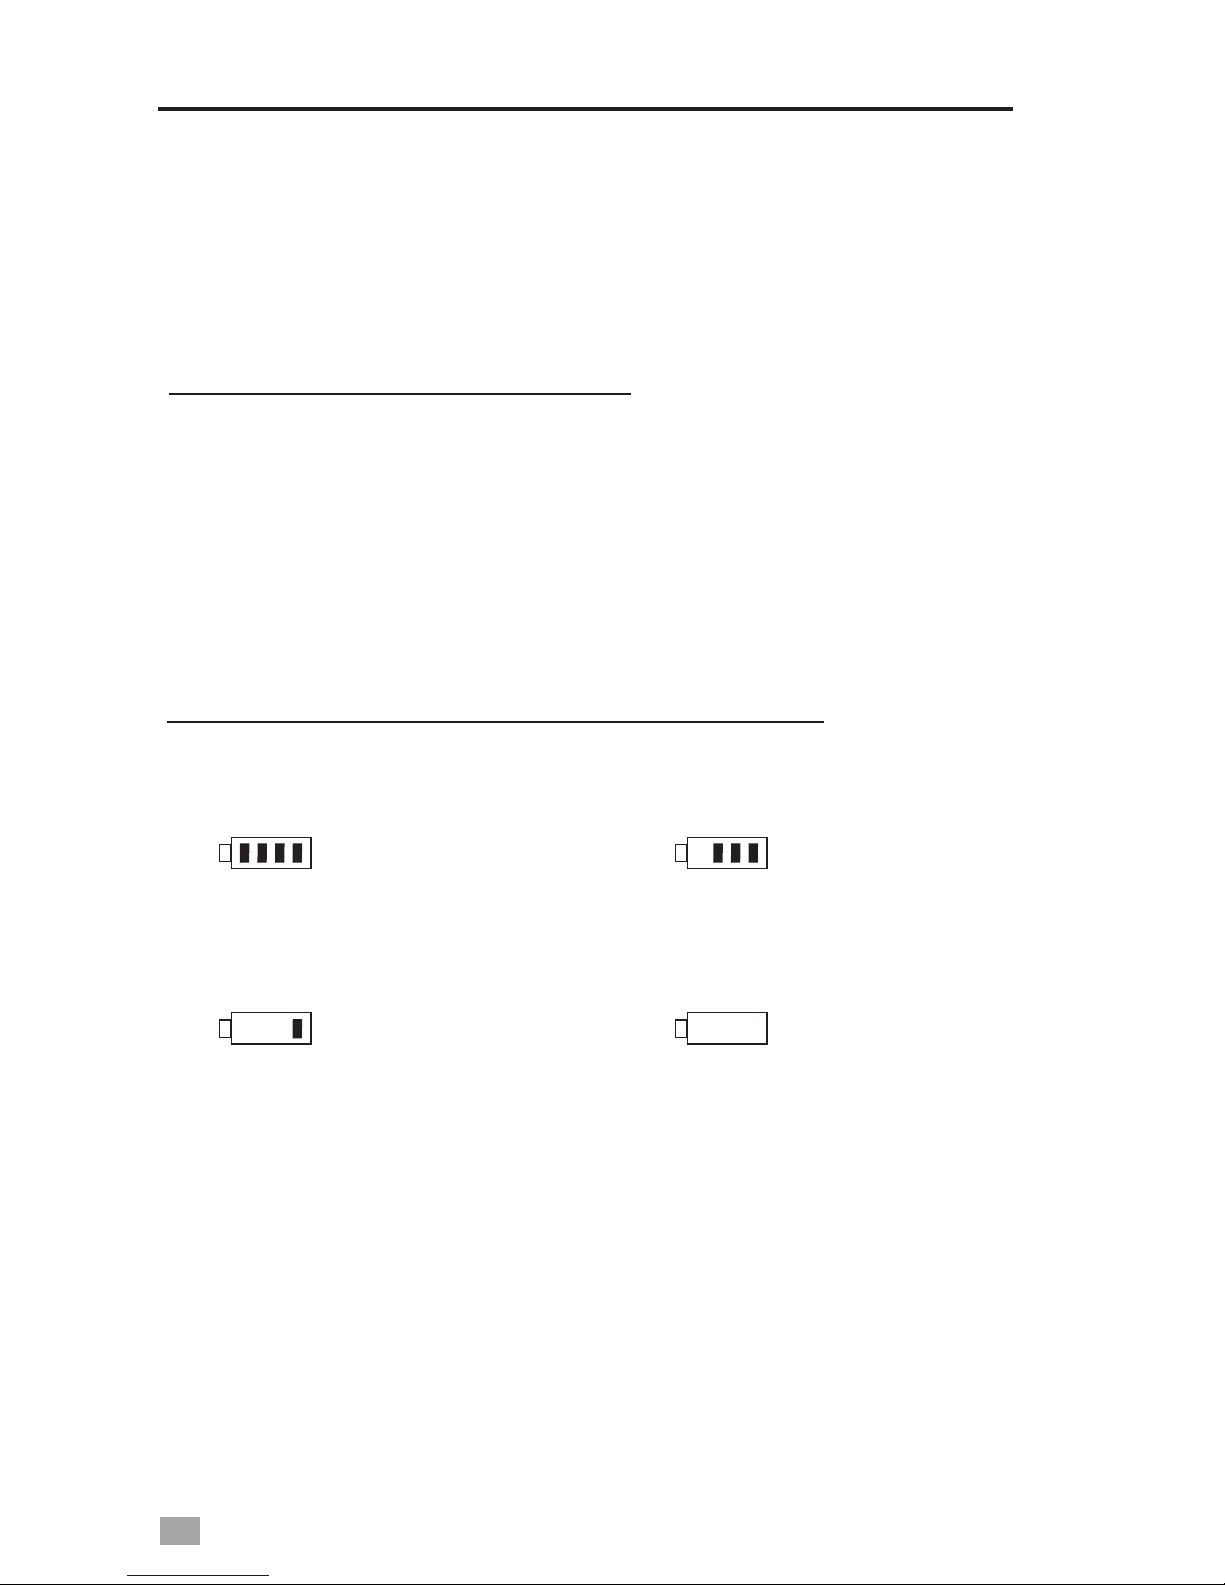
1. Full
4. Exhausted
2. Medium
3. Low
4
BATTERY POWER SUPPLY
Before initial use, open the battery compartment (behind
the back stand), make sure the lithium battery is installed.
INSTALLING THE BATTERY
1. Turn off the unit and open the battery cover.
2. Install the provided lithium battery according to the battery
polarity.
3. Close the battery cover.
BATTERY CONSUMPTION INDICATION

USB Jack
Left Side
5
CHARGING THE LITHIUM BATTERY
To charge the battery, connect the unit to the mini-USB port
and opposite end to a power source(5V DC/≥500mA, not
provided). While charging, the battery symbol shown on the
display “ ” moves from right to left, and stops when the
battery is full charged.
A computer with a USB jack can also be used as a power
source to charge the battery.
After installing the lithium battery, connect the unit and the
computer with the provided USB cable to charge the battery.
Note: 1. Please turn off the radio while charging the battery
to avoid interference. Do not turn on the unit when
the adaptor output current is less than 500mA.
2. After fully charging the battery, please first disconnect
the USB cable before turn on the radio.
3. Prior to first use, fully charge and drain the battery
three times to extend the battery’s life.
Caution: Do not use the unit when charged by PC, to avoid
damage to PC power.

6
USING STRAPS
USING BACK STAND
Open the stand on the rear of the unit to allow for an
upright position.
USING STRAPS

7
MAIN MENU
1. Turn ON/OFF manually: Press the < > button.
2. Turn off using automatic Sleep Timer: Select “Sleep Timer”
in Sys set mode, press the Tuning Knob to enter and then
rotate the Tuning Knob to adjust to auto turn off timer from
0~90 minutes.
3. Auto Turn Off: The unit will turn off automatically in 3
minutes if not in either Recording, Music or Radio playing
mode.
Note: If the unit can not be turned on, please check the
battery or the key lock button.
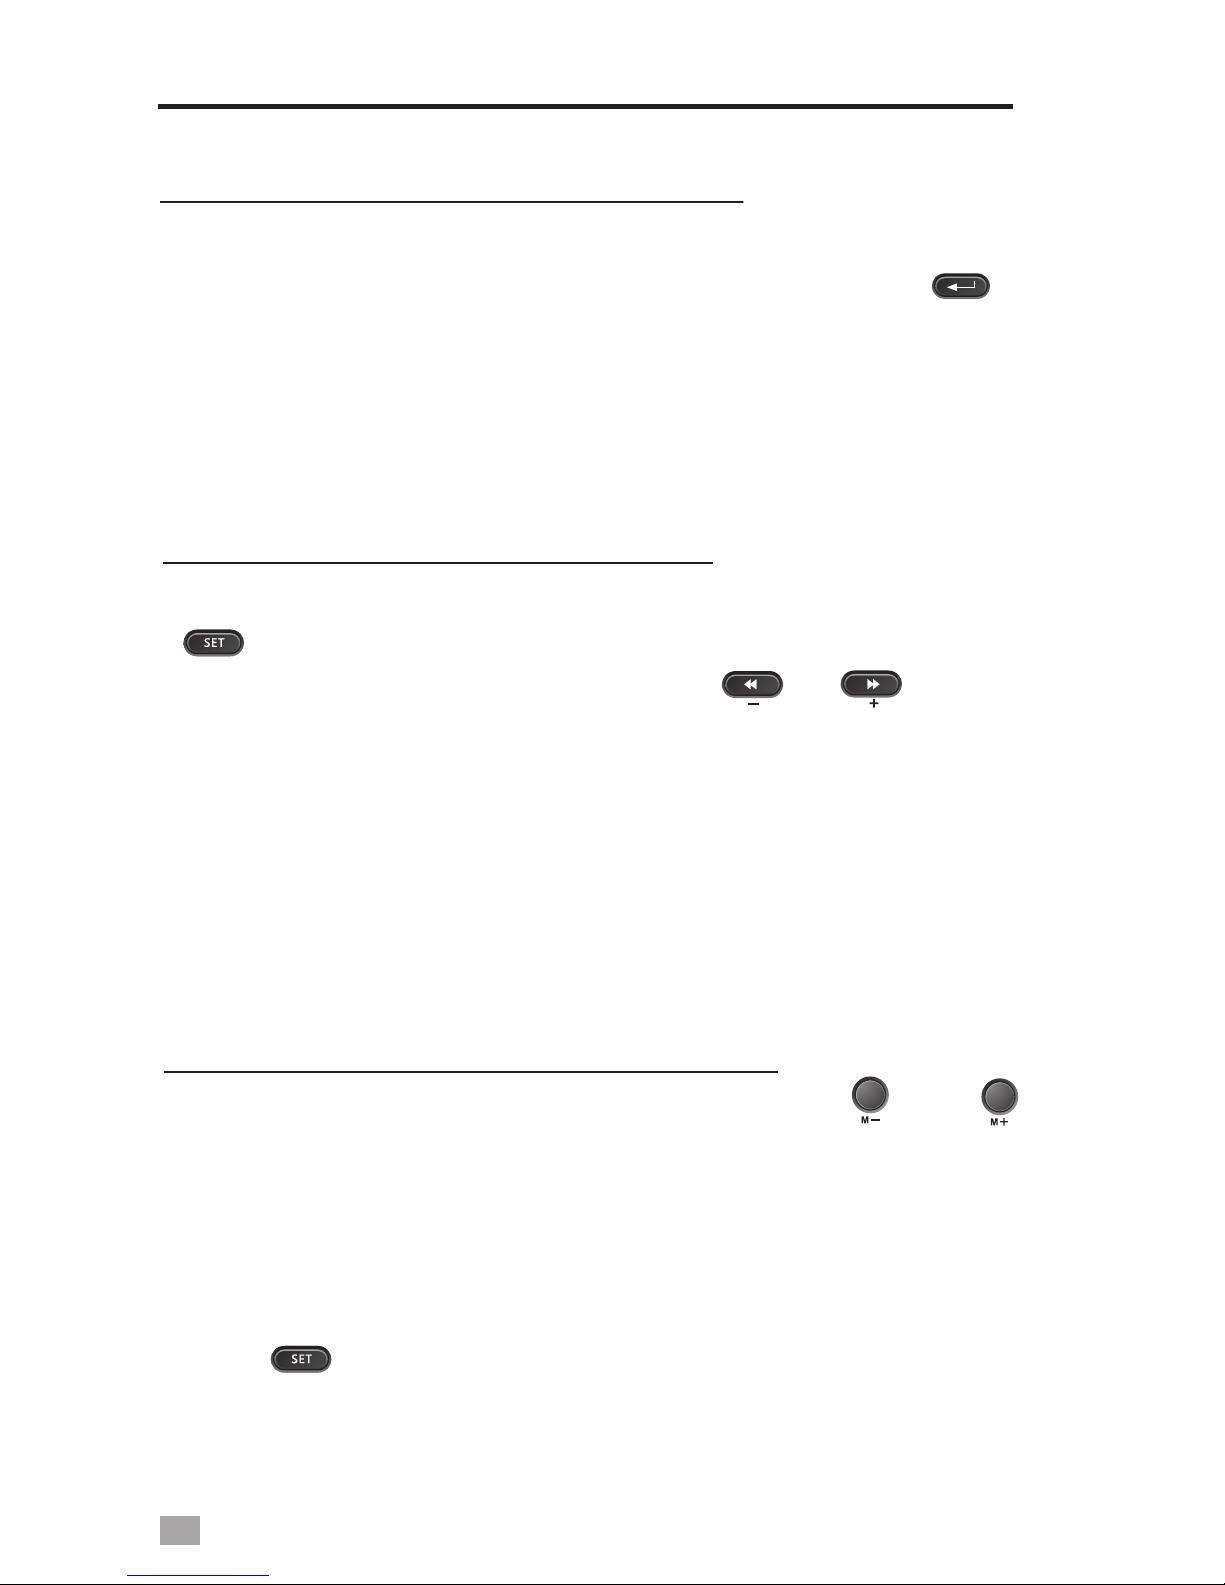
TURN ON/OFF THE UNIT
MAIN MENU
In any Mode, press the< >button can go back to Main
Menu.
In Main Menu mode, rotate the Tuning Knob or press the
< > or < > button to select either of below function
and press the Tuning Knob to enter.
FM Radio: FM/AM/SW Radio
Music: MP3 music play mode
MIC Record: MIC Recording mode
Voice Play: Recording file play mode
Ebook: Text reading mode (Support TXT)
Loudspeaker: Expand the sound
A-B Repeat: Repeat, Read and Contrast
Sys Set (system setting): Time set, date set, calendar info,
alarm set, backlight, language, sleep timer, power off mode,
contrast, memory info, firmware version, firmware upgrade,
date format, time format, exit.
Radio
SELECT
Main Menu

FM RADIO
CHOOSE BANDS
8
In Main Menu, select FM Radio by press the Tuning Knob to
listen to FM.
Press the < > button to enter either Radio or Music Mode.
89.8
FM
M02
MHz
06
Radio
SELECT
FM Radio
CHOOSE BANDS
In Radio Mode, press the Tuning Knob or < > button to
enter radio menu. Rotate the Tuning Knob or press the
< >,< > button to select either of the below functions:
- Save: Manual store the station into memory from 1~50
- Record: Select 129k/40k BPS direct radio recording
- Delete: Delete single memory
- Delete all: Delete all stored memory
- ATS: Auto tunes and store all stations into memory
- Normal Band: 87~108MHz
- Japan Band: 76~90MHz
In Radio Mode, press the< >,< > or< >
button to select your desired band. The top left corner
of the display will show the band you are listening to.
When listening to SW, press the < > button can
change <m> bands.
Repeat Follow Contrast
Contrast

TUNE IN STATIONS
9
- School Band: 64~108MHz
- Open RDS: Press to Open/Close RDS
- Update RDS time:
- AM Spacing Switch: Repeatedly press to select 9K/10K
tuning step and direct enter AM listening
9K Frequency range: 522~1710KHz
10K Frequency range: 520~1710KHz
- Exit
Syn the RDS time to the unit
Note: <Open RDS> and <Update RDS time> only appears when
using FM Radio
<AM Spacing Switch> only appears when using AM
Radio.
FM STEREO/MONO SELECTION
To activate stereo listening, press the < > button
and the display will show < > symbol; press again to
deactivate, and the mono symbol < > will show.
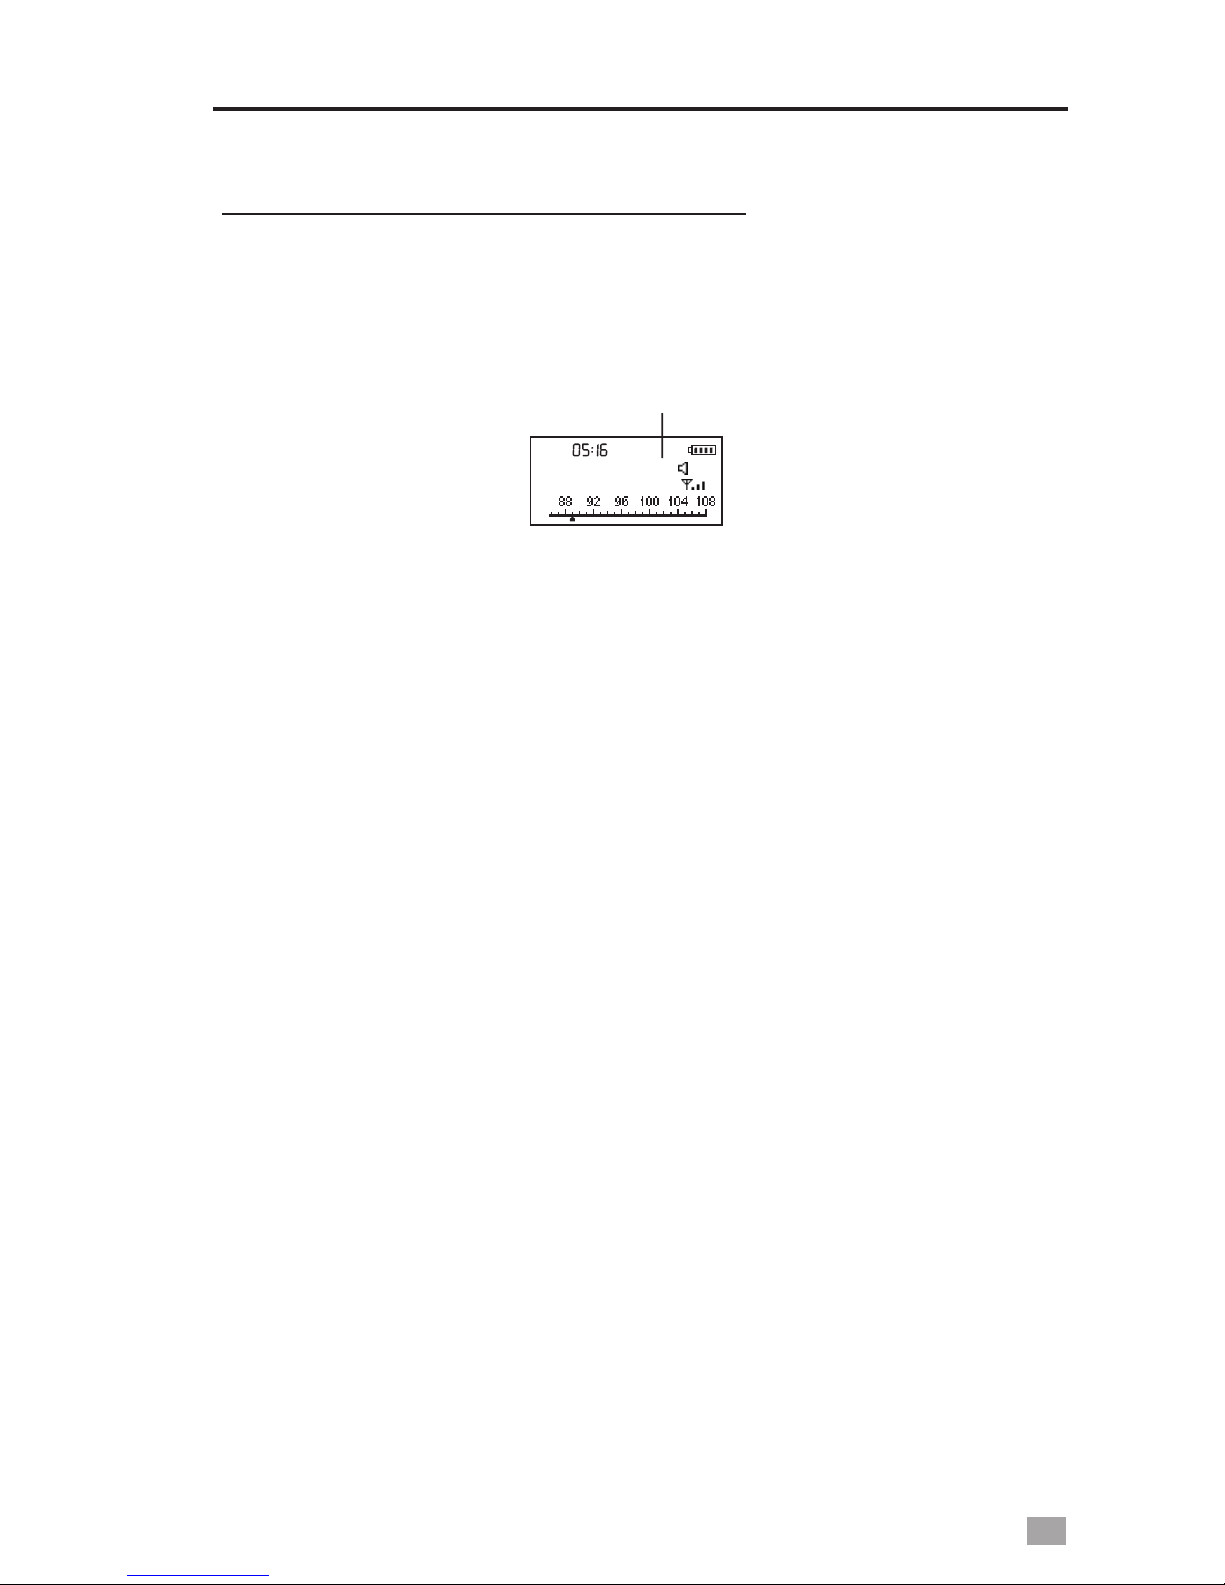
VOLUME ADJUSTMENT
Press the < > or < > button to adjust your desired
volume level, the display will show the volume level.
Repeatedly press the < > button to turn on/off the
speakers.
ANTENNA RECEPTION
1. It only works when listen to FM and SW.
2. When listen to FM or SW, you can change the length of
the antenna according to the signal intensity to get better
reception.
Repeat

TUNE IN STATIONS
10
USING BUILT-IN ANTENNA
1.It only works when listen to AM Broadcast..
2. While listening to AM station, rotate the radio to find the
position which gives the best reception, as the built-in
ferrite bar is located inside the unit and it is strongly
affected by the direction of placing of the unit.
MANUAL TUNING
Turn on the radio and select FM Radio from <Main Menu>
by rotating the Tuning Knob. Press the Tuning Knob to enter,
then choose your desired band by pressing on either the FM,
AM or SW button.
Using either of the methods below to tune into your desired
station:
1. Rotate the Tuning Knob or press the < >,< >
button.
Volume Level (0~31)
Signal Intensity
06
M02
MHz
89.8
PMFM
Band Symbol
Frequency Display
Frequency Point
2.Press and hold the < > or < > button for about
two seconds, then release to auto tune into the next
available station.
TUNE IN STATIONS
11
AUTO TUNING STORAGE(ATS)
In radio mode, press the Tuning Knob and rotate it to select
<ATS>. Press the Tuning Knob again to start auto scan and
store the available stations within the memories.
Memory Location
06
M50
MHz
89.8
FM
Memory Locations:
FM/SW(ATS): M51 ~ M99
AM(ATS): M26 ~ M50
Note: 1. To have better reception, go near a window or outdoor
when using ATS function.
2. Do not use ATS while charging the unit to avoid interference.
TUNE IN STATIONS
12
DIRECTLY INPUT FREQUENCY
STORING STATIONS MANUALLY
In Radio Mode,
corresponds to a station’s frequency, and then press < >
button to directly enter.
press the number on the keypad that
Note: When listening to <m> bands, it is invalid if your input
is out of the frequency range.
Select your desired station, press the tuning knob or the
< > button and rotate the Tuning Knob to select <Save>,
then rotate the Tuning Knob or the < >,< > button
to select memory location from 1~50 in FM/SW mode or
1~25 in AM mode. Press the Tuning Knob again to confirm.
Memory Locations:
FM/SW(manual storage): M1 ~ M50
AM(manual storage): M1 ~ M25
LISTENING TO STORED MEMORIES
1. After storing stations into memory, press the < > or < >
button with the memory address M01~M99 shown on the
display(next to the frequency) to select your desired station
memory.
2. In radio mode, press the number on the keypad that
corresponds to a station’s memory number, then press
the < > button to enter the stored station.

13
TUNE IN STATIONS
DELETE SINGLE/ALL MEMORIES
Press the Tuning Knob in radio mode, and rotate the
Tuning Knob to select either <Delete> or <Delete All>
and press the Tuning Knob again to delete single
memory or all memories.
FM RDS
14
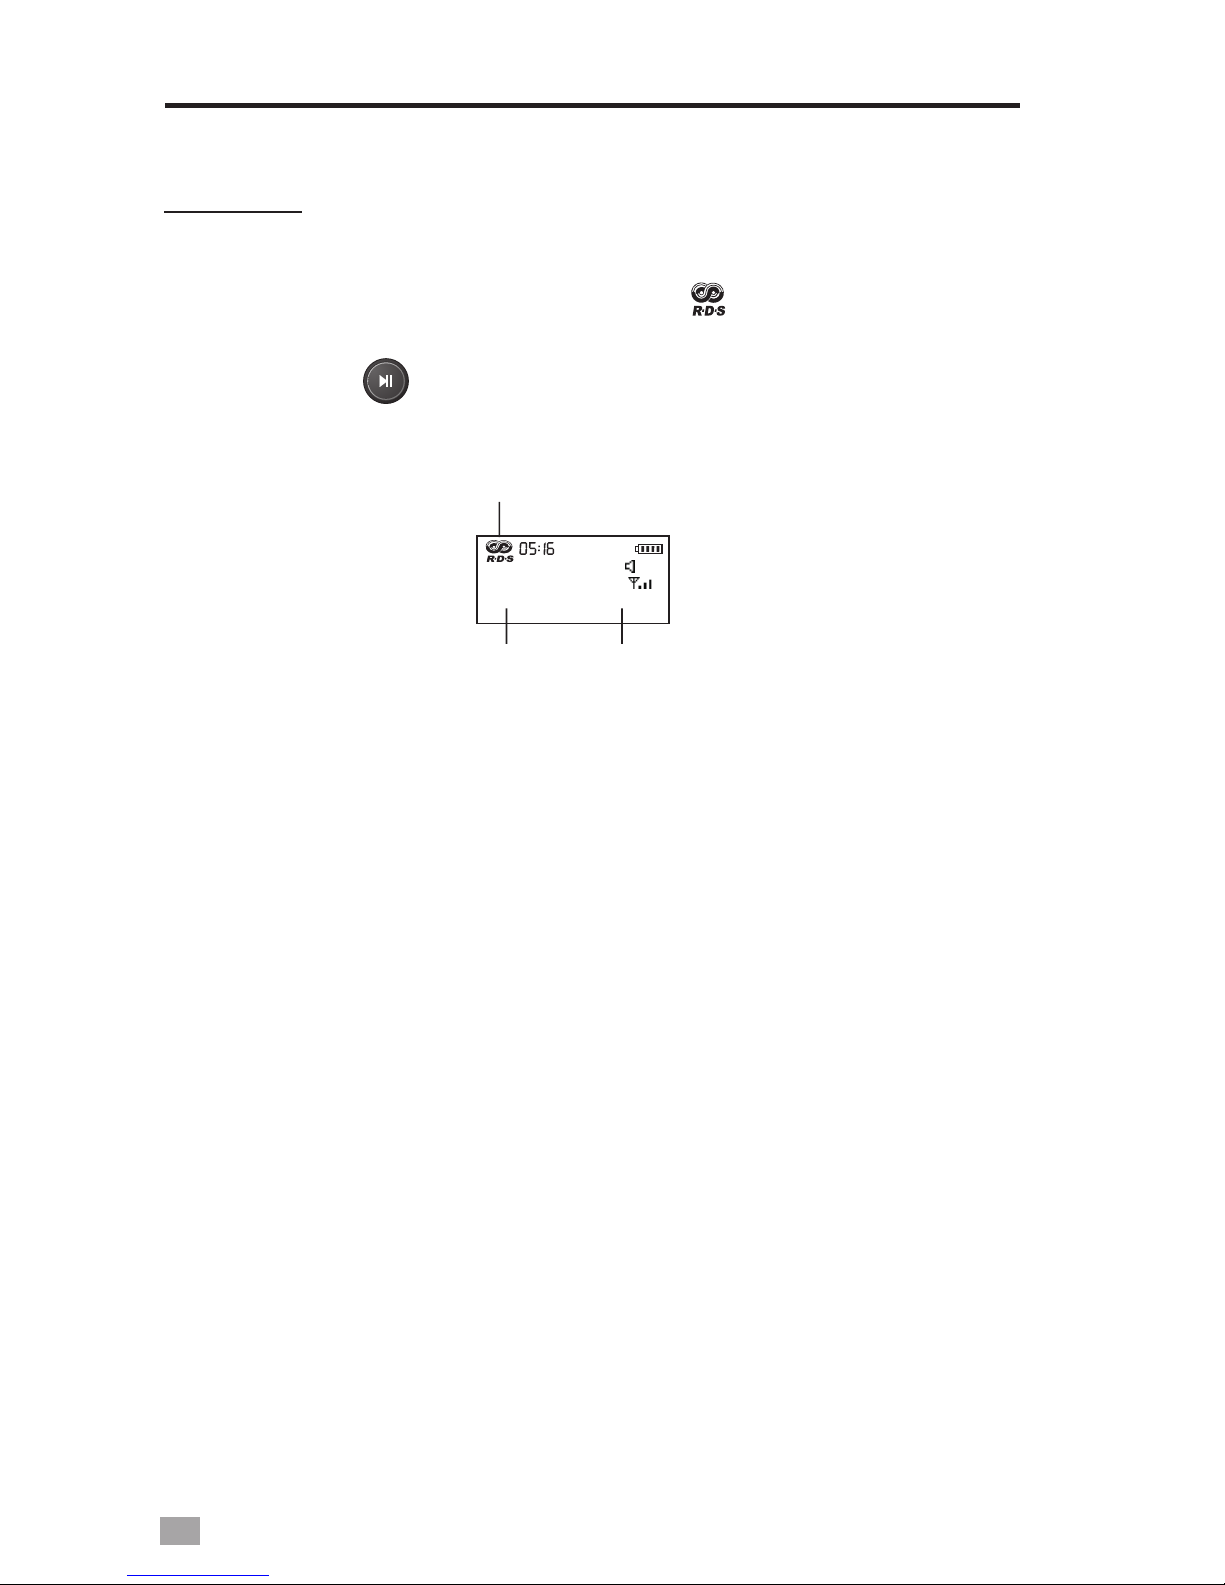
1. Select an FM station, press the Tuning Knob and rotate to
select <Open RDS>, the symbol < > will show on the
display.
2. Press the < > button to shift the transmitted details
(display on the bottom of the screen).
FM RDS
87.8
M50
MHz
06
PTY
info. SZ87.8
RDS is on
PS
3. Update RDS time: If the RDS time is correct, you can
update the RDS time to your radio by press the Tuning
Knob and rotate to select <Update RDS Time>.
4. Press the Tuning Knob and rotate to select <Close RDS>
to turn RDS off.
PTY: Program Type
PS: Station Name
RT: Station Text Message (Only display if the station has
transmitted)
CT: Update RDS time (wait about 2-3 minutes to get the
RDS time)
Note: 1. You can receive the RDS information only if the
station has this function.
2. You can get the complete RDS information when
the signal is full. If the RDS signal is weak, please
find another location to receive clear reception.

15
RECORD RADIO
RECORD RADIO
While listen to the FM/AM/SW stations, you can directly
record the programs by following the steps below:
1. Adjust the volume level up to 10 (minimum).
2. Press the Tuning Knob and rotate it to select either of
below recording formats:
- 129k BPS (WAV format, max 68 hours, 4G,)
- 96k BPS (Mp3 format, max 215 hours, 4G)
3. Press the Tuning Knob to confirm your selection and
start recording. The timer on the display starts to count.
4. Press the < > button to pause and press it again to
restart, press the < > button to stop and auto store
the recorded file into the memory.
All recorded files can be located in the <Voice> folder of the
<Main Menu>.
Note: A shortcut to the recording function is to directly press
the < > button, recording format is according to your
last selection.
16
LISTEN TO MP3 FILES
1. Turn on the unit and select <Music> from the “Main Menu”,
then press the Tuning Knob to enter.
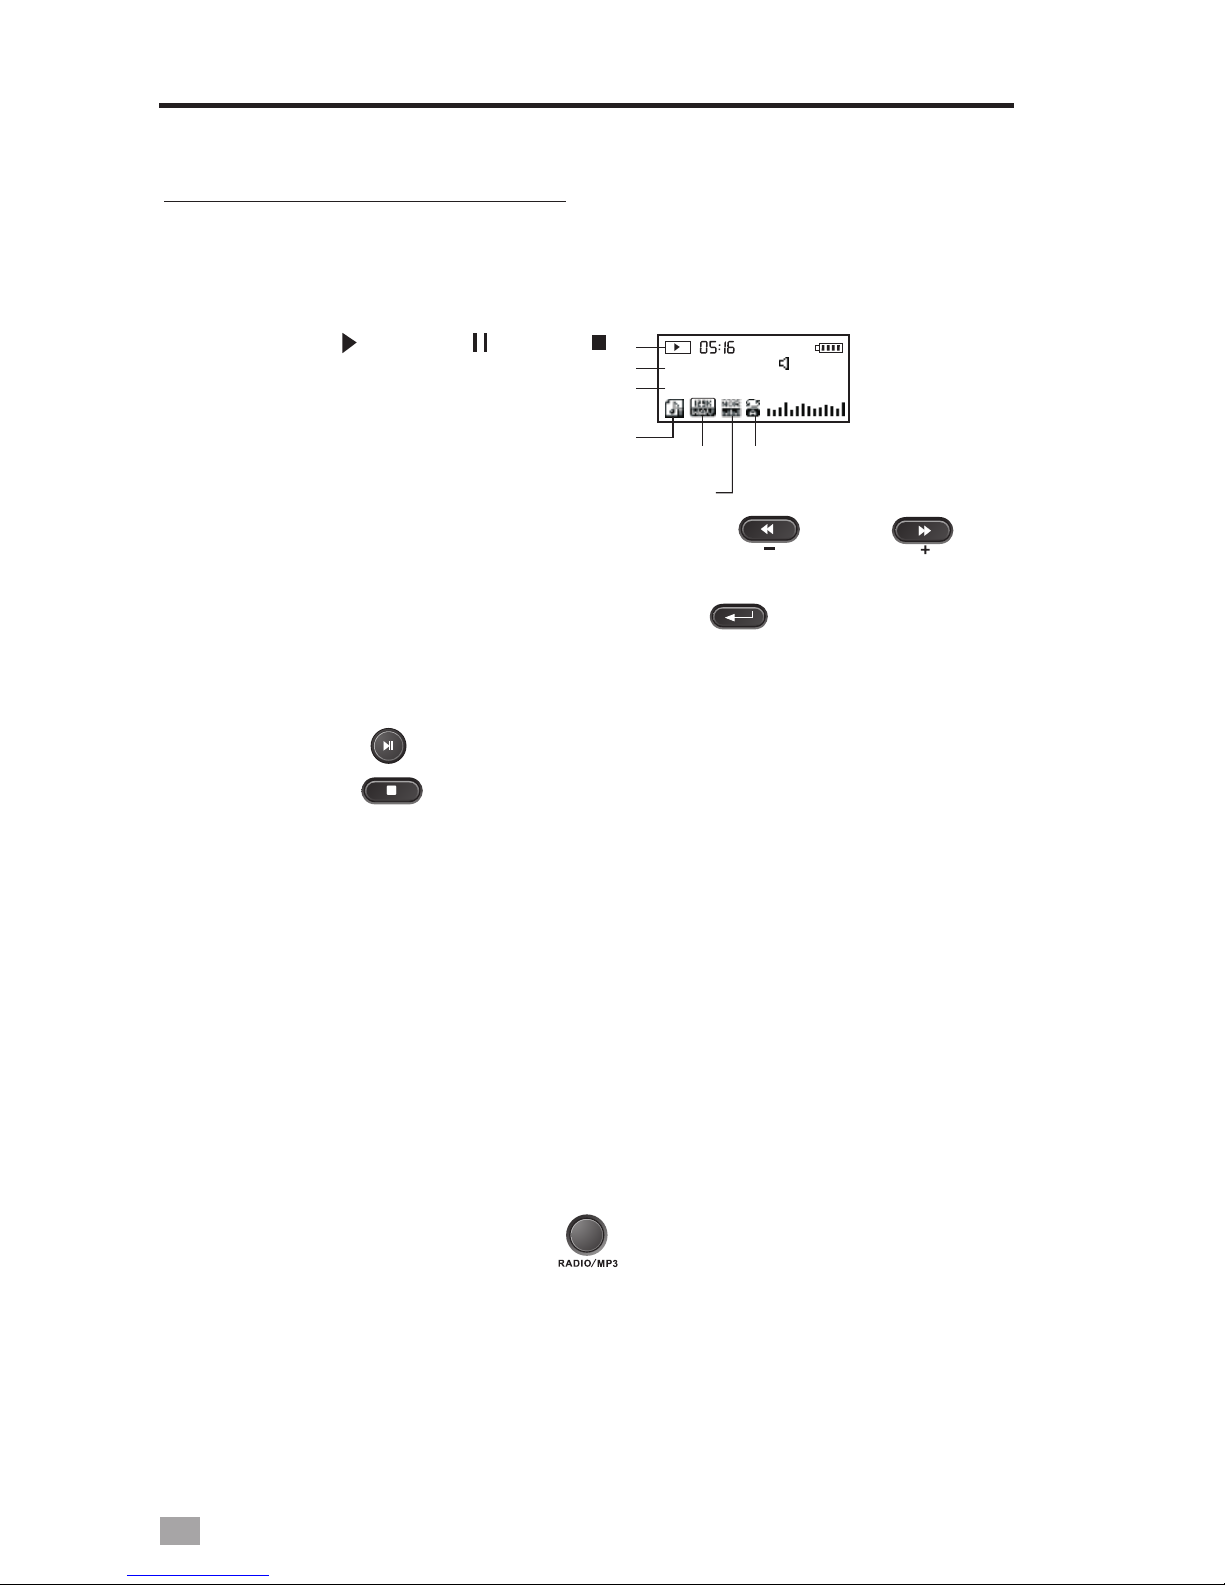
LISTEN TO MP3 FILES
PM
003 00:01:57
Gaga Poker Face
Play( ) Pause( ) Stop ( )
No. of the Music Files
Name of the Song and players
“T” refers to LRC available
format and Kbps
Sound Quality Mode
Repeat Mode
18
2. Rotate the Tuning Knob or press the < > or < >
button to select music file. You can also directly enterl the
No. of the music file and press the < > button to enter.
To search for a particular song, you can press the Tuning
Knob in Stop Playing Mode and select Local folder to find.
3. Press the < > button to play, press it again to pause;
press the < > button to stop.
4. While playing music file, press the Tuning Knob to enter the
following settings:
- Repeat: Normal, Repeat One, Repeat All, Random
- Equalizer: Natural, Rock, Pop, Classic, Soft, Jazz, Bass,
3D sound
- Tempo rate: -8 to 8 levels
- Lyrics: Press the Tuning Knob to turn on/off
- Exit
Note: 1. A shortcut to the Music playing in radio mode is to
directly press the < > button.
2. The Lyrics must be in LRC format, use the same
name as the song, and it must be located in the
same folder.
Table of contents
Other DEGEN MP3 Player manuals


