Delta Audio Titan User manual

TITAN I User manual
Delta Audio 2014/5
Page 2
TITAN I User manual
1. Installation
2. Speed calibration
3. Operation
4. Arm board
5. Tonearm
6. Clamp
7. Maintenance
8. Technical data
3
4
5
6
6
6
7
7
Table of Contents
Delta Audio 2014/5
DEAR CUSTOMER
Delta Audio is proud to welcome you in the world of highest engineering
standards and guides you in a new level of performance to the turntables
at this price range.
Titan I is the outcome of 2 years development and It is a first turntable in
Delta audio products range. Designed for the reproduction of natural
music in conjunction of safe operation, perfect long-time stability and we
are sure it will accompany you with musical pleasure for many years.
Thank you for selecting DELTA audio Titan I turntable
Declaration of conformity
Page 3
TITAN I User manual
fig.4
fig.5
Delta Audio 2014/5
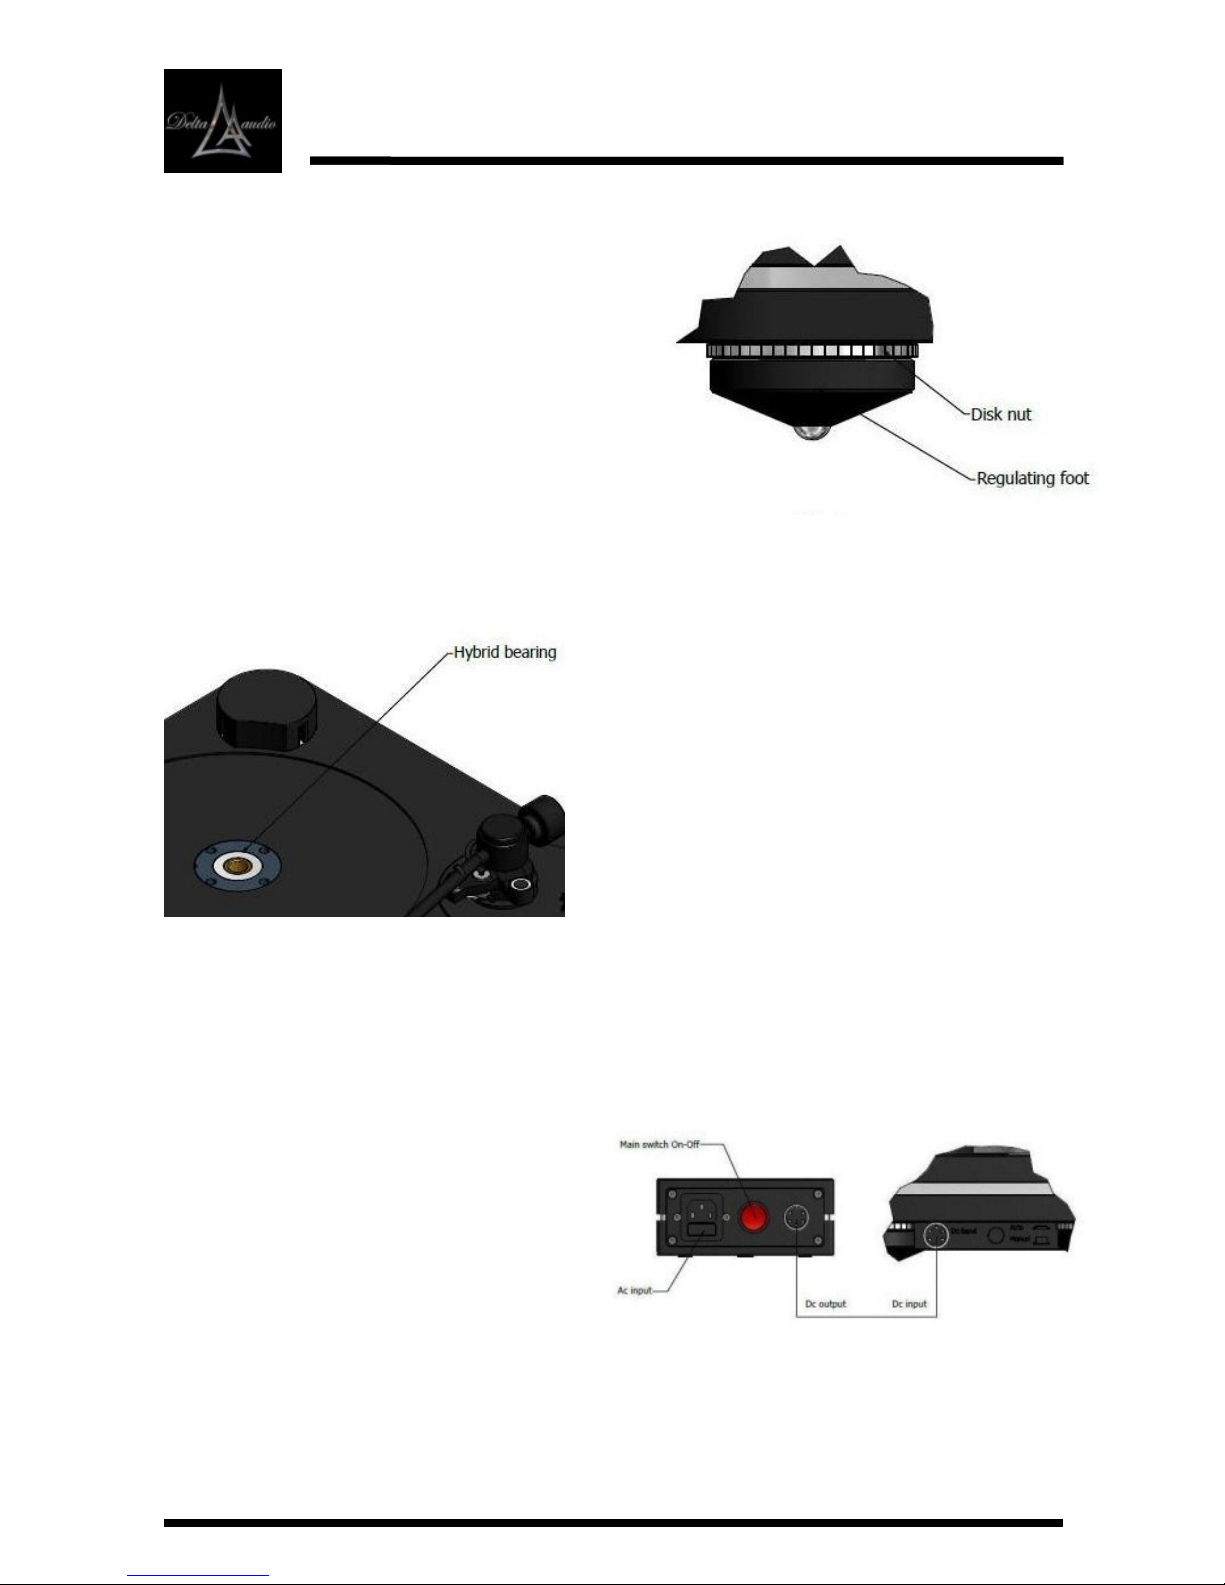
1. Installation
Place first the chassis on a clean
and soft surface. Please pay
attention, that the turntable has
been correctly adjusted in
horizontal and vertical level. The
three regulating feet A1-A3 will help
you with this by using a spirit level.
Then tight the disk-nut as shown in
the fig.4.
With the syringe insert the
specified amount of oil within
the bearing and placed the ball.
Unpack and place the platter
carefully on the bearing which is
mounted in the turntable chassis,
fig.4a below. Important notice:
Please behave gently during the
platter placement at the bearing,
because too much pressure will
cause problem at the bearing housing.
Place first the belt on the platter and
then on pulley.
Connect the power supply chassis
to the Delta Audio turntable
chassis with the umbilical cable
which is provided, as shown in the
fig.5 below.
From power's supply output plug
to the input plug on the turntable.
Connect the power cord to the
main wall plug or to the power
distributor.
fig.4a
Page 4
TITAN I User manual
fig.6
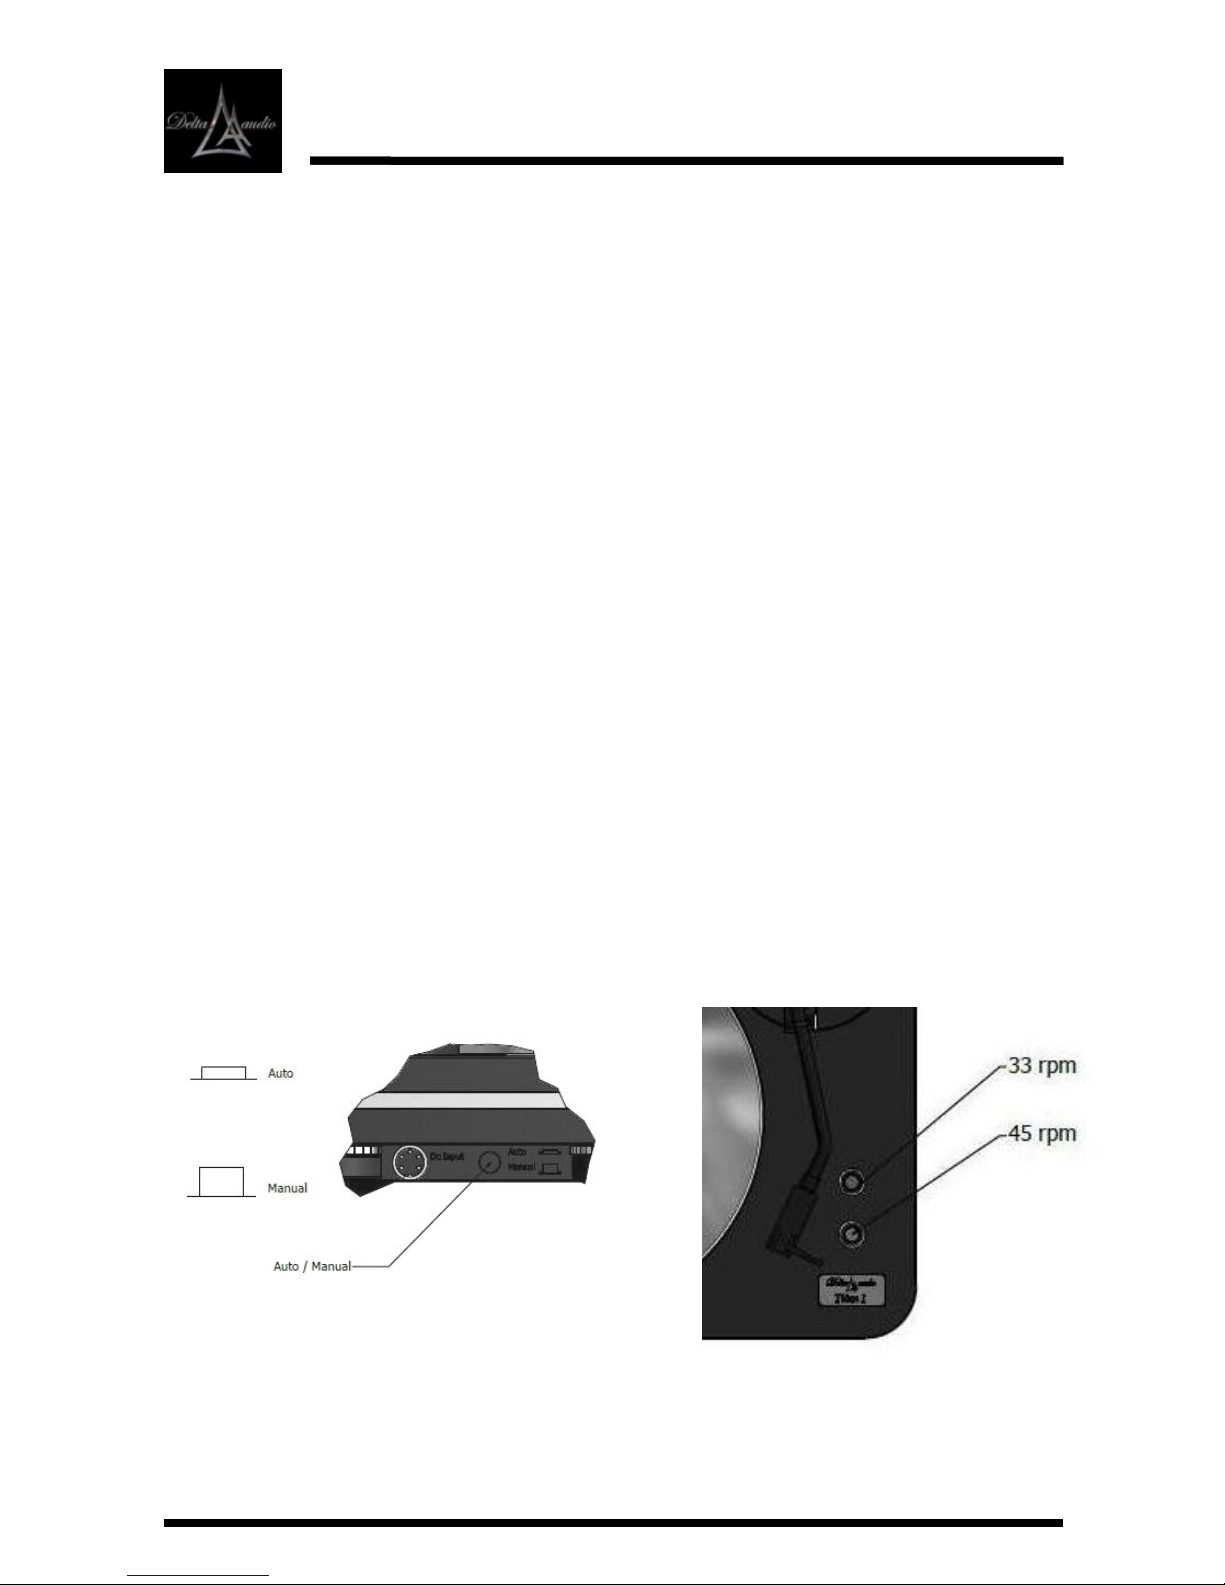
2. Speed calibration
1. Set the AUTO/MANUAL switch to MANUAL which is placed on the rear side
of the turntable. Fig 6
2. Push the selection speed 33 button ( for regulating speed 33 rpm ) or 45 (
for regulating the speed 45 rpm ) for more than ten seconds to enter to the
set-up process speed. In this mode the indicator light is blinking, Fig.7
3. Press momentarily on the following button 33 rpm, repeatedly to increase
the speed (+).
4. Press momentarily on the following button 45 rpm, repeatedly to decrease
the speed ( –).
5. Until it is set. (In this mode we use a strobe disc).
6. Then press the 33 button (or 45 for regulating the speed 45 rpm) until the
indicator stops flashing to save the setting speed.
7. Set the AUTO/MANUAL switch to AUTO.
8. In AUTO position the speed is automatically controlled at real time with
micro sensor under the platter, starting from the speed which is saved in
manual position.
Delta Audio 2014/5
fig.7
Page 5
TITAN I User manual
Delta Audio 2014/5
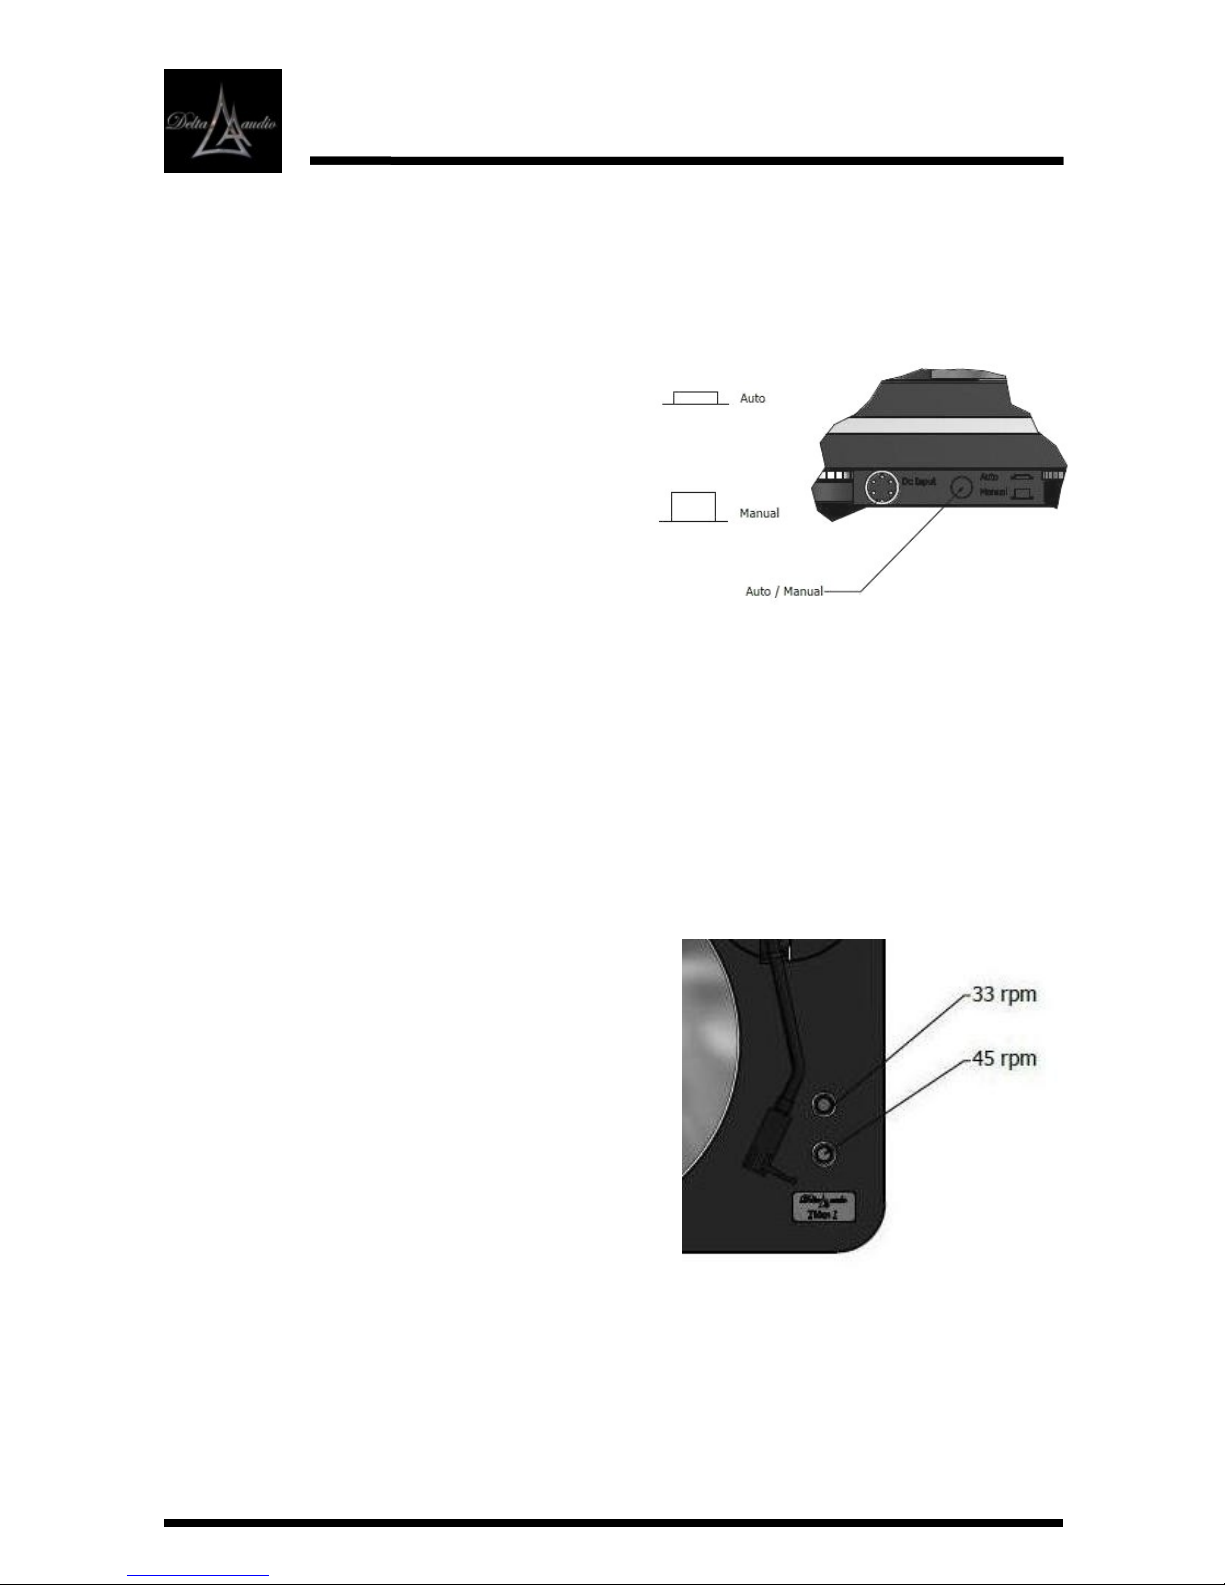
3. Manual speed Operation
1. The turntable is ready to operate
after turning ON the main switch
at the back side of the
transformer, as shown in the fig.5
2. Set Auto/Manual switch which is
positioned at the rear side of
turntable in Manual position, as
shown in the fig.7
3. Start by pressing the button 33 or
45 rpm, in this mode the indicator
light illuminates steadily.
4. Stop by pressing and hold the
same button.
As shown in the fig. 7a below.
3a. Auto speed Operation
1. Set Auto/Manual switch which is
positioned at the rear side of
turntable in Auto position, as
shown in the fig.7
2. Start by pressing the button 33 or
45 rpm. In this mode the indicator
light flashes when the speed is not
accurate, and remains on steady
when corrected. (This can occur
momentarily several times,
depending on the circumstances).
3. Stop by pressing momentarily the
same button.
As shown in the fig. 7a below.
fig.7a
fig.7

Page 6
TITAN I User manual
6. Clamp & Hybrid bearing
The magnetic nature of the bearing reduces the friction and the weight of the
stainless steel shaft is transferred to the walls (bronze sleeves), resulting in
much smoother rotation with the least possible torque, like the platter floats.
The conventional side is evident in the Clamp, whose designated weight both
stabilizes the vinyl disk on the surface and, in addition, puts optimal pressure
to the shaft so that it contacts the ceramic ball.
fig.9 Delta Audio 2014/5
5. Tonearm installation
Jelco SA 250 tonearm is included in the package, please follow the
manufacturer's instructions for its right placement on the armboard.
4. Armboard
The armboard as shown in the fig. 8 is
made to accompany Linn standard
tonearm between 9 –10 in.
* On demand we prepare the armboard
to accommodate any tonearm (208-250
PSD ) available in the market.
fig.8

Page 7
TITAN I User manual
Construction type:
Platter bearing:
Clamp:
Platter:
Power Supply
Drive unit:
Speeds:
Speed variation:
Weight:
Dimensions:
Warranty:
Massive layered chassis various damping, low
resonance.
Belt drive
Hybrid (Magnetic & Conventional with ceramic ball)
Record Clamp 730 gr. with spirit level
Aluminium, with high purity surface ( Mass 3,7 Kg )
Separate power supply 230 Ac Volt –9Volt
Dc motor with amplifier
33 rpm / 45 rpm
± 0,1 % with manual or auto control
Approx. 27 Kg ( depend on the equipment )
450 mm x 385 mm x 165 mm
5 Years
8. Technical Data
Delta Audio 2014/5
7. Maintenance & Special instructions
Please fill out the enclosed warranty card and return it to Delta Audio or to
your local distributor / dealer. During any transportation of the turntable,
always remove the platter. If this is not done, DAMAGE COULD OCCUR!
Please regularly check for main leads of your turntable & transformer
assembly. If there is any damage to any wire or the main’s plug, have them
replaced immediately by a qualified person (your dealer or distributor), or
Delta Audio directly. We will inform you about your nearest service
location .
Make sure that you keep all the parts of the original packaging as they are
necessary in case of transportation.
* To clean the turntable, use only special silicone cleaner, which is not
alcohol based. Otherwise you could damage the surface material.
Table of contents


