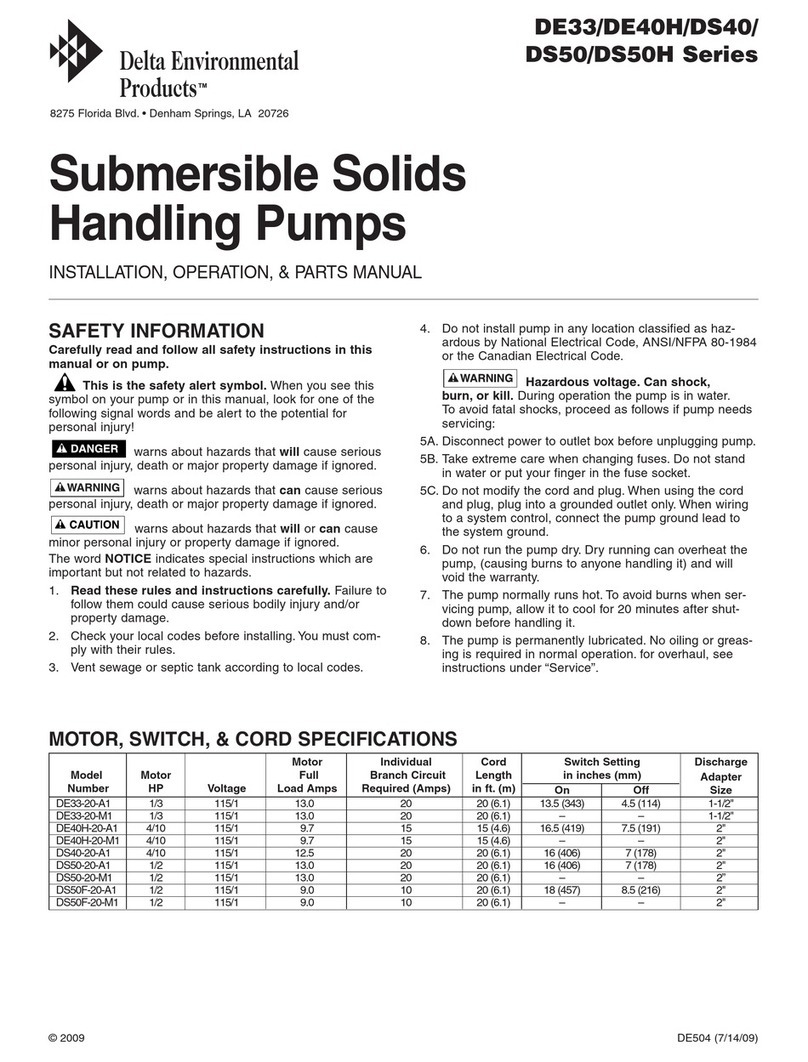
Delta Environmental Products WHITEWATER WWSFA-115V User manual

1
WHITEWATER®
PRE-ENGINEERED DRIP DISPOSAL SYSTEM
MODEL WWSFA-115V / WWSFA-230V
P.O. BOX 969, DENHAM SPRINGS, LA 70727
800-219-9183 504-664-9467<FAX>
www.deltaenvironmental.com
OH 4-16-07

2
HOW THE WHITEWATER®FILTER SYSTEM WORKS
The Whitewater®Filter/Drip System consists of the following basic items:
1. Pre-Treatment/Trash Tank
2. Whitewater®Aerobic Treatment Plant
3. Dose Tank
4. Pump
5. Filter System
6. Valves
7. Controls and Alarm Panel
8. Wastewater Grade Emitter Line and Accessories
Treated effluent water from the Whitewater®aerobic wastewater treatment plant spills into an underground
dosetankthatissizedinaccordancewithStaterequirements. Treatedwateristemporallystoredinthedose
tank until disposal in the drip disposal field.
The control panel contains a programmable logic controller (PLC) that periodically turns the pump, located
insidethedosetank,onandoff. Thepumppumpswaterfromthedosetanktothefilterlocatedinsideaground
level box. The filter removes all particles greater than 100 microns (150 mesh) in size. At the beginning of
eachpumpingcycle,thePLCturnsthepumpon,andsequentiallyopensandclosestheflushvalvethatallows
the filter to wash for a set period of time, after which the water is pumped through the filter to the disposal
system. Approximatelyonceperweek(fieldadjustable),thesystemfieldflushvalveopenstoflushthedisposal
system of any solids that have built up. Sequential flushing is done for each zone during subsequent pump
cycles.The flush water alongwithanyimpuritiesremovedbythefilterisreturnedto thepretreatmenttankfor
further treatment. The control panelis furnished with a Hand-Off-Autoswitch locatedin the panel. Thehand
mode overrides the PLC timer so the pump can be manually turned on for inspection and or servicing the
system. Whenthelevelofwaterinthedosingtankisbelowasafeoperationallevel,thepumpfloatswitchwill
beintheoffposition, thus disabling the pump,preventing dry run damage. Thecontrolpanelalsocontainsa
high level alarm that will sound if a high level is reached in the dose tank.
The filtered effluent is pumped through the supply line to flexible emitter tubing with containing pressure
compensating emitters uniformly spaced along the line. Effluent is uniformly distributed over the entire
absorption field using a low flow rate.
Absorption field size is determined by, soiltype, sitecharacteristics anddaily wastewater flow. The field size
variesdependingonsoiltextureandpermeability. Theabsorptionfieldshouldbesituatedonthebestsoiland
landscapepositionofthesite.Separationbetweenthebottomoftheemitterpipeandanyunderlyingrestrictive
horizons(seasonably high water table)canbeaslittleas6inchesorasregulationsrequire. Theemitterlines
should be installed between 6 and 18 inches deep depending on soil and site characteristics.

3
An absorption field installed on slopes should be carefully designed to take into consideration elevation
changes and emitter line placement due to gravitational pressures. The pretreatment tank, treatment plant,
dosing tank and filter unit should not be placed in low areas in order to prevent subsurface or surface runoff
from returning or flooding the units.
Oncethesoilandsiteevaluationhasbeencompleted,themostsuitablelocationandsizeoftheabsorptionfield
is selected. Depending on the hydraulic loading rate of the soil, the linear feet of emitter pipe and number of
zonesaredetermined. Itisalsoimportantthateachzoneisplacedalongthegroundcontour.Theconfiguration
of each zone may vary due to changes in slope.
The PLC controller must be set in the field as system flow based on the emitter selected and the number of
emittersperzoneswillvary from siteto site. Thepumponandoff time as wellas thenumbers ofzones must
be field set as per regulatory requirements.
Example Using Geoflow WFPC 16-4-24, Nominal 1GPH Drip Line:
System flow - 480 gallons per day (GPD)
Total area required as determined by ODH criteria = 2800 sq.ft.
Minimum emitter pipe required =1400 ft.
Total length of emitter pipe supplied - 1500 feet
Number of zones - 2 at 750 feet each
1 gallon/hour ÷ .25 gallon/dose cycle = .25 hour (15 minutes) maximum run time/dose
1 gallon/day ÷ .25 gallons/day = 4 dose cycles/day maximum @15 minutes/cycle, per Zone
Number of pump cycles per day, 2 zones X 4 cycles/per zone = 8 (field set)
Zone capacity – 750 feet per zone ÷ 2 foot (emitter spacing) = 375 emitters/zone
375 emitters X 1pgh ÷ 60 minutes/hour = 6.25 gallons per minute (GPM)
Timer setting - 480gpd ÷ 6.25gpm/per zone = 76.8 minutes (Total Daily Run Time)
76.8 minutes/day ÷ 8 cycles/day = 9.6 minutes/cycle
Pump on = 10 minutes (field set)
Pump off = 170 minutes (field set)
Float switch setting - 10 minutes/cycle X 6.25gpm = 62.5 gallons per cycle
Using a safety factor of 1.5, 1.5 X 62.5 gallons per cycle = 93.75 gallons
Set pump operational float at 95 gallons
Set high water alarm float switch per code.

4
FILTER SYSTEM SPECIFICATIONS
MODEL WWSFA-115V
OPERATING PARAMETERS
Motor/pump size 1/2 H.P.(Standard)
Pressure regulator 40-PSI nominal
Filtration 100 microns
Pump cycles Set in Field (Factory set to12 times per day)
Field flush Factory at 84 (once per week, field adjustable)
Filter wash Each pump cycle (field adjustable for duration)
Electrical requirements 115Volts, 1 Phase , 60 Hertz, 20 Amps
COMPONENTS AND MATERIALS
Pump/motor Stainless steel submersible
Piping system Schedule 40 PVC
Valves Glass reinforced nylon
Pressure regulator Thermoplastic with stainless steel hardware
Control panel NEMA 4X Fiberglass
Solenoid valves 24 VAC Encapsulated
Filter 100 Micron Auto Wash
Flow Meter Multi-jet for reclaimed water
Dripline Geoflow or Netafim pressure compensating
PARTS LIST
Item Item No.
Dose tank 1
Pump 2
Pump on/off permissive float switch 3
High level alarm float switch 4
Air/Vacuum release valve 5
Pump access riser 6
Filter system box 7
Filter 8
Filter flush valve 9
Flow meter 10
Field flush valve 11
Control panel 12

5
FILTER SYSTEM SPECIFICATIONS
MODEL WWSFA-230V
OPERATING PARAMETERS
Motor/pump size 1 H.P.(Standard)
Pressure regulator 40-PSI nominal
Filtration 100 microns
Pump cycles Set in Field (Factory set to12 times per day)
Field flush Factory at 84 (once per week, field adjustable)
Filter wash Each pump cycle (field adjustable for duration)
Electrical requirements 230Volts, 1 Phase , 60 Hertz, 15 Amps
COMPONENTS AND MATERIALS
Pump/motor Stainless steel submersible
Piping system Schedule 40 PVC
Valves Glass reinforced nylon
Pressure regulator Thermoplastic with stainless steel hardware
Control panel NEMA 4X Fiberglass
Solenoid valves 24 VAC Encapsulated
Filter 100 Micron Auto Wash
Flow Meter Multi-jet for reclaimed water
Dripline Geoflow or Netafim pressure compensating
PARTS LIST
Item Item No.
Dose tank 1
Pump 2
Pump on/off permissive float switch 3
High level alarm float switch 4
Air/Vacuum release valve 5
Pump access riser 6
Filter system box 7
Filter 8
Filter flush valve 9
Flow meter 10
Field flush valve 11
Control panel 12

6
Pre-Engineered Subsurface Drip Disposal Systems
By
Delta Environmental Products
TABLE 1
WWSFA -115V
Drip Tubing Drip Tube
per Zone Laterals
per Zone Length
per Lateral Max. Number
of Zones
per System
Pressure
Regulator Zone Discharge
in GPM
Geoflow PC .53 1320 6 220 6 40 PSI 5.8
Geoflow PC 1.01 750 3 250 6 40 PSI 6.3
Netafim Bio-Line PC .61 1200 3 400 6 40 PSI 6
WWSFA – 230V
Drip Tubing Drip Tube
per Zone Laterals
per Zone Length
per Lateral Max. Number
of Zones
per System
Pressure
Regulator Zone Discharge
in GPM
Geoflow PC .53 2400 8 300 6 40 PSI 10.6
Geoflow PC 1.01 1750 6 250 6 40 PSI 14.6
Netafim Bio-Line PC .61 2100 7 300 6 40 PSI 10.7
Consult Delta Environmental Products for alternate designs.

7
1. Prepareanexcavationwithan openingapproximatelyonefootlargerthanthedosetankandadepth
that will allow water to freely flow from the treatment plant into the dose tank. Backfill with a 6 inch
layerofsandorgravelifotherwiseunabletoprovideasmooth,level,compactbase. Installthepump
accesspipeintothedosetankthroughthetopofthetankandseal. Provideasufficientlengthofpipe
toextendintothepumpaccessriserabout4inches. Whileworkingwithopenpitswerecommendthat
the hole be roped off in some fashion to prevent injury to passers by.
2. Fill the dose tank with clean water before back filling; fill around the tank approximately 12 inches
below ground level. Backfill material should be placed in 12 inch layers and tamped to insure
maximum skin friction between dose tank and surrounding ground.
3. Positiontheelectricalconduitinthegroundbetweenthepumpaccessriserandthefilter. Drilla1-3/4
inch hole (or as needed based on pipe size) in the pump access riser for the pump outlet pipe and a
7/8 inches hole for the electrical conduit. Install pump access riser and filter system so they are at
least flush with ground level, and high enough to prevent surface water from entering.
4. Installaschedule40PVCpipeofsufficientlengthtoextendfromthepumpintothepumpaccessriser
and have enough room to attach the vacuum release valve and union. Install the vacuum release
valve and union using appropriate fittings.
5. AttachthefloatswitchestothedischargepipeusingclampsfurnishedbyDelta. Adjustthepositionof
the clamps as shown on the drawings or as required to insure that the pump stops at the minimum
operating water level and turns on above this level, and that the alarm sounds at high level position.
6. Install the entire pump assembly through the pump access riser. Install the electrical cables and
connectthe unionfrom the pumpoutlet tothefilter system. Use siliconto seal aroundexitingpiping.
7. Connect the filter system outlet pipe to the drip line pressure regulator that attaches to the supply
manifold. Connect the drip line return manifold to field flush valve, located in the filter assembly.
Connect the outlet of the field flush valve to the inlet of the treatment system.
8. Attach control panel to suitable mounting surface using all four mounting holes on back of box. Use
proper screws of sufficient length to insure a secure and permanent mounting.
9. Control panel israted for outdoor service, however do not place it where it canbe immersedinrising
wateror where run-offwatersuch as froma roof willfallonit. Also do notmount itwhereitissubject
to wetting from sprinklers, hoses, etc. Mount control panel where there is a minimum working
space 30” wide and 6’ high.
10. The control panel must never be connected to a circuit that is not properly grounded. Never plug the
unit into a receptacle that has a 2 pole to 3 pole grounding adapter attached. If there is any doubt,
have a qualified electrician check for proper grounding. The control panel must be connected to an
electric source equipped with a ground fault current interrupter (GFCI) circuit breaker or GFCI
receptacle. A standard receptacle can be replaced with a GFCI receptacle. GFCI breakers and
receptacles can be obtained from most stores that sell electrical supplies.
11. The wire from the filter system to the control panel if direct buried MUST BE TYPE UF rated for

8
underground service. It must be buried a minimum of 2 feet below the final grade and must be
protectedbyconduitwhereitexitstheground.Conduitmustextendaminimumof1'-6"belowground
where the wires rise from the ground to the control panel. These requirements are per the National
ElectricCode. Checkwithlocalauthoritiestoseeiftheyhavemorestringentrequirements. Schedule
40 PVC is shown; note this is conduit not water pipe. However, if the conduit is subject to physical
damage, you must use schedule 80 PVC conduit and appropriate fittings.
12. Wire the solenoid valves as shown on the drawings.
13. Verify that all electrical systems are connected and secure.
14. Close cover on control panel and connect control panel to a ground fault current interrupter (GFCI)
circuit.
15. Verifyproperpump operation byobservingpumpwhilemanually operatingpumpfloatswitch. Pump
must not be run unless immersed in water. Verify alarm system by manually operating alarm float
switch.Pump and disposeofall clean waterin the tank.Verifythat 14 inchesofwater remains inside
thetankwhen pump stopfloat switchturnspumpoff. Verifyoperation of the floatsby observingPLC
input screen.
16. Install a 2-inch layer of gravel in the filter access boxes and complete back filling the site.
17. Install drip line 6 to 8 inches deep, but not to exceed 18" below ground. The drip line should not be
stretched during installation or damage may occur.
18. Installthe system headerfirst:Typical layout willbe FilterUnit,Zone Valve (ifrequired)andpressure
regulator at each individual Drip Zone.Then installthe PVCschedule 40supply lines. Theseshould
be buried at a depth of 12 to 18 inches minimum, 4 to 12 inches below the depth of the driplines. If
thereis a risk offreezing,burymainlinesbelowthefrostline. Atalltimesavoidgettingdebrisintothe
system;it maybe necessaryto coverthe ends of exposed pipes with tape. Flushmain lines,testfor
leaks and leave them full of water. Larger diameter pipes left full of air in a trench that has not been
compacted may "float". System must be installed per drip line layout drawings.
19. Open trenches for the sub-main manifold and flush line manifold. These trenches should be 8 to 10
inchesdeep,minimum. Atthebeginningofthedriplinetrenchconstructanearthdampabovedripline
elevationandlaydriplineoverearthdamptomanifold. Thiswillpreventwaterfromdrainingfromdrip
line.
20. Clean sub-main and flush line manifold trenches, moisten and compact the bottom of the trench. (If
thisisnotdone,themanifoldsmay"settle"andslowlypulloutthecouplings). Assemblethesub-main
manifold outside the trench if practical. Connect to main PVC lines and to the system header. Flush
these lines. A high water velocity is required to carry away debris that may have entered the pipes
before or during installation. Place the sub-main and flush manifolds into the trench.
21. Install drip lines on contour, not perpendicular or up and down, etc. to the slope.
22. Maximum lateral length, for standard zones are as indicated in Table 1, consult Delta Environmental
Products for alternative zone designs.

9
23. Minimum lateral spacing must be 2 feet, except for special design.
24. Lateral spacing of three feet or more should be used for slopes of 20% or greater.
25. Install air vent/vacuum breakers at the high end of each drip zone supply and return manifold. Air
vents/vacuumbreakerstobeplacedinprotectiveenclosuretopreventanaccumulationofsubstances
that could prevent their proper operation and they must have a grade level access.
25. The size of the installation, type of soil, slope, availability of labor and cost will determine the best
installationmethod. Duringinstallationcoverallopenpipeendsincludingdriplinestoavoidgettingdirt
or debris into the system. Leave enough length at the beginning and end of each drip line for
connections. Itmaybemoreconvenient to finish thelastfootorsoof the trench byhand. This gives
more room for connections. Beware of bending the drip tubing tight during installation. When doing
looped systems, care must be taken if the tubing is bent to create the loop as it can kink and reduce
flow. An alternate method is to use flexible PVC or drip line ells and a straight run of drip tube
between.Thedriplinemayelongateathightemperatures,donotstoreindirectsunlight. Toprevent
stress due to contraction always leave tube snaked from side to side of trench (1’ per 100’) or when
plowingleaveslackatsupplyandreturnmanifold. Connectdriplinestosub-mainandflushmanifolds.
Flush again. Run the system before covering and check for leaks.
27. Install schedule 40 PVC for return flush line. Run return line back to the filter system. The electric
solenoidvalvethatoperatestheflushlineispartofthefiltersystem.Installschedule40PVCdripflush
line and filter flush line back to the treatment system as shown on the drawings.
28. Tocompensateforalackofdepthtoarestrictivehorizon/layerand/orseasonalwatertableacleanfill
materialofloamysand,sandyloamorlightloammaybeusedasfill. Thefillmaterialshallconsistofa
minimum of 70% sand particles equal to or greater than 0.25 mm, and clay content shall be 20% or
less, be sure to check local codes for specific requirements on fill and where they exist follow them.
Organic matter should be removed prior to placing fill material. If not the site must be plowed to
preventanorganicsealinglayerfromforming. Fillmaterialshouldbeappliedovertheentireareaina
shallow layer (3 inches) and then be tilled into the natural soil to prevent a textural interface from
forming. When fill is used, the entire area must be covered with sod to prevent erosion or other
erosion control measures taken.
29. Whenever possible, spend time with your customer. Review operating instructions; be sure that the
customer has a manual to keep with them as this may prevent an unnecessary return visit.

10
CARE AND OPERATION INSTRUCTIONS
The Whitewater®System has been designed and built to provide long term, reliable and efficient service.
Oncethe unithas beeninstalled (seeinstallation instructions) theunit willoperatewith a minimumamount of
attention.
The following checks should be made periodically as described:
CAUTION: USE LATEX PROTECTIVE GLOVES WHEN HANDLING EFFLUENT WASTEWATER. AVOID
GETTINGANYEFFLUENTWATERONYOU. WASHUPWITHANTI-BACTERIALSOAPWHENFINISHED.
Daily: - Owner/Operator
Checkthe alarms on boththetreatmentplantanddosingsystem. Thetreatmentplantalarm
comesonwhentheairsupplysystemhasmalfunctioned. Ifthealarmisactivated,checkfora
blown fuse or thrown circuit breaker. Check air compressor to be sure it is operating. Once
accustomedto thesoft hummingsound ofa properly operating unit,any unusual noiseis an
indicationofmalfunction.Ifanunusualnoiseisdetectedortotalfailureisobserved, callyour
local dealer for service.
Weekly: - Owner/Operator
Check the treatment plant for offensive odor.
Check for water leakage at the ground level boxes that house the components of the filter
system.
If such conditions should develop, call your local dealer for service.
6 Months: - Dealer Service
Check the air filter on the air compressor. Rinse with warm water if necessary.
Check the screen filter in the filter system. Rinse with clean water if necessary.
Periodically: Solids Removal - Refer to the Whitewater®Treatment Plant
Maintenance Manual
DURINGTHISPROCEDUREITISIMPORTANTTHATCAREISTAKENTOPREVENTANY
SOLIDS FROM DISCHARGING INTO THE DOSING TANK.
During pump out of treatment plant, pump out the lower 25 percent of the dosing tank to
removeany solids that wouldhaveaccumulatedonthebottom. Anysludgeremoved from
system must be disposed of according to all state, local, and federal regulatory
requirements. Thealarmtothedosingtankisactivatedwhenthereisahighwatersituation
inthedosingtank. Thiscouldindicateaproblemwiththefiltersystem,dosingpump,orpump
float level switches. Observe if dosing pump is operational. Turn the Hand-Off-Auto switch
locatedinthe control panel to thehandposition. This will overridethePLCtimerandturnthe
pumponifoperational;thereisa2minutedelaybeforepumpstart.Observethewatermeter
located in the filter box for flow. If the flow is less than that at the time of installation, it is
possiblethe filter requirescleaning. Disconnect power from the filter control panel. The
filter is located in the filter box. Unscrew the filter canisters and remove the filter element in
thefilterhousing. Washfilterelementwithcleanwaterandreinstallintothecanister.Turnthe

11
switchtothehandpositionandobservethewatermeter,againthereisa2minutetimedelay
before pump run. Flow would have been reduced if the filter were excessively dirty. After a
periodof time,observe ifalarm stopssounding. This will indicate whether ornot thesystem
has returned to normal operation. Turn the switch back to the automatic position.
(One revolution of the water meter is 10 gallons)
If no flow has been observed, call your local dealer for service.
CAUTION: EXCESSIVE MANUAL OVERRIDE MAY CAUSE WATER TO SURFACE AT
THE GRID SYSTEM. MANUAL OVERRIDE MUST NOT EXCEED 10 MINUTES EVERY 2
HOURS.
Note - To keep maintenance to a minimum and ensure high effluent quality, the following items
should not be permitted to enter the system.
-Strong disinfectants or bleaches, other than small amounts normally utilized in day to day
cleaningandlaundry(beconservative). Uselow-sudsing,lowphosphatesandbiodegradable
laundry detergents.
-Discharge from water softener.
-Any type of oils, greases, or other chemical wastes.
-Disposable baby diapers and wipes.
-Sanitary napkins, condoms or other similar devices.
-Hair, bandages, rags, or string.
-Latex, plastic, or metallic objects.
-Coffee grounds or cigarette butts.
-Mud or sticks.
-Paper towels, napkins or Kleenex.
-Excessive use of water over the design flow of the system, or organic overloading
in excess of design parameters.
Theproper operation of thisor any other homesewagesystemdependsuponproperorganicloading andthe
life of the microorganisms inside the system. Delta is not responsible for the in-fieldoperation ofthe system,
otherthanthemechanicalandstructuralworkingsofthesystemitself. Wecannotcontroltheamountofharsh
chemicals or other harmful substances that may be discharged into the system by the occupants of a
household.

12
DELTA ENVIRONMENTAL PRODUCTS
FILTER SERVICE POLICY
INITIAL POLICY:
The manufacturer or the distributor through the dealer shall furnish a two-year initial service policy
to the user. This policy is included in the original purchase price and shall provide the following:
1. An inspection/service call every six months, which includes inspection,
adjustment, and servicing of the mechanical and electrical component parts as
necessary to ensure proper function.
2. If any improper operation is observed which cannot be corrected at that time, the user
shall be notified immediately in writing of the conditions and the estimated date of
correction.
CONTINUING SERVICE POLICY:
An annually renewable service policy affording the same coverage as the Initial Service Policy is
available. Consult your dealer for pricing information.
PARTS:
Replacement parts or components may be obtained from your local distributor or directly from Delta
Environmental Products
COMPLAINTS:
In order for Delta Environmental Products to properly address any complaints we require that you
put in writing the date and nature of the complaint as detailed as possible. This must include the
Serial Number of your system.
Send to: Delta Environmental Products
P. O. Box 969
Denham Springs, La. 70727-0969

13
LIMITED WARRANTY
Delta Environmental Products warrants the parts supplied by Delta in each system for a period of
two (2) years. All warranty questions shall be resolved through Delta Environmental Products. The
warranty on the device is that the device is free from defects in material and workmanship from the
date of installation. Some states do not allow limitations on how long an implied warranty lasts, so
the above limitation may not apply. Sole obligation under this warranty is as follows: Delta
Environmental Products shall fulfill this warranty by repairing or exchanging any component part,
F.O.B. factory that in Delta Environmental Products judgment shows evidence of defects, provided
said component part has been paid for and is returned through an authorized dealer, transportation
prepaid. The warrantee must also specify the nature of the defect to the manufacturer.
The warranty does not cover processes/devices that have been flooded by external means, or that
have been disassembled by unauthorized persons, improperly installed, subjected to external damage
or damaged due to altered or improper wiring or parts not supplied by Delta.
This warranty applies only to the processes/devices and does not include any of the house wiring,
plumbing, drainage, or other disposal systems. Delta Environmental Products is not responsible for
any delay or damages caused by defective components or material, or for loss incurred because of
interruption of service, or for any other special or consequential damages or incidental expenses
arising from the manufacture, sale or use of this process/device.
Delta Environmental Products reserves the right to revise, change or modify the construction and
design of the process/device for household wastewater or any component part or parts thereof
without incurring any obligation to make changes or modifications in previously sold equipment.
Delta Environmental Products also reserves the right, in making replacements of component parts
under this warranty, to furnish a component part which, in its judgment is equivalent to the part
replaced.
Under no circumstances will Delta Environmental Products be responsible to the warrantee for any
other direct or consequential damages, including but not limited to lost profits, lost income, labor
charges, delays in production, and/or idle production, which damages are caused by a defect in
material and/or workmanship in its parts. Some states do not allow the exclusion of limitation of
incidental or consequential damages, so the above limitation or exclusion may not apply to you.
This warranty is expressly in lieu of any other express or implied warranty, excluding any warranty
of merchantability or fitness and of any other obligation on the part of Delta Environmental Products
This warranty gives you specific legal rights, and you may also have other rights, which vary, from
state to state.

14
GENERAL DESCRIPTION OF OPERATION
1. Upon power up at panel there is a 2 minute time delay before the pump starts.
2. After this time delay, the pump will start and run for a set period of time, then turn off for another
set period of time.
3. When the pump starts, the filter flush valve will open for a set period of time then close.
4. After a set number of pump starts, the field flush valve will open for a set period of time after the
pump starts and after the filter flush valve closes.
5. The field flush cycle will repeat itself on each subsequent pump cycle for the number of fields
connected to the system before resetting.
6. In a normal cycle, the field flush valve can be opened for a period of 60 seconds by momentarily
pushing the “Field Flush” toggle switch up then releasing it. This can be repeated for additional
flushes.
7. At the end of each pumping cycle, after the pump shuts off, both the filter flush and field flush
valves will open for a set period of time then close.
DESCRIPTION OF CONTROL FLOATS
1. Float FS1 is a wide angle float that when up, permits the pump to run and when down, keeps the
pump from running and pumping dry. Note that by placing the HAND-OFF-AUTO switch in HAND
position, you by-pass all floats and the pump will run without regard to the level of water in the
pump tank. The switch is spring loaded and returns to OFF when released. After FS1 activates,
there is a one minute delay before the pump will start if being called to run by the PLC before the
float switch activated.
2. Float FS4 is the high level alarm float. When the water level reaches this float, the high level alarm
light illuminates continuously, and the audible alarm sounds continuously. The audible alarm can
be silenced by the silence switch. When the high level water level recedes, the alarm will stop.
Delta Environmental Products offers our Pre-Engineered system with a variety of control options; consult
the factory for available options.

15
DISTRIBUTOR AND HOMEOWNER NOTES
TheDeltaEnvironmentalProductsWhitewater®Filter/DripSystemisdesignedtofiltereffluentwaterdischarged
from an aerobic treatment plant that is listed by the National Sanitation Foundation (NSF)in accordancewith
ANSI/NSFStandard40,Class1effluentrequirements. Itisdesignedforusewithdripsystems,sprayirrigation
systems, or other systems that may require highly filtered water. The Delta Environmental Products
Whitewater®DFseriesaerobictreatmentplantsarelistedbyNSFinaccordancewithANSI/NSFStandard40,
Class 1 and makes a perfect combination when used with the Whitewater® Filter/Drip System and drip line
designed for Class 1 effluent water.
Consult your local Sanitarian/Environmentalist prior to installation.
HOMEOWNER RECORDS
S/N: Date: _________________________
Installed By: _____________________________________________________
Distributor: ______________________________________________________
Timer Setting: On for __ minutes off __ hours.
Flow through meter at time of installation: GPM
Timer DOES NOT need to be reset after power outage.
(PLC must be field adjusted for run/off time)
Whitewater®is a trademark of Delta Environmental Products

16
PROGRAMING THE
PLC SETTINGS
In the event that the PLC settings were changed and it is desired to return to the factory settings
or you to change the factory settings proceed as follows:
STEP 1: Press both of the ESC and OK
buttons simultaneously.
STEP 2: Press the ▼down cursor button
once.
STEP 3: Press OK
STEP 4: The PLC now displays the first
parameter to set. You should see:
<
Parameter B02
<Pumpruntime
<Pumpofftime
< Current time in PLC
(Not settable, could be another number, may be changing
continuously). Disregard.
STEP 5: Press OK
STEP 6: Flashing cursor moves to the settings. ◄& ►buttons
moves flashing cursor left and right. ▲& ▼buttons
changes numbers under flashing cursor. Set until display
numbers appear like the B02 window shown in step 4.
STEP 7: Press OK
STEP 8: Press ▼button.
You should see:
< Parameter B10
< Period of time that filter flush
valve is open when pump starts.
<Disregard
STEP 9: Press OK
B 02: Par
TH= 00:12h
TL= 02:00h
Ta= 00:00h
B 10: T
T= 01:00m
Ta= 00:00

17
STEP 10: Using same procedure as in step 6, set until display numbers
appear like the B10 window shown in step 8.
STEP 11: Press OK
STEP 12: Press ▼button.
You should see:
< Parameter B11
< Period of time that filter flush
valve is open when pump stops.
< Disregard
STEP 13: Press OK
STEP 14: Using same procedure as in step 6, set until display numbers
appear like the B11 window shown in step 12.
STEP 15: Press OK
STEP 16: Press ▼button.
You should see:
< Parameter B13
< Period of time that field flush
valve is open during normal operation.
< Disregard
STEP 17: Press OK
STEP 18: Using same procedure as in step 6, set until display numbers
appear like the B13 window shown in step 16.
STEP 19: Press OK
STEP 20: Press ▼button.
You should see:
< Parameter B14
< Number of pump starts before field flush valve opens
for a field flush.
< Disregard
STEP 21: Press OK
B11: T
T= 02:00m
Ta = 00:00
B13: T
T= 02:00m
Ta = 00:00
B14: Par
Lim= 000084
Cnt= 000000

18
STEP 22: Using same procedure as in step 6, set until display numbers
appear like the B14 window shown in step 20.
STEP 23: Press OK
STEP 24: Press ▼button.
You should see:
< Parameter B18
< Number of fields
< Disregard
STEP 25: Press OK
STEP 26: Using same procedure as in step 6, set until display numbers
appear like the B18 window shown in step 24.
STEP 27: Press OK
STEP 28: Press ▼button.
You should see:
< Parameter B21
< Period of time that field flush
valve is open after pump stops.
<Disregard
STEP 29: Press OK
STEP 30: Using same procedure as in step 6, set until display numbers
appear like the B21 window shown in step 28.
STEP 31: Press OK
STEP 32: Press ▼button.
PLC display returns to block B02 shown in step 4.
STEP 33: If you wish to review the settings press ▼button
for 6 times to scroll through settings. Keep pressing
to keep scrolling. When finished go to next step.
STEP 34: Press ESC
STEP 35: Press ▲button
STEP 36: Press OK
B18: Par
Lim= 000004
Cnt= 000000
B21: T
T= 02:00m
Ta= 00:00
m

19
STEP 37: You can now set the clock if you desire. A correct
clock setting is not required to run this program. Use
the same procedure as in step 6.
STEP 38: Press OK
STEP 39: Press ESC
PLC is now operating using the new parameters.
To review the parameters, repeat the procedure.
A factory supplied module can be supplied that will automatically
reload the program with the factory default settings.

20
PLC PARAMETERS
CPWWSFA-VERSION 1.0
BLOCK DESCRIPTION NON-ADJUST FACTORY
SETTING
PLC
NOMENCLATURE
BO2 TH=Run time
TL=Off time
12 Minutes
2 Hours
00:12h
02:00h
BO4 Time delay on power up X 2 Minutes 02:00m
B10 Open filter flush valve
when pump turns on
1 Minute 01:00m
B11 Open filter flush valve
when pump turns off
2 Minutes 02:00m
B13 Open field flush valve
on field flush cycle
2 Minutes 02:00m
B14 Number of pump starts
until field flush valve
opens
84 84
B18 Numbers of fields 4 4
B21 Open field flush valve
when pump turns off
2 Minutes 02:00m
B23 Open field flush valve
after manual switch
operation
X 1 Minute 01:00m
Note:
Minute settings are in minutes and seconds. For example 02:00m is 2 minutes, 02:10m is 2
minutes and 10 seconds. Hour settings are in hours and minutes. For example 02:00h is 2 hours
and no minutes, 02:10h is 2 hours and 10 minutes.
This manual suits for next models
1
Table of contents
Other Delta Environmental Products Water Pump manuals
Popular Water Pump manuals by other brands
BJM Pumps
BJM Pumps S Series Installation, operation & maintenance manual
Crane
Crane WEINMAN 320 Installation and operation manual

Lincoln industrial
Lincoln industrial CENTRO-MATIC FlowMaster 85244 quick start guide
Ferplast
Ferplast bluflow 600 user manual
SMC Networks
SMC Networks PAP3310 Series Operation manual

Waterax
Waterax BB-4 Series owner's manual
