Delta PARTY TENT 20’x20’ PE User manual

Please read instructions COMPLETELY before
assembly. This party MUST be securely anchored.
THIS IS ATEMPORARY STRUCTURE AND NOT
RECOMMENDED AS A PERMANENT
STRUCTURE
Warning!
1. Prior to installation, consult with all local municipal codes regarding installation of temporary
shelters. The owner of the tent has the sole responsibility to make sure that these local rules are
followed and that the mounting is correct.
2. We are not responsible for damage to the unit or the contents from acts of nature.
3. It is always recommended that you secure your tent properly with storm straps and ground
pegs when you put up the structure. Proper Anchoring system selection is your responsibility.
PARTY TENT 20’x20’PE

Heavy dutyAnchor are sold separately and are not included in this products.
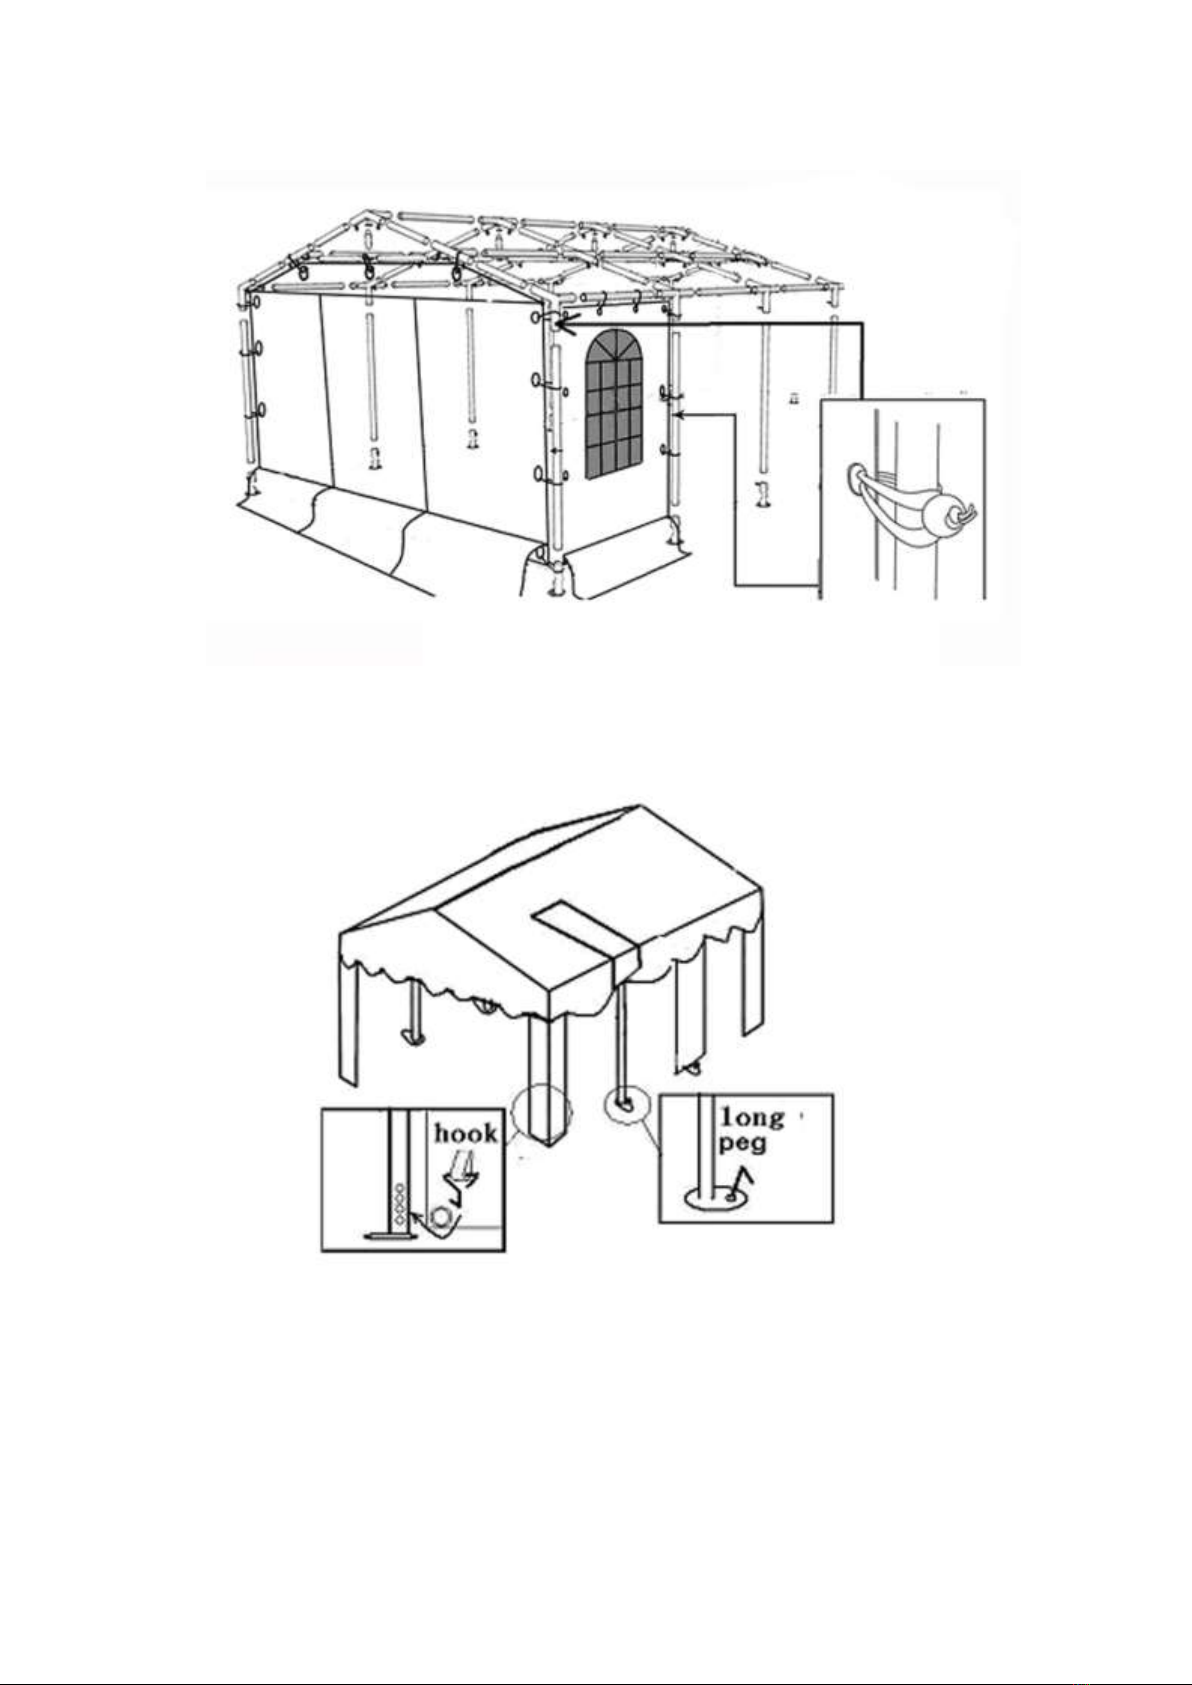
4. Periodically check the anchors to ensure stability of shelter.
5. In case of extreme weather conditions the tent cover must be removed.
6. Any shelter that is not anchored securely has the potential to fly away causing damage. We are not
responsible for any shelter that blows away.
7. This canopy is intended to protect against the effects of sun, rain, light snow, etc. It is not
designed to hold the loads that can accompany wind, rain, snow or ice storms. This structure
is not tested for specific snow, rain and wind loads.
8. Do not use open fire, welding equipment or other ignition sources in the tent.
9. We recommend you to insure the tent, or check if it is covered by home contents insurance, in
case of unplanned events, accidents or bad weather.
CARE AND CLEANING:
A tight cover ensures longer life and performance. Always maintain a tight cover. Loose fabric can
accelerate deterioration of cover fabric.
Immediately remove any accumulated water, snow or ice from the roof structure with a
broom, mop or other soft-sided instrument.
DO NOT use bleach or harsh abrasive products to clean the fabric cover. Cover is easily cleaned
with mild soap and water.
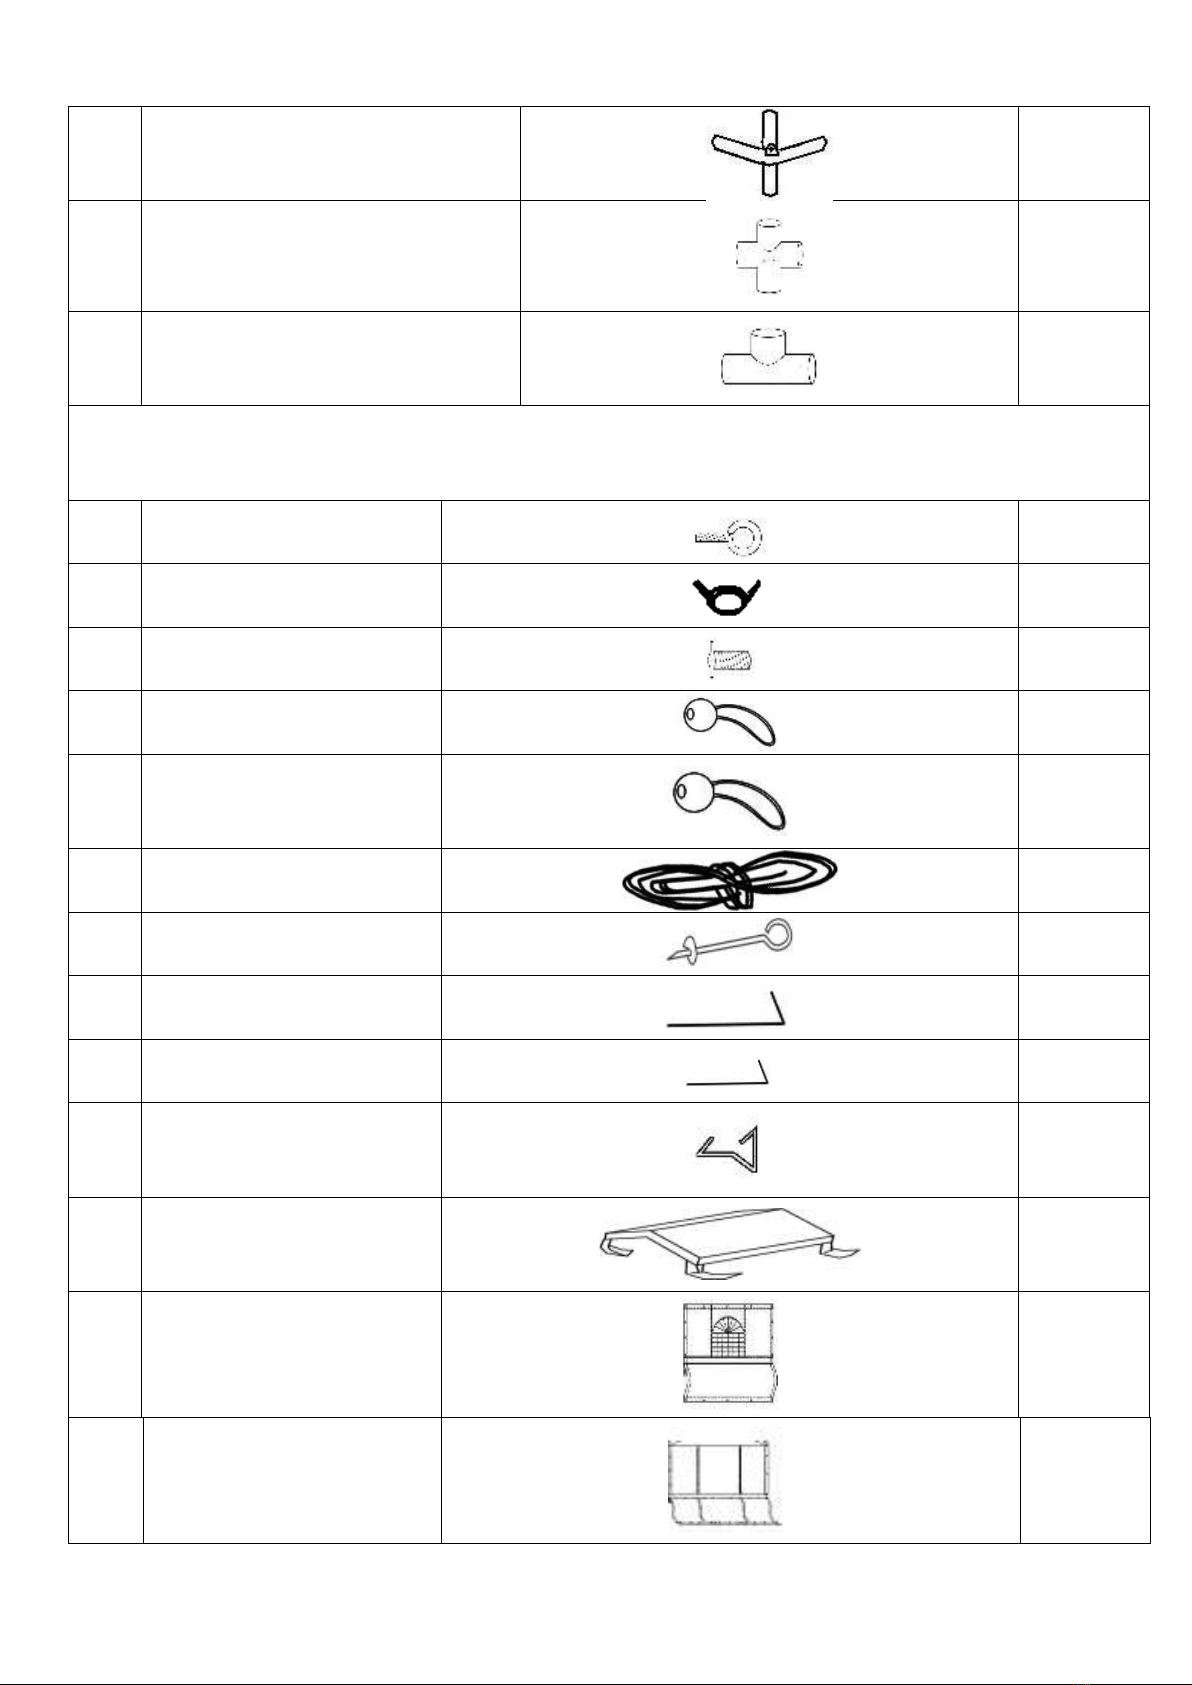
Parts List
Part
no..
ITEM
PHOTO
QTY
1
Rafter Poles (Length 57.87")
16
2
Cross Poles (Length 76.38")
15
3
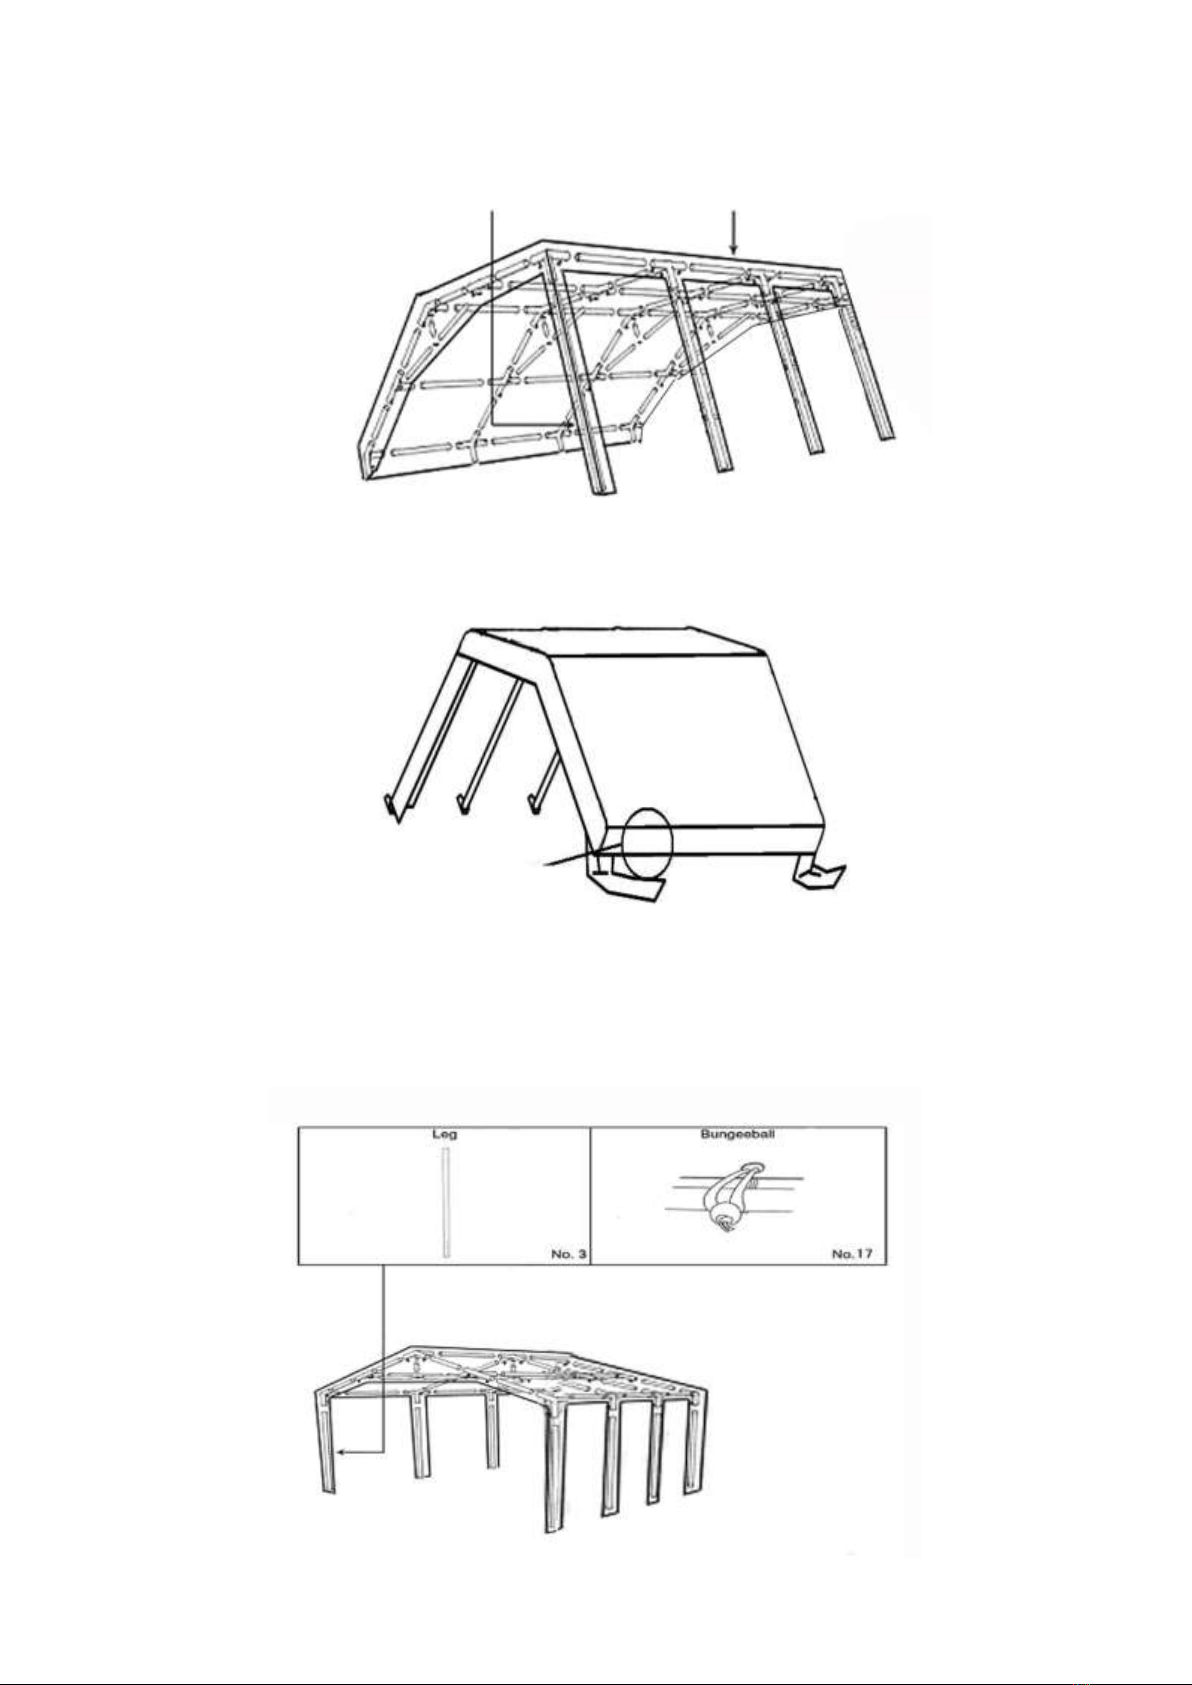
Leg poles (Length 75.59")
8
4
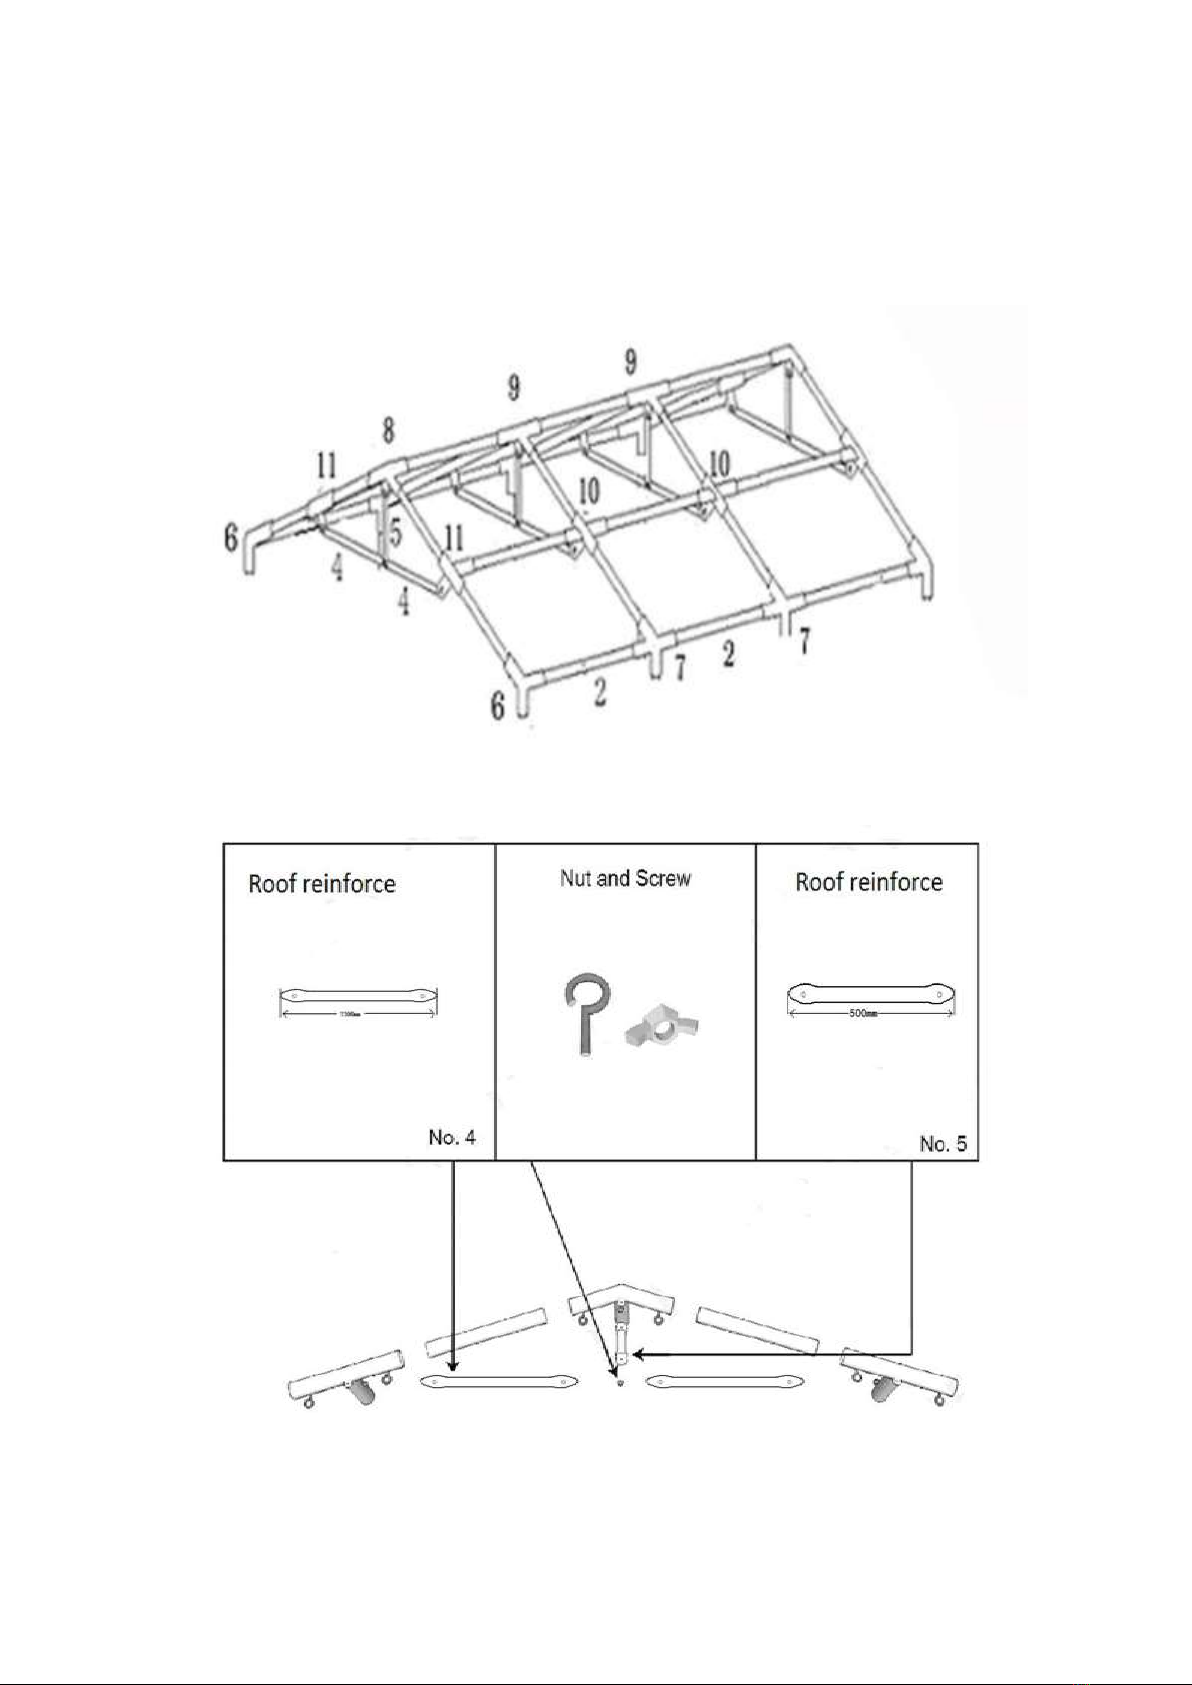
Roof reinforce (Length 59")
8
5
Roof reinforce (Length 19.7”)
4
6
3-way-corner 110° ( Leg connector)
4
7
4-way-corner 110°( Leg connector)
4
8
3-way-corner 140° ( roof
connectors)
2

9
4-way-corner 140°( roof connectors)
2
10
4-way-corner ( roof connectors)
4
11
3-way-corner ( roof connectors)
4
HARDWARE AND CLOTH PART LIST
13
Eyelet Screw
16
14
Wing Nut
16
15
Bolts
70
16
Short Bungee Balls
26
17
Long Bungee Ballls
92
18
Guy Line
4
19
Spiral Peg
4
20
Long Peg
8
21
Short Peg
36
22
Hook
8
23
Roof
1
24
Side Panel
6
25
End Panel
2

3+ individual recommended for assembly, approximate time 2 to 3 hours
Choose a calm day to set up your tent.
Before putting up
Please use gloves when assembling the metal frame portion of this unit. The metal components of this
product have been treated with a rust preventive coating that may feel oily to the touch. This coating is not
dangerous, but may dirty your hands during assembly. We recommend that you wipe metal parts clean with
a mixture of warm water and dish detergent prior to assembly. Should your hands become dirty, simply
wash with soap and water.
Pay attention to the following points when choosing a location:
The pavilion must stand on a flat, non-slip and safe place
choose a sheltered location
Avoid damage to the material, please place the pavilion so that it cannot rub or chafe on
branches, parts of buildings etc.
Put up the pavilion at a safe distance to fireplaces and pay attention to the direction of the wind
Leave your pavilion to dry in an erected position before packing it away.
PARTYTENTASSEMBLY
Step1. Assembly is easiest if you layout all parts on the ground as shown.

Step 2. Connect the roof poles and connectors from middle and out.
Tips: Make sure all the poles are pushed all the way into the connectors and all screws are tightened. IF
the poles are not pushed all the way to the connectors, the frame that you build will be bigger than the top
size. Canopy cover won’t fit the frame.
Step 3: Apply the reinforce bars #4 and #5 as shown.

Step 5: Insert leg poles ( #3) into one side as shown below
Step 6: Put the roof cover on the frame
Step 7: Lift the opposite site of the frame and insert remaining leg poles (#3) to finish the tent framework.
And tie down with bungee balls as shown.
Tips: Tie in the bungee-balls 5 at one side followed by 5 in the other and continue until finished
Caution: Safety Goggles must be worn when secure the bungees

Step 8: Attach the side panels and end panels as picture show below
Step 9: Use the long pegs to secure the legs to the ground. Use the hooks to secure the leg cover to the
leg poles.
Warning: You must use stakes to secure your tent to the ground. If you set up your tent on
concrete, you need to buy sand bags, water bucket, or bolts to secure your tent. Any shelter that is
not anchored securely has the potential to fly away causing damage.

Step 10. The guy lines clasp to each corner of tent and another end of line secure to the ground by spiral
pegs. Use short pegs to secure the side and end panels to the ground
This is a temporary spike anchor. Not intended for permanent use.
All images used are for illustration purposes only and may not represent an individual
product.
Note: PROPER ANCHORING OF THE FRAME IS THE
RESPONSIBILITY OF THE CONSUMER. Choose proper anchor
system FOR YOUR NEEDS。Heavy duty anchors, such as storm
straps and ground pegs, are sold separately and are not included in
this product.
Table of contents