manuals.online logo
Brands
  1. Home
  2. •
  3. Brands
  4. •
  5. Dension
  6. •
  7. Adapter
  8. •
  9. Dension Gateway Five User manual

Dension Gateway Five User manual

Gateway Five
iPod, USB, Bluetooth
General
Installation Guide
v1.0
GWF-9001-1
1 Introduction
Warning!
Always make sure that the the ignition key is
removed from the car, the radio is switched off
and that you have the security code of the
head unit (radio) available (if applicable).
The Dension Gateway Five connects your iPod or
USB storage (stick, hard drive or mass storage
capable mp3 player) to your original car radio,
providing music playback, menu based control
and charging.
The Gateway Five also offers Bluetooth
connectivity for music streaming (via A2DP) and
handsfree mobile call handling via the original
buttons and screens of your vehicle.
Please make sure that the vehicle compatibility
is correct.
The Dension Gateway Five is available in specific
versions for different vehicle types, therefore the
exact operation and installation may be different in
each case.
Remove the head unit
First, carefully remove your vehicle's existing
factory fit head unit as per the factory instructions
and using the correct tools.
In some cases, removing the head unit will require
panel removal. Contact your vehicle's dealer or
installation supplier/installer for more information.
2 Fitting the Gateway Harness
Once the head unit has been removed, disconnect
the antenna cable (1), then unclip the main wiring
connector from the head unit (2). This will differ in
all makes and manufacturers.
With the main radio cable removed, connect the
Dension supplied cable between the original
factory cable harness and the head unit.
3 Connection
The below diagram depicts how the different
modules connect to the Gateway Five.
Connect the 18 way micro-fit to the Car side of the
Gateway Five module.
The Connector port allows easier access to the
USB and Aux connections of the gateway, and
provides a bypass switch and an easy reset
option. The iPod connection and charging is
possible directly through the iPod Dock Cable or
an iPod Cradle (not included).
The Connector port
Please fix the connector port in a position where
the user can access the inputs, and leave
sufficient room for attaching USB storage devices.
The dock cable or the cradle can also be fitted at
this stage. These can either be run to the Glove
box or centre console.
4 Installation
You can find dip switches on the bottom of the
Gateway Five. These are factory set according to
the car type and software version. Please do not
change these settings, as in that case the
Gateway Five will not function in your car.
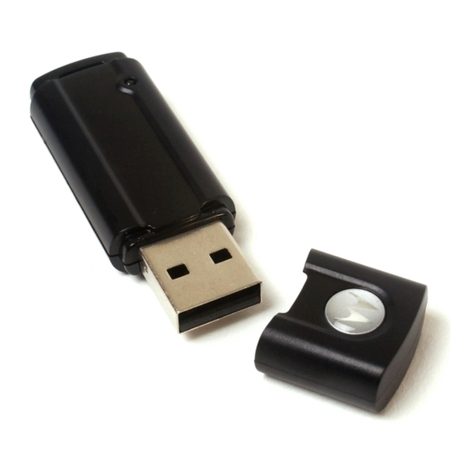
The Bluetooth Dongle
The Bluetooth dongle is factory inserted to the
relevant USB port. Please do not remove or
replace the original dongle.
Fitting the microphone
The microphone will work best when it is kept
away from all noise sources (open windows or
speaker) and close to the speaker. So the best
place to ensure perfect sound is to install at the
light cluster or rear view mirror in the centre of the
wind screen. There are clips that help you to do
this.
The optimal place for the microphone depends on
many factors, so it is recommended that you try
different installation places before finally mounting
the microphone.
Test and refit
Before you refit the head unit, test the Gateway
Five with your car audio, making sure all
connections are correct and that you have full
functionality.
Note: If during testing you notice any changes
or inconsistencies in the way the car's
electrical system operates, disconnect the
Gateway product immediately and consult
your dealer.
When you have tested everything, refit your head
unit. Take care not to trap any wires or the
Dension product. We supply cable ties to mount
the Gateway Five module.
Refit is the reversal of the removal process for
your specific vehicle, as per your manufacturer's
instructions.
Warning! Do not trap the cables, or leave them
in a position where they may become trapped
after refitting the head unit.
5 Disclaimer
Disclaimer
All photos/illustrations are for representation
purposes only and may differ visually from the
equipment in your vehicle. Information correct at
time of going to print E. & O. E. Dension Audio
Systems Ltd. and it's registered partners cannot
be held liable for any damages caused by the
incorrect installation of any Dension product
Other Dension Adapter manuals

Dension Gateway Lite D2B User manual

Dension

Dension Gateway Lite D2B User manual

Dension IVA User manual

Dension

Dension IVA User manual

Dension Gateway Blue User manual

Dension

Dension Gateway Blue User manual

Dension 500S BT User manual

Dension

Dension 500S BT User manual

Dension Gateway Lite D2B User manual

Dension

Dension Gateway Lite D2B User manual

Popular Adapter manuals by other brands

Insignia NS-PU37H-BK Quick setup guide

Insignia

Insignia NS-PU37H-BK Quick setup guide

Lenovo N2225 user guide

Lenovo

Lenovo N2225 user guide

Nvidia Mellanox ConnectX-4 Lx user manual

Nvidia

Nvidia Mellanox ConnectX-4 Lx user manual

SeaLevel ULTRA COMM+8.PCIe user manual

SeaLevel

SeaLevel ULTRA COMM+8.PCIe user manual

ACTiSYS ACT-WF8000U Specifications

ACTiSYS

ACTiSYS ACT-WF8000U Specifications

Uclear WT300 user manual

Uclear

Uclear WT300 user manual

ZyXEL Communications FN312 user guide

ZyXEL Communications

ZyXEL Communications FN312 user guide

Digitus AC600 user guide

Digitus

Digitus AC600 user guide

Sabrent C35U user manual

Sabrent

Sabrent C35U user manual

ReadyNet VRT210 Quick installation guide

ReadyNet

ReadyNet VRT210 Quick installation guide

Renkforce RF-4210674 operating instructions

Renkforce

Renkforce RF-4210674 operating instructions

ActionTec SBWD100KIT user manual

ActionTec

ActionTec SBWD100KIT user manual

ADF Web HD67D35-B2 quick start guide

ADF Web

ADF Web HD67D35-B2 quick start guide

Insignia NS-MTC1875 quick start guide

Insignia

Insignia NS-MTC1875 quick start guide

Arlo VMA4900 quick start guide

Arlo

Arlo VMA4900 quick start guide

Cirronet CR-HN50 quick start guide

Cirronet

Cirronet CR-HN50 quick start guide

Algo 8301 Installation/configuration

Algo

Algo 8301 Installation/configuration

Linksys WPC55AG user guide

Linksys

Linksys WPC55AG user guide

manuals.online logo
manuals.online logoBrands
  • About & Mission
  • Contact us
  • Privacy Policy
  • Terms and Conditions

Copyright 2025 Manuals.Online. All Rights Reserved.