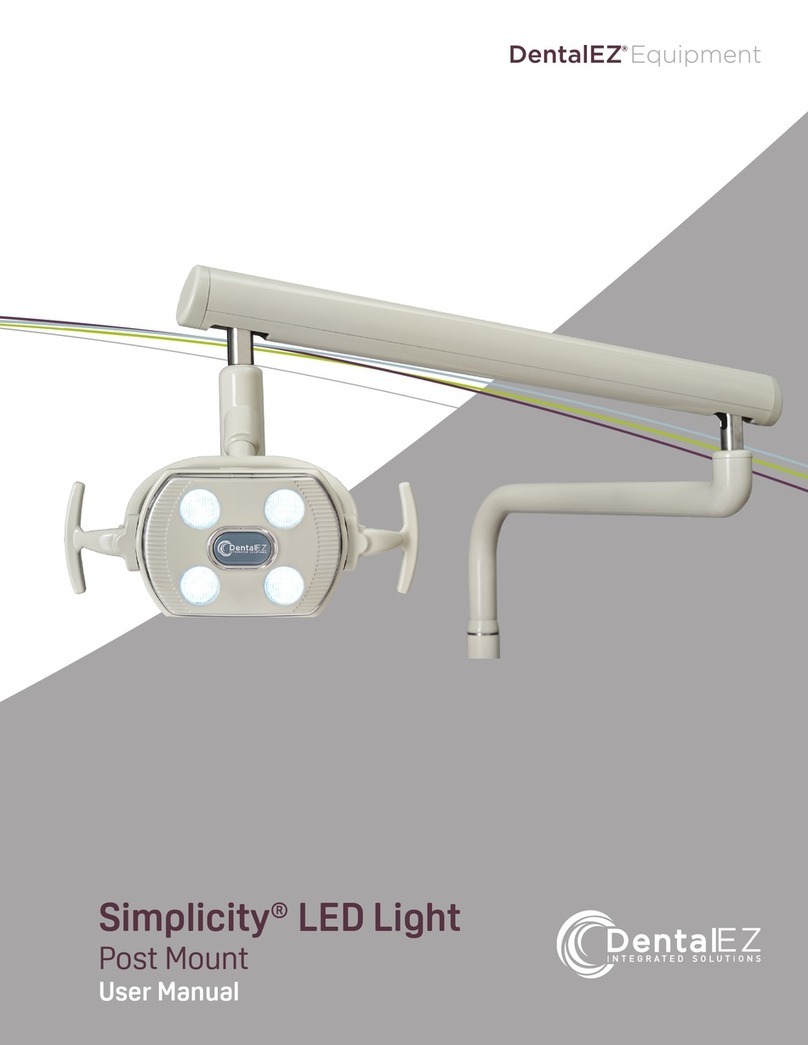
DentalEZ EverLight User manual

User Manual
EverLight®
Post Mount

1
User Manual
Table of Contents
Section I Introduction
Specications .......................................................................................................................... 2
Classications......................................................................................................................2-3
LightHeadRangeofMotion............................................................................................... 3
Dimensions ............................................................................................................................. 4
Packaging ................................................................................................................................. 4
Section II Installation
PostMountwithServiceConsole..................................................................................5-6
PostMountforMagellanCMU .......................................................................................... 6
Section III Operation
LightSwitch............................................................................................................................. 7
TouchPads .............................................................................................................................. 7
PositioningLight..................................................................................................................... 8
EliminatingAdjustableArmDrift........................................................................................ 9
Section IV Care
Cleaning&Disinfecting ...................................................................................................... 10
Section V User Service Information
Troubleshooting................................................................................................................... 11
ServiceInstruction .............................................................................................................. 11
DisposalofEquipment........................................................................................................ 11
Section VI Parts List/Diagrams
LightArm............................................................................................................................... 12
LightHead............................................................................................................................. 12
Limited Warranty ........................................................................................................ 13
Wiring Schematic ........................................................................................................ 14
EMC Information .................................................................................................... 15-18

User Manual
2
EverLight® (Post Mount)
Section I Introduction
Classications
Medical-GeneralMedicalEquipment
Certiedastoelectricalshock,re
andmechanicalhazardsonlyinaccor-
dancewithUL60601-1,
CAN/CSA-C22.2No.601.1,
CAN/CSA-C22.2No.60601-1(2008)&
ANSI/AAMIES60601-1(2005).
–Type of protection against electric shock: Class 1
Equipment
–Degree of protection against the ingress of water:
Ordinary
–Equipment not suitable for use in the presence of
a ammable anesthetic mixture with air or with
oxygen or nitrous oxide.
–Mode of operation: Continuous
–Environmental conditions recommended ranges
for:
Transport and Storage:
- Temperature range of - 10º C to + 70º C
- Relative humidity range of 10% to 100%
- Atmospheric pressure range of 500 to 1060 kPa
Normal Use:
- Temperature range of + 10º C to + 40º C
- Relative humidity range of 30% to 75%
- Atmospheric pressure range of 700 to 1060 kPa
Power Supply: Primary: 100-240V AC, 50/60 Hz.
Secondary: 12V DC
Operating Amperage: .4 max. - .16 min. Amp
Focal Length: 68.6 cm (27")
Color Temperature: High: 5800° Kelvin
(Color Matching)
Medium: 4500° Kelvin
(Operative Setting)
Low: 3200° Kelvin
(Composite Setting)
Light Intensity: High: 2790 Footcandles
(30,000 Lux)
Medium: 2325 Footcandles
(25,000 Lux)
Low: 1395 Footcandles
(15,000 Lux)
Light Pattern: 16.5 cm (6-1/2") x 8.9 cm (3-1/2")
Unit Weight: Post Mount: 12 kg (27 lbs.)
TheauthorizedEuropeanrepresentativeis:
DentalEZ(GB)Ltd.
ClevelandWay
HemelHempstead,Hertfordshire
HP27DY,England
Phone:(01442)269301
Attn:Mr.AndyKing
This manual contains installation, operation and care
instructions and user service information for the
EverLight® LED operatory light.
The EverLight operatory light system is intended to
be used by trained professional dental care personnel
to provide shadow free illumination to the oral cavity
for dental practices. The operatory light arm system
allows optimal light positioning, which for a reclined
patient, is normally from the sagittal plane directly
above or slightly behind the patient's oral cavity. The
operator will typically be positioned behind or to one
side of the patient. The arm assembly is counterbal-
anced so that minimum force is required to move
the light head assembly. The operatory light is not
designed to handle any external loads, such as hanging
foreign objects from the light system.
The EverLight operatory light is designed to provide
trouble-free service when installed, operated and
maintained according to the procedures set forth in
this manual.
To ensure correct installation, carefully read all
the instructions contained in this manual
paying close attention to all notes, notices,
cautions and warnings.
After the light is installed, please review the operation
procedures and care guidelines with the doctor's staff.
Then leave this manual in the doctor's ofce for
future reference.
53HN
Specications

3
In accordance with Part 15 of FCC rules, this
equipment was tested and complies with Class
A digital device limits. These limits are designed
to give equipment reasonable protection against
detrimental interference when operated in a
commercial environment.
Medical electrical equipment needs special
precautions regarding electromagnetic
compatibility (EMC) and needs to be installed
according to EMC information. (See EMC
Information Pgs. 15 through 18.)
Mobile radio frequency (RF) communications
equipment can effect medical electrical
equipment.
Section I Introduction
=Caution
=Warning
=Biohazard
=WarningDangerousVoltage
=AlternatingCurrent
=DirectCurrent
=TypeBAppliedPart
=ProtectiveEarth(ground)
=GeneralMandatoryAction
=RefertoManual(followinstructions)
= EuropeanCertication,ifapplicable.
Seenameplate.
=SerialNumber
=ManufactureDate
=Manufacturer
SN
Light Head Range of Motion
NOTICE
145º
145º
180º
150º
Explanation of Symbols and Signs:

User Manual
4
EverLight® (Post Mount)
Section I Introduction
Dimensions
The EverLight components are packaged and shipped
according to the packing list below. Please verify the
carton contents against the packing list.
Post-Mount Packing List
•Light Arm Assembly
•Light Post
• Flanged Bronze Bushing (optional)
• Power Supply Box
•Hardware Package
•Damage Instructions
•Manual
•Warranty Card
NOTE:Be aware that some cartons are shipped as
llers and may be empty (even if optional components
are ordered).
Carefully unpack the light. Inspect all of the items
received to assure there has been no shipping damage.
If damage is discovered, contact the carrier
immediately. Then report and le the appropri-
ate claims with the carrier within 24 hours after
delivery. (See Limited Warranty, Page 13.)
Light Arm
Assembly
Light Post
Post-Mount Arm Assembly Dimensions
15"
17"
7.25"
2"
24" 31.75"
1.701"
Packaging
For any questions about an order, please
contact a DentalEZ Equipment customer service
representative at 1-866-DTE-INFO.
NOTICE
All parts supplied are vital for proper installation.
Do not discard any hardware or components until
installation is complete.
NOTICE

5
Section II Installation
Isolating the light from the supply mains is accomplished
by unplugging the light from its power supply.
NOTICE
Installation by an authorized DentalEZ dealer service
technician is recommended.
NOTICE
Do not modify this equipment without authorization
from the manufacturer.
WARNING
Light Post
Set Screw
Spindle Slot
Light Arm
Assembly
NOTE: Refer to your chair mounted unit manual for
installation of the light pole.
NOTE: The post-mount arm assembly dimen-
sions are illustrated at the top of Page 4.
NOTE: The side covers of the post mount service
console must be off. Refer to the unit manual for
removal.
NOTE: If the chair's seat upholstery was installed,
remove it according to the respective chair's manual.
Light Arm Assembly
1. Place the chair base in its lowest position.
2. Disconnect the chair power.
3. Back out the set screw from the light post.
4. Apply a light coat of lubricant to the spindle.
7. Insert the light arm assembly into the bushing
until it is fully seated in the light post.
8. Using a 5/64 Allen wrench, turn the set screw
in the light post until it passes through the
light arm assembly spindle slot and engages
the light arm assembly. Then loosen the set
screw two revolutions for clearance.
Power Supply Box
1. Inside the post-mounted service console, plug the
operatory light cord into the power supply cord.
Power
Supply
Supplied
Power Cord
5. Feed the low-voltage operatory light cord
through the center of the light post, arm
pivot and console post into the post-mounted
service console.
6. Pull the light cord all the way through the
post-mounted service console until the cord is
not too tight or loose going through the posts.
To avoid the risk of electrical shock, this
equipment must only be connected to a
supply mains with protective earth.
Before proceeding with electrical installation,
all wiring must be in accordance with NEC
and local electrical codes.
WARNING
WARNING
Rating of main circuit breakers should be
20 Amp maximum.
CAUTION
Post Mount with Service Console
2. Plug the supplied power cord into the power supply.

User Manual
6
EverLight® (Post Mount)
Section II Installation
Post Mount for Magellan CMU
3. Route the supplied power cord through the
bottom of the console and into the front of
the chair. (P-clamps provided in bag of supplies.)
5. Roll up any excess wires and neatly place
the power supply and excess wires inside the
console making sure no wires interfere with
closure of the console covers.
6. Replace the side covers on the console.
7. Reconnect the chair power and test the light
switch as described in Section III Operation.
Light Arm Assembly
1. Place the chair in its lowest position.
2. Disconnect the chair power.
3. Apply a light coat of lubricant to the spindle.
4. Slide the bushing (lipped end rst) over the light
cord and onto the spindle.
5. Feed the light cord through the center of the
light pole, pulling the cord out of the bottom
of the pole.
Power Supply Box
1. Plug the supplied power cord into the power
supply. (See photo below.)
2. Plug the light harness from the light arm into
the power supply.
3. Route the supplied power cord harness
through the front of the seat casting and plug
it into the chair harness. (See second photo on this
page.)
4. Roll up any excess wire and neatly place them
inside the seat casting making sure no wires
will interfere with moving parts. (Wire ties
provided in bag of supplies.)
5. Using the supplied Velcro, adhere the power
supply to the magellan manifold cover.
4. Plug the supplied power cord into the chair
harness located inside the chair.
P-Clamp
Console
Supplied
Power Cord
Chair Harness
Supplied
Power Cord
NOTE: Refer to the Magellan Unit Installation
Manual for installation of the light pole.
NOTE: If the chair's seat upholstery was installed,
remove it according to the respective chair's manual.
Magellan Manifold
Cover
Power
Supply
6. Reconnect the chair power and test the light
switch as described in Section III Operation.
NOTE: Replace the seat upholstery if it was removed.
Power
Cord

7
Section III Operation
Designed with three procedural and three intensity
settings EverLight offers a total of nine settings to
assure the correct light in every procedure.
Procedural Settings
•A- Sun - Color Matching - 5800° Kelvin
•B - Sun/Bulb - Operative Setting - 4500° Kelvin
•C - Bulb - Composite Setting - 3200° Kelvin
Low
(15,000 Lux)
Sun/Bulb - 4500°Kelvin
(Operative Setting)
Bulb - 3200°Kelvin
(Composite Setting)
Sun - 5800°Kelvin
(Color Matching)
Procedural
Settings
Intensity
Settings
Intensity Settings
•1 - Low - 15,000 Lux
•2 - Medium - 25,000 Lux
•3 - High - 30,000 Lux
Medium
(25,000 Lux)
High
(30,000 Lux)
The light ON/OFF toggle switch is located on the
elbow section of the light arm assembly.
Toggle
Switch
•Flip the toggle switch to the UP to turn the light ON.
•Flip the toggle switch DOWN to shut the light OFF.
ON
OFF
The EverLight dental light is designed to provide illu-
mination of the oral cavity for use by dental profes-
sionals in the dental operatory.
Light Switch
Touchpads
é
é

User Manual
8
EverLight® (Post Mount)
Section III Operation
Using the handles on either side of the LED head,
position the light to illuminate the oral cavity. (See
Light Head Range Of Motion, Pg. 3.)
Handles
Positioning Light
To take full advantage of the EverLight's intensity
and color correction, position the light between 20"
and 45" away from the oral cavity.
NOTICE

9
Section III Operation
The adjustable arm is factory-adjusted to counter-
balance the weight of the light head. If it becomes
necessary to adjust the mechanism because of added
weight, such as a mirror, perform the following steps:
Tools Required
•5/64 Allen wrench
•9/64 Allen wrench
•Phillips-head screwdriver
•Large at-head (slotted) screwdriver
1. Using a Phillips-head screwdriver, loosen the
#6 screw under the cap at the end of the
adjustable arm nearest the light head.
2. Using a 5/64 Allen wrench, remove the four
Allen-head screws from the underside of the
adjustable arm (two on each end). Then slide off
the top cover along with the end cap.
3. Insert a 9/64 Allen wrench into the two small
holes in the side of the adjustable arm and
completely loosen the friction block.
4. Insert a large at-head screwdriver into the
large slot in the side of the adjustable arm and
tighten the slotted nut.
5. Adjust the friction block to provide one to
two pounds maximum of break-away force.
6. Replace the adjustable arm cover and secure
using the four 5/64 Allen-head screws
previously removed.
7. Replace the end cap and tighten the #6 screw
using a Phillips-head screwdriver.
Adjustable Arm
Top Cover
5/64 Allen-head Screws (2)
End Cap
5/64 Allen-head
Screws (2)
9/64 Allen
Wrench
Tw o
Small
Holes
Friction Block
Adjustable
Arm
Adjustable Arm
Large
Slot
Slotted
Nut
Large Flat-head
Screwdriver
Set
Screw
End Cap
Adjustable
Arm
Eliminating Adjustable Arm Drift

User Manual
10
EverLight® (Post Mount)
Section IV Care
1. To clean all surfaces, use a typical
ALCOHOL-FREE, commercial cleaner or a
solution of neutral liquid detergent and water.
2. After washing, a disinfectant may be used
following the manufacturer's instructions.
NOTE: Daily cleaning with soap and water or a neu-
tralizer for iodophors may reduce discoloration.
Cleaning & Disinfecting
Under normal use, there is no routine
maintenance required.
NOTICE
Avoid spraying anything directly on the light. Spray
cloth rst, then wipe.
CAUTION
Do not use alcohol based disinfectants on plastic
surfaces.
CAUTION
All surface disinfectants cause varying degrees of
discoloration to light-colored surfaces.
CAUTION
3. The following disinfectants are acceptable to
use:
•Caviwipes
•Banicide
•Coecide

11
Section V User Service Information
No light Master/light switch is in OFF position Turn ON master/light switch.
No power Check circuit breaker.
Power supply failure Replace power supply.
Broken arm wire harness Check arm wire harness for
continuity.
Faulty switch Replace switch.
Low light intensity Intensity set on low Set intensity to high.
Plastic light shield dirty Clean light shield.
Light arm drifts vertically Counterbalance out of adjustment Adjust arm drift. (See Page 9.)
Light arm drifts horizontally Light post not level Level light post.
If the area of concern is not addressed in this man-
ual, contact your local DentalEZ full-service dealer-
ship. (See Limited Warranty, Page 13.)
Please have the following product information
available:
•Model Name ___________________________
•Model Number _________________________
•Serial Number __________________________
•Installation Date ________________________
•Dealer ________________________________
Symptom Possible Cause(s) Solution
Light Arm
Assembly
Model/Serial
Number Plate
The chart below should be used when troubleshoot-
ing EverLight problems. If these suggested trouble-
shooting procedures do not resolve the problem, see
the service instruction that follows.
Disposal and Decommissioning of DentalEZ product
Note: All local regulatory requirements for
disposal and decommissioning of equipment apply.
Electrical Salvage: Remove all circuit board and
electrical cabling for recycle as electrical salvage.
Metal Salvage: Remove all aluminum and steel
components for recycle as metal salvage.
Plastic Salvage: Remove all plastic components for
recycle as plastic salvage.
Non-Salvage Components: All other material
unsuitable for recycling should be disposed of
properly.
Troubleshooting
Service Instruction
Disposal of Equipment
Exercise extreme caution when
troubleshooting the electrical components
of the EverLight. When electrical power
is required, safety precautions must be
observed.
WARNING
For convenient referencing, a color-coded wiring
schematic is located at the end of this manual.
NOTICE The DentalEZ Technical Service Department is
available to supply service personnel with any
additional information or instructions needed to
repair or maintain the dental light.
NOTICE

User Manual
12
EverLight® (Post Mount)
Section VI Parts list/Diagrams
10
11
9
8
7
4
5
6
1
21
3
# Part/Kit Name Part/Kit No.
4 Switch Lever & Boot 3802-353
5 On/Off Switch 3802-351
6 Right Side LED Light Control 3802-329
7 Left Side LED Light Control 3802-328
8 Color Control Decal 3802-337
9 Intensity Control Decal 3802-336
10 Light Control Housing Kit w/Decals 3802-338
11 Front Clear Cover Set 3802-331
Ribbon Cable Kit 3802-332
Power Supply Kit 3802-334
Power Supply Kit, CE 3802-352
Complete Head 3802-354
Light Head
# Part/Kit Name Part/Kit No.
1 Arm End Cap 3801-811
2Rigid Arm Cap 3801-814
3 Post Bushing 3801-848
Light Arm

13
Limited Warranty
DentalEZ Group and its employees are proud of the products we provide to the dental community. We stand behind these prod-
ucts with a warranty against defects in material and workmanship as provided below.
In the event that you experience difculty with the application or operation of any of our products, please contact our Technical
Service Department at our expense at 1-866-DTE-INFO (1-866-383-4636).
If we cannot resolve the issue by telephone, we will arrange for a representative to contact you or suggest that the product be
repaired by a dealer service technician.
If product repair or return is required, we will provide you with a Return Authorization number and shipping instructions to
return the product to the proper facility. If the product is under warranty, we will ask you to provide proof of purchase, such as
a copy of your invoice. Please be sure to include the Return Authorization number on the package you are returning. Products
returned without a Return Authorization number cannot be repaired.
Freight costs for product returns are the responsibility of the customer. Products under warranty will be repaired or replaced
at our sole discretion and returned at our expense. Products outside the warranty limits will be repaired and returned with costs
invoiced to the customer. We are not responsible for shipping damages. We will, however, help you le a claim with the freight
carrier. Written repair estimates are available.
DentalEZ warrants the EverLight to be free of defects in material and workmanship, under normal usage, under the following
terms:
Light Components: Warranty Period:
Structural Members: Fixed Arm, Adjustable Arm and Handles 3 Years from date of installation*
Switches, LED Driver, Lens/LED 6 Years from date of installation*
Please note the following additional terms of our warranty and return policy:
• Warranties cover manufacturing defects only and do not cover defects resulting from abuse, improper handling, cleaning,
care or maintenance, normal wear and tear or non-observance of operating, maintenance or installation instructions. Fail-
ure to use authorized parts or an authorized repair facility voids this warranty.
• Liability is limited to repair or replacement of the defective product at our sole discretion. All other liabilities, in
particular liability for damages, including, without limitation, consequential or incidental damages are excluded.
• THIS WARRANTY IS IN LIEU OF ALL OTHER WARRANTIES, EXPRESSED OR IMPLIED, INCLUDING ANY
IMPLIED WARRANTIES OF MERCHANTABILITY OR FITNESS FOR A PARTICULAR PURPOSE. NO EM-
PLOYEE, REPRESENTATIVE OR DEALER IS AUTHORIZED TO CHANGE THIS WARRANTY IN ANY WAY
OR TO GRANT ANY OTHER WARRANTY.
WARRANTY REPAIRS: Parts repaired or replaced on a product that is in warranty will be warranted for the duration of that
product's original warranty.
NON-WARRANTY REPAIRS: The warranty on parts either repaired or replaced on an out-of-warranty product will cover the
repaired part only and will be for the time frame of a new parts warranty period.
PRODUCT RETURN: Opened products or product returns more than a year old cannot be returned for credit. There will be a
15% ($25.00 minimum) restocking charge on all items authorized for return.
* Provided conditions dened in the Instruction Manual are met.
EverLight and DentalEZ are registered trademarks of DentalEZ, Inc.
© 2015 DentalEZ Alabama, Inc..
EverLight®

User Manual
14
EverLight® (Post Mount)
Wiring Schematic
Power Supply
INPUT
100-240 VAC, 50/60 HZ
OUTPUT
12 VDC, 40 W
White (Neutral)
Green (Ground)
Black (Line)

15
EMC Information
Table 1
Guidance and manufacturer’s declaration - electromagnetic emissions
The EverLight Light is intended for use in the electromagnetic environment specified
below. The customer or the user of the EverLight should assure that it is used in such an
environment.
Emissions test Compliance Electromagnetic environment – guidance
RF emissions
CISPR 11
Group 1
The EverLight uses RF energy only for its internal
function. Therefore, its RF emissions are very low and
are not likely to cause any interference in nearby
electronic equipment.
RF Emissions
CISPR 11
Class A
The EverLight is suitable for use in all
establishments, other than domestic establishments
and those directly connected to the public low-voltage
power supply network that supplies buildings used for
domestic purposes.
Harmonic
emissions
IEC 61000-3-2
Class A,
Not Applicable
Voltage
fluctuations/flicker
emissions
IEC 61000-3-3
Class A
Not Applicable
•Use only replacement cables listed in Parts Section, Page
12. Other cables and accessories may negatively affect EMC
performance.
•When the EverLight is used adjacent to other equipment,
observe the light to verify normal operation.
WARNING

User Manual
16
EverLight® (Post Mount)
EMC Information
Table 2
Guidance and manufacturer’s declaration – electromagnetic immunity
The EverLight is intended for use in the electromagnet environment specified below. The
customer or the end user of the EverLight should assure that it is used in such an environment.
Immunity test IEC 60601
Test level Compliance level Electromagnetic environment
- guidance
Electromagnetic
discharge (ESD)
IEC 61000-4-2
+6 kV contact
+8 kV air
+6 kV contact
+8 kV air
Floors should be wood,
concrete or ceramic tile. If
floors are covered with
synthetic material, the
relative humidity should be at
least 30 %.
Electrical fast
transient/burst
IEC 61000-4-4
+2 kV for power
supply lines
+1 kV for input/output
lines
+2 kV for power
supply lines
+1 kV for input/output
lines
Mains power quality should
be that of a typical
commercial or hospital
environment.
Surge
IEC 61000-4-5
+1 kV differential
mode
+2 kV common mode
+1 kV differential
mode
+2 kV common mode
Mains power quality should
be that of a typical
commercial or hospital
environment.
Voltage dips,
short
interruptions and
voltage
variations on
power supply
input lines
IEC 61000-4-11
<5 % U
T
(>95 % dip in U
T
)
for 0.5 cycle
40 % U
T
(60 % dip in U
T
)
for 5 cycles
70 % U
T
(30 % dip in U
T
)
for 25 cycles
<5 % U
T
(>95 % dip in U
T
)
for 5 sec
<5 % U
T
(>95 % dip in U
T
)
for 0.5 cycle
40 % U
T
(60 % dip in U
T
)
for 5 cycles
70 % U
T
(30 % dip in U
T
)
for 25 cycles
<5 % U
T
(>95 % dip in U
T
)
for 5 sec
Mains power quality should
be that of a typical
commercial or hospital
environment. If the user of
the EverLight requires
continued operation during
power mains interruptions, it
is recommended that the Ever
Light be powered
froman uninterruptible
power supply or a battery.
Power frequency
(50/60 Hz)
magnetic field
IEC 61000-4-8
3 A/m 3 A/m Power frequency magnetic
fields should be at levels
characteristic of a typical
location in a typical
commercial or hospital
environment.

17
EMC Information
Table 4
Recommended separation distance between
Portable and mobile RF communications equipment and the model @ 3Vrms
The EverLight is intended for use in an electromagnetic environment in which radiated RF
disturbances are controlled. The customer or the user of the EverLight can help prevent
electromagnetic interference by maintaining a minimum distance between portable and mobile RF
communications equipment (transmitters) and the EverLight as recommended below, according
to the maximum output power of the communications equipment.
Separation distance according to frequency of transmitter m
Rated maximum output
power of transmitter W
150 kHz to 80 MHz
P
v
d⎥
⎦
⎤
⎢
⎣
⎡
=
1
5.3
80 MHz to 800 MHz
P
E
d⎥
⎦
⎤
⎢
⎣
⎡
=
1
5.3
800 MHz to 2.5 GHz
P
E
d⎥
⎦
⎤
⎢
⎣
⎡
=
1
7
0.01 0.12 0.12 0.23
0.1 0.34 0.34 0.74
1 1.7 1.7 2.3
10 3.7 3.7 7.4
100 11.7 11.7 23.3
For transmitters rated at a maximum output power not listed above, the recommended separation
distance d in meters (m) can be estimated using the equation applicable to the frequency of the
transmitter, where P is the maximum output rating of the transmitter in watts (W) according to the
transmitter manufacturer.
Note 1: At 80 MHz and 800 MHz, the separation distance for the higher frequency range applies.
Note 1:These guidelines may not apply in all situations. Electromagnetic propagation is affected by
absorption and reflection from structures, objects and people.

User Manual
18
EverLight® (Post Mount)
EMC Information
Table 6
Guidance and manufacturer’s declaration - electromagnetic emissions
The EverLight is intended for use in the electromagnetic environment specified below. The customer or the
user of the EverLight should assure that it is used in such an environment.
Immunity test IEC 60601
Test level
Compliance
Level
Electromagnetic environment - guidance
Radiated RF
IEC 61000-4-3
Conducted RF
IEC 61000-4-6
3 V/m
80MHz to 2.5
GHz
150 kHz to 80
MHz
3 V/m
3 Vrms
Portable and mobile RF communications equipment
should be used no closer to any part of the Simplicity
Light including cables, than the Recommended
separation distance calculated from the equation
applicable to the frequency of the transmitter.
d = 1.7 √P 80 MHz to 800 MHz
d = 2.3 √P 800 MHz to 2.5 GHz
d = [3.5/V1] √P
Where P is the maximum output power rating of the
transmitter in watts (W) according to the transmitter
manufacturer and d is the recommended separation
distance in meters (m).
Field strengths from fixed RF transmitters, as determined
by an electromagnetic site survey, should be less than
the compliance level in each frequency range.
Interference may occur in the vicinity of equipment
marked with the following symbol:
NOTE 1 At 80 MHz and 800 MHz, the higher frequency range applies.
NOTE 2 These guidelines may not apply in all situations. Electromagnetic propagation is affected by absorption
and reflection from structures, objects and people.
aField strengths from fixed transmitters, such as base stations for radio (cellular/cordless) telephones and land
mobile radios, amateur radio, AM and FM radio broadcast and TV broadcast cannot be predicted theoretically
with accuracy. To assess the electromagnetic environment due to fixed RF transmitters, an electromagnetic site
survey should be considered. If the measured field strength in the location in which the EverLight is used
exceeds the applicable RF compliance level above, the EverLight should be observed to verify normal
operation. If abnormal performance is observed, additional measures may be necessary, such as reorienting or
relocating the EverLight.
bOver the frequency range 150 kHz to 80 MHz, field strengths should be less than 3 V/m.

© DentalEZ® Alabama, Inc.
Printed in USA
PN: 2717-252B
November, 2015
2500 Highway 31 South
Bay Minette, Alabama 36507
866-DTE-INFO
Fax: (251) 937-0461
www.dentalez.com
Table of contents
Other DentalEZ Work Light manuals
