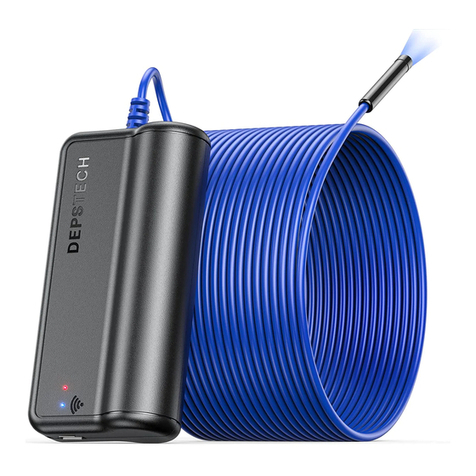
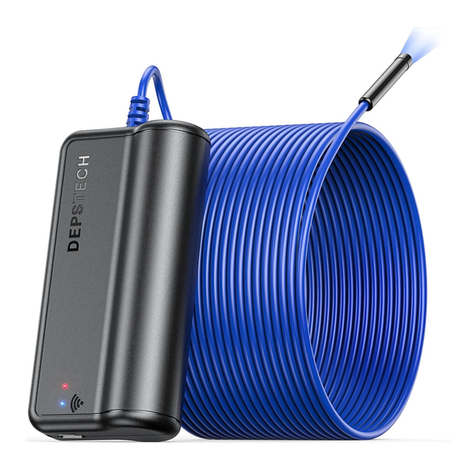
Depstech WF020X User manual

Multi-Language User Manual
FHD Inspection Camera

EN
DE
01 - 11
ES
12 - 22
IT
23 - 33
FR
34 - 44
45 - 55
JP
56 - 65
Catalog

English
01
Product Structure
1. Power Button ON/OFF
2. Camera LEDs dimmer:
Roll to control the brightness of the camera LEDs
3. WiFi signal indicator:
Blue LED flash: Ready to pair
Blue LED stay on: Connect successfully
4. Power indicator:
Red LED stay on: Power system work normally
Red LED flash: Low battery
Green LED stay on: Charging status
5. Reset Button:
Long press the reset button for 7S,the product will restore
to factory settings.
6. Micro-USB charging port
125
3
4 6

02
Step 1- APP Downloading
Note: For the first usage, the application may require your permission to get
access to the camera, album or WLAN/WiFi setting. But pls don’t worry, we
promise there is no privacy risk for our app.
For iOS user (iOS 9+), search and download “DEPSTECH-View”
app from APP Store.
For Android user (Android 5.0+), search and download
“DEPSTECH-View” from Google Play Store.
For Windows user, download DEPSTECH-View from Microsoft
Store.
iOS & Android
Android iOS

03
Step 2- Power on
Push the power button to “ON” to open the endoscope.
Step 3- WiFi Connection
A. Turn to the WiFi setting on your smart devices (Phone, Tablet
or PC with WiFi module), search for the factory setting WiFi
SSID: DEPSTECH_******
B. Then choose and fill the factory setting WiFi password:
12345678
Note: Once the power system standby, the red LED indicator will stay on.
When the blue LED indicator flashed, means the WiFi module is ready to
paired.
Note: “******” will be a series of random numbers& letters, and it may
take several seconds to wait for the WiFi signal and the wifi connection.
Please be patient for the process.

04
Step 4- Start Your First Trial!
Note:
If the endoscope and your smart device connected successfully, you
can receive the real-time images of the endoscope via the
DEPSTECH-View APP, and the blue LED of the endoscope Wi-Fi
transmiter will stay on.

05
2
3
4
5
6
1
APP Introduction
Rotate Button: Click to rotate the image 90°
Photo Shoot Button: Click to take a photo
Record Button: Click to start / end a video record
Buttons Hidden Function:
Click the screen to hide / wake the buttons.
Zoom in / Zoom out Function:
Two fingers expand outwards to zoom in the real- time image.
Two fingers get close to zoom out the real- time image.
Gallery Button: Click to check the photos / videos
Setting Button: Click to enter the setting
Camera Switch Button: Click to switch main / side camera
2
3
4
5
1
6

06
APP Introduction
Resolution: Click to choose different resolution.
WiFi Setting: Click to modify the WiFi SSID and Password. After
setup please remember to click reset button.
Channel Switch: Click to switch 2.4G&5G WiFi signal.

07
Charging Guide
DC 5V/2A
33.3ft (Without any obstacles)
IP67(For camera part only)
Maximum
Resolution
Sensor
Working Voltage
and Electric Current
WiFi Transmission
Distance
Model
Viewing Angle
Depth of View
Diameter
WiFi Frequency
Waterproof Grade
WF020X WF028 WF028 Dual Cam
2MP CMOS 5MP CMOS 2*2MP CMOS
1920*1080px 2592*1944px 1920*1080px
67°±3° 2*72°(144°)
1.96-11.8 in Main cam: 1.2-3.9 in
Side cam: 4/5~2.4 in
8.5mm 5.5mm 8.5mm 7.9mm
2.4G
WF025
2MP CMOS
1920*1080px
Specification
1. Connect the device to the DC 5V USB adapter for charging;
2. During the charging process, the green LED indicator light will be steady on.
3. When the device is fully charged, the green LED indicator will go out.
Guide for Accessories Installation
Turn counterclockwise-remove
accessories
Turn clockwise-tighten
accessories

08
FAQ& Help
Q1: How to connect WiFi endoscope to "DEPSTECH-View"?
A1: 1. Make sure the device is fully charged, long press the power
button or press the switch to turn on the device. The WiFi
module will turn on about 15 seconds after turning on the
device. You can observe whether the WiFi signal light (blue
light) of the device is always on. If it is on, it indicates that the
WiFi module is ready;
2. Enter the phone's "Settings" - "WiFi Connection" to find the WiFi
name printed on the device; select and connect, the default
password is "12345678". If the phone prompts "Internet may be
unavailable", please ignore the prompt and select "Keep
Connected";
3. Open this App and get real-time images of the endoscope.
While the App is acquiring the device image, the WiFi signal
light will flash. If the image cannot be obtained during the
flashing process, please contact the seller of the device.
Q2: The mobile phone cannot get the real-time image of the WiFi
endoscope or the screen went black?
A2: Please follow the steps below to solve the problems.
1. Please try to restart the device after fully charged.
2. There is a reset hole near the charging port of the device.
Please use the attached reset pin to insert the reset hole.
Please make sure that you've reached the reset button with the
reset pin, and the device will turn on again.
3. Please turn off the "WiFi" function of other mobile phones that
have been connected to this WiFi endoscope at home.

09
FAQ& Help
Q3: Can search for the Wi-Fi signal, but couldn’t get the connection?
A3: 1. The Wi-Fi connection may be failing, you’ve to forget the
network and reconnect it. Also, you can change to an some
place without Wi-Fi distribute and retry the connection.
2. For Android user, at the first time of connecting to the Wi-Fi
signal, the phone may tip "Internet may not be available",
please click "Keep Wi-Fi connection" option.
3. For iOS user, please make sure that you’ve turn on the "Cellular
data" and "Native network" option in the settings -
“DEPSTECH-View”.
4. For user who used to modified the Wi-Fi-SSID/ password
before, please use a reset pin and plug it into the reset port of
the endoscope. You can refer to lable on the bottom to the
default Wi-Fi SSID/ Password and reconnect it.
4. Turn on the phone in airplane mode, search for the WiFi signal
identified on the device body, select and connect it, the default
password is "12345678";
5. It should be noted that during the installation of this App, you
need to authorize the "photo/media content" and "document
storage" permissions of this App, otherwise some functions
such as taking pictures/viewing albums may be hindered;
6. For iOS users (especially iOS 14), please enter the "Settings"
interface of the phone, find and click “DEPSTECH-View”, then
turn on the "Cellular Data" and "Native network"option,
otherwise it may not be able to establish communication with
the device.
If you still couldn’t figure out how to get the connection, please feel free
contacting the supplier for help.

10
SAFETY & MAINTENANCE INFO
※Please remember to turn off the endoscope and place it in a dry environment after
per use. You can use soft cotton cloth with little alcohol to keep the camera lens
clear, which also does great help to capture the best image. Besides, for every
three month you should charge and use your electric devices regularly, which will
do great help to extend the battery life.
※The storage temperature should between 32-158℉. And the working temperature
should between 32-113℉. Besides, the Childs can only operate this device with
the guidance of adults, please don’t let them operate the device alone.
※Please keep the device away from fire source/ liquid/ acidic. These may increase
the risk of electrical shocks and damages of the device.
※The unit is not shock-resistant. Please avoid high impact results from things such
as dropping the unit from height.
※The lens and the tube are water resistant when the unit is fully assembled, but the
WiFi box isn’t. Which means IP67 waterproof only available for the camera probe
part, and the camera part support underwater inspections within 3.33ft/ 30 mins.
Note: Do not immerse the WiFi box in water
※According to the guidance of WEEE, attention should be given to the
environmental aspects of battery disposal.
※It's normal that the camera will turn hot, especially when the camera LED turn to
the brightest level, but it won’t affect the regular usage or the lifespan of the
endoscope.
※The WiFi transmission distance is about 33ft without any obstacles. Please keep
the distance between WiFi box and the phone/ tablet within 33ft.
※Please Keep the unit away from strong WiFi disturb area while using. Otherwise,
it may affect the WiFi connection between the WiFi box and the smartphone.
For your safety and better using experience, please read the
instructions carefully before using.

11
※FCC statement: This device complies with Part 15 of the FCC rules.
Operation is subject to the following two conditions:
1) This device may not cause harmful interface;
2) This device must accept any interference received, including
interference that may cause undesired operation.
This equipment complies with FCC radiation exposure limits set forth
for an uncontrolled environment. This equipment should be installed
and operated with a minimum distance of 20cm between the radiator &
your body. This transmitter must not be co-located or operating in
conjunction with any other antenna or transmitter.
※2012/19/EU (WEEE directive): Products marked with this symbol
cannot be disposed of as unsorted municipal waste in the European
Union. For proper recycling, return this product to your local supplier
upon the purchase of equivalent new equipment, or dispose of it at
designated collection points. For more information see: www.recycle-
this.info
2013/56/EU (battery directive): This product contains a battery that
cannot be disposed of as unsorted municipal waste in the European
Union. See the product documentation for specific battery information.
The battery is marked with this symbol, which may include lettering to
indicate cadmium (Cd), lead (Pb), or mercury (Hg). For proper
recycling, return the battery to your supplier or to a designated
collection point. For more information see: www.recyclethis.info
※EU Conformity Statement
This product and - if applicable - the supplied accessories too are
marked with "CE" and comply therefore with the applicable harmonized
European standards listed under the EMC Directive 2004/108/EC, the
RoHS Directive 2011/65/EU and Amendment (EU) 2015/863.

Deutsch
12
Angabe über die Bestandteile des Produkts
1. Power-Taste ein / aus
2. Dimmer der Kamera-LED:
Scrollen Sie, um die Helligkeit der Kamera-LED zu steuern.
3. WiFi-Signalanzeige:
Blaue LED blinkt: Bereit zum Pairing
Blaue LED leuchtet immer: Verbindung ist erfolgreich
4. Betriebsanzeige:
Die rote LED leuchtet immer: Das Stromversorgungssystem
funktioniert normal
Rote LED blinkt: Batterie schwach
Grüne LED leuchtet immer: Ladestatus
5. Reset-Taste:
Drücken Sie lange die Reset-Taste für 7S, das Produkt wird auf
die Werkseinstellungen zurückgesetzt.
6. Mikro-USB-Ladeanschluss
1 2 5
3
4 6

Schritt 1 – App herunterladen
Hinweis: Bei der erstmaligen Nutzung könnte die App Sie gegebenenfalls
um Ihre Erlaubnis für den Zugriff auf die Kamera, das Fotoalbum oder die
Einstellung von WLAN/WiFi bitten. Machen Sie sich bitte keine Sorgen, wir
können Ihnen garantieren, dass unsere App Ihre Privatsphäre nicht
gefährden wird.
iOS Benutzer (iOS 9+) Können im App Store nach
„DEPSTECH-View“ App suchen und sie herunterladen.
Android Benutzer (Android 5.0+) Können im Google Play Store
nach „DEPSTECH-View“ suchen und sie herunterladen.
Wenn Sie Windows Benutzer von Windows 10 laden
DEPSTECH-View aus dem Microsoft Store herunter.
13
iOS & Android
Android iOS

Schritt 2 – Aktivierung des Gerätes
Drücken Sie den Netzschalter auf „ON“, um das Endoskop zu
öffnen.
Schritt 3- WiFi-Verbindung
A. Schalten Sie die WiFi-Einstellung auf Ihren Smart-Geräten ein
(Android/ iOS phone), suchen Sie nach der Werkseinstellung
WiFi SSID: DEPSTECH_******
B. Wählen Sie das WiFi-Passwort für die Werkseinstellung aus
und geben Sie das Passwort ein: 12345678
Blaue LED WiFi-Anzeige
Rote LED Power-Anzeige
Hinweis: Wenn das Power-System auf Standby ist, leuchtet die rote
LED-Anzeige dauerhaft.
Wenn die blaue LED-Anzeige blinkt, ist das WiFi-Modul bereit für die
Kopplung.
Hinweis: „******“ ist eine Reihe von Zufallszahlen und Buchstaben, das
Warten auf das Wifi-Signal und der Verbindungsaufbau mit WiFi kann ein
paar Sekunden in Anspruch nehmen. Haben Sie bitte etwas Geduld für
diesen Prozess.
14

Schritt 4- Probieren Sie es zum ersten Mal aus!
Hinweis:
Wenn das Endoskop und Ihr Smartgerät erfolgreich verbunden wurden,
können Sie die Echtzeitbilder des Endoskops über die DEPSTECH-View
APP empfangen und die blaue LED des Endoskop-WLAN-Senders
leuchtet.
15

Erläuterung über die App
Funktion zum Verstecken der Buttons:
Durchs Klicken darauf werden die Buttons versteckt / aktiviert
Umdrehen-Button: Durchs Klicken darauf werden die Bilder um 90° umgedreht
Fotoaufnahme-Button: Durchs Klicken darauf wird ein Foto aufgenommen
Videoaufnahme-Button: Durchs Klicken darauf wird eine Videoaufnahme
gestartet / beendet
Galerie-Button: Durchs Klicken darauf werden die Fotos / Videos angezeigt
Einstellung-Button: Durchs Klicken darauf wird das Einstellungsmenü angezeigt
Hinein zoomen / Heraus zoomen:
Ziehen Sie mit zwei Fingern das Bild auseinander, um das Echtzeit-Bild hinein zu
zoomen.
Schieben Sie mit zwei Fingern das Bild zusammen, um das Echtzeit-Bild heraus zu
zoomen. 16
Kamera-Umschalttaste: Klicken Sie hier, um die Haupt- / Seitenkamera zu
wechseln
2
3
4
5
1
2
3
4
5
6
1
6

Erläuterung über die App
Auflösung: Darauf Klicken zum Auswählen von unterschiedlichen
Auflösungen.
WiFi-Einstellung: Darauf Klicken zur Änderung des WiFi SSID und
Passworts. Nach der Einstellung vergessen Sie bitte nicht, auf den
Reset-Button zu klicken.
Kanalwechsel: Wenn es in der Nähe zu viel 2.4g&5g WiFi-Sig-
nalstörungen gibt, klicken Sie darauf.
17

Gegen den Uhrzeigersinn drehen Im Uhrzeigersinn drehen
Installationsanleitung für Zubehöre
Die drei mitgelieferten Zubehöre (Seitenspiegel, Haken und Magnet)
sind alle auf der gleichen Art und Weise wie oben dargestellt an der
Kamera installiert.
18
DC 5V/2A
33.3ft (ohne jegliche Hindernisse)
IP67(gilt nur für die Kamera)
Maximale
Auflösung
Sensor
Betriebsspannung
und Betriebsstrom
WiFi-
Reichweite
ModelI
Betrach-
tungswinkel
Fokusbereich
Diameter
WiFi- Frequenz
Schutzklasse
WF020X WF028 WF028 Dual Cam
2MP CMOS 5MP CMOS 2*2MP CMOS
1920*1080px 2592*1944px 1920*1080px
67°±3° 2*72°(144°)
7-40cm (Wird das beste in 10cm sein) Hauptkamera:1.2-3.9 in
Seitenkamera:4/5~2.4 in
8.5mm 5.5mm 8.5mm 7.9mm
2.4G
WF025
2MP CMOS
1920*1080px
Spezifikation
Ladeanleitung
1. Schließen Sie das Gerät zum Aufladen an den DC 5V USB-Adapter an;
2. Während des Ladevorgangs leuchtet die grüne LED-Kontrollleuchte
dauerhaft.
3. Wenn das Gerät vollständig aufgeladen ist, erlischt die grüne LED-Anzeige.
Other manuals for WF020X
2
This manual suits for next models
3
Table of contents
Languages:
Other Depstech Digital Camera manuals
Popular Digital Camera manuals by other brands

Agility Technologies
Agility Technologies FirstLook360 user manual
Sony
Sony CYBER-SHOT DSC-W12 operating instructions
dp smart
dp smart Rogy360 Operation guide

Sony
Sony DSC-P7 - Cyber-shot Digital Still Camera Service manual
Olympus
Olympus CAMEDIA C-3030ZOOM instructions
Vicon
Vicon IX 1000 L Installation & operation manual
