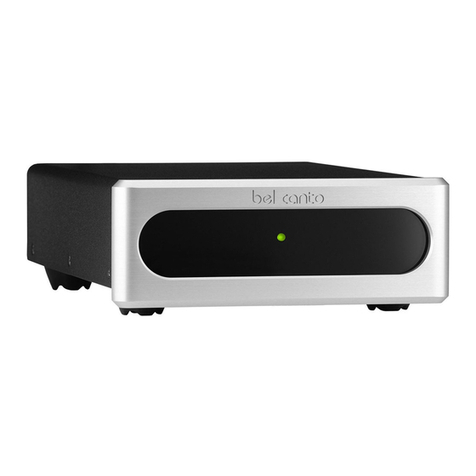
Design by Mr. K PPA - 01 User manual

Introduction of the Passive Preamplifier
Our company thanks you for purchasing the Passive Preamplifier, PPA –
01. Our PPA-001 is of a high quality range and a reakthrough in the
design of passive pre-amplifiers. Its performance can satisfy all music
lovers. Please e informed of its key features elow.
•Selectable Gain Control Switch Specials
In electromagnetics, when an external magnetic field is applied to a
ferromagnet (e.g. iron), and the atomic dipoles align themselves with
it, a physics phenomenon called Magnetic Hysteresis occurs. In such
a case, even when that external magnetic field is removed, part of the
alignment retains. As a result, that ferromagnet material ecomes
magnetized.
Magnetic Hysteresis theory is also applied in our PPA – 01 design, y
winding coil around the transformer core. When current/voltage
passes through the coil, magnetic force is induced throughout our 59
steps autotransformer (C Core), a slightly delay effect on the sound
quality will result. This makes the transformer volume very different.
That explains why tu e amplifier usually produce sound quality
superior to that of solid-state amplifier.
With x, 3x, 5x and 0x gain options, this PPA - 01 provides the
following high uilt quality of sound:
P.1

Differ from conventional passive amplifiers, this product wisely
adopted a 59 steps autotransformer (C Core) design. With a
material we keep confidential, our transformer adopted the new
“cool-melted method” technology, without having to use metal
clamps. In conventional transformer design, metal clamps having
material mismatch can cause a drop in sound quality.
•59 steps Mechanical Volume Control Switch
Typically, a passive preamplifier consists of a VR-connected
transformer. In our product, only one 59 steps autotransformer (C
Core), is used, and that makes this kind of 59 steps mechanical
volume control switch special and the sound feature gorgeous.
PPA - 01 is also an entirely passive design with literally zero extra power
sources plugged in to the audio signal path, meaning:
•NO power required;
•NEITHER distortion nor interference are added y active
components or power lines to this device;
Last ut not least, this device is designed and manufactured in Hong
Kong. P.2

Table of Contents
•Introduction of the Passive Preamplifier P.1 – 2
•Table of Contents P.3
•Important Safety Instructions P.4
•Special esign Features and Philosophies P.5
•Installation Instructions P.6 – 8
•Operations P.9 – 11
•Specifications P.12 – 13
•Warranty and Contact etails P.14 – 15
P.3

Important Safety Instructions
Note: Please read the following instructions carefully efore operating
your PPA - 01.
•DO NOT connect this device to Power Amplifiers/Integrated
Amplifiers with input impedance lower than 10kΩ, otherwise
malfunctions will e led due to the minimum output impedance of
10kΩ on this device.
•DO NOT plug in any power sources to this device.
•DO NOT attempt to place any heavy o jects (> 3kg) on top of this
device.
•DO NOT attempt to repair this device. If repair is needed, please
contact us. Contact details are listed in the last session.
•DO NOT expose this device to extremely high or low temperatures.
•DO NOT operate this device with the cover removed.
•DO NOT allow any liquid to contact the device.
•DO NOT use this device without authorizations. Keep it away from
children.
•DO NOT place this device within 10cm next to the isolation
transformer or power amplifier.
•ALWAYS set this device down gently.
P.4

Special Design Features and Philosophies
•59 Steps Autotransformer
Conventional passive preamplifier usually uses a traditional VR-
connected transformer with single input and output ports in the
design. Our Passive Preamplifier however leads a special design y
using only one 59 steps autotransformer. It is an ALL-IN-ONE
design.
This clever all-in-one design gives music lovers the experience of
direct-mechanical selection and control of transformer output.
Unlike the conventional passive preamplifier, its output is usually
controlled y a digital switch-connected external remote device
which worsens the sound quality.
P.5

Installation Instructions
Please read through the following instructions for the first-time
installation.
1. Placement
Place the PPA – 01 near to the source, input or output components
when connecting your Passive Preamplifier to the system. That can
minimize the negative effects of long ca le connections.
2. Turn off Associated Components
To avoid the potential damages caused y other components during
the PPA – 01 connection.
3. Connections
3.1 Installations Methods
PPA – 01 can provide 3 different connection methods to allow
varying sound qualities:
Type 1 Connections
CD/Network player → PPA – 01 → Power Amplifier/Integrated
Amplifier
P.6

* Power Amplifier/Integrated Amplifier
Applica le to oth tu e amplifier and solid-state amplifier.
Type 2 Connections
CD/Network player → PPA – 01 → Preamplifier → Power
Amplifier
* Power Amplifier/Preamplifier
Applica le to oth tu e amplifier and solid-state amplifier.
4. Type 3 Connections
CD/Network player → Solis-State Amplifier → PPA – 01 → Power
Amplifier
# Due to the concern of the high output impedance for tu e amplifier,
we recommend the preamplifier type of solid-state amplifier.
* Power Amplifier
Applica le to oth tu e amplifier and solid-state amplifier. P.7

3.2 Input Port Connections
Connect the audio players output(Source Component)to your
Passive Preamplifier input. With 3 different input ports(Port A, B
and C), audio players can e freely to e connected, to the
corresponding RCA (Red and White Ports). Audio players can e CD
players, networking players, radio sets etc.
3.3 Output Port Connections
Connect the output amplifier input to your Passive Preamplifier
output, to the corresponding RCA (Red and White Ports). Since the
minimum output impedance of PPA – 01 is 10kΩ, your output
amplifiers should not e lower than 10kΩ with the input impedance.
Some amplifiers in the markets applied a 600Ω transformer for input
impedance, this will cause function defect if these types of amplifiers
are used for connections.
5. Switch on Source Component
Turn on your audio players(Source Component) and start playing
your music.
6. Switch on Power Amplifier
Turn on you power amplifier.
7. Turn it up
Now, you may slowly increase your PPA – 01 volume/gain control
switch. Enjoy your music!
P.8

perations
•Front Panel
1. Volume Control Switch
The high-quality and machined kno allows up to 59 steps of
absolute mechanical volume control, ranging from the lowest
to the highest volume y turning from far left to far right.
2. Gain Control Switch
Condition
Make sure the VOLUME CONTROL SWITCH is selected
to the LOWEST VOLUME before using this gain control
switch. P.9

The special and unique gain control kno gives a selectable 4
choices of gain value. With the application of Magnetic
Hysteresis from the coil in the 59 steps autotransformer (C
Core), the PPA – 01 sound quality varies. Under x, 3x, 5x and
0x gain options, you can definitely experience superior
build quality of sound at different volume levels, so as to
achieve the est control.
3. Input Selector
To select one of the three sources of input(Ports A, B and C)
using the input selector switch.
P.10

•Rear Panel
4. Source Inputs
Receive outputs from audio players (Source Component), with
3 input ports choices (Ports A, B and C).
5. Preamplifier Output
Receive inputs from output amplifier.
6. GN
House ND
This GND ena les metal contact for wire connection.
Audio ND
This GND is RCA output ground connected.
Connect the House GND and Audio GND ports to the ground
ox if it is eing use; otherwise, you can short oth the House
GND and Audio GND together y connecting a jumper wire.
P.11

Specifications
•Transformer
Core Type C Core
Core Material Confidential
•Voltage Steps 59 steps
•Output Range
Measuring Condition
Connect output amplifiers with input impedance not lower than 10kΩ
to avoid malfunctions, as the output impedance of this PPA – 01 is
10kΩ.
Output Range +20dB – 80dB
•Gain Range
Gain 1X 3X 5X 10X
Coil Ratio 1:1.00 1:3.10 1:4.97 1:10.39
•Frequency Response
Measuring Condition
Turn to the highest volume level with a 10kΩ resistor loading.
Frequency Response 20 – 20kHz (+/- 3dB) at 1X gain
P.12

•Audio Connections
Inputs 3 RCA
Outputs 1 RCA
GND 1 HG, 1 AG
•Overall imensions
Width 350mm
Depth 280mm
Height 80mm
•Weight
Gross 6.8kg
Net 4.0kg
•Series Type Stepped Attenuators/ 15A Resistance Taper (For 1X
Gain)
P.13

Warranty and Contact Details
The PPA – 01 is covered y a lifetime warranty plan from the date of
purchase under normal circumstances. This lifetime warranty plan expires
only when all our manufacturing components are exhausted. But our
company guarantees the availa ility component supply for no less than
two years from the date of you purchase your unit.
•Warranty Coverage
The warranty provided y our company in this statement applies only
to product purchased from our authorized distri utors and authorized
resellers. Warranty coverage commences from the date of purchase.
Our company warrants the Product according to the following terms:
a) Against defects in material or workmanship only, ut not Product
appearance;
) not the cost of shipping or transportation for maintenance.
•Warranty Limitations
This warranty shall not apply when:
a) Defects caused y the operation outside the usage parameters
stated in the owners manual;
P.14

) malfunctions caused y misuse or a use, improper installation,
operation or maintenance, improper connections or peripherals, use
of spare parts not from this company, service modifications or
repair performed y a person not authorized y us or other conditions
unrelated to defects in Product material or workmanship;
c) Malfunctions or failure caused y accidental or intentional
damage;
d) Defects resulting from normal wear and tear.
•Contact etails
If you believe you need warranty service, please contact us through
the following means:
Telephone: (+852) 2889 1924
Fax: (+852) 2889 2493
E-mail: info@design ymrk.com
Face ook: https://www.face ook.com/Design- y-Mr-K-
386812875128890
We site: www.design ymrk.com
Preliminary instruction manual.
Data changed without notice. Design by Mr. K
Version .3 Date: 04th Feb., 202 P.15
Table of contents


