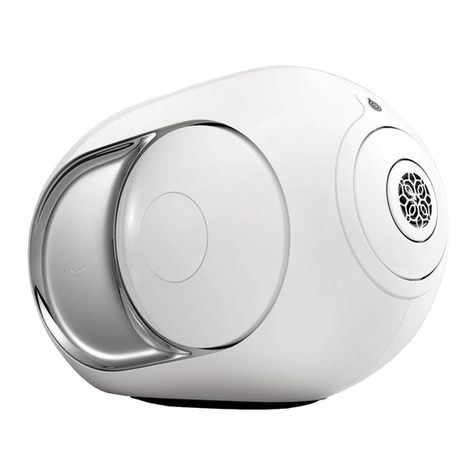
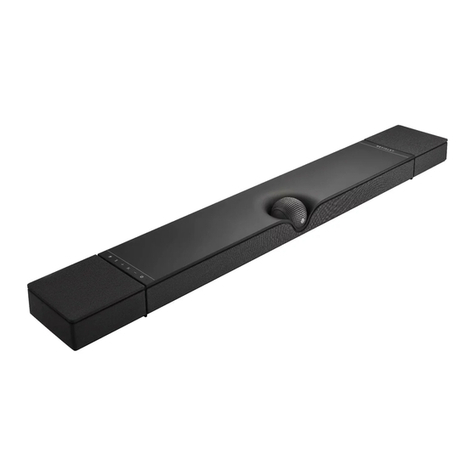
Devialet Dione User manual

•
•
•
• •
•
• •
• ••
• • •
• • • • • • • • • •
• • • • • • • • •• ••• •
• •
.:
..
·:.
...........
: .
•• • •
•••••••••••••••
••••
• • •• ••• • •
•••••••
• • • • •
••
•
••••••
• • •
••••
•
••••••
•• ••
•
••
•• •
••••
• • •• •• •
•••••
• • •
••
•
••••
• •
••
•
•••
• •
••
••
•
••
•
••
•••• •
•••
•••
••
•
••••
...
HELLO
...
• • •
••
•
••••
=··
••:
-:·.:•
•:-•:.
•••• •
•••
•
••
••
•
••••
• •
••
•
•••
• • • • • •
• •• •• •
• • •
••
•
••••
• • •••• •
•••••
• ••• •
•••
• •• • •
•••
• • •• • •
••••
• • ••••
••
•
•••••••
..
..
.
..
..
.
....
•
...
• . . :
•••
•••••••
•••
!
..•
.
.•
··•····
..
.
.•....
.
• • • • • • • • • • • • • • • • •
• •
• • • • • • • • • •
. . .-. . .
• •
• •
• •
•
•
•


Devialet was born of a pledge: to keep pushing the boundaries of sound experiences.
Fourteen years later, after delivering groundbreaking, iconoclast innovations
KPVJGƂGNFQHCEQWUVKEU&GXKCNGVXGPVWTGUKPVQVJGYQTNFQHCWFKQXKUWCN
&GXKCNGV&KQPGQWTƂTUVUQWPFDCTOCVGTKCNK\GUQWTNCVGUVFGXGNQROGPVUKPCWFKQ
VGEJPQNQI[VQDTGCVJGPGYGPGTI[KPVQVJGYC[[QWYCVEJCP[EQPVGPV
)TCPFKQUGCNNGPXGNQRKPIUQWPFVJCVEQORNGOGPVUCNNVJKPIUXKUWCN
CPFFTCYU[QWFGGRKPVQVJGCEVKQP
Watch your senses.

2
ENGLISH
Remove the product from its packaging
and place the installation wedges on a
flat surface.
Drilling template
Wall mount guide
Devialet Dione
Installation wedges
24'2#4'&'8+#.'6&+10'
1
Power cable + HDMI
Documentation
Protective cover
Packaging

3
215+6+10+0)
PLACE ON A SHELF MOUNT ON A WALL
To fix Devialet Dione on a wall, carefully read
the wall-mount guide inside the cardboard
box marked «Wall-mount guide».
Place Devialet Dione on a stable and flat surface next
to your TV. Make sure to leave some space between
the wall and Devialet Dione, avoid placing any objects on
top of the soundbar, and leave the sides unobstructed.
eARC / ARC
Insert the power cable into the soundbar power
port, then connect the appropriate audio cable.
Use the HDMI cable if your TV has an HDMI port
labeled eARC/ARC. If your TV does not have an
HDMI eARC/ARC port, use a TOSLINK optical
cable (not included).
3
Place Devialet Dione upside down
on the installation wedges.
Do not turn Devialet Dione upside down without
using the installation wedges to avoid contact
between the center sphere and a hard surface.
2

4
56#46&'8+#.'6&+10'
Connect the audio cable to the TV, make sure
to plug the HDMI cable into the HDMI eARC/ARC
port on your TV, or use an Optical cable.
Then, plug Devialet Dione into a power outlet
and wait until the indicator light stops flashing.
Before you start listening, check your TV’s audio setting and make sure
to set the audio output to HDMI eARC/ARC or to Optical depending on
which audio cable you are using to connect Devialet Dione to the TV.
Enjoy Devialet Dione!
Download and launch the
DEVIALET APP and follow
the steps indicated on
the screen to complete set-up.
1
2
3
eARC/ARC

5
%100'%6+8+6+'5
• Press and hold Devialet Dione Bluetooth button for 2 seconds.
When the indicator light blinks blue.
Devialet Dione is ready to be paired to a Bluetooth device.
• Open the Bluetooth settings on your device and search for «Dione-XXXX».
• Connect Devialet Dione to the same Wi-FI network as your Apple device.
• Play the audio track you want to stream
• Tap the AirPlay or streaming icon
• Choose Devialet Dione as the output speaker
• Use your phone, tablet or computer as a remote control for Spotify.
Go to spotify.com/connect to learn how
TO PLAY VIA BLUETOOTH
TO PLAY VIA AIRPLAY
TO PLAY VIA SPOTIFY CONNECT
Dione-XXXX
WE CAN HELP: help.devialet.com

6
Indicator light
Devialet button
Press to switch between HDMI and Optical source
Press and hold for 7 seconds to enter standby mode
To exit standby mode, press any button on Devialet Dione
Volume
Press to lower/increase volume
Play/Pause
Press to pause or resume playback
Bluetooth
Press and hold to enable Bluetooth pairing
Disable microphone
Press to disable room calibration microphones
Reset
Press and hold for 6 seconds to reset Dione
2
4
3
1
AC power
Connect to a power
socket
Optical (TOSLINK)
Use a TOSLINK Optical cable
if your TV or Projector does not
have an HDMI eARC/ ARC port.
HDMI eARC/ARC
Connect the HDMI cable
to the HDMI port labeled
eARC/ARC on your TV
or Projector.
Ethernet
Use an Ethernet cable
for better network stability.
1 2 3 4
WE CAN HELP: help.devialet.com

7
SHELF
126+/#.2.#%'/'06
WALL MOUNT


DEVIALET
DI
WALL
MOUNTING
GUIDE

Installation should always be carried
out
by
two
people.
Before
mounting
Devialet
Dione
on
the
wall,
make
sure
you
have
completed
the
first
3
steps
described
in
the
Ouickstart.
Devialet Dione should
be
flipped over
on
the
installation
wedges
and
the
relevant cables should
be
connected accordingly.
ENGLISH
1

2
FIXING DEVIALET
DIONE
Make sure
to
complete
the
first 3
steps
indicated
in
the Ouickstart.
1
Place the drilling template againstthe wall,
keep a minimum
of
8.0" (20cm) between
Devialet Dione and the
bottom
of
the
lV.
Make sure
to
leave the sides
of
the
soundbar unobstructed
-8.0"
5
Grab
the
4 adhesive pads
found
in
the
packaging.
2
Check
for
levelness with a level
and
mark
the
locations
of
the
2 screws then remove
the
template.
(
Drill
through
the
wall on
the
marks
marked in
the
previous step.
See drilling
recommendations on p.4
6
Stick
the
4 adhesive pads on
both
sides
of
the
wall notches.
0
~
0
~
0
0
-1----,i---------;
11
-
0
0
G G
e
4
Install
the
appropriate
fasteners
for
your wall using
the
lugs
found
in
the
packaging.
Lugs
7
Flip
the
product
on its side,
the
center sphere facing upwards.

8
Hang
Devialet
Dione
on
the
wall fasteners
using
the
notches
located
behind
the
bar.
11
INSTALLING DEVIALET
DIONE
9
Turn
the
central sphere clockwise.
You
may
encounter
some
resistance
at
the
beginning
of
the
operation.
~
Do
not
turn
the
sphere
the
other
way.
Ensure
the
Devialet
logo
is
correctly
positioned
in
front
of
you.
Turning
the
central sphere
is
mandatory
to
guarantee
opt
imal
rendering
from
the
sphere's internal speakers in
the
wall-mount
position.
10
Turn
until
you
hear
a click. The Devial
et
logo
should
end
up
in
front
of
you.
12
Devialet
Dione
is
now
ready
to
be
used.
Refer
to
the
"Start
Dev
i
alet
Dione"
step
of
the
Ouickstart
to
continue.
3

4
DRILLING
RECOMMENDATIONS
Do
not
install Devialet Dione on a wall
that
is
not
indicated on this page.
1 - Walls
made
of
solid material or concrete blocks:
2x
Dowels
5/16"
x
2-1/4"
E
;:s
:2
;s;:
>>>1J
Drilling
depth
(minimum):
2-3/8"
2 - Plasterboards:
2x
Dowels
3/8"
x2"
717
3- Walls
made
of
solid
wood
:
Do
not
use
dowels
Drilling
depth
(minimum):
2"
SAFETY
INSTRUCTIONS
2x
Screws
3/16"
x
2"
~
tll
Screw
head
diameter<
15/32"
Screw
head
t
hickness<
15/64"
2x
Screws
3/16"
x2"
Screw
head
diameter<
15/32"
Screw
head
thickness<
15/64"
2x
Screws
3/16"
x2"
Screw
head
diameter
<
15/32"
Screw
head
thickness<
15/64"
To
avoid
the
risk
of
falling, fire and electric shock, please make sure
to
read
the
following instructions carefully.
Any unauthorized modification could compromise your safety and normal operation
of
the unit.
If
you have any problems, please consult
an
expert. For your safety, make sure an isolating device (switch
or
circuit breaker) is installed and easily accessible.
In
the
event
of
a lightning storm, turn
off
the
power.
Make sure
that
your electrical installation complies with all applicable electrical standards
in
your country.
Make sure the wall on which DEVIALET DIONE will
be
installed is flat, smooth and vertical.
Make sure
that
the wall
on
which the sound barwill be install
ed
is undamaged, and
that
it
is capable
of
supporting 20 kg
per
mounting point.
For each
type
of
bracket, use
the
screw+dowel combination shown in this
guide
.
When drilling the wall, make sure
the
drill
bit
is
the
correct diameterand suitable
for
the
bracket.
Be sure
to
properly fix
the
screws
the
to
the
wall for optimal support.

DEVIALET

DEVIALET
SAFETY
INSTRUCTIONS

EN
. I
MPORTANT
SAFETY
INSTRUCTIONS
Made
inChina -devialet.com
DEVIALET,
10
Place Vendome 75001 Paris FRANCE
PLEASE
READ
THESE
INSTRUCTIONS,
keep
these instructions,heed all warnings,
follow
all instructions
Input
electrical
rating:
100-240
V-
50/60
Hz2.SA.
-Alternating current
To
completelydisconnectthis appliancefrom
the
mains, disconnect
the
power
supplycord
plug
from
the
product.
Socket-outlet shall
be
installed near
the
appliance
and
shall
be
easily accessible.
Keepappliance awayfrom any
sort
of
liquid,source
of
humidityand major heatsource
both
when inuse and
not
in use.
Warning:
To
reduce
the
risk
of
fire
or
electric shock,
the
appliance shall
not
be
exposed
to
dripping
or
splashing,
and
objectsfilled
with
liquids, such
as
vases, shall
not
be placednear
the
apparatus.
Unplugappliance during lightning storms
or
when unused
for
long
periods
of
time.
Do
not
obstruct
the
heatsink.
Handle appliance
with
care. Manhandlingcan affectperformance.
The loudspeakersare fragile elements,
do
not
touch it.
Onlyclean appliancewith a
dry
cloth.
Do
not
leave appliancewithin reach
of
children.
Risk
of
electricshock!
Do
not
open!
You
mustnevercarry
out
maintenance
on
the
system
or
itsaccessories yourself.
Qualified
people
alone can carry
out
these measures. Any unauthorizedalterations maycompromise
your
safetyand
the
appliance's performance.
If
you haveanyproblems, please consult an expert.
The Lightning Flash
with
arrowhead symbol within an equilateral triangle, is intended
to
alert
the
user
to
the
presence
of
uninsulated •dangerous
voltage•
within
the
product
enclosure
that
may
be
of
sufficientmagnitude
to
constiMe
a risk
of
shock
to
persons
Theexclamation
point
within an equilateraltriangle is intended
to
alert
the
user
to
the
presence
of
important
operating
and
maintenance(servicing) instructionsin
the
literature
accompanying
the
product
Make
sure
that
yourappliance is securely fastened
to
a stable surface
before
playing it.This will ensure
that
no
mechanical vibrations
will
be
transmitted
to
the
product'simmediate
surroundings,
owing
to
itsdesi!Jn,
Do
not
dangle
the
product
by
its
power
cord. Protect
the
power
cord from being walked
on
or
pinched particularly
at
plugs, convenience receptacles, and
the
point
where
they
exit
from
the
apparatus.
Onlyuse
attachments/
accessoriesspecified
by
the
manufacturer.
Maximum
operating
temperature
of
equipment:
35°C
Operating frequency band :
8Iuetootti
: 2402-2480MHz
WLAN 2.4G band: 2.400-2.4835GHz
WLAN 5G band:5.15-5.85GHz
WLAN Device (5G band)
1.The device
for
operation in
the
band
S150-5250 MHz
is
only
for
indooruse
to
reduce
the
potential
for
harmfulinterference
to
co-channel
mobile
satellitesystems
2. The maximumantenna
gain
permitted
for
devices in
the
band
5725-5825 MHz shall
comply
with
the
EIRP
limitsspecified
for
point-yo-point
and
non
point-to-point
operation
as
appropriate
Model
number:
MM593
Listening
at
highvolume maydamage yourhearing.Foryoursafety, keep yourdistance
from
speakers
and
set
the
appliance'ssound volume
to
a reasonable level.
TheSpotifvsoftware is subject
to
third party licenses found here: www.spotify.com/connect/third-party-licenses
Use
of
the
Works
with
Apple
badge
means
that
anaccessoryhas beendesigned
to
work
specificallywith
the
technologyidentified in
the
badge
and hasbeen certified
by
the
developer
to
meet
Apple
performance standards.
AirPlayistrademark
of
Apple
Inc., registered
in
the
US
and
other
countries
The
Adopted
Trademarks HDMI,
HDMI
High-Definition Multimedia Interface, and
the
HDMI
Logo
are trademarks
or
registered trademarks
of
HDMI
Licensing Administrator, Inc. In
the
UnitedStates
and
other
countries.• OR
"The
terms HDMI, HDMI High-Definition
Multimedia
Interface,
and
the
HDMI
Logo are trademarks
or
registered trademarks
of
HDMI
Licensing Administrator, Inc.
Qualcomm
aptX
is a
product
of
Qualcomm Technologies, Inc.
and/or
itssubsidiaries. Qualcomm isa trademark
of
QualcommIncorporated,registered in
the
United States and
other
countries. aptXis a trademark
of
QualcommTechnologies International, Ltd., registered in
the
UnitedStates
and
other
countries.
Dolby,
Dolby
Atmos, and
the
double-D
symbolareregistered trademarks
of
DolbyLaboratoriesLicensing Corporation.
Manufactured underlicense from
Dolby
Laboratories. Confidentialunpublished works.
Copyright
C 2012-2020
Dolby
Laboratories. Allrights reserved.
~
FCC
Compliance Statement(Class 8): This device complieswith Part
15
of
the
FCC Rules/IndustryCanadalicence-exempt
RSS
standard(s).
Operation
issubject
to
the
following
I""-'
two
conditions:
(1)
this device may
not
cause harmful interference, and (2) this device mustaccept any interferencereceived, including interference
that
maycause undesirea
operation.
CAN
ICES-3
(8)/
NM8-3(8)'
NOTE: This
equipment
has been testedand found
to
comply
with
the
limits
for
a Class 8
digital
device, pursuant
to
part
15
of
the
FCC Rules. These limitsare designed
to
provide
reasonable
protection
against harmful interference in a residential installation.
This
equipment
generates, uses and can radiate radio frequency energy and,
if
not
installed and used
in
accordance
with
the
instructions, maycause harmful interference
to
radio
communications. However, there is
no
guarantee
that
interferencewill
not
occur in a particular installation.
If
this
equipment
does
cause harmful interference
to
radio
or
television reception, which can
be
determined
by
turning
the
equipment
off
and
on,
the
user isencouraged
to
try
to
correct
the
interference
by
one
or
more
of
the
following measures:
-Reorient
or
relocate
the
receiving antenna.
-Increase
the
separation
between
the
equipment
a.nd
receiver.
-Connect
the
equipment
into
an
outlet
on
acircuit different
from
that
to
which
the
receiverisconnected.
-Consult
the
dealer
or
anexperienced radio/TVtechnician
for
help.

Changes
or
modifications
not
expresslyapproved
by
theparty responsible
for
compliance
could
void
the
user'sauthority
to
operate
the
equipment.
DEVlALET herebydeclares
that
this
product
isin compliancewith
the
essential requirementsand
other
relevant provisions
of
Directive 2014/53/EU and all
other
applicable
EU
directive requirements. The completedeclaration
of
conformitycan
be
found at: devialet.com/compliance
This
product
bears
the
selective sorting symbol
for
Waste electrical and electronic
equipment
(WEEE).
This means
that
this
product
must
be
handled pursuant
to
European
directive2012/19/EUin order
to
be
recycled
or
dismantled
to
minimize
its
impact
on
the
environment.
Userhas
the
choice
to
givehis product
to
a
competent
recyclingorganization
or
to
the retailerwhen
he
buys a
new
electrical
or
electronicequipment.
Suitable
for
altitude
below
2000m
This is a Class
II
(double insulated) deviceand has been designed in such a way
that
it
does
not
require a safetyconnection
to
electrical earth(ground).
Complies
with
IMDA
Standards
DA107451

DEVIALET
Other manuals for Dione
1
Table of contents
Other Devialet Speakers System manuals
