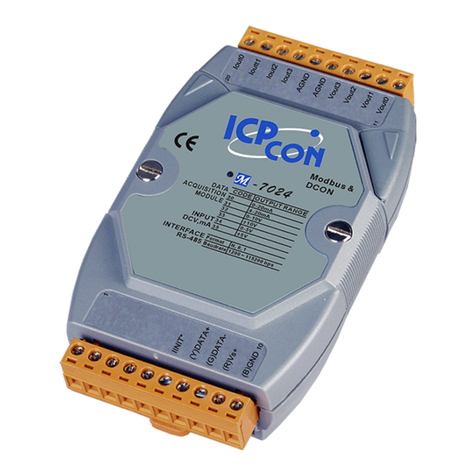
DeviceNet GFK-1539A User manual

DeviceNet Network Master/Slave
August 2002 GFK-1539A
1
Product Description ______________________________
Revision Letter: BA
Firmware version: 1.10
Firmware upgrades: None
DeviceNet
Certification:
Certificate available upon request.
Product Name: DeviceNet Network Control Module (NCM)
Specifications ___________________________________
Operating Modes: Master only, Slave only, Combined
Master/Slave
Slaves Supported: Up to 40 slave devices may be configured for
the Master mode
Configuration: Configured as a Generic Communication
Module with contiguous %I, %Q, %AI, and
%AQ references.
Status Data: Slave presence bit per each slave device, 64
bits total.
DeviceNet Features: Slave only - Group 2 Only Server or UCMM
Capable (COMMREQ selectable)
Master or Master/Slave - UCMM Capable
DeviceNet network
address:
0 to 63. COMMREQ selectable.
DeviceNet network
data rate:
125K, 250K, 500K baud. COMMREQ
selectable.
Indicators (3): OK LED to indicate the status of the NCM after
powerup. Mod LED to indicate the status of the
NCM module. Net LED to indicate
communication status on the DeviceNet
network.
Power Consumption: 140mA at 5V, 10mA at 3.3V
The DeviceNet Network Control Module is a DeviceNet master/slave
module that provides an interface to the a DeviceNet network. One
or more NCMs may be installed at any location in the PLC.
PLC CPU
power supply Optional booster
power supply
DeviceNet Network
Control Module
Preinstallation Check _____________________________
Carefully inspect all shipping containers for damage. If any
equipment is damaged, notify the delivery service immediately. Save
the damaged shipping container for inspection by the delivery
service. After unpacking the equipment, record all serial numbers.
Save the shipping containers and packing material in case it is
necessary to transport or ship any part of the system.
Quick Start Guide ________________________________
1. Install the Communications Carrier on the DIN Rail by simply
clicking it into place.
Note: Connecting carriers must be
installed on the same section of
35mm x 7.5mm DIN rail.
The DIN rail must have a conductive
(unpainted) finish for proper
grounding.
2. Install the Module on the Communications Carrier.
The latch on the module must be in the
unlocked position.
Align the connectors and the latch post
and press the NCM down until the two
tabs on the bottom of the NCM click
into place.
Turn the latch to the locked position to
secure the NCM to the top of the
carrier.
3. Connect the communications bus to the connector on the front
of the Network Control Module. (Refer to the heading Bus
Installation Guidelines for detailed bus installation instructions.)
4. Remove the connector cover on the right-hand side of the
Communications Carrier. Do not discard this cover; you will
need to install it on the last carrier. It protects the connector pins
from damage and ESD during handling and use.
Connector
5. Install additional modules by mounting modules on their
carriers and sliding them along the DIN rail to fully engage the
connectors in the sides of the carriers.

DeviceNet Network Master/Slave
August 2002 GFK-1539A
2
6. Power up the System, and Observe the Module LEDs. The
LEDs indicate the presence of power and show the operating
mode and status of the NCM.
O
K
M
O
D
NET
OK OFF when the NCM has not yet started its powerup sequence.
Blinking green indicates the NCM is performing its powerup sequence
and has not yet finished successfully.
Green indicates the NCM has successfully completed powerup
diagnostics.
Amber when the NCM has either failed powerup diagnostics or has not
yet received a valid configuration from the CPU.
Blinking amber means the NCM has failed powerup diagnostics. The
number of blinks indicates the fault type.
MOD OFF when the NCM is not powered.
blinks green if the NCM configuration is missing, incomplete, or incorrect.
The NCM may be in Standby state.
green when the NCM is operating normally.
blinks red if there is a recoverable fault.
red if there is an unrecoverable fault. The NCM may need replacing.
NET OFF when the NCM is not online or not powered.
blinks red and green if the NCM detects a Network Access error and is in
the Communications Faulted state.
blinks green if the NCM is online but has no connections in the
established state. It has no established connections to other nodes.
green when the NCM is online and has connections in the established
state.
blinks red if one or more I/O Connections are in the Timed-Out state.
red if an error renders the NCM incapable of communicating on the
network.
Bus Installation Guidelines ________________________
The network cable required for DeviceNet operation is specified in
the following table. A 5-conductor cable is necessary. One wire is a
drain, two wires are for carrying power on the network, and the
remaining two wires are to carry the data transmission. On a
DeviceNet fieldbus, every device must, at least, power its network
transceivers from the network power source. Some devices draw all
of their power from the network supply.
DeviceNet specifies two types of network cable, Thick and Thin
cable. Thick cable provides for longer distances and more power.
Generally, Thick cable is used for the Trunk cable. Thin cable is
used for shorter distances and is generally used for drop cables or
where cable flexibility is necessary.
DeviceNet Cable Specifications
Thick Cable General
Specifications
Two shielded pairs - Common axis with
drain wire in center
Overall braid shield - 65% coverage; 36
AWG or 0.12mm tinned Cu braid
minimum (individually tinned)
Drain wire- #18 Copper minimum; 19
strands minimum (individually tinned)
Outside diameter - 0.410 inches (min)
to 0.490 inches (max.) roundness -
radius delta to be within 15% of 0.5
O.D.
Thin Cable General
Specifications
Two shielded pairs - Common axis with
drain wire in center
Overall braid shield - 65% coverage; 36
AWG or 0.12mm tinned Cu braid
minimum (individually tinned)
Drain wire - #22 Copper; 19 strands
minimum (individually tinned)
Outside diameter - 0.240 inches (min.)
to 0.280 inches (max.) roundness -
radius delta to be within 20% of 0.5
O.D.
Network Topology Bus with limited branching
(trunkline/dropline)
Redundancy Not Supported
Network Power for
Node devices
Nominal 24 volt DC ±4%
Allowed Nodes
(Bridging excluded)
64 nodes
Data Packet Size 0-8 bytes with allowance for message
fragmentation
Duplicate Address
Detection
Addresses verified at power-up
Error Detection /
Correction
CRC - retransmission of message if
validity not acknowledged by recipient
Bus Length
The maximum length of the bus is limited by the cable type, transfer
rate, and the number and accumulated length of drop lines. Individual
branch lengths may not exceed 6 meters and are limited to one network
node per drop. However, the node may be a node offering multiple
ports.
With Thin cable, the maximum bus length, regardless of data rate, is
100m. With Thick cable used as the trunk line, the maximum bus length
is as shown in the following table.
Data Rate Bus length and drop length restrictions
500Kbps 100m bus length and branches totaling < 39m
250Kbps 250m bus length and branches totaling < 78m
125Kbps 500m bus length and branches totaling < 156m

DeviceNet Network Master/Slave
August 2002 GFK-1539A
3
Bus Connectors and Termination
DeviceNet uses several forms of connectors. The NCM provides the
5-pin standard Phoenix open-style pluggable connector. The pin-to-
signal-to-wire color assignments are shown in the following table:
Pin Signal Wire Color
1V- Black
2 CAN_L Blue
3 Shield Bare
4CAN_HWhite
5V+ Red
Connector orientation on the NCM is shown in figure below:
1 - V-
2 - CAN_L
3 – Shield
4 - CAN_H
5 - V+
Termination of a DeviceNet network is passive and includes one
resistor at each end of the network. A terminating resistor is placed
across the data communication signals at pin 2 (CAN_L) and pin 4
(CAN_H). Correct terminating resistor is a 121 ohm 1% ¼ watt
resistor.
Bus Power Supply and Grounding
DeviceNet requires a power supply of 24VDC (±4%) at a 16A
maximum. However, with the use of Thick cable, a maximum of 8A
is permitted on a single network segment. This is possible if the
power supply is placed at the center point of two network segments,
thus supplying 8A to each segment. With the use of Thin cable, a
maximum of 3A is permitted.
As with most Fieldbus networks, grounding of the network and its
devices is very important. In DeviceNet, it is required that all cable
shields be tied to ground at each device connection. This is done by
tying the bare wire of the cable to pin 3 (Shield) of the connector.
In addition, the DeviceNet network power supply must be grounded,
but only at one point. The V- signal must be connected to Protective
Earth Ground at the power supply only. If multiple power supplies
are used, only one power supply must have V- connected to Earth
Ground.
Configuration Guidelines ________________________
The DeviceNet Network Control Module must be configured in two
steps. The first step uses the configuration software to include the
module in the PLC configuration. The second step uses the
programming software to send a COMMREQ containing the network
addressing and data lengths to the NCM.
PLC Configuration for the DeviceNet NCM
The NCM is configured as part of the overall PLC system
configuration. The configuration software is used to specify the
following module characteristics:
A location. The NCM can be placed in any module location in
the system. In the selected location, insert a Communication
Carrier. On that Carrier, insert a Generic Communications
Module.
Settings:
9Select the Reference Address and Length for an I/O area in
each of the 4 reference types: I, AI, Q, and AQ. The length for
each must exactly match the total amount of data of that type
for all the slave devices controlled by the NCM, including the
64 bits of Communications Status Data provided by the NCM
itself. For example, the %I length must equal the total amount
of all discrete input data contained in the NCM’s input data
area, described later in this chapter. And the %AI length must
equal the total amount of all analog input data contained in
the NCM's input data area. Conversely, the %Q and %AQ
lengths must equal the total amount of all discrete and
analog output data, respectively.
9Enter the Module ID: FFFF9808.
Wiring: can be used to enter tags for the different data points.
Power Consumption: can be used to enter the power consumption
figures for the DeviceNet NCM.
Programming Guidelines ________________________
The second part of configuring an NCM is to send a single COMMREQ
from the application program to the NCM. No communications can
occur until a valid COMMREQ is received by the NCM. The format of
this COMMREQ is shown below.
The configuration COMMREQ defines whether the NCM is used as a
DeviceNet Master, a DevceNet Slave, or as both simultaneously. It
specifies the network address and data rate of the NCM. It also specifies
the network address of each device, the I/O mode, and the lengths of
each slave’s data. The sum of the I/O data for each slave device
(including the NCM itself, if the NCM is a Slave) and the 64 bits of
Communications Status Data must exactly equal the length for each
reference type entered using the configuration software.
Configuring the NCM as a DeviceNet Master Only
When configuring the NCM as a Master, the COMMREQ must specify:
the network address of the Master.
the network data rate of the Master.
For each subordinate slave:
9its network address
9its I/O mode
9the amount of I/O data of each type: I, AI, Q, AQ
Configuring the NCM as a DeviceNet Slave Only
When configuring the NCM as a Slave, the COMMREQ must specify:
the network address
the network data rate
the network mode
the amount of I/O data of each type: I, AI, Q, AQ
Configuring the NCM as a DeviceNet Master and Slave Combined
When configuring the NCM as both a DeviceNet Master and Slave, the
COMMREQ must provide all of the configuration information for both a
Master and Slave. Note that in this combined scenario, the network
mode of the slave is ignored as the Master configuration requires the
slave to be UCMM-capable.
the network address of the Master/Slave.
the network data rate of the Master/Slave.
For the NCM as a Slave the amount of I/O data of each
reference type: I, AI, Q, AQ
For each subordinate slave:
9the network address
9the I/O mode
9the amount of I/O data of each type: I, AI, Q, AQ

DeviceNet Network Master/Slave
August 2002 GFK-1539A
4
COMMREQ Command Block
Word # Contents
1 Length of the data block in words. (Shown below,
number of slaves = length):
0 slave = 8, 1 slave =11, 2 slaves = 14, 3 slaves
=17,…, n slaves = 8 + n * 3.
2Always0
3 Status Pointer Memory (8 = R, 10 = AI, 12 = AQ)
4 Status Pointer Offset (0 based)
5 - 6 Always 0
The slave devices can be entered in the COMMREQ in any order.
The NCM checks that the lengths for the four data areas sent in the
PLC configuration file match the sum of the lengths sent in the
COMMREQ. For convenience, the units of length in the
configuration of a Generic Communication Module match the units
of length defined in the COMMREQ. Any bit length field must be
entered as a multiple of 8 bits, such as 8, 16, 24, etc.
COMMREQ Data Block
Word
#
Byte # Contents
1 1 - 2 COMMREQ Command Number = 1000H
3 Master Address (0 – 63)2
4 Master Baud Rate (0 = 125k, 1 = 250k, 2 =
500k)
5 If NCM is Slave, Length of its I data (in bits, 0 if
none)
3
6 If NCM is Slave, Length of its AI data (in words,
0 if none)
7 If NCM is Slave, Length of its Q data (in bits, 0
if none)
4
8 If NCM is Slave, Length of its AQ data (in
words, 0 if none)
5 9 - 10 Reserved for Master Scan Rate, 0 = Scan as
fast as possible
6 11-12 NCM Slave communication mode (0 = UCMM-
capable, 1 = Group 2 Only) This field is only
applicable when the NCM is configured as a
Slave only. This field is also ignored when the
NCM is configured as a Master device. In the
Master case, the NCM Slave communication
mode is fixed as UCMM-capable.
7-8 13-16 Reserved
17 First Slave’s Address (0 – 63)9
18 First Slave’s I/O mode (1 = Poll, 2 = Strobe, 4
= COS w/Ack, 0xC = COS w/o Ack)
19 First Slave’s I data length (in bits, 0 if none)10
20 First Slave’s AI data length (in words, 0 if none)
21 First Slave’s Q data length (in bits, 0 if none)11
22 First Slave’s AQ data length (in words, 0 if
none)
12-14 23 - 28 Second Slave’s configuration
: : : : :
126-
128
251 –
256
Fortieth Slave’s configuration
COMMREQ Return Codes
The following table lists the possible return codes returned by the
COMMREQ upon completion. The return code is written to the Status
Pointer location specified by Words 3 and 4 of the COMMREQ
Command Block.
Return
Code (Hex) Description
1 Successful Status - Network operation can proceed
2 NCM has already received a COMMREQ
3 NCM has not been configured via PLC configuration
4 NCM is using the default configuration, i.e.
configuration includes 64 bits %I only
5 COMMREQ does not include sufficient data (length
must be 8 when configured as a Slave Only)
6 Slave information is incomplete (length must be
11,14,17, etc when configured as a Master)
7 COMMREQ Command number is invalid (must be
0x1000)
8 Reserved fields (Words 7-8) are not 0 as required
9 Total Discrete Input length does not match the
module configuration
A Total Discrete Output length does not match the
module configuration
B Total Analog Input length does not match the module
configuration
C Total Analog Output length does not match the
module configuration
D NCM network address is invalid (must be 0-63)
E NCM network data rate is invalid (must be 0,1,2)
F Slave network address is invalid (must be 0-63)
10 Reserved
11 Slave I/O type is invalid (must be 1,2,4, or 0xC)
12 Multiple I/O types are specified for a slave (must be
1,2,4,or 0xC)
13 When configured as a Strobe device, the output data
length must be 0
14 When configured as a Strobe device, input data
length must 1-8 bytes
15 Duplicate configuration for a slave device. There are
two or more entries with the same Slave network
address.
16 Master or Slave Discrete Input Length must be
divisible by 8 (8,16,24, etc)
17 Master or Slave Discrete Output Length must be
divisible by 8 (8,16,24, etc)
18 Unknown Configuration error
19 Headend stopped - aborted configuration

DeviceNet Network Master/Slave
August 2002 GFK-1539A
5
COMMREQ Example
The following example illustrates the COMMREQ function block of
the PLC logic and the COMMREQ Command Block, Data Block, and
Return Code.
COMMREQ Parameters
IN The IN parameter specifies the location of the
Command and Data Block.
SYSID The SYSID parameter specifies the physical slot
location of the NCM. In the following example, the
NCM is in slot 1 next to the PLC CPU.
TASK The TASK parameter specifies the NCM application
task to which the COMMREQ is directed. The
TASK must always be 0.
FT
COMM
REQ
IN
SYSID
TASK
1
%R00001
0
The following example configures the NCM to communicate with 5
slave devices with Slave Addresses 1 through 5. The Master will
use address 0 and operate the network at 500Kbits/sec. The Master
will not act as a slave device in this configuration.
Address Device Description Network I/O Requirements
1 2 input points
2 output points
2 bytes Input (1 byte of data
+1 byte of status)
1 byte Output
2 4 input points
4 output points
2 bytes Input (1 byte of data +
1 byte of status)
1 byte Output
3 4 input points
4 output points,
2 analog inputs
2 analog outputs
2 bytes Input (1 byte of data +
1 byte of status)
2 words Input
1 byte Output
2 words Output
4 2 input points
2 output points
1 byte Input
1 byte Output
5 1 input point
1 output point
1 byte Input
1 byte Output
The COMMREQ Command Block is placed at %R00001 through
%R00006 and the Data Block follows immediately from %R00007
through %R00029. When specifying the input and output lengths for the
slave devices, specify the number of bits for discrete data and the
number of words for analog data. Hence, 1 byte of input data is
specified as 8 bits. And 1 word of output data is specified as 1 word.
COMMREQ
Area
Ref
Table
Value Description
%R1 23 Length of Data Block
(23 words, %R7-%R29)
%R2 0 Not used (must be 0)
%R3 8 Reference Table (8=%R)
%R4 99 Reference Table Offset
%R100
%R5 0 Not used (must be 0)
Command
Block
%R6 0 Not used (must be 0)
%R7 0x1000 COMMREQ Command
%R8 0x200 Master Address = 0
Baud Rate = 500K
%R9 0 NCM is not a slave
%R10 0 NCM is not a slave
%R11 0 Reserved (must be 0)
%R12 0 NCM is not a slave
%R13 0 Reserved (must be 0)
%R14 0 Reserved (must be 0)
%R15 0x101 Slave Address 1
Polled I/O
%R16 0x10 (16) 16 bits (2 bytes) input
%R17 0x08 8 bits (1 byte) output
%R18 0x102 Slave Address 2
Polled I/O
%R19 0x10 (16) 16 bits (2 bytes) input
%R20 0x08 8 bits (1 byte) output
%R21 0x103 Slave Address 3
Polled I/O
%R22 0x210 2 words input
16 bits (2 bytes) input
%R23 0x208 2 words output
8 bits (1 byte) output
%R24 0x104 Slave Address 4
Polled I/O
%R25 0x08 8 bits (1 byte) input
%R26 0x08 8 bits (1 byte) output
%R27 0x105 Slave Address 5
Polled I/O
%R28 0x08 8 bits (1 byte) output
Data
Block
%R29 0x08 8 bits (1 byte) input

DeviceNet Network Master/Slave
August 2002 GFK-1539A
6
Finally, when specifying the Generic Communication Module
configuration for the NCM, it is necessary to add up the I/O
requirements of each of the slave devices. Also add the 64 bytes of
status for the NCM.
Generic Communication Module Reference and Lengths
%I 128 (64 for the NCM status + 16 + 16 + 16 + 8 + 8)
%Q 40 (8 + 8 + 8 + 8 + 8)
%AI 2
%AQ 2
Communications Status Data Format
The first 8 bytes (64 bits) of the NCM input data contain the
communications status of each of the 64 node addresses. By
looking at this data first, the application program in the PLC can
determine the validity of each device’s input data.
01234567
Byte 7Byte 6Byt e 5Byte 4Byte 3Byte 2Byte 1Byte 0
LSBMSB
Byte 0 - Node addresses 0-7
Byte 1 - Node addresses 8-15
Byte 2 - Node addresses 16-23
Byte 3 - Node addresses 24-31
Byte 4 - Node addresses 32-39
Byte 5 - Node addresses 40-47
Byte 6 - Node addresses 48-55
Byte 7 - Node addresses 56-63
4849505152535455
MSB LSB
Each bit represents the status of the device corresponding to that
node address. For example, bit 0 in byte 0 represents the status of
the device with node address 0. Bit 1 in byte 0 represents the status
of the device with node address 1, and so on.
When the NCM is configured as a Slave device, the corresponding
bit for the NCM address represents the status of the Slave device.
When the NCM is configured as a Master only, the corresponding bit
is 0.
Bit Value Description
0 The device is NOT successfully exchanging I/O data
on the DeviceNet network
1 The device is successfully exchanging I/O data on the
DeviceNet network
Operating Notes/Restrictions _______________________
1. The DNCM is limited to communicating with up to 40 slave devices.
2. Because a quick RUN-STOP-RUN transition of the CPU headend
may cause the NCM to become confused during configuration, it is
suggested that the Configuration COMMREQ to the NCM be
delayed at least 4 seconds after first scan.
3. Contact Technical Support for network performance data.
Popular Control Unit manuals by other brands
Advantech
Advantech MIC-75M20-00B Startup manual
Assa Abloy
Assa Abloy Norton ADAEZ Installation and operating instructions
power automation
power automation PA 8000 installation instructions

krispol
krispol STARCUS CONNECTOR instruction manual
Runxin
Runxin 51240B (F112BS) user manual
jbc
jbc DME-A instruction manual

