Dfine Technology DF-DL08 User manual

Wireless Media Box User Manual
(4TV)
Content
1 Important Information
1.1 Safety Precautions
1.2 Declaration of Conformity
1.3Special notice
1.4Cleaning
2 Product Overview
2.1Product Specifications
2.2Product Feature
2.3Packing Content
2.4Operating Principle
2.4.1 APmode
2.4.2LAN mode
2.5 Functional Interface Description
2.5.1 Front Panel Description
2.5.2Back Panel Description
2.5.3Right Panel Description
3 Installation
3.1 Device Connection
4.Operation
4.1 Device Operation
4.1.1 Remote Control User Guide
4.1.2Booting Screen
4.1.3Home Screen
4.1.4Setup Menu
4.2 Windows Control Application User Guide
4.3 Android control application
4.4 DLNA software
5 Software update
6 Troubleshooting
7 Other information
1 Important Information
Before you use wireless media box, it is important that you read this user manual carefully to get
important information and instructions regarding this device.
Thank you for buying this quality product. Any defects or malfunctions occurring during a
specific period will be rectified or repaired free of charge, but this warranty may not apply to
following cases:
Unauthorized modification to the products or repair by an unauthorized
technician.
Breakage caused by accidents such as but not limited to fire, water immersion
and moisture.
Use on incorrect voltage, use contrary to operating instructions.
Product number got altered, removed or made illegible.
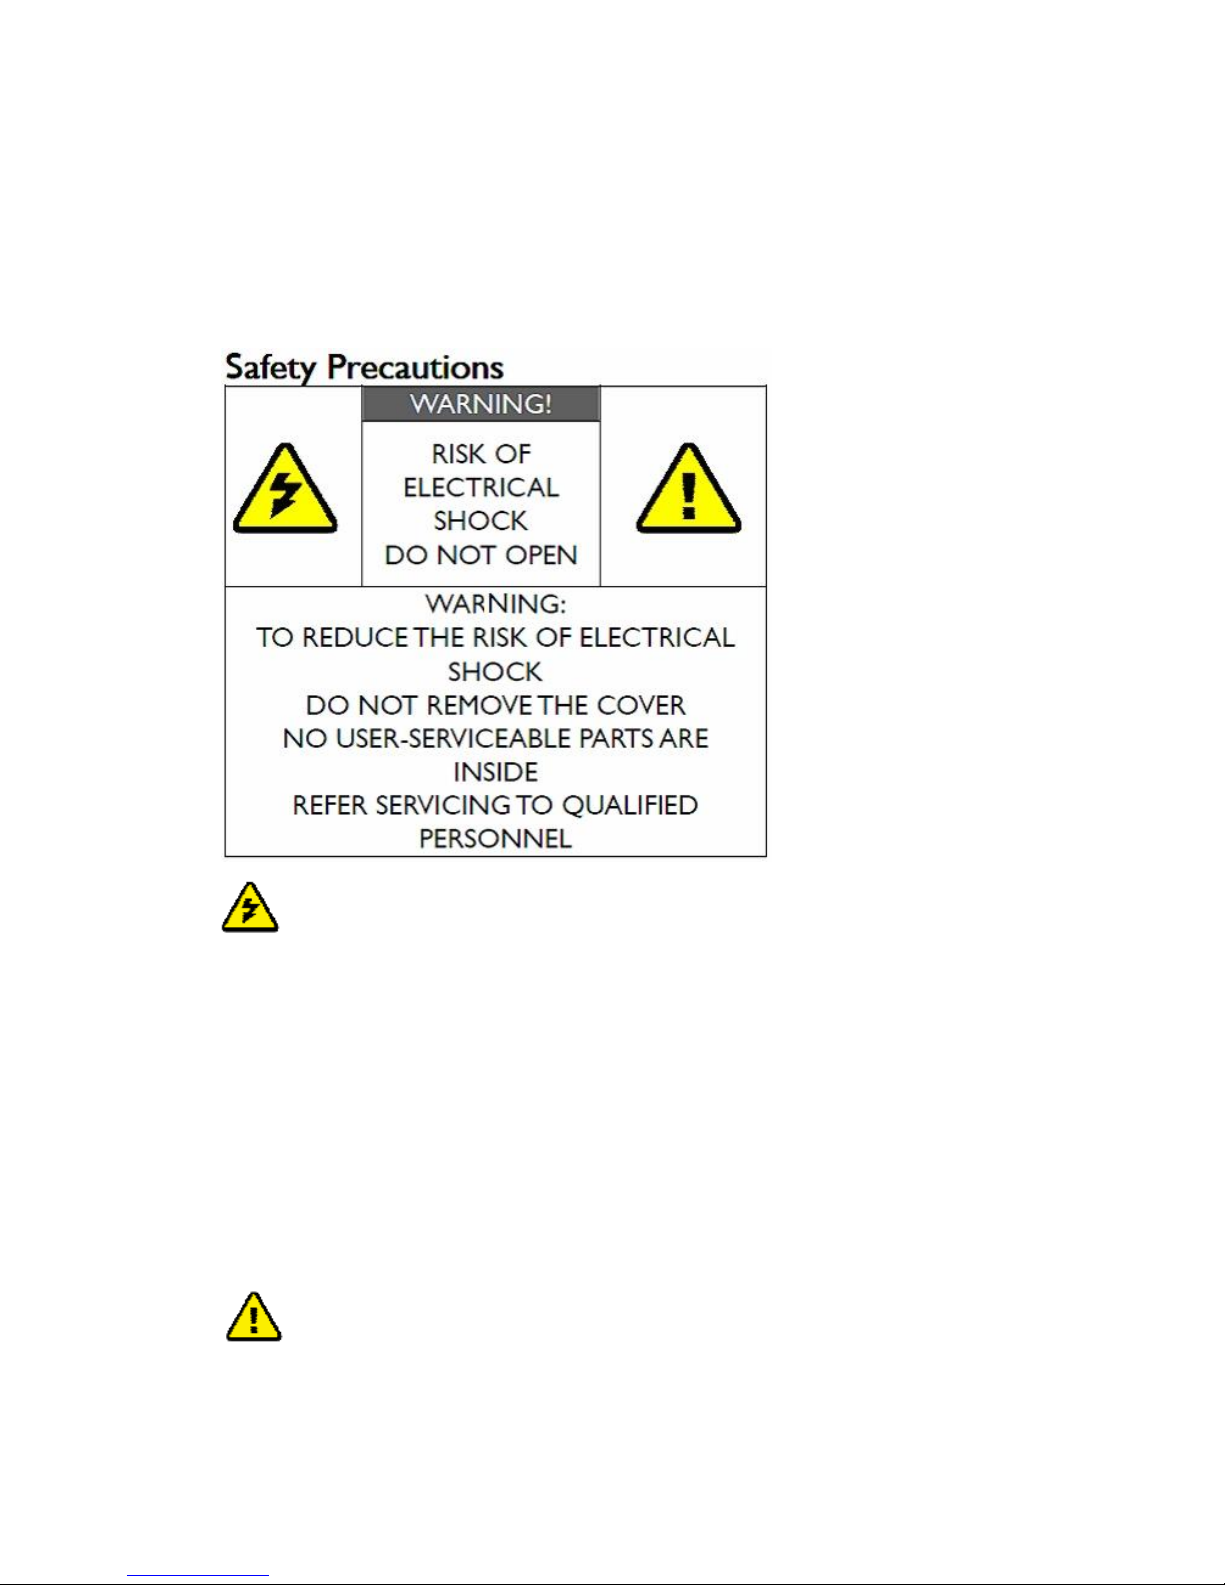
1.1 Safety Precautions
Danger: Electricity Hazard
Power must be switched off when not in use, any power adaptors connected AV devices and
TV should be plugged out.
Power outlet: To prevent electricity shock, please check if the mains lead used on the receiver
and transmitter corresponds to the power outlet.
Mains lead: Stepping or putting heavy stuffs on mains lead is prohibited.
Power overloading: Do not overload the power outlets, otherwise electric shock or fire could
happen. If the power is overly loaded, please extend the mains lead.
Lighting stroke: Disconnect the power adaptor when product is not used for a long time or in
lighting stroke weather.
Switch off the power when product is not in use to prevent electric shock or fire.
Warning:
Keep the product away from objects with liquids and splashing or dripping on this product is
strictly prohibited.

Put the product in a well-ventilated space and keep it away from direct sunlight or any source
of heat.
Do not expose the product to rain or moisture.
1.2 Declaration of Conformity
1.3 Special Notice
Do not use this device nearby an aircraft or medical facilities otherwise interference
and undesired operation may occur. Place this device carefully to prevent abnormal
video/audio.
This device complies with relative criteria CE Certification.
EN 60950-1:2006
Information Technology
Equipment ---Safety---
Part 1: General Requirements
EN 300440-01(V1.6.1)
Electromagnetic Compatibility and Radio Spectrum Matters (ERM)
Short Range Devices.
Radio equipment to be used in the 1GHz to 40GHz frequency.
Part 1: Technical Characteristics and Test Methods
EN 301489-03(V1.4.1)
Electromagnetic Compatibility and Radio Spectrum Matters (ERM);
Part 3: Specific conditions for Short-Range Device (SRD)
Operating on frequency between 9 kHz and 40 GHz
EN 301489-17(V2.1)
Electromagnetic Compatibility (EMC) Standard for Radio Equipment and Services;
Part 17: Specific conditions for Broadband Data Transmission Systems
EN 301893(V1.5.1)
Broadband Radio Access Network (BRAN)
5 GHz high performance RLAN
Harmonized EN covering the essential requirements of article 3.2 of the R&TTE Directive
R&TTE This product complies with Part 15C and Part 15E of FCC Rules.
Part 15: Subpart C—Radiated Emission Limits, Additional Provisions.
Part 15: Subpart E---Unlicensed National Information Infrastructure Devices.

Keep this device away from metal furniture and explosive products. Don’t put it on
unsteady places. Ensure there is no danger hazard on joints of wires.
Do not put it on dusty or damp environment. Keep it away from too low or too high
temperature or any source of heat.
This device should be powered by direct current. Ensure battery used on it meets the
standard of 5V 2.5A.
Putting heavy stuffs on this device is strictly prohibited. Place it on a well-invented
area. Do not block vent area.
Please turn power off and pull power adaptor out of socket for energy saving.
Restart the device when undesired problems occurred. If problems still exist, please
consult professionals for maintenance.
This device has been manufactured and tested to comply with each country’s
safety regulations. It doesn’t guarantee that interference would never happen in some
specific environment. If interference does occur, please increase the separation between
transmitter and receiver.
This product tends to be interfered by wireless device with 5GHz frequency, such as a router
or other wireless device. If you have 802.11n router, configure it to use the 2.4GHz rather
than 5GHz.
The optimal operation distance between receiver and transmitter is from 1 meter to 30
meters.
1.4 Cleaning
Turn the power off and wipe the device using a soft cloth or a cloth moistened with alcohol.
Do not use chemical detergent and ensure all cleaning is conducted when power is off.
Do not dismantle this device or conduct maintenance or cleaning when it is powered
Maintenance should be conducted by authorized technician.
Dripping or splashing on this device is strictly prohibited.
Keep it away from fire or any source of heat.
Do not let kids play with it.
2 Product Overview
2.1 Product Specifications
Model
DF-DL08
Supported video
frequency
480p、720p、1080p
HDMI port
Support HDMI1.3 audio and video format
Transmission
distance
With transmission distance of 10 meters in space
free of obstacles
Wireless connection
Wi-Fi 802.11 b/g/n
Network port
Ethernet 10M/100M
Antenna
Built out antenna
Operating frequency
2.4 GHz
Power
100~ 240V alterlating current input, 5V 2.5A
direct current output adaptor
Certificates
FCC、CE
Audio port
Lotus base(L/R), digital optical
Operating
temperature
0℃- 50℃
Dimensions
127mm(L)×96mm(W)×28mm(H)
Weight
260g
2.2 Product Feature
Support 1080P HD video
With operating frequency of 2.4GHz
With a transmission distance of 10 meters
Built-out antenna
Designed with functions as a wireless router
Available to play video and audio files from U flash disk
2.3 Packing Content
Please check if the following items are present at package box, if any of them is missed or
damaged, please contact distributor.
Main part:
Picture 1 Real Object

Supplied Accessories:
One user manual, one power adaptor, one infrared remote control, one installation disk
Users manual’
Power Adaptor User Manual
Remote Control Installation Disk
2.4 Operating Principles
This device can be operated under two network connection mode
2.4.1 AP mode
Picture 2 AP mode
The 4TV acts as a wireless access point. Your Windows computer or smart device can be connect
ed to 4TV directly. This setup constructs a temporary wireless network for a non wireless
environment, as illustrated by picture 2.
2.4.2 LAN Mode
Picture 3 LAN mode
The 4TV and your Windows computer or smart device connects to a same wireless network.

This setup provides capability for remote operation and internet connection, as
illustrated by picture 3.
2.5 Functional Interface Description
2.5.1 Front Panel Description
Link LED
Power LED
Picture 4 Front Panel
-Link LED : indicates connection status
-Power LED: indicates power supply status
2.5.2 Back Panel Description
RJ45 Port
Audio L/R
Power
Optical Audio Port
HDMI
Picture 5 Back Panel
-HDMI port: for connecting 4TV to display equipment
-Right and Left Channel Audio Port: for connecting 4TV to audio player
-Mains Port: to connect5V 2.5A power adaptor
-Optical Audio Port: for connecting 4TV to optical audio player
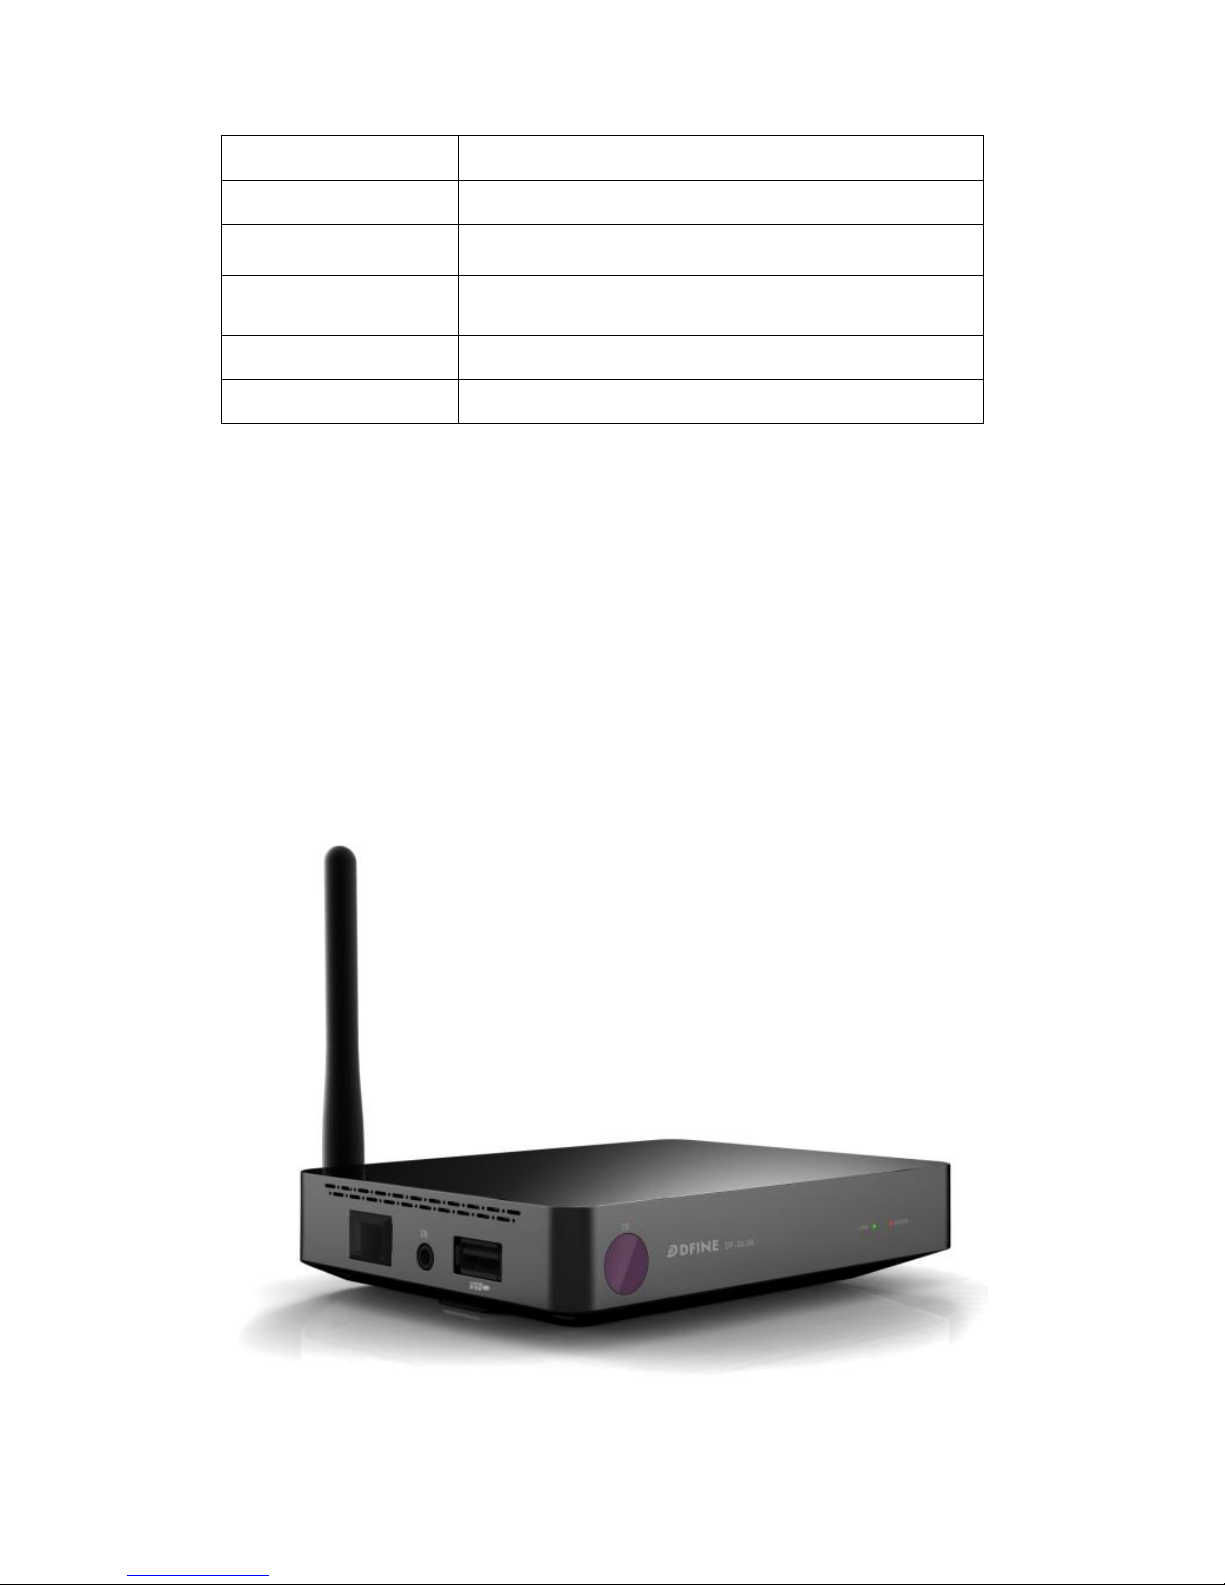
2.5.3 Right Panel Description

USB Port
IR Port
Power
Picture 6 Right Panel
-Power Switch Button: to switch power on and off
-Infrared Extension Port: to connect infrared wire
-USB port: to connect USB flash disk
3Installation
3.1 Connection
Adaptor
HDMI Cable
Picture 7 Device Connection
a) Connect 4TV to display equipment by HDMI cable, such as LED.
b) Plug power adaptor in and device will be powered on.
Please note: make sure wireless router is correctly configured.
4Operation
4.1 Device User Guide
4.1.1 Remote control button description
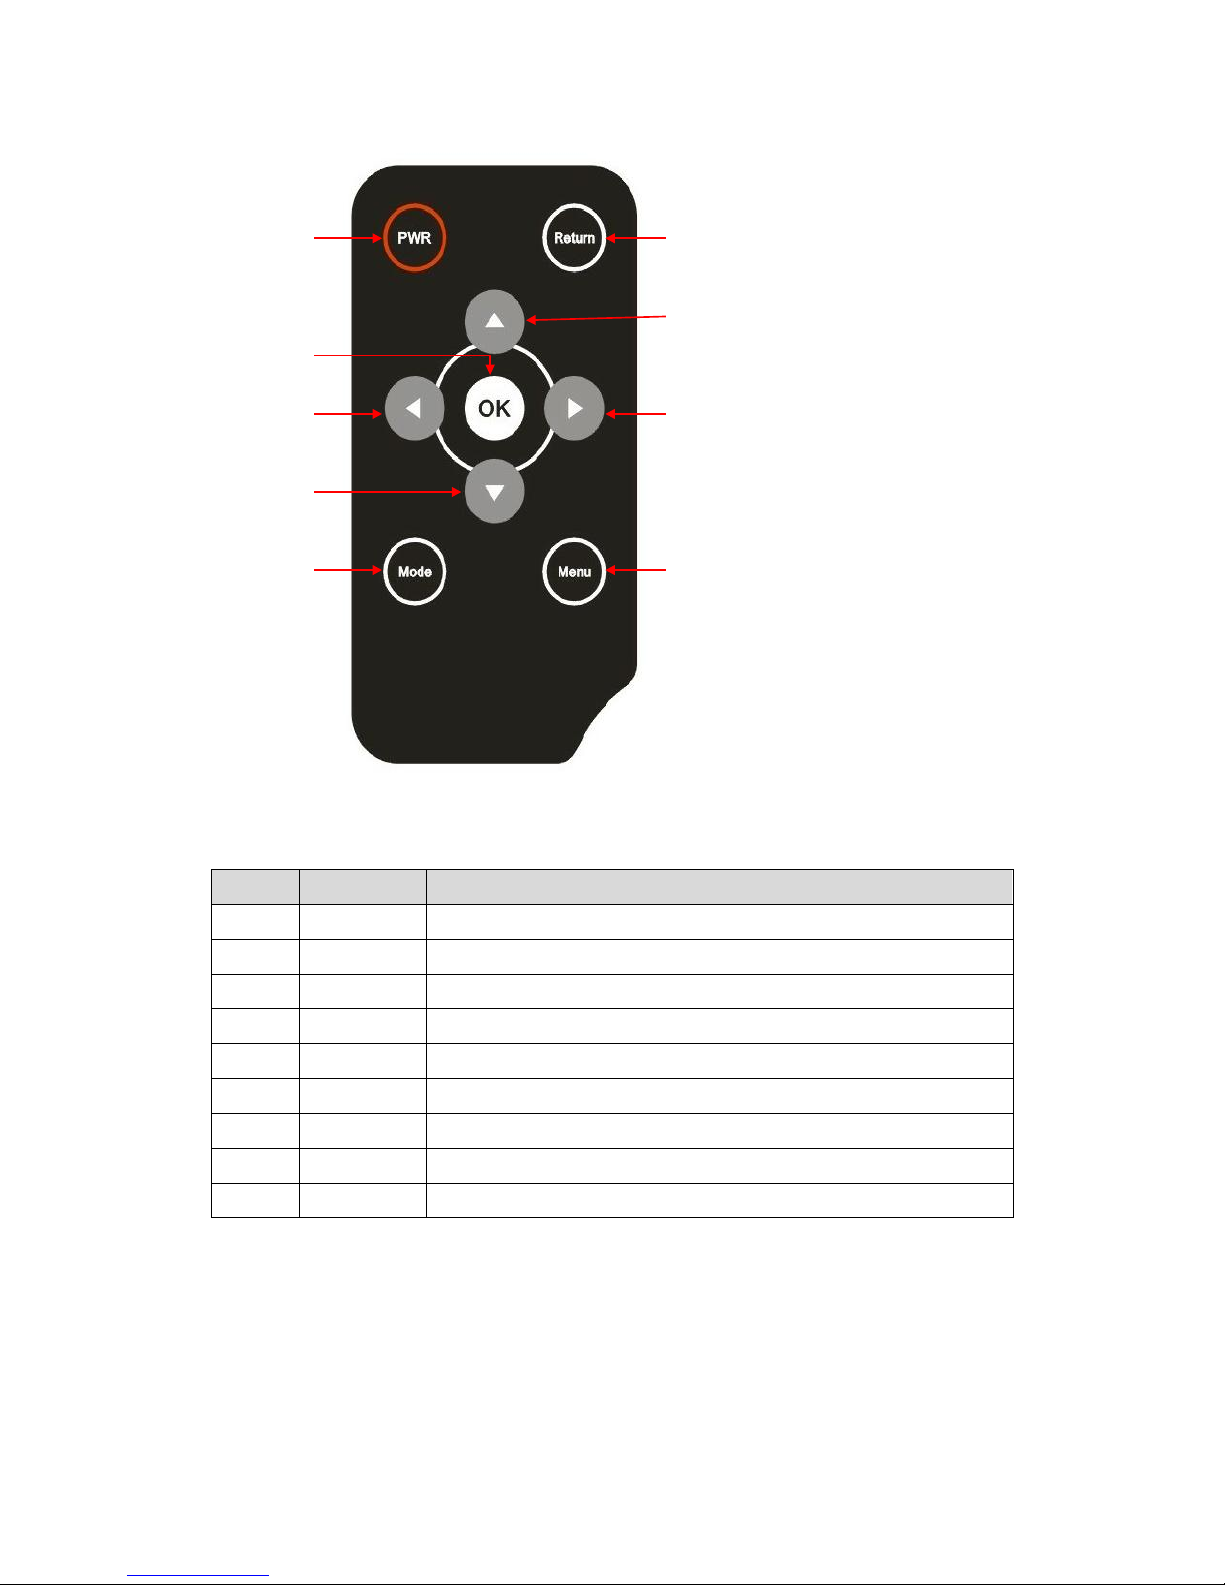
① ②
⑧ ⑨
⑥⑤
⑦
④
③
Picture 8 Infrared Remote Control
Table 1 Remote Control Button Description
Number
Name
Function description
①
PWR
Standby button
②
Return
To return to previous interface
③
OK
To confirm
④
△
Up
⑤
▽
Left
⑥
△
Right
⑦
▽
Down
⑧
Mode
To select desired mode
⑨
Menu
To show all items
4.1.2 Boot Screen
After connected correctly and got powered on, the device will start to boot and boot screen will be
shown as follows at display equipments (LED, TV)

Picture 9 Boot Screen
4.1.3 Home Screen
Home screen shows the current network connection mode and the client device connection status.
Picture 10 Home Screen
Device information: to show device name and wireless network status.
Connection status: as illustrated by picture 11, you can know link status such as network IP
address, connection process and connected output devices.

Picture 11 Device Connection Status
4.1.3.1 AP mode
If 4TV runs in AP mode and device is trying to access network, home screen will be shown as
below:
a) Accessing network video will be shown.
b) Wireless network information will be displayed in network status bar
When wireless network is connected successfully, home screen will be shown as illustrated by
picture 12.
a) System will alert network is successfully connected.
b) Wireless network information will be displayed in network status bar.
Picture 12 Successful Connection under AP Mode
Picture 13 Successful Connection under LAN Mode
4.1.3.2 LAN mode

If wireless media box runs in LAN mode and device is trying to access network, home screen will
be shown as below:
a) System is trying to access network.
b) Wireless network information will be shown at network status bar.
When wireless network is connected successfully, home screen will be displayed as below:
a) System alerts network is successfully connected.
b) WiFi information and IP information will be shown at network status bar.
4.1.3.3 Ethernet mode
a) When device is waiting for Ethernet to connect, home screen will be shown as illustrated by
picture 14
b) When Ethernet is connected successfully, home screen will shown IP address, as illustrated by
picture 15.
Picture 14 Systems is Waiting for Ethernet Network to Connect
Picture 15 Ethernet is Successfully Connected
4.1.3.4 Client Control Application Connection Status
4TV supports client control application and DLNA DMC.
4TV client control application connection status:
a) When input device is successfully connected by client control application, it will be shown on
device list on display equipment.
b) Buffering information is shown on display equipments when device is trying to play video
items.
c) Playing status is shown on display equipments when 4TV is playing audio items.
4.1.3.5 DLNA DMC Device Connection Status
When DLNADMC is playing media files, device list will show playing status.
4.1.4 Setup Menu
Press “menu”button on remote control to show setup item.
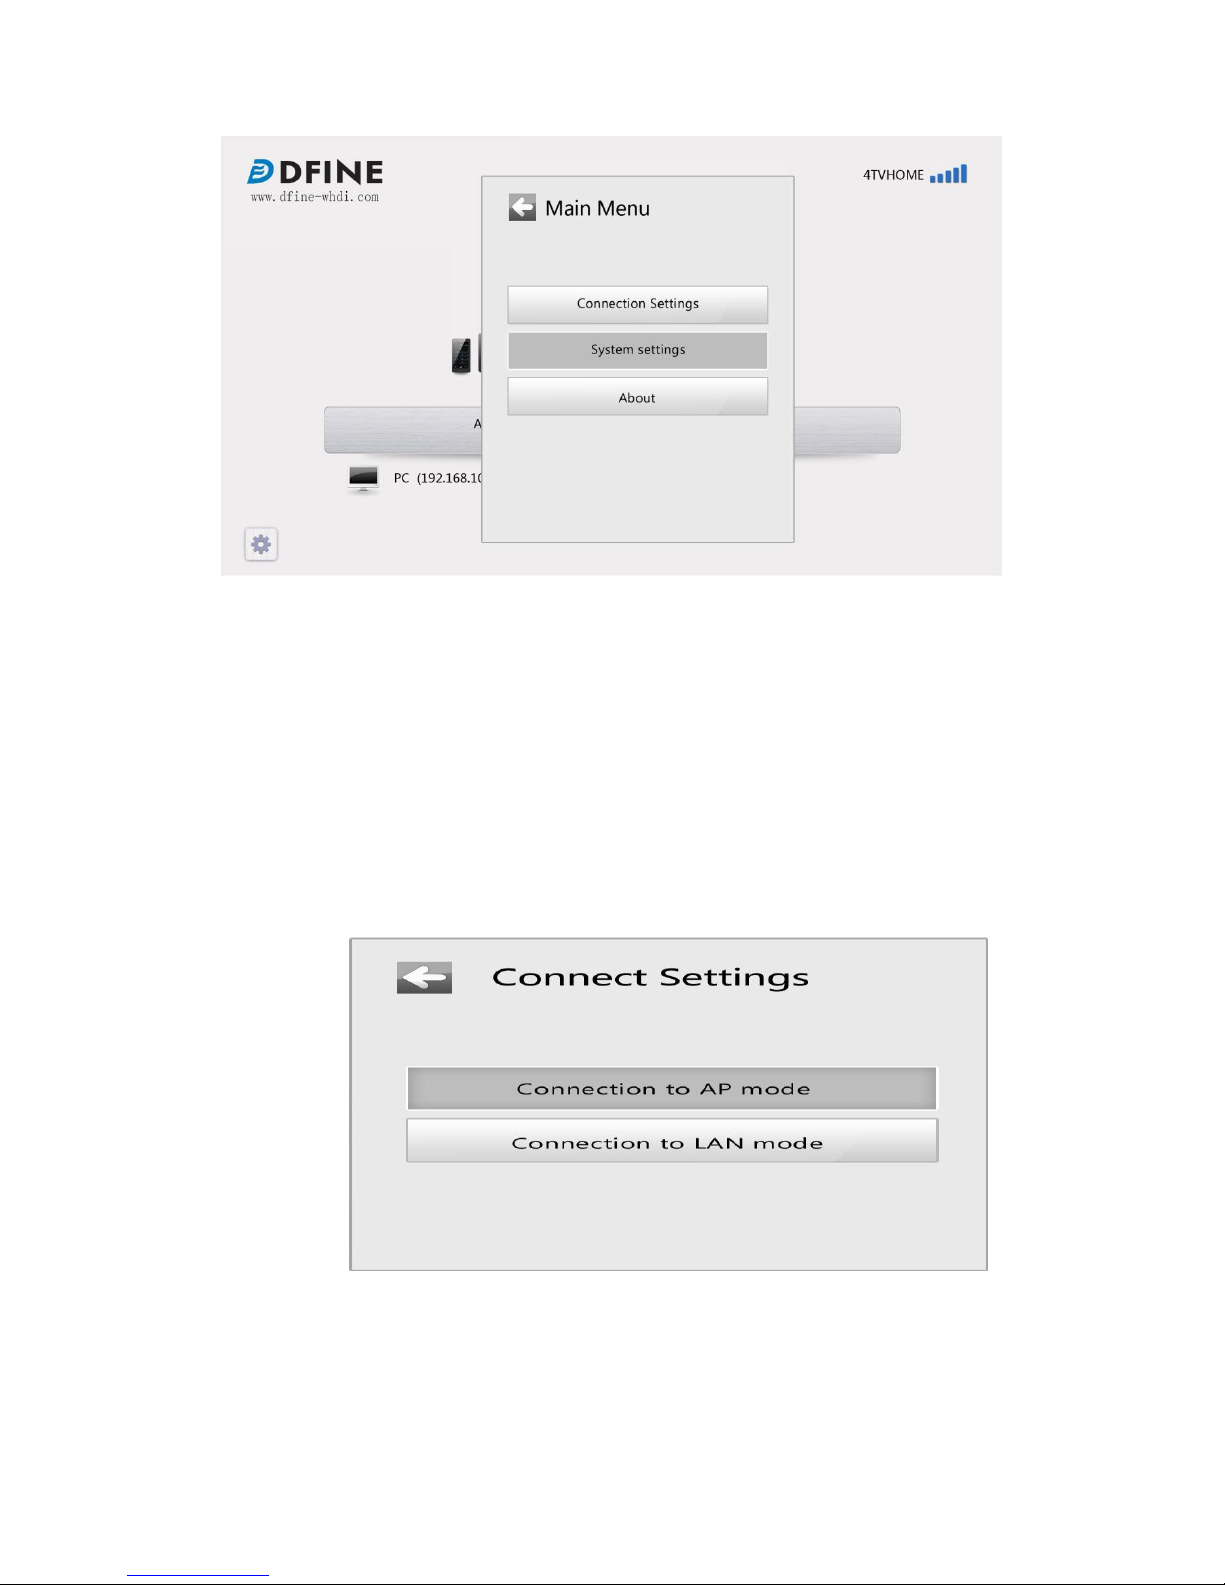
Picture 16 Setup Menu
Setup menu can help you configure wireless network, switch network mode, modify device name
and change audio output mode and set language.
4.1.4.1 Switch network mode
You can switch network mode by the following steps:
a) Ensure home screen is displayed;
b) Press 【Menu】button on remote control to show setup item;
c) Use navigation button 【up】【 down】to locate “connection setup’item;
d) Press 【OK】button on remote control to show subsidiary menu.
1) If system is under “AP mode”, subsidiary menu will show “switch to LAN
mode”.
2) If system is under “LAN mode”, submenu will show “switch to AP mode”.
Picture 17 Connection Settings
4.1.4.2 Wireless Network Configuration
You can configure network by the following steps:
a) Use remote control to go to setup item.
b) Use navigation button 【up】and 【down】to locate “WIFI”item( as illustrated by picture 18);

Picture 18 Wireless Network List
c) Use navigation button 【up】and 【down】to locate desired wireless network;
d) Press OK button to confirm;
1) If the wireless network that you want to connect is protected with a password, the
password input screen will be shown. Use the navigation buttons to move the selection
cursor and press the 【OK】button to input the selected character. Submit password and
system will connect to selected wireless network. (As illustrated by picture 19).
Picture 19 Password Input Screen
2) If desired wireless network had been connected successfully before or is not protected by
a password, system will connect automatically.
3) Use 【Return】button on remote control to close password input screen and cancel
wireless network connection.
e) When system is trying to connect wireless network, connection video and network status
will be shown on the screen.
f) When network is successfully connected, connection mode will be switched to LAN
mode.
1) If system prompts wrong password, please input password again.
2) If wireless network connection is failed, system will try to connect other wireless
network that has been connected successfully before. If system cannot connect any
wireless network ,system will switch to AP mode automatically
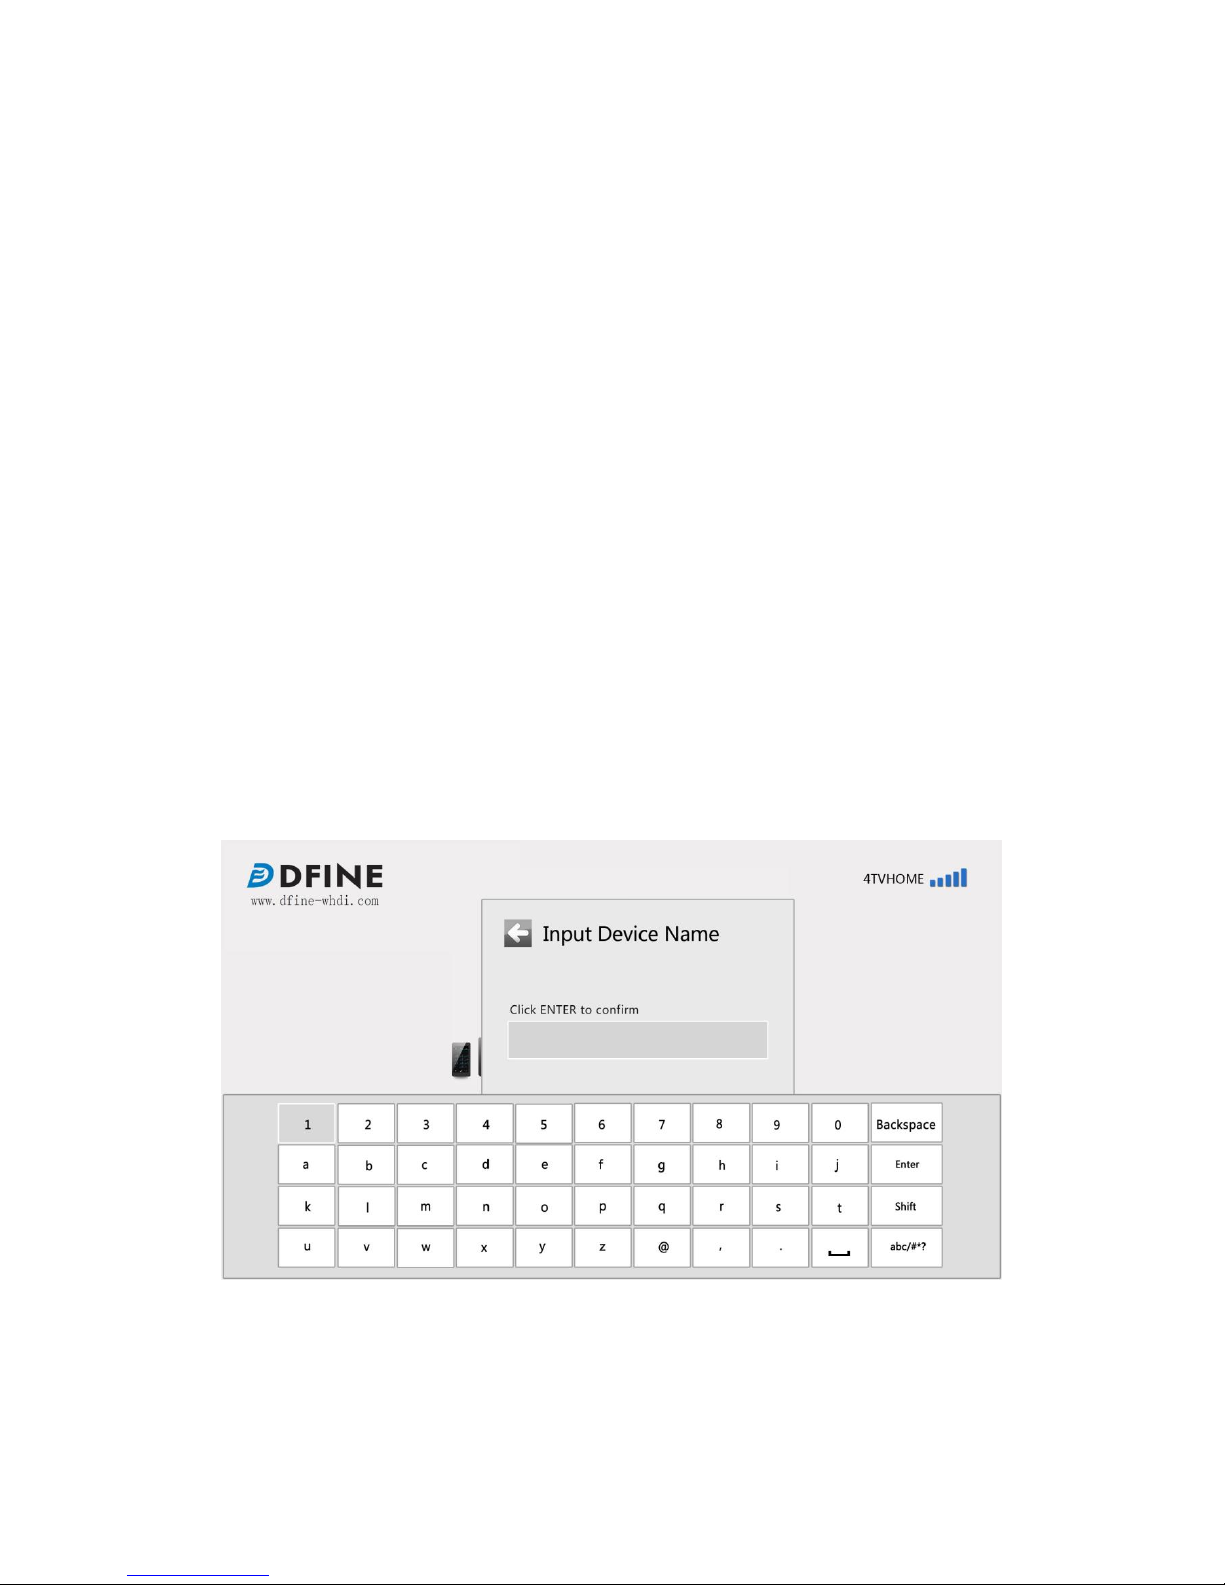
4.1.4.3 Device Name Modification
Wireless media box had been set to a default name when it was manufactured. Users can rename
the device using the remote control:
a) Ensure system is on home screen.
b) Press 【Menu】button on the remote control to show the setup menu.
c) Select subsidiary “system setting “item.
d) Press 【OK】button to show subsidiary item of system setting.(As illustrated by picture 20)
e) Use the navigation buttons to move the selection cursor and press ok button to input the
selected character. After name input is complete, use the navigation button to locate the enter
key and press the 【OK】button to submit the name.
f) 4TV box will return to home screen and the new name will be shown on the top right corner.
Picture 20 Device Name Modification
Please note: you can press 【Return】button on remote control to cancel setup operation.
4.1.4.4 Change Audio Output
You can set audio output mode by remote control and switch it between HDMI, microphone

and SPDIF as follows:
a) Ensure home screen is displayed.
b) Press 【Menu】button on remote control to show setup items;
c) Use navigation button to locate 【system setup】item;
d) Press 【OK】button to enter into subsidiary items;
e) Use navigation buttons to locate ‘Audio Output Selection’item, and press 【OK】button to
show audio output setting interface;
Picture 21 Audio Output Setting
f) Use navigation buttons on the remote control to move the selection bar to select the targeted
output mode.
4.1.4.5 Language Setting
The wireless media box supports multiple languages. Currently it supports English, Simplified
Chinese, Traditional Chinese, and Japanese. You can change the system language using the remote
control.
a) Make sure home screen is displayed.
b) Press 【Menu】button on remote control to show setup menu.
c) Use navigation button on remote control to locate “system setting” item.
d) Press 【OK】button to show subsidiary item.
e) Use navigation button to locate “language setting”item and press 【OK】button to show
language setting interface.

Picture 22 Language Setting
f) Use navigation button to choose desired language and press 【OK】to confirm.
4.1.4.6 Device Information Search
you can click 【about device】to get to know device information by the following procedures:
a) Ensure home screen is displayed;
b) Press 【Menu】button on remote control to show setup items;
c) Use navigation button to locate 【about device】item;
d) Press 【OK】button to show system information.
Picture 23 Device Information Interface
4.1.4.7 Screen Keyboard User Guide

Screen keyboard will be displayed automatically when you configure wireless network and
modify device name.
Picture 24 Screen Keyboard
Infrared remote control user guide
a) Press navigation button 【up】【 down】to move cursor .
b) Press 【OK】to submit selected item.
Other buttons description:
a) Backspace : to delete previous character;
b) Enter : to submit
c) Shift :to switch capitalized character and lowercase.
d) : To switch English characters and symbols.
4.2 Windows Client Control Application User Guide
Windows client control application is software that runs on windows computer. It can help users to
play Windows computer media items on display equipment or you can transmit all contents filled
Windows computer screen to display equipments through Mirror Function.
4.2.1 Software Installation
a) Double click 4TV windows application to run it.
b) If your computer’s OS is Windows 7 or Vista and UAC alerts you that the setup application
needs permission to run it, click the 【YES】button to continue.
c) You can select the installation language to guide your operation.
d) Click 【Next】to continue your installation.
e) When the license information is displayed, click the【I AGREE】button to continue.
f) System will check if Visual C++ 2005 Redistributable Package, if it needs to be installed,
screen will be shown as follows:

Picture 25 System didn’t Install VC Package
g) Select path to install package, and click 【Installation】to continue;
Picture 26 Select Installation Path
h) If system don’t have VC package, system will prompts install it or not .click 【Yes】to
continue;
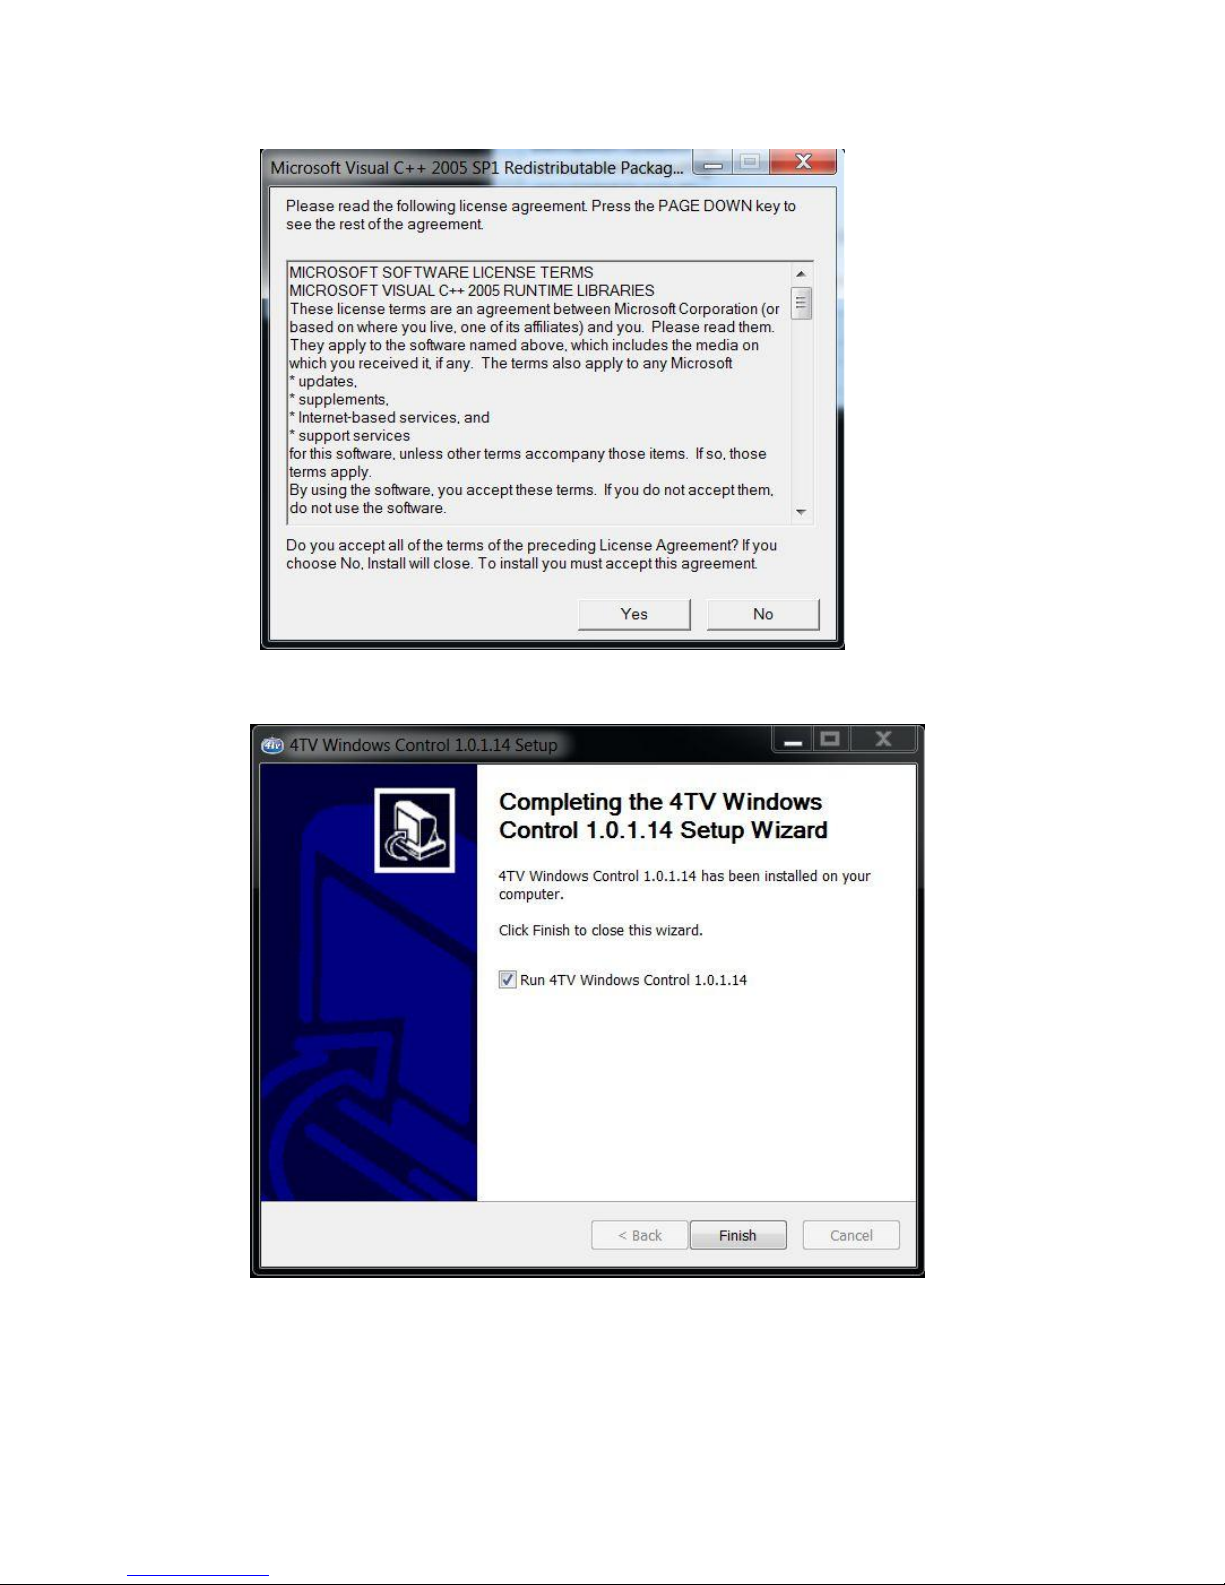
Picture 27 Installation of VC Package
i) Installation is complete
Picture 28 Installation is Complete
4.2.2 Connection and Operation
You can double click the “4TV Windows Control”shortcut icon to run the application
manually.
You can follow steps listed below to run the application exampled by Windows 7.
Table of contents


