Diesel FL137AX User manual

DIGITAL MOVEMENT GUIDE................2
INSTRUCTION
English . . . . . . . . . . . . . . . . . . . . . . . . . . . . . . . . . . . . . . . 4
Italiano ......................................16
Deutsch .....................................29
Français .....................................42
Español .....................................55
Português....................................68
Svenska .....................................81
Русский.....................................94
日本語 .....................................107
中文 .......................................121
繁體中文 ...................................133
한국어......................................145
WARRANTY
English . . . . . . . . . . . . . . . . . . . . . . . . . . . . . . . . . . . . .157
Italiano .....................................159
Deutsch ....................................160
Français ....................................162
Español ....................................164
Português...................................167
Svenska ....................................169
Русский....................................170
日本語 .....................................172
中文 .......................................174
繁體中文 ...................................175
한국어......................................177
Service Centers .............................179
Certificate of Warranty ........................185
NOTICES ......................................187

2 3
DIGITAL MOVEMENT GUIDE / GUIDA AL MOVIMENTO
DIGITALE / DIGITALES UHRWERK – LEITFADEN / GUIDE DU
MOUVEMENT NUMÉRIQUE / GUÍA DE MOVIMIENTO DIGITAL
/ GUIA DIGITAL DE MOVIMENTO / ANVISNINGAR FÖR
ANVÄNDNING AV DIGITALA FUNKTIONER / ИНСТРУКЦИЯ ДЛЯ
ЦИФРОВЫХ МОДЕЛЕЙ / デジタルムーヴメントガイド / 数字型机芯指南 /
數位顯示機芯之說明 / 디지털 무브먼트 가이드
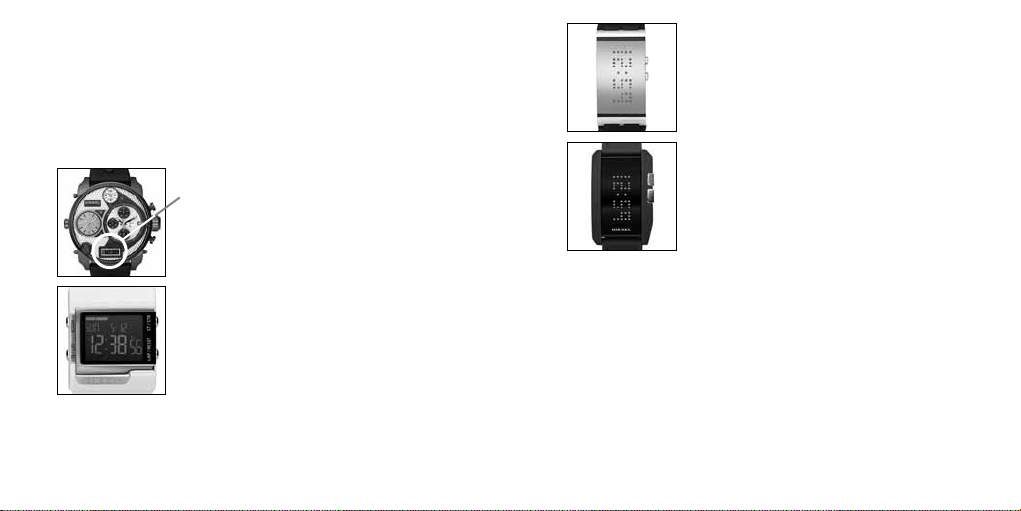
FL137AX, QFOX21CA
DZ7125 - DZ7127, DZ7193, DZ7194, DZ7214,
DZ7221, DZ7223, DZ7234, DZ7246, DZ7247,
DZ7250, DZ7260
(for digital display only)
MLL-045
DZ7092
QFL226
DZ7130, DZ7131, DZ7150
QFL631
DZ7164

4 5
ENGLISH
IMPORTANT TO KNOW!
• When the watch is underwater or wet, never use the pushers/bezels, or set the time. Watch cases
and metal bracelets should be rinsed thoroughly in fresh water after being in salt water.
• No hot tub/sauna. Please do not take your DIESEL watch into the hot tub/sauna. The combination of
extreme heat and water may cause your watch to lose some of its water-resistance.
• No backward hand, or date, adjustments should be made when the analog hands read between 8pm
and 3am. At these times, the gears are too close together and such a change could cause damage.
• Tighten screwlock crown completely.
• Always set the crown in the normal position.
Resistance to Water
Depth WATER-RESISTANT
3 BAR (30 M) WATER-RESISTANT
5 BAR (50 M) WATER-RESISTANT
10 BAR (100 M)
Caseback marking 3 ATM 5 ATM 10 ATM
Light spray, perspiration,
light rain, etc. OK OK OK
Bathing, etc. NO OK OK
Swimming, etc. NO NO OK
Skin diving (diving
without oxygen cylinder) NO NO OK
Water-resistant
characteristics Normal daily
water contact.
Suitable for bathing,
but cannot be worn for
swimming or diving.
Suitable for skin
diving.
Day/Date Watch 2305
DATE SETTING
1. Pull crown out to position 2.
2. Turn clockwise and set date for previous day.
DAY SETTING
With crown still in position 2, turn counter-clockwise and set
day for previous day.
TIME SETTING
1. Pull crown out to setting 3.
2. Turn counter-clockwise to advance time and continue until
day/date changes to present day.
3. Set correct time.
4. Push crown back to position 1.
2
13
DATE
DAY
Date Watch VJ22A31, 505.2-3, 515.2-3, 585.2, 2115, 2117, 2315
DATE SETTING
1. Pull crown out to position 2.
2. Turn counter-clockwise and set date for previous day.
TIME SETTING
1. Pull crown out to setting 3.
2. Turn counter-clockwise to advance time and continue until
day/date changes to present day.
3. Set correct time.
4. Push crown back to position 1.
2
13
DATE

6 7
Multifunction 6P25
DATE SETTING
1. Pull crown out to position 2.
2. Turn counter-clockwise to select date.
DAY AND TIME SETTING
1. To set time, pull crown out to position 3.
2. Turn clockwise to set hour and minute hands. The hand showing days of the week will also move
with the hour and minute hands. Keep turning until you have reached the desired day.
3. Push crown back to position 1.
2
13
DAY
DATE
2
13
DAY
DATE
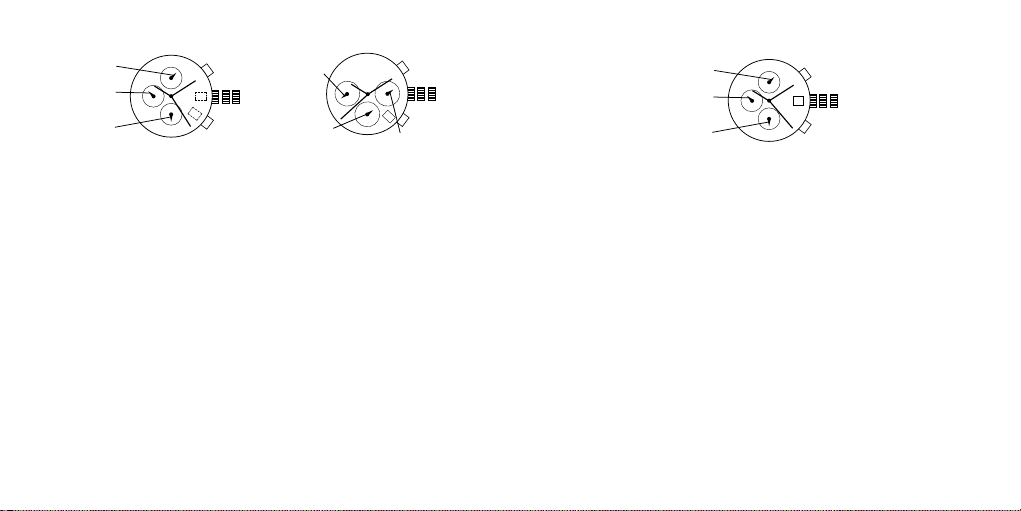
Chronograph with Date FS20
TIME SETTING
1. Pull crown out to position 3. Chronograph second hand will return to zero position. Do not return
the crown to its normal position while the hands are returning to zero, or else the position the
hands are at when this is done will be recognized as the new zero position.
2. Turn to set hour, minute and 24 hour hands.
3. Return crown to position 1.
DATE SETTING
1. Pull crown out to position 2.
2. Turn clockwise to set the date.
3. Return crown to position 1.
CHRONOGRAPH OPERATION
1. Push A to start/stop the chronograph.
2. Push B to reset the chronograph.
CHRONOGRAPH ZERO RESET
1. Pull crown out to position 3.
2. Press A to set the chronograph second hand to 12:00 (zero) position. Each press advances
the chronograph second hand one mark. If A is held down for over 2 seconds, the chronograph
second hand advances continuously.
3. Return crown to position 1.
B
A
2
13
CHRONOGRAPH
SECOND HAND
CHRONOGRAPH
MINUTE HAND
24-HOUR HAND
DATE
SECOND HAND

8 9
Chronograph JS15, JS16, JS25
TIME AND DATE SETTING
1. Pull crown out to position 2.
2. Rotate crown clockwise until the previous day’s date is shown in the date window.
3. Pull crown out to position 3.
4. Rotate crown clockwise until the correct date is shown in the date window.
5. Continue to rotate crown to set correct am/pm time.
NOTE: The movement of the 24-hour hand corresponds to the hour and minute hands. When
setting the time be sure to check that the 24-hour hand is set properly.
6. Return crown to position 1.
NOTE: When the crown is in position 2, do not press the pushers. Otherwise the chronograph
hands will move.
NOTE: Do not set the date between 9:00 p.m. and 1:00 a.m. to ensure accuracy.
CHRONOGRAPH
1. Press A to start/stop the chronograph.
2. Press B to reset to zero.
CHRONOGRAPH ZERO RESET
1. If either of the chronograph hands is not at the zero (12:00) position, pull crown out to position 3.
2. Press A to move hands clockwise; press B to move hands counter-clockwise. Each press of A or
B will move the chronograph hands by one increment/decrement. Or press and hold A or B for fast
increment/decrement.
3. When both hands are in the zero position, reset time and return crown to position 1.
NOTE: Chronograph minute hand will synchronize with chronograph second hand during
chronograph zero reset.
B
A
2
13
CHRONOGRAPH
SECOND HAND
CHRONOGRAPH
MINUTE HAND
24-HOUR HAND
B
A
2
13
CHRONOGRAPH
MINUTE HAND
24-HOUR HAND
CHRONOGRAPH
SECOND HAND
Chronograph Stopwatch VD57B, VD57B1B
TIME SETTING
1. Pull crown out to position 3.
2. Set time by turning the crown clockwise.
3. Push back to position 1 to start the watch.
USING THE STOPWATCH
1. Press A to start/stop the stopwatch.
2. Press B to control the split time and reset.
STOPWATCH HAND ADJUSTMENT
1. Pull crown out to position 3.
2. Press A to reset the stopwatch 1/10 second hand to the “0” position.
3. Press B to reset the second and minute hands. The hands only move clockwise.
4. With each press of A or B, the hands move one position. They move quickly if the pushers are
held down.
NOTE: If the stopwatch hands function improperly, pull out crown and press A and B at the same
time for over 2 seconds. When the pushers are released, the stopwatch second and 1/10 second
hands will spin around and return to “0.” This will indicate that the internal circuit has been reset.
DATE SETTING (on some models only)
1. Pull crown out to position 2.
2. Turn clockwise until desired date appears in window.
3. Push crown back to position 1.
B
A
2
13
MINUTE HAND
1/10 SECOND HAND
SECOND HAND

10 11
Chronograph Stopwatch VD53, VD53B
TIME AND DATE SETTING
1. Before setting the time, make sure the chronograph is stopped and set to zero (12:00) position.
2. Pull crown out to position 2.
3. Turn crown clockwise until the previous day’s date is displayed.
4. Pull crown out to position 3 when the second hand is at the 12:00 position.
5. Turn crown to set time.
NOTE: The movement of the 24-hour hand corresponds to the hour and minute hands. When setting
the time be sure to check that the 24-hour hand is set properly.
6. Return crown to position 1.
NOTE: When the crown is in position 2, do not press the pushers. Otherwise the chronograph hands
will move.
CHRONOGRAPH
1. Press A to start/stop the chronograph.
2. Press B to reset to zero.
SPLIT TIME
1. Press B while the chronograph is running.
2. Press B again to return to the chronograph.
3. Press A to finalize timing.
4. Press B to reset.
CHRONOGRAPH ZERO RESET
1. If either of the chronograph hands is not at the zero (12:00) position, pull crown out to position 3.
2. Press A to move hands clockwise; press B to move hands counter-clockwise.
3. Return crown to position 1.
B
A
2
13
24-HOUR HAND
MINUTE HAND
SECOND HAND
Digital FL137AX, FL137AB, QFOX21CA, QFOX21CB
NORMAL TIME DISPLAY
1. Press A to change display. Display sequence is time, calendar, seconds.
2. Press B to toggle 12/24-hour format.
TIME AND DATE SETTING
1. Press and hold B for 2 seconds to enter setting mode; year will begin flashing.
2. Press A to advance digit; press and hold A for fast advance.
3. Press B to set and advance to next setting value.
4. Setting sequence is year, month, date, hour, minute.
5. Press B to exit setting mode.
NOTE: Hour will be displayed in 24-hour format in time setting mode.
NOTE: If no pusher/button is operated for 30 seconds, all changes will be saved and the setting
will automatically return to display mode.
Digital FL137AX / QFOX21CA / QFOX21CB
Digital FL137AB
B A
BA
2
13

12 13
MODE A
SET/EL B
MODE C
START/STOP D
LAP/RESET
REAL TIME SET (hold for
2 seconds) TO
CHRONOGRAPH TOGGLE TIME1/
TIME2 KEY TONE ON/
OFF
TIME SETTING EXIT NEXT ADVANCE DECREMENT
CHRONOGRAPH MEMORY
RECALL TO TIMER START/STOP LAP/RESET
MEMORY
RECALL NEXT LAP TO TIMER TO CHRONO-
GRAPH TO
CHRONOGRAPH
TIMER SET (hold for
2 seconds) TO ALARM START/STOP RESET
TIMER SETTING EXIT NEXT ADVANCE DECREMENT
ALARM TIME SET (hold for
2 seconds) TO REAL TIME NEXT ALARM ALARM ON/OFF
ALARM SETTING EXIT NEXT ADVANCE DECREMENT
OVERVIEW
Features include DUAL TIME/DATE, CHRONO, TIMER, ALARM, and LIGHT UP EL.
LIGHT-UP EL
Press A to activate light-up function for 3 seconds.
TIME OF DAY MODE
- Press C to toggle between Time 1 and Time 2.
Alarm on
Hourly chime on
Automatic EL
Key tone
Chronograph
B
A
C
D
Count stop
Count repeat
Count up
Digital QFL226DB - Hold C for two seconds to set Time 1 or 2 as default.
- Press D to turn on/off key tone.
Time 1
- To set Time, press A until hour flashes. Press B to select the setting item. Use C and D buttons to adjust
the values up or down. Press A to exit set mode.
Time 2
- To set Time, press A until hour flashes. Press B to select the setting item. Use C and D buttons to adjust
the values up or down. Press A to exit set mode
- The range difference between Time 1 and Time 2 is 23 hours.
CHRONO MODE
- Press C to start and stop chronograph.
- Press D to Split/Reset the chronograph.
- Press A to recall the memory if Chronograph is stopped.
- Press A again to view the next lap.
- Press C or D to exit Recall mode and go back to Chronograph mode.
- There are a total of 10 lap memories.
TIMER MODE
- There are 3 different modes of timer: Count Down-Stop, Count Down-Repeat, Count Down-and Up.
- Press C to start/stop the timer counting.
- Press D to reset the counter to the preset value if timer is stopped.
- Press and hold A for 2 seconds to enter Timer Setting Mode.
Timer Setting Mode
- Press B to cycle around the setting item: timer-type, hour, minute, second and to back timer-type again.
- Press C and D to increase/decrease the setting value.
- Press A to exit the setting mode.
Timer Alarm
- Timer alarm will beep 2 times a second for 30 seconds.
ALARM MODE
- Press C to select the alarm.
- Press D to enable/disable the alarm.
- Press B to change to Time mode again.
Alarm Setting Mode
- Press and hold A for 2 seconds to enter the alarm settings mode.
- Press C and D to increase or decrease the settings value.
- Press A to exit the settings mode.

14 15
Curved LED Digital MLL-045
NORMAL TIME DISPLAY
1. Press B for time display and animation.
2. Press B again to toggle time/date mode.
3. When time or date is displayed, press and hold B for 3 seconds to
toggle horizontal/vertical display.
TIME AND DATE SETTING
1. From time display, press and hold A; 12/24 hour format will begin
flashing.
2. Press B to select 12/24 hour format.
NOTE: In 12 hour format, a small dot will be shown in the upper left
hand corner of the display to indicate p.m. time.
3. Press A to set and advance to hour.
4. Press B to advance digit.
5. Press A to set and advance to next setting value.
6. Setting sequence is: 12/24 hour format, hour, minutes, date, month.
7. Press A to save and exit setting mode.
NOTE: If no pusher is operated for 7 seconds, settings will be saved
and the display will return to normal time display.
PERSONAL MESSAGE SETTING
1. Press B to display time, press B again to display date, press and hold
A; first letter of message will begin flashing.
2. Press B to select character.
3. Press A to set and advance to the next character.
4. Repeat steps until desired message. Please note there are only ten
spaces available.
B
A
Curved LED QFL631
NORMAL TIME DISPLAY
1. Press B for time display.
2. Press B again immediately for date display.
3. After time or date display, message will scroll. Display will
automatically turn off after message scrolling is complete.
TIME AND DATE SETTING
1. Press and hold A for 2 seconds to enter setting mode; 12/24-hour
format will begin flashing.
2. Press B to select 12/24 hour format.
3. Press A to advance to hour.
4. Press B to increase digits; press and hold B for fast advance.
5. Press A to advance to next setting value.
6. Setting sequence is: 12/24-hour format, hour, minutes, year,
month, date
7. Press A to save and exit setting mode.
NOTE: If no pusher is operated for 7 seconds, settings will be
saved and the display will automatically turn off.
MESSAGE SETTING
1. In calendar mode, press and hold A for 2 seconds to enter setting
mode; first character will begin flashing.
2. Press B to change the character.
3. Press A to advance to next character.
NOTE: Maximum message length is 10 characters.
B
A

16 17
Orologio con Giorno/Data Movimento 2305
IMPOSTAZIONE DELLA DATA
1. Estrarre la corona fino alla posizione 2.
2. Girare in senso orario e impostare la data al giorno precedente.
IMPOSTAZIONE DEL GIORNO
Mantenendo la corona in posizione 2, girare in senso antiorario e
impostare il giorno al giorno precedente.
IMPOSTAZIONE DELL’ORA
1. Estrarre la corona fino alla posizione 3.
2. Girare in senso antiorario per avanzare l’ora; continuare fino a
quando la data/giorno si aggiorneranno alla data attuale.
3. Fissare l’ora esatta.
4. Spingere la corona fino alla posizione 1.
ITALIANO
INFORMAZIONI IMPORTANTI!
• Quando l’orologio è sott’acqua o bagnato non utilizzare mai pulsanti /corone né impostare l’ora. Si
consiglia di sciacquare con acqua di rubinetto cassa e bracciale dell’orologio nel caso in cui siano
stati immersi in acqua salata.
• Evitare bagni caldi/sauna. Non indossate il vostro orologio DIESEL in bagni caldi o sauna. La
combinazione di calore elevato e acqua potrebbe causare al vostro orologio perdita di capacità di
impermeabilità.
• Non effettuare impostazioni all’inverso, né modifiche di data quando le lancette si trovano fra le
ore 20:00 e le 03:00. Durante queste ore gli ingranaggi sono troppo vicini e tale cambiamento
d’impostazioni potrebbe causare danni.
• Chiudere completamente la corona a vite.
• Riposizionare sempre la corona in posizione normale.
Resistenza all’acqua
Profondità
RESISTENTE
ALL’ACQUA
3 atmosfere (30 M)
RESISTENTE
ALL’ACQUA
5 atmosfere (50 M)
RESISTENTE
ALL’ACQUA
10 atmosfere (100 M)
Indicazioni sul fondello 3 ATM 5 ATM 10 ATM
Pioggia leggera,
traspirazione, spray, ecc. OK OK OK
Bagno, doccia, ecc. NO OK OK
Nuoto, ecc. NO NO OK
Apnea (immersioni
senza bombole) NO NO OK
Caratteristiche
impermeabilità
Utilizzo giornaliero
dell’orologio a
contatto con acqua.
Utilizzabile per
fare il bagno, ma
non utilizzabile
per nuotare o fare
immersioni.
Adatto alle
immersioni.
Data Movimento VJ22A31, 505.2-3, 515.1-3, 515.2-3, 585.2, 715-2, 2115, 2117, 2315
IMPOSTAZIONE DELLA DATA
1. Estrarre la corona fino alla posizione 2.
2. Girare in senso antiorario e fissare la data al giorno precedente.
IMPOSTAZIONE DELL’ORA
1. Estrarre la corona fino alla posizione 3.
2. Girare in senso antiorario per far avanzare l’ora e continuare così
fino a che la data/giorno cambiano al giorno attuale.
3. Fissare l’ora corretta.
4. Spingere la corona fino alla posizione 1.
2
13
DATA
2
13
DATA
GIORNO

18 19
Multifunzione a due settori 6P25
IMPOSTAZIONE DELLA DATA
1. Tirare in fuori la corona portandola nella posizione 2.
2. Ruotarla in senso antiorario per selezionare la data.
IMPOSTAZIONE DEL GIORNO E DELL’ORA
1. Per impostare l’ora, tirare in fuori la corona portandola nella posizione 3.
2. Ruotare la corona in senso orario per impostare le lancette dell’ora e dei minuti. La lancetta indicante
il giorno della settimana si sposterà insieme alle lancette delle ore e dei minuti. Continuare a ruotare
la corona fino a quando non si raggiunge il giorno desiderato.
3. Premere indentro la corona per riportarla nella posizione 1.
2
13
GIORNO
DATA
2
13
GIORNO
DATA
Cronografo con Data FS20
IMPOSTAZIONE DELL’ORARIO
1. Estrarre la corona e portarla in posizione 3. La lancetta dei secondi del cronografo tornerà
in posizione zero. Non riportare la corona nella posizione normale mentre le lancette tornano
nella posizione zero. In caso contrario, la posizione in cui si trovano le lancette durante questa
operazione, verrà riconosciuta come la nuova posizione zero.
2. Ruotare la corona per impostare le lancette delle ore, dei minuti e delle 24 ore.
3. Riportare la corona in posizione 1.
IMPOSTAZIONE DELLA DATA
1. Estrarre la corona e portarla in posizione 2.
2. Ruotarla in senso orario per impostare la data.
3. Riportare la corona in posizione 1.
FUNZIONAMENTO DEL CRONOGRAFO
1. Premere A per avviare/arrestare il cronografo.
2. Premere B per azzerare il cronografo.
AZZERAMENTO DEL CRONOGRAFO
1. Estrarre la corona e portarla in posizione 3.
2. Premere A per impostare la lancetta dei secondi del cronografo alle 12:00 (posizione zero). Ad
ogni pressione la lancetta dei secondi del cronografo avanza di una posizione. Se il tasto A viene
tenuto premuto per oltre 2 secondi, la lancetta dei secondi del cronografo avanza continuamente.
3. Riportare la corona in posizione 1.
B
A
2
13
LANCETTA DEI SECONDI
CRONOGRAFO
LANCETTA DEI MINUTI
CRONOGRAFO
LANCETTA 24 ORE
DATA
LANCETTA DEI SECONDI

20 21
Cronografo JS15, JS16, JS25
IMPOSTAZIONE DI DATA E ORA
1. Estrarre la corona e portarla in posizione 2.
2. Ruotare la corona in senso orario fino a impostare la data del giorno precedente.
3. Estrarre la corona e portarla in posizione 3.
4. Ruotare la corona in senso orario fino a impostare la data corretta.
5. Continuare a ruotare la corona fino a impostare l’ora corretta.
NOTA: la lancetta delle 24 ore si sposta insieme alle lancette delle ore e dei minuti. Quando si
imposta l’ora, controllare che la lancetta delle 24 ore sia impostata correttamente.
6. Riportare la corona in posizione 1.
NOTA: quando la corona è in posizione 2, non premere alcun pulsante. In caso contrario, le lancette
del cronografo si muoveranno.
NOTA: per ottenere la massima precisione, non impostare la data tra le ore 21:00 e le ore 1:00.
CRONOGRAFO
1. Premere A per avviare/arrestare il cronografo.
2. Premere B per azzerare.
AZZERAMENTO DEL CRONOGRAFO
1. Se le lancette del cronografo non si trovano entrambe sulla posizione zero (12:00), estrarre la corona
in posizione 3.
2. Premere A per spostare le lancette in senso orario; premere B per spostarle in senso antiorario.
Ogni pressione di A o B sposta rispettivamente in avanti o indietro le lancette del cronografo di una
posizione. Oppure, premere e tenere premuto A o B per spostarle in avanti o indietro rapidamente.
3. Quando entrambe le lancette si trovano sulla posizione zero, azzerare l’ora e riportare la corona in
posizione 1.
NOTA: la lancetta dei minuti del cronografo si sincronizza con la lancetta dei secondi durante
l’azzeramento del cronografo.
B
A
2
13
LANCETTA DEI
SECONDI DEL
CRONOGRAFO
LANCETTA DEI MINUTI
DEL CRONOGRAFO
LANCETTA
DELLE 24 ORE
B
A
2
13
LANCETTA
DELLE 24 ORE
LANCETTA DEI
SECONDI DEL
CRONOGRAFO
LANCETTA DEI
MINUTI DEL
CRONOGRAFO
Cronometro a 3 Contatori VD57B, VD57B1B
IMPOSTAZIONE DELL’ORA
1. Estrarre la corona fino alla posizione 3.
2. Girare la corona in senso orario per impostare l’ora.
3. Spingere dentro la corona fino alla posizione 1 per far ripartire l’orologio.
USO DEL CRONOMETRO
1. Il tasto A ferma e fa partire il cronometro.
2. Il tasto B controlla la frazione di tempo e azzera il cronometro.
REGOLAZIONE DELLA LANCETTA DEL CRONOMETRO
1. Tirare fuori la corona fino alla posizione 3.
2. Premere il tasto A per azzerare la lancetta del cronometro di 1/10 di secondo alla posizione “0.”
3. Premere il tasto B per azzerare le lancette dei secondi e dei minuti. Le lancette si spostano solamente
in senso orario.
4. Ogni volta che si preme il tasto A o il tasto B le lancette si spostano di una posizione in avanti. Se si
premono in continuazione i tasti, le lancette si spostano velocemente.
NOTA: Se le lancette del cronometro non dovessero funzionare correttamente, premere il tasto A
assieme al tasto B per oltre 2 secondi. Quando si rilasciano i pulsanti, le lancette dei secondi e di 1/10
di secondo si girano e tornano alla posizione “0.” Ciò indica che il circuito interno è stato azzerato.
IMPOSTAZIONE DELLA DATA (SOLAMENTE SU MODELLI SPECIFICI)
1. Estrarre la corona fino alla posizione 2.
2. Girare la corona in senso orario finché la data desiderata appaia nel finestrino.
3. Spingere dentro la corona fino alla posizione 1.
B
A
2
13
LANCETTA DEI MINUTI
LANCETTA DEL CRONOMETRO
DI 1/10 DI SECONDO
LANCETTA DEI SECONDI

22 23
Cronometro a 3 Contatori VD53, VD53B
IMPOSTAZIONE DELL’ORA E DELLA DATA
1. Prima di impostare l’ora, assicurarsi che il cronografo non sia attivato e che sia posizionato a “0”
(ore 12:00).
2. Estrarre la corona fino alla posizione 2.
3. Ruotare la corona in senso orario fino a visualizzare la data del giorno precedente.
4. Estrarre la corona fino alla posizione 3 quando la lancetta dei secondi si trova a ore 12:00.
5. Girare la corona per impostare l’ora desiderata.
NOTA: la lancetta delle 24 ore si muove in corrispondenza delle lancette dell’ora e dei minuti.
Quando si imposta l’ora assicurarsi che la lancetta delle 24 ore sia posizionata correttamente.
6. Riportare la corona nella posizione 1.
NOTA: Quando la corona è in posizione 2 non premere i pulsanti, altrimenti si aziona il cronografo.
CRONOGRAFO
1. Premere A per azionare/fermare il cronografo.
2. Premere B per azzerare il cronografo.
MISURAZIONE DELL’INTERTEMPO IN MODALITÀ CRONOGRAFO
1. Premere B mentre il cronografo è in funzione.
2. Premere di nuovo B per ritornare alla funzione cronografo.
3. Premere A per finalizzare la misurazione dell’intertempo.
4. Premere B per azzerare il cronografo.
AZZERARE IL CRONOGRAFO
1. Se nessuna delle lancette del cronografo è posizionata a “0” (ore 12:00), estrarre la corona fino alla
posizione 3.
2. Premere A per muovere le lancette in senso orario; premere B per muovere le lancette in senso
antiorario.
3. Riportare la corona nella posizione 1.
B
A
2
13
LANCETTA DELLE 24 ORE
LANCETTA DEI MINUTI
LANCETTA DEI SECONDI
Modello Digitale FL137AX, FL137AB, QFOX21CA, QFOX21CB
VISUALIZZAZIONE ORARIO NORMALE
1. Premere A per modificare la visualizzazione. La sequenza di visualizzazione è ora, calendario, secondi.
2. Premere B per passare dal formato 12 ore al formato 24 ore e viceversa.
IMPOSTAZIONE DELL’ORA E DELLA DATA
1. Premere e tenere premuto B per 2 secondi per accedere alla modalità di impostazione; l’anno inizia a
lampeggiare.
2. Premere A per far avanzare le cifre; premere e tenere premuto A per l’avanzamento veloce.
3. Premere B per impostare e avanzare al valore di impostazione successivo.
4. La sequenza di impostazione è anno, mese, data, ore, minuti.
5. Premere B per uscire dalla modalità di impostazione.
NOTA: l’ora verrà visualizzata nel formato 24 ore nella modalità di impostazione dell’ora.
NOTA: se non si preme alcun pulsante per 30 secondi, tutte le modifiche saranno salvate e
l’impostazione tornerà automaticamente alla modalità di visualizzazione.
Digitale FL137AX / QFOX21CA / QFOX21CB
Digitale FL137AB
B A
BA
2
13

24 25
MODALITÀ A
IMPOSTAZIONE/
RETROILLUMINAZIONE
B
MODALITÀ C
AVVIO/STOP
D
FRAZIONE/
AZZERARE
TEMPO REALE IMPOSTAZIONE (tenere
premuto per 2 secondi) A
CRONOGRAFO COMMUTARE
ORA 1/ORA 2
ATTIVAZIONE/
DISATTIVAZIONE
SUONO TASTI
IMPOSTAZIONE
ORARIO USCITA AVANTI AVANZARE DIMINUZIONE
CRONOGRAFO RICHIAMO MEMORIA A TIMER AVVIO/STOP FRAZIONE/
AZZERARE
RICHIAMO
MEMORIA FRAZIONE SUCCESSIVA A TIMER A
CRONOGRAFO A
CRONOGRAFO
TIMER IMPOSTAZIONE (tenere
premuto per 2 secondi) A SVEGLIA AVVIO/STOP AZZERARE
IMPOSTAZIONE
DEL TIMER USCITA AVANTI AVANZARE DIMINUZIONE
ORARIO DELLA
SVEGLIA IMPOSTAZIONE (tenere
premuto per 2 secondi) A TEMPO
REALE SVEGLIA
SUCCESSIVA
ATTIVAZIONE/
DISATTIVAZIONE
SVEGLIA
IMPOSTAZIONE
SVEGLIA USCITA AVANTI AVANZARE DIMINUZIONE
Sveglia attivata
Suoneria oraria attivata
Retroilluminazione automatica
Suono tasti
Cronografo
B
A
C
D
Arresto conteggio
Ripetizione conteggio
Conteggio
Modello Digitale QFL226DB DESCRIZIONE GENERALE
Le funzioni comprendono DOPPIA ORA/DATA, CRONO, TIMER, SVEGLIA e RETROILLUMINAZIONE.
RETROILLUMINAZIONE
Premere A per attivare la funzione di retroilluminazione per 3 secondi.
MODALITÀ ORA
- Premere C per commutare tra Ora 1 e Ora 2.
- Tenere premuto C per due secondi per impostare Ora 1 o Ora 2 come valore predefinito.
- Premere D per attivare/disattivare il suono tasti.
Ora 1
- Per impostare l’ora, premere A finché l’ora non lampeggia. Utilizzare i pulsanti C e D per selezionare
l’ora. Premere B per avanzare. Premere A per uscire dalla modalità di impostazione.
Ora 2
- Per impostare l’ora, premere A finché l’ora non lampeggia. Utilizzare i pulsanti C e D per selezionare
l’ora. Premere B per avanzare. Premere A per uscire dalla modalità di impostazione.
- La differenza massima possibile tra Ora 1 e Ora 2 è di 23 ore.
MODALITÀ CRONO
- Premere C per avviare ed interrompere il cronografo.
- Premere D per Separare/Azzerare il cronografo.
- Premere A per richiamare la memoria se il cronografo è stato arrestato.
- Premere di nuovo A per visualizzare la frazione seguente.
- Premere C o D per uscire dalla Modalità Richiamo e tornare alla Modalità Cronografo.
- Esistono complessivamente 10 memorie di frazioni di tempo.
MODALITÀ TIMER
- Sono presenti 3 modalità diverse di timer: Conto alla rovescia-Stop, Conto alla rovescia-Ripetizione,
Conto alla rovescia e in avanti.
- Premere C per avviare/interrompere il conteggio del timer.
- Premere D per riportare il contatore al valore impostato quando il timer è stato arrestato.
- Tenere premuto A per 2 secondi per accedere alla modalità di impostazione Timer.
Modalità Impostazione Timer
- Premere B per seguire il ciclo delle voci di impostazione: tipo di timer, ora, minuto, secondo e di nuovo
il tipo di timer.
- Premere C e D per incrementare/diminuire il valore dell’impostazione.
- Premere A per uscire dalla modalità di impostazione.

26 27
Sveglia timer
- La sveglia timer emetterà 2 volte un segnale acustico per 30 secondi.
MODALITÀ SVEGLIA
- Premere C per selezionare la sveglia.
- Premere D per attivare/disattivare la sveglia.
- Premere B per tornare alla modalità Ora.
Modalità di impostazione Sveglia
- Tenere premuto A per 2 secondi per accedere alla modalità di impostazione Sveglia.
- Premere C e D per incrementare/diminuire il valore dell’impostazione.
- Premere A per uscire dalla modalità di impostazione.
LED Curvo Digitale MLL-045
VISUALIZZAZIONE ORARIO NORMALE
1. Premere B per visualizzare l’ora e l’animazione.
2. Premere nuovamente B per commutare fra la modalità ora e data.
3. Quando viene visualizzata l’ora o la data, tenere premuto B per 3 secondi
per commutare fra la visualizzazione orizzontale e verticale.
IMPOSTAZIONE DELL’ORA E DELLA DATA
1. Nella modalità di visualizzazione dell’ora, tenere premuto A; l’orario in
formato 12/24 ore inizierà a lampeggiare.
2. Premere B per selezionare il formato 12 ore o 24 ore.
NOTA: nell’orario in formato 12 ore, verrà visualizzato un piccolo punto
nell’angolo in alto a sinistra dello schermo per indicare l’orario pomeridiano.
3. Premere A per confermare e passare all’ora.
4. Premere B per far avanzare la cifra.
5. Premere A per confermare e passare al valore di impostazione successivo.
6. La sequenza di impostazione è: orario in formato 12/24 ore, ora, minuti,
data, mese.
7. Premere A per salvare i dati e per uscire dalla modalità di impostazione.
NOTA: se non viene premuto alcun pulsante entro 7 secondi, le
impostazioni verranno salvate e il display tornerà alla visualizzazione
normale dell’orario.
IMPOSTAZIONE MESSAGGIO PERSONALE
1. Premere B per visualizzare l’ora, premere nuovamente B per visualizzare
la data, tenere premuto A; la prima lettera del messaggio comincerà a
lampeggiare.
2. Premere B per selezionare il carattere.
3. Premere A per confermare e passare al carattere successivo.
4. Ripetere i passaggi fino a ottenere il messaggio desiderato. Notare che gli
spazi disponibili sono solo dieci.
B
A

28 29
LED Curvo QFL631
VISUALIZZAZIONE DELL’ORA NORMALE
1. Premere B per la visualizzazione dell’ora.
2. Premere subito e nuovamente B per la visualizzazione dell’ora.
3. Dopo la visualizzazione dell’ora o della data, il messaggio scorre. La
visualizzazione si disattiva automaticamente dopo che lo scorrimento
del messaggio viene completato.
IMPOSTAZIONE DI DATA E ORA
1. Premere e tenere premuto A per 2 secondi per entrare nella
modalità di impostazione; il formato 12/24 ore inizia a lampeggiare.
2. Premere B per selezionare il formato 12/24 ore.
3. Premere A per passare all’ora.
4. Premere B per aumentare il valore visualizzato; premere e tenere
premuto B per avanzare rapidamente.
5. Premere A per passare all’impostazione del valore successivo.
6. La sequenza di impostazione è la seguente: formato 12/24 ore, ora,
minuti, anno, mese, data
7. Premere A per salvare e uscire dalla modalità di impostazione.
NOTA: se non viene utilizzato alcun pulsante per 7 secondi,
le impostazioni vengono salvate e la visualizzazione viene
automaticamente disattivata.
IMPOSTAZIONE DEL MESSAGGIO
1. In modalità calendario, premere e tenere premuto A per 2 secondi
per entrare nella modalità di impostazione; il primo carattere inizierà
a lampeggiare.
2. Premere B per modificare il carattere.
3. Premere A per passare al carattere successivo.
NOTA: la lunghezza massima del messaggio è 10 caratteri.
B
A
DEUTSCH
WICHTIGE INFORMATIONEN
• Niemals die Druckknöpfe/Krone betätigen oder die Zeit einstellen, wenn sich die Uhr unter Wasser
befindet oder naß ist. Nachdem die Uhr Salzwasser ausgesetzt war, müssen Uhrengehäuse und
Armband gründlich in Süßwasser abgespült werden.
• Kein Dampfbad und keine Sauna. Nehmen Sie bitte Ihre DIESEL Uhr nicht mit ins Dampfbad oder in die
Sauna. Die dort herrschende extreme Hitze in Kombination mit Feuchtigkeit kann dazu führen, daß Ihre
Uhr nicht mehr richtig wasserdicht ist.
• Zwischen 20.00 und 03.00 Uhr dürfen Zeiger oder Datum nicht zurückgesetzt werden. Während dieser
Zeit stehen die Zahnräder sehr eng zusammen und ein Zurückstellen kann Schäden verursachen.
• Stellen Sie die Krone immer in die Normallage.
• Schraubkronen vollständig anziehen.
Wasserdichtigkeit
Tiefe WASSERDICHT BIS
3 BAR (30 M) WASSERDICHT BIS
5 BAR (50 M) WASSERDICHT BIS
10 BAR (100 M)
Kennzeichnung auf
der Rückseite 3 ATM 5 ATM 10 ATM
Spritzwasser, Schweiß,
Sprühregen, usw. JA JA JA
Baden usw. NEIN JA JA
Schwimmen usw. NEIN NEIN JA
Sporttauchen (Tauchen
ohne Sauerstofflasche) NEIN NEIN JA
Beschreibung der
Wassertauglichkeit
Im Alltag
vorkommende
normale Kontakte
mit Wasser.
Geeignet zum Baden,
kann aber nicht beim
Schwimmen odor Tauchen
getragen werden.
Kann beim
Sporttauchen
getragen werden.

30 31
Uhr mit Tages-/Datumsanzeige 2305
EINSTELLEN DES DATUMS
1. Krone bis in Position 2 herausziehen.
2. Drehen Sie die Krone im Uhrzeigersinn und stellen Sie das
Datum des Vortages ein.
EINSTELLEN DES TAGES
Drehen Sie die in der Stellung 2 befindliche Krone gegen den
Uhrzeigersinn und stellen Sie den Vortag ein.
EINSTELLEN DER ZEIT
1. Krone bis in Position 3 herausziehen.
2. Krone gegen den Uhrzeigersinn drehen, um die Zeit vorzustellen, und
dann solange drehen, bis Tag/Datum zum heutigen Tag wechseln.
3. Richtige Uhrzeit einstellen.
4. Krone zurück in Position 1 drücken.
Uhr mit Datumsanzeige VJ22A31, 505.2-3, 515.2-3, 585.2, 2115, 2117, 2315
EINSTELLEN DES DATUMS
1. Krone bis in Position 2 herausziehen.
2. Krone gegen den Uhrzeigersinn drehen und das Datum des
Vortages einstellen.
EINSTELLEN DER ZEIT
1. Krone bis in Position 3 herausziehen.
2. Krone gegen den Uhrzeigersinn drehen, um die Uhr vorzustellen
und weiterdrehen, bis Tag/Datum zum gegenwärtigen Tag wechseln.
3. Richtige Uhrzeit einstellen.
4. Krone zurück in Position 1 drücken.
2
13
DATUM
2
13
DATUM
TAG
Multifunktionsuhr mit zwei Chrono-Augen 6P25
DATUM EINSTELLEN
1. Ziehen Sie die Krone auf Position 2 heraus.
2. Drehen Sie die Krone nach links, um das Datum einzustellen.
DATUM UND UHRZEIT EINSTELLEN
1. Ziehen Sie die Krone auf Position 3 heraus, um die Uhrzeit einzustellen.
2. Drehen Sie die Krone nach rechts, um den Stunden- und Minutenzeiger einzustellen. Der Zeiger,
der die Wochentage anzeigt, bewegt sich mit. Drehen Sie weiter an der Aufzugskrone, bis der
richtige Tag eingestellt ist.
3. Drücken Sie die Krone wieder in die Stellung 1.
2
13
TAG
DATUM
2
13
TAG
DATUM

32 33
Chronograph mit Datum FS20
EINSTELLEN DER UHRZEIT
1. Ziehen Sie die Krone auf die Position 3 heraus. Der Sekundenzeiger des Chronographen kehrt in
die Null-Position zurück. Bringen Sie die Krone nicht wieder in die Normalposition zurück, während
die Zeiger auf die Null-Position zurückkehren, ansonsten wird die Position, in der sich die Zeiger
befinden, wenn dies geschieht, als neue Null-Position erkannt.
2. Zum Einstellen der Stunden-, Minuten- und 24-Stunden-Zeiger drehen.
3. Drücken Sie die Krone wieder in die Position 1 zurück.
DATUMSEINSTELLUNG
1. Ziehen Sie die Krone auf die Position 2 heraus.
2. Drehen Sie sie im Uhrzeigersinn, um das Datum einzustellen.
3. Drücken Sie die Krone wieder in die Position 1 zurück.
CHRONOGRAPH-FUNKTION
1. Drücken Sie A, um den Chronographen zu starten oder zu stoppen.
2. Drücken Sie B, um den Chronographen zurückzusetzen.
CHRONOGRAPHEN AUF NULL ZURÜCKSETZEN
1. Ziehen Sie die Krone auf die Position 3 heraus.
2. Drücken Sie A, um den Sekundenzeiger des Chronographen in die 12:00 Uhr-Position (Null-Position)
zu bringen. Jedes Drücken bewegt den Sekundenzeiger des Chronographen eine Stelle weiter.
Wenn A länger als 2 Sekunden gedrückt wird, bewegt sich der Sekundenzeiger des Chronographen
kontinuierlich weiter.
3. Drücken Sie die Krone wieder in die Position 1 zurück.
B
A
2
13
SEKUNDENZEIGER DES
CHRONOGRAPHEN
MINUTENZEIGER DES
CHRONOGRAPHEN
24-STUNDEN-ZEIGER
DATUM
SEKUNDENZEIGER
Chronograph JS15, JS16, JS25
EINSTELLEN DER UHRZEIT UND DES DATUMS
1. Ziehen Sie die Krone auf die Position 2 heraus.
2. Drehen Sie die Krone im Uhrzeigersinn, bis das Datum des Vortages im Datumsfenster erscheint.
3. Ziehen Sie die Krone auf die Position 3 heraus.
4. Drehen Sie die Krone im Uhrzeigersinn, bis das richtige Datum im Datumsfenster erscheint.
5. Fahren Sie mit dem Drehen der Krone fort, um die Zeit im 12-Stunden-Format richtig auf AM/PM
einzustellen.
HINWEIS: Der 24-Stundenzeiger bewegt sich entsprechend mit dem Stunden- und Minutenzeiger.
Wenn Sie die Uhrzeit einstellen, vergewissern Sie sich, dass der 24-Stundenzeiger richtig eingestellt ist.
6. Drücken Sie die Krone wieder in die Position 1 zurück.
HINWEIS: Wenn sich die Krone in Position 2 befindet, drücken Sie nicht auf die Tasten. Sonst
bewegen sich die Zeiger des Chronographen.
HINWEIS: Stellen Sie das Datum, um Genauigkeit zu gewährleisten, nicht zwischen 21.00 Uhr und
1.00 Uhr ein.
CHRONOGRAPH
1. Drücken Sie A, um den Chronographen zu starten oder zu stoppen.
2. Drücken Sie B, um den Chronographen auf Null zurückzusetzen.
CHRONOGRAPHEN AUF NULL ZURÜCKSETZEN
1. Wenn einer der beiden Zeiger des Chronographen nicht auf der Null-Position (12.00 Uhr) steht, ziehen
Sie die Krone auf Position 3 heraus.
2. Drücken Sie A, um die Zeiger im Uhrzeigersinn zu bewegen; drücken Sie B, um die Zeiger entgegen
den Uhrzeigersinn zu bewegen. Jedes Drücken von A oder B bewegt die Chronographenzeiger um
eine Einheit vor oder zurück. Oder halten Sie A oder B gedrückt, um die Zeiger schnell vor- oder
zurückzubewegen.
B
A
2
13
SEKUNDENZEIGER DES
CHRONOGRAPHEN
MINUTENZEIGER DES
CHRONOGRAPHEN
24-STUNDEN-ZEIGER
B
A
2
13
24-STUNDEN-
ZEIGER
MINUTENZEIGER DES
CHRONOGRAPHEN
SEKUNDENZEIGER DES
CHRONOGRAPHEN

34 35
Chronograph Stoppuhr VD57B, VD57B1B
EINSTELLEN DER UHRZEIT
1. Ziehen Sie die Krone bis auf Position 3 heraus.
2. Drehen Sie sie im Uhrzeigersinn, um die Zeit
einzustellen.
3. Drücken Sie die Krone zurück auf Position 1,
um die Uhr zu starten.
GEBRAUCH DER STOPPUHR
1. Drücken Sie Knopf A, um die Stoppuhr zu starten/stoppen.
2. Drücken Sie Knopf B, um die Zwischenzeit zu nehmen und die Uhr auf „0“ zu stellen.
JUSTIEREN DER STOPPUHR ZEIGER
1. Ziehen Sie die Krone bis auf Position 3 heraus.
2. Drücken Sie Knopf A, um den 1/10 Sekundenzeiger auf „0“ zu stellen.
3. Drücken Sie Knopf B, um den Sekunden- und Minutenzeiger auf „0“ zu stellen. Die Zeiger bewegen
sich nur im Uhrzeigersinn.
4. Mit jeder Betätigung der Knöpfe A und B bewegen sich die Zeiger um eine Position. Sie bewegen
sich schneller, wenn die Knöpfe anhaltend gedrückt werden.
ANMERKUNG: Sollten sich die Zeiger der Stoppuhr fehlerhaft bewegen, drücken Sie Knopf A und
B gleichzeitig für mind. 2 Sekunden. Werden die Knöpfe losgelassen, bewegen sich die Sekunden-
und 1/10 Sekundenzeiger der Stoppuhr in die Nullstellung. Dies zeigt an, daß der interne Kreislauf
auf „0“ gestellt wurde.
EINSTELLEN DES DATUMS (NUR BEI EINIGEN MODELLEN)
1. Ziehen Sie die Krone bis auf Position 2 heraus.
2. Drehen Sie sie im Uhrzeigersinn, bis das gewünschte Datum im Fenster angezeigt wird.
3. Drücken Sie die Krone zurück auf Position 1.
B
A
2
13
MINUTENZEIGER
1/10 SEKUNDENZEIGER
SEKUNDENZEIGER
3. Wenn sich beide Zeiger in der Null-Position befinden, setzen Sie die Uhrzeit zurück und drücken die
Krone wieder in die Position 1 zurück.
HINWEIS: Während des Rücksetzens des Chronographen synchronisiert sich der Minutenzeiger
des Chronographen mit dem Sekundenzeiger des Chronographen.
Chronograph Stoppuhr VD53, VD53B
EINSTELLEN DER ZEIT UND DES DATUMS
1. Bevor Sie die Uhrzeit einstellen, muss der
Chronograph in der 12:00 Uhr Position (Null
Position) stehen und gestoppt sein.
2. Ziehen Sie die Krone auf die Position 2 heraus.
3. Drehen Sie die Krone im Uhrzeigersinn bis das
gewünschte Datum im Fenster angezeigt wird.
4. Ziehen Sie die Krone auf die Position 3 heraus wenn der Sekundenzeiger auf der 12:00 Uhr
Position steht.
5. Drehen Sie die Krone um die Zeit einzustellen.
ANMERKUNG: Die 24 Stunden Anzeige bewegt sich abhängig vom Stunden- und Minutenzeiger.
Wenn Sie die Zeit einstellen, überprüfen Sie bitte ob die 24 Stunden Anzeige richtig eingestellt ist.
6. Stellen Sie die Krone zurück auf Position 1.
ANMERKUNG: Betätigen Sie die Drücker nicht, wenn die Krone auf Position 2 ist. Ansonsten
werden sich die Zeiger des Chronographen bewegen.
CHRONOGRAPH
1. Drücken Sie A um den Chronographen zu starten / stoppen.
2. Drücken Sie B um den Chronographen wieder auf 0 zu stellen.
ZWISCHENZEIT
1. Drücken Sie B während der Chronograph läuft.
2. Drücken Sie wieder B um zur Chronographenfunktion zurück zu kehren.
3. Drücken Sie A um die Zeitmessung zu beenden.
4. Drücken Sie B um zurück zu setzen.
CHRONOGRAPHEN ZURÜCKSETZEN
1. Wenn eine der Chronographenzeiger nicht auf der Null Position steht, ziehen Sie die Krone auf
Position 3 heraus.
2. Drücken Sie A um die Zeiger im Uhrzeigersinn zu bewegen, drücken Sie B um die Zeiger gegen
den Uhrzeigersinn zu bewegen.
3. Stellen Sie die Krone zurück auf Position 1.
B
A
2
13
24 STUNDEN
ANZEIGE
MINUTENZEIGER
SEKUNDENZEIGER

36 37
Digital FL137AX, FL137AB, QFOX21CA, QFOX21CB
STANDARD-ZEITANZEIGE
1. Drücken Sie A, um die Anzeige zu ändern. Die Reihenfolge der Anzeige ist Uhrzeit, Kalender
und Sekunden.
2. Drücken Sie B, um zwischen dem 12/24-Stundenformat hin- und herzuschalten.
EINSTELLEN DER UHRZEIT UND DES DATUMS
1. Halten Sie B für 2 Sekunden gedrückt, um zum Einstellmodus zu gelangen; die Jahresangabe
beginnt zu blinken.
2. Drücken Sie A, um den Wert zu erhöhen; halten Sie A gedrückt, um die Werte schnell zu
durchlaufen.
3. Drücken Sie B, um den Wert einzustellen und zum nächsten Einstellwert zu gelangen.
4. Die Einstellsequenz lautet: Jahr, Monat, Datum, Stunde, Minute.
5. Drücken Sie B, um den Einstellmodus zu verlassen.
HINWEIS: Im Zeiteinstellmodus wird die Stunde im 24-Stunden-Format angezeigt.
HINWEIS: Wird 30 Sekunden lang kein Drücker/Knopf betätigt, werden alle Änderungen
gespeichert und die Einstellung kehrt automatisch zum Anzeigemodus zurück.
Digital FL137AB
B A
MODUS A
BELEUCHTUNG/
EINSTELLEN
B
MODUS C
START/STOPP
D
RUNDE/
RÜCKSETZEN
ECHTZEIT
ECHTZEIT EINSTELLEN
(2 Sekunden
gedrückt halten)
CHRONOGRAPH-
MESSUNG UMSCHALTEN
ZEIT1/ZEIT2 TON EIN/AUS
EINSTELLEN DER
UHRZEIT BEENDEN NÄCHSTES ERHÖHEN VERRINGERN
CHRONOGRAPH DATENABRUF AUS
SPEICHER STOPPUHR-
MESSUNG START/STOPP RUNDE/
RÜCKSETZEN
DATENABRUF AUS
SPEICHER NÄCHSTE RUNDE STOPPUHR-
MESSUNG CHRONOGRAPH-
MESSUNG
STOPPUHR EINSTELLEN
(2 Sekunden
gedrückt halten)
WECKER/ALARM-
FUNKTION START/STOPP RÜCKSETZEN
STOPPUHR-
EINSTELLUNG BEENDEN NÄCHSTES ERHÖHEN VERRINGERN
WECKZEIT EINSTELLEN
(2 Sekunden
gedrückt halten)
ECHTZEIT-
FUNKTION NÄCHSTER
ALARM WECKER/ALARM
EIN/AUS
WECKER/ALARM-
EINSTELLUNG BEENDEN NÄCHSTES ERHÖHEN VERRINGERN
Wecker ein
Stundenschlag ein
Automatische Beleuchtung
Ton
Chronograph
B
A
C
D
Zählung stoppen
Zählung wiederholen
Aufwärts zählen
Digital QFL226DB
Digital FL137AX / QFOX21CA / QFOX21CB
BA
2
13

38 39
ÜBERSICHT
Funktionen: DOPPELUHRZEIT/DATUM, CHRONOGRAPH, STOPPUHR, WECKER und BELEUCHTUNG.
BELEUCHTUNG
Drücken Sie A, um die Beleuchtung 3 Sekunden lang einzuschalten.
TAGESZEIT-MODUS
- Drücken Sie C, um zwischen Zeit 1 und Zeit 2 umzuschalten.
- Halten Sie C zwei Sekunden gedrückt, um Zeit 1 oder Zeit 2 als Standard zu wählen.
- Drücken Sie D, um den Ton ein- oder auszuschalten.
Zeit 1
- Zum Einstellen der Uhrzeit drücken Sie A, bis die Stunde blinkt. Drücken Sie C und D, um die Stunde
einzustellen. Drücken Sie B, um zum nächsten Wert zu gelangen. Drücken Sie A, um den Einstellmodus
zu verlassen.
Zeit 2
- Zum Einstellen der Uhrzeit drücken Sie A, bis die Stunde blinkt. Drücken Sie C und D, um die Stunde
einzustellen. Drücken Sie B, um zum nächsten Wert zu gelangen. Drücken Sie A, um den Einstellmodus
zu verlassen.
- Der Bereichsunterschied zwischen Zeit 1 und Zeit 2 beträgt 23 Stunden.
CHRONOGRAPHMODUS
- Zum Starten/Stoppen des Chronographen drücken Sie C.
- Drücken Sie D für Zwischenzeit/Rücksetzung des Chronographen.
- Drücken Sie A, um bei gestopptem Chronographen die Daten aus dem Speicher abzurufen.
- Drücken Sie erneut A, um die nächste Runde anzuzeigen.
- Drücken Sie C oder D, um den Datenabruf-Modus zu beenden und in den Chronograph-Modus
zurückzukehren.
- Insgesamt sind 10 Rundenspeicher vorhanden.
STOPPUHRMODUS
- Es stehen 3 verschiedene Stoppuhrmodi zur Verfügung: Count-Down-Stopp, Count-Down-
Wiederholung, Count-Down und Count-Up (Aufwärtszählung).
- Drücken Sie C, um die Stoppuhr zu starten/stoppen.
- Drücken Sie D, um den Zähler nach Stoppen der Stoppuhr auf den voreingestellten Wert zurückzusetzen.
- Halten Sie A zwei Sekunden lang gedrückt, um den Stoppuhr-Einstellmodus zu aktivieren.
Einstellmodus für die Stoppuhr
- Drücken Sie B, um zwischen den Einstelloptionen zu wechseln: Stoppuhrtyp, Stunde, Minute, Sekunde
und zurück zum Stoppuhrtyp.
- Drücken Sie C und D, um den angezeigten Einstellwert zu erhöhen bzw. zu verringern.
- Drücken Sie A, um den Einstellmodus zu verlassen.
Stoppuhralarm
- Der Stoppuhralarm ertönt 30 Sekunden lang im Takt von 2 Tönen pro Sekunde.
ALARMMODUS
- Drücken Sie C, um den Alarm auszuwählen.
- Drücken Sie D, um den Alarm zu aktivieren bzw. zu deaktivieren.
- Drücken Sie B, um in den normalen Zeitmodus zurückzukehren.
Alarmeinstellmodus
- Halten Sie A zwei Sekunden lang gedrückt, um in den Alarmeinstellmodus zu wechseln.
- Drücken Sie C und D, um den angezeigten Einstellwert zu erhöhen bzw. zu verringern.
- Drücken Sie A, um den Einstellmodus zu verlassen.
This manual suits for next models
21
Table of contents
Languages:
Other Diesel Watch manuals