digi-tech L401 User manual

Manual
L401
Version: EN-V1.2

Shenzhen Digitech Co., Ltd. L401 Manual
2
Shenzhen Digitech Co., Ltd. www.riding-evolved.com
Contents
Product Description and Specifications ..............................................................3
Parts Description ..................................................................................... 3
Function introduction ...................................................................................4
Features ............................................................................................... 4
Buttons Functions .................................................................................... 5
Operation ..................................................................................................5
Power on/off .......................................................................................... 5
Riding interface....................................................................................... 6
Assist level switch .................................................................................... 6
Turn on/off the light ................................................................................. 6
Clear trip data ........................................................................................ 7
Error Code ............................................................................................. 8
User Menu ............................................................................................. 9
Advanced Menu ......................................................................................... 11
Enter advanced menu...............................................................................11
Wheel Size............................................................................................11
Battery Voltage ......................................................................................12
Sensor .................................................................................................12
Reset ..................................................................................................13
Eixt Menu .............................................................................................13
Attentions................................................................................................ 14

Shenzhen Digitech Co., Ltd. L401 Manual
3
Shenzhen Digitech Co., Ltd. www.riding-evolved.com
Product Description and Specifications
DTK3 Button L401 Display
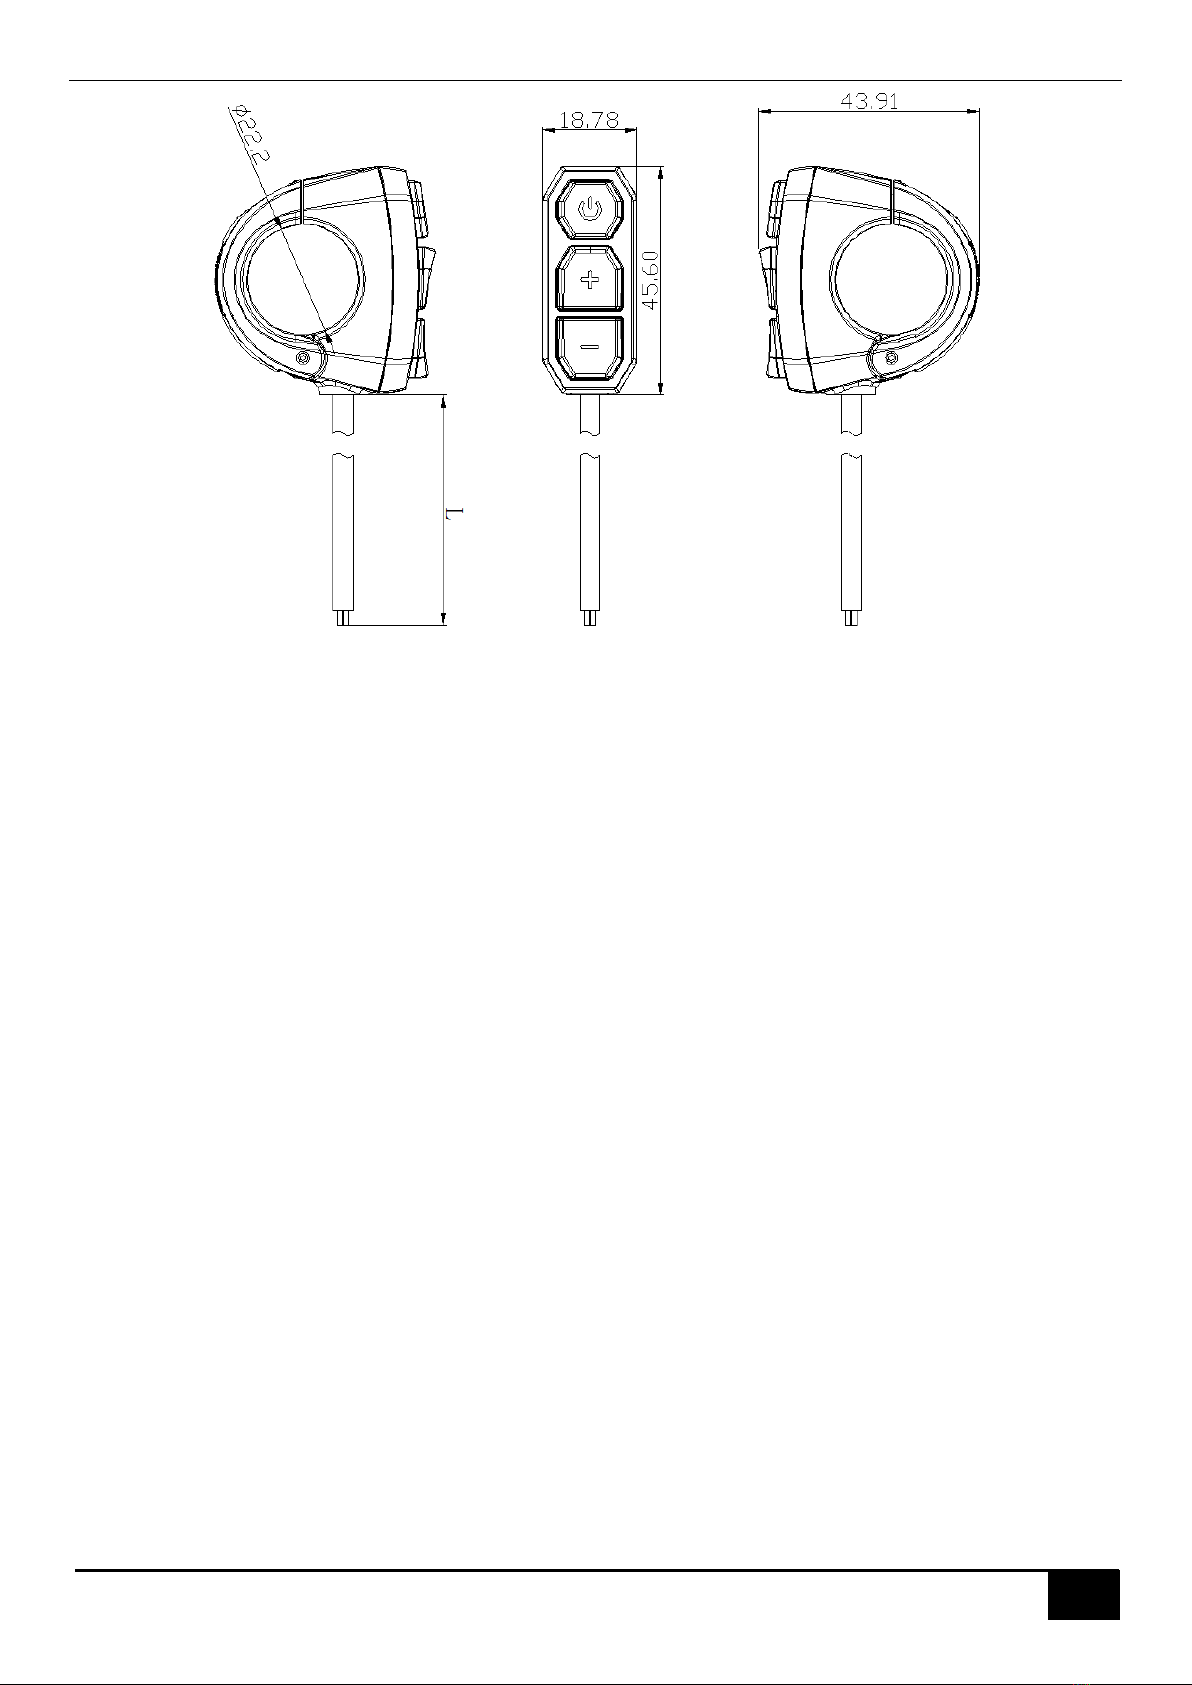
Parts Description
Display Dimensions
Shenzhen Digitech Co., Ltd. L401 Manual
4
Shenzhen Digitech Co., Ltd. www.riding-evolved.com
DTK3 Button Dimensions
Function introduction
Features
L401 supports the common riding parameters and statistical results, as well as some useful functions:
Real-time speed, Max speed, Average speed
Real-time motor power
Battery indicator
Assistant level
Odometer, trip
Trip time
Calorie burnt
Light indicator
Metric(km/h)/Imperial(mph) switching
Error codes indicator
Auto headlights, Brightness adjustment, automatic backlight
Auto Power-off
USB Port(5V/500mA)
In addition, the Bluetooth version also supports the following functions:
APP connection
Data synchronization
Riding ranking
Riding track recording
Shenzhen Digitech Co., Ltd. L401 Manual
5
Shenzhen Digitech Co., Ltd. www.riding-evolved.com
Buttons Functions
Buttons
Name
Functions
[Power]
1、Power on/off
2、Setting confirmation
[+]
1、Parameter adjustment
2、Light turn on/off
3、Menu operation
[-]
1、Parameter adjustment
2、Push mode on/off
3、Menu operation
Operation
Power on/off
Long press the [Power] button to power on, the boot interface will be shown for about 2s, followed by the
riding interface:
In any interface, long press the [Power] button, the shutdown interface will be shown for about 2s before
power off:

Shenzhen Digitech Co., Ltd. L401 Manual
6
Shenzhen Digitech Co., Ltd. www.riding-evolved.com
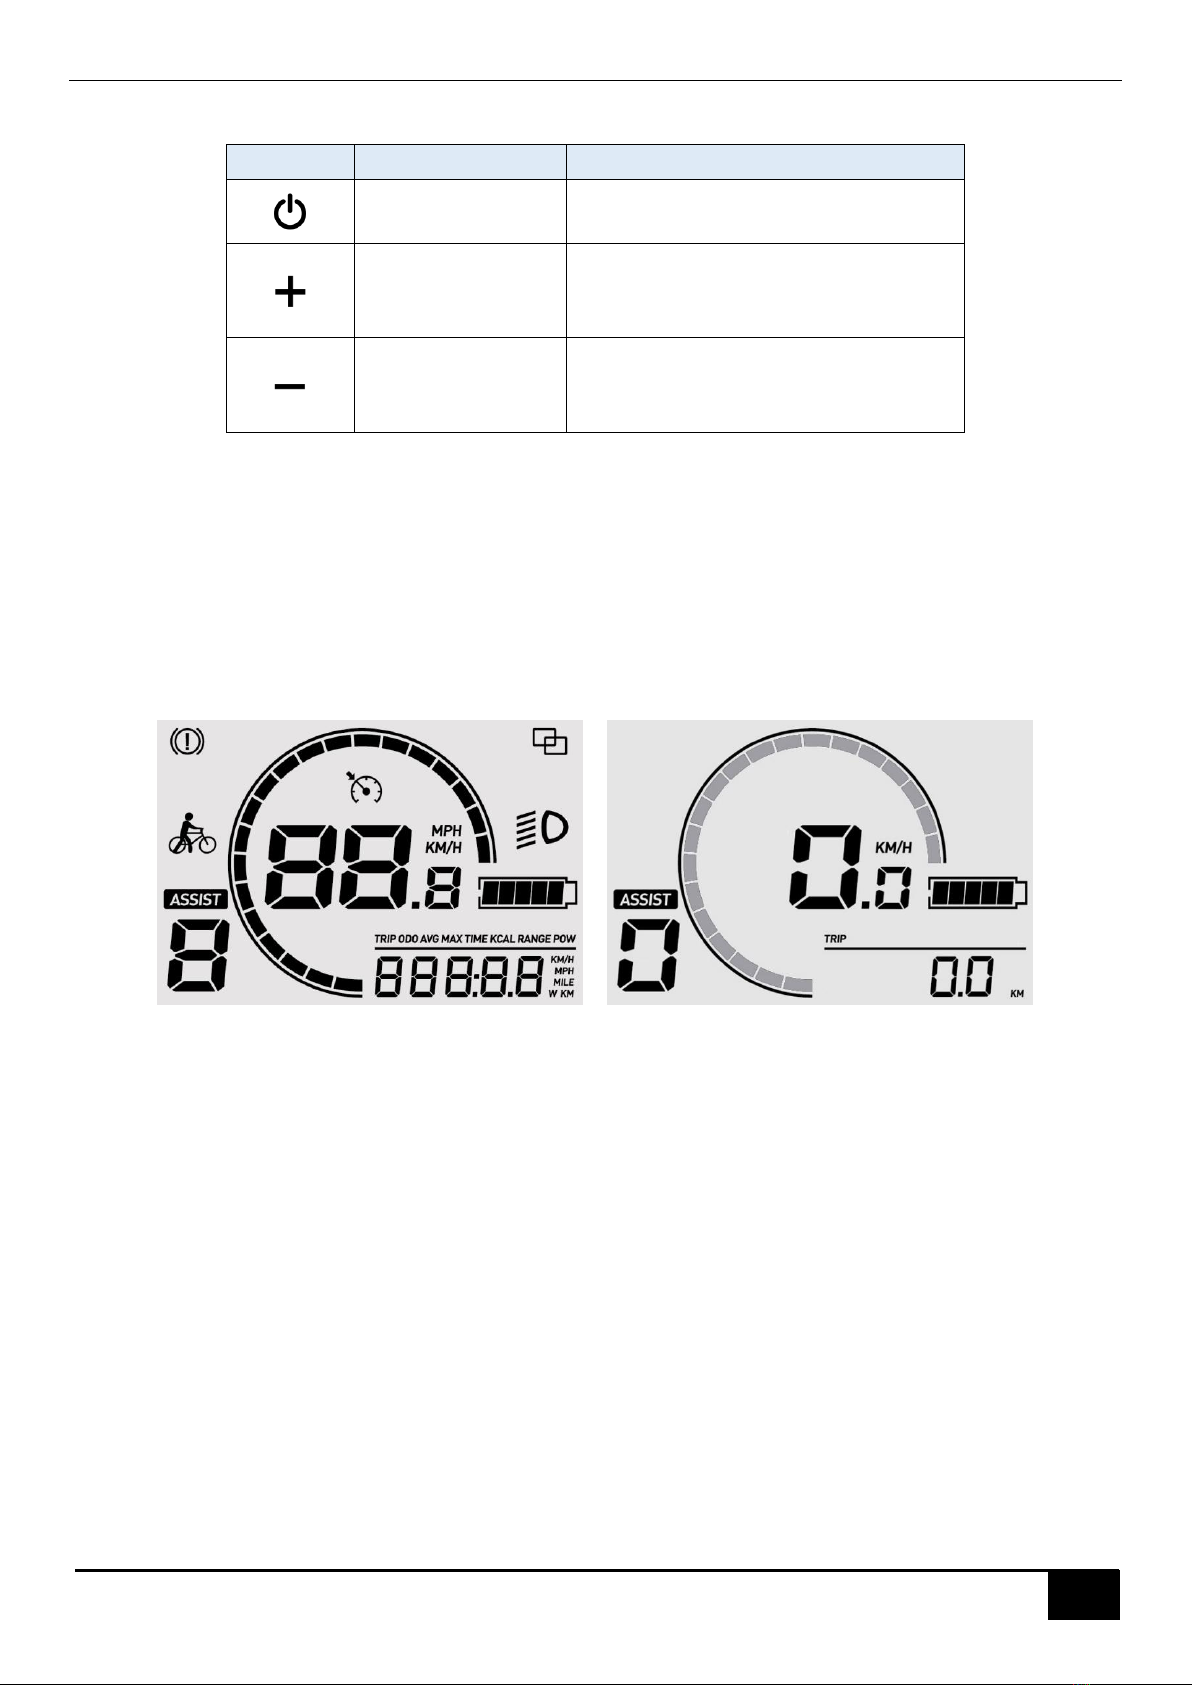
Riding interface
The speed ring is displayed according to the current speed and the speed limit value, and when the speed
reaches the speed limit, the full ring is displayed.
The parameters in the multi-function display area at the bottom right can be switched by clicking the
[Power] button:
Assist level switch
Click [+] or [-] to switch assist levels;
Press and hold the [-] button to enter the pedestrian mode, and release to exit.
Turn on/off the light
Long press [+] button to turn on/off the light.
Assist
Multi-function
display area
Bluetooth connection indicator
Light indicator
Battery indicator
Riding data
Speed ring
Error indicator
Cruise
Avg speed Max speed Riding time Calories burnt
Trip
Power
Data area
Unit area
Pedestrian mode
Range
ODO
Shenzhen Digitech Co., Ltd. L401 Manual
7
Shenzhen Digitech Co., Ltd. www.riding-evolved.com
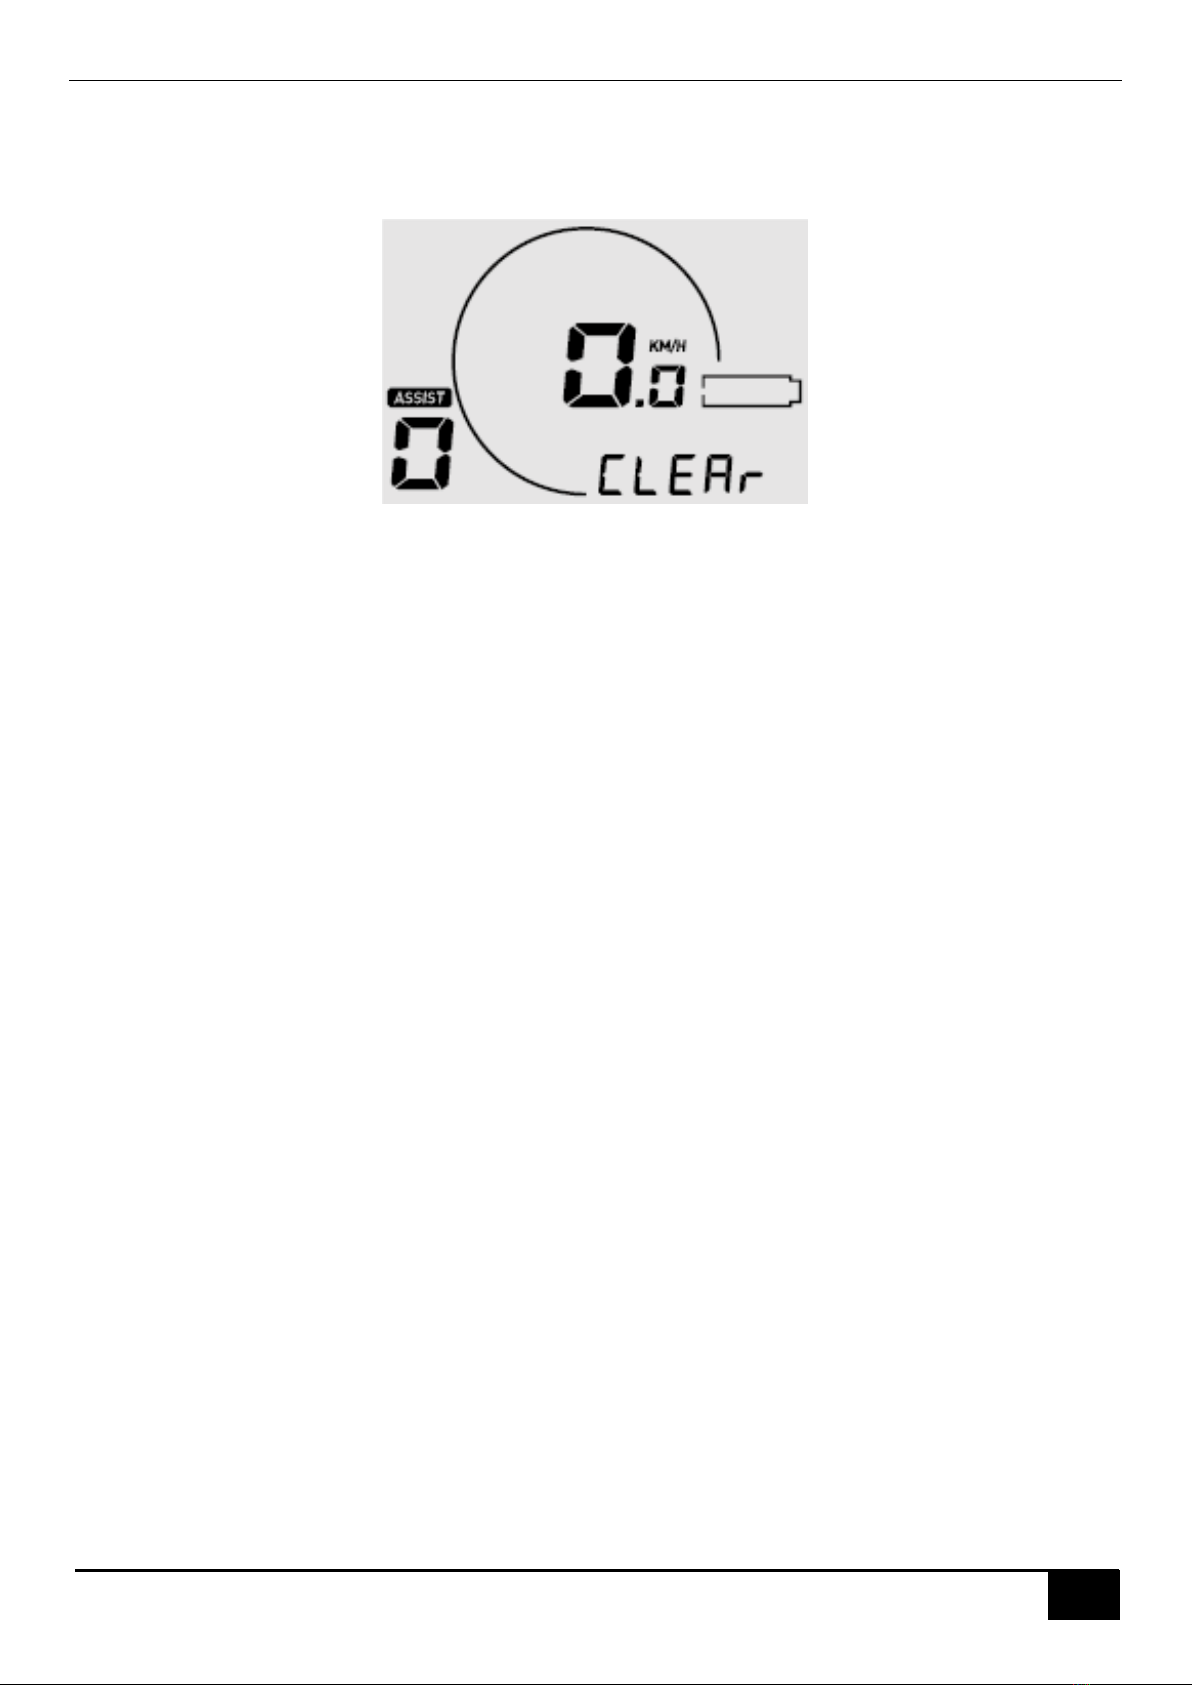
Clear trip data
Long press [Power] & [+] button to clear trip data.
[Note] The trip time, max speed, average speed, and calories burnt will be also cleared by this operation.

Shenzhen Digitech Co., Ltd. L401 Manual
8
Shenzhen Digitech Co., Ltd. www.riding-evolved.com
Error Code
Common error codes are as follows(Only for reference, depending on other electrical parts of the ebike):
KM5S protocol Error Code
Error Code
Meaning
21
Current or Mos Error
22
Throttle Error
23
Motor Phase Error
24
Motor Hall Error
25
Brake Error
26
Low-voltage protection
30
Communication Error
Li2 protocol Error Code
Error Code
Meaning
02
Brake Error
06
Low-voltage protection
07
Motor Phase Error
08
Throttle Error
09
Current or Mos Error
14
Motor Hall Error
30
Communication Error

Shenzhen Digitech Co., Ltd. L401 Manual
9
Shenzhen Digitech Co., Ltd. www.riding-evolved.com
User Menu
To enter the user menu, please long press the [+] & [-] combination buttons for 2s on the riding interface
when static.
To ensure the user’s safety, it can only be accessed when static (when the speed is 0). In this interface, you
can switch the submenu by clicking the [+] or [-] button, and enter the submenu by clicking the [Power]
button
1、Speed Limit
The first menu interface after entering the user menu.
Click the [+] / [-] button to adjust the speed limit value, click the [Power] button to confirm and go to the
next menu interface.
2、Speed Unit
Click the [+] / [-] button to switch the speed unit, click the [Power] button to confirm and go to the next
menu interface.
3、Auto Power off.
Click the [+] / [-] button to adjust the value of auto power off, the adjustment range is 0-99(unit: min),
0=Never auto power-off, click the [Power] button to confirm and go to the next menu interface.

Shenzhen Digitech Co., Ltd. L401 Manual
10
Shenzhen Digitech Co., Ltd. www.riding-evolved.com
4、Backlight Brightness
After entering the interface, the display area flashes to display the current backlight brightness, you can
click the [+] / [-] button to adjust, the adjustment range is 1-5, click the [Power] button to confirm and go to
the next menu interface.
5、Bluetooth connection (Bluetooth version only)
After entering the interface, the numerical display area flashes "n", which means that the Bluetooth is not
connected.
You can search and connect on the APP side. After the operation is successful, the interface displays "y" and
stops flashing.

Shenzhen Digitech Co., Ltd. L401 Manual
11
Shenzhen Digitech Co., Ltd. www.riding-evolved.com
Advanced Menu
The L401 provides ebike manufacturers with an advanced menu that can be used to make adjustments to
the ebike configuration and the following parameters:
Wheel Size
Battery Voltage
Sensor
Enter advanced menu
In the power off state, long press the [Power] button for 6s to enter the advanced menu login interface:
The lower right is the password area, click the [+] / [-] button to adjust the value of the flashing bit, click the
[Power] button to switch the adjustment bit or confirm the login. When the password is wrong, the first
digit will flash again, and the value of each digit can be readjusted at this time.
Please contact our sales to get the password.
Wheel Size
In this interface, a prompt of "SIZE" appears at the bottom right, and the wheel size value in the data area
flashes:
Click the [+] / [-] button to adjust, the adjustment range is 1-5

Shenzhen Digitech Co., Ltd. L401 Manual
12
Shenzhen Digitech Co., Ltd. www.riding-evolved.com
Battery Voltage
In this interface, a prompt of "BAT" appears at the bottom right, and the battery voltage value in the data
area flashes:
Click the [+] / [-] button to adjust the value of auto battery voltage, the adjustment range is36V/48V, click
the [Power] button to confirm and go to the next menu interface.
Sensor
In this interface, a prompt of "SNSR" appears at the bottom right, it means SENSOR, and the sensor value in
the data area flashes:
Click the [+] / [-] button to adjust the value of auto sensor, the adjustment range is 1--12, click the [Power]
button to confirm and go to the next menu interface.
Shenzhen Digitech Co., Ltd. L401 Manual
13
Shenzhen Digitech Co., Ltd. www.riding-evolved.com
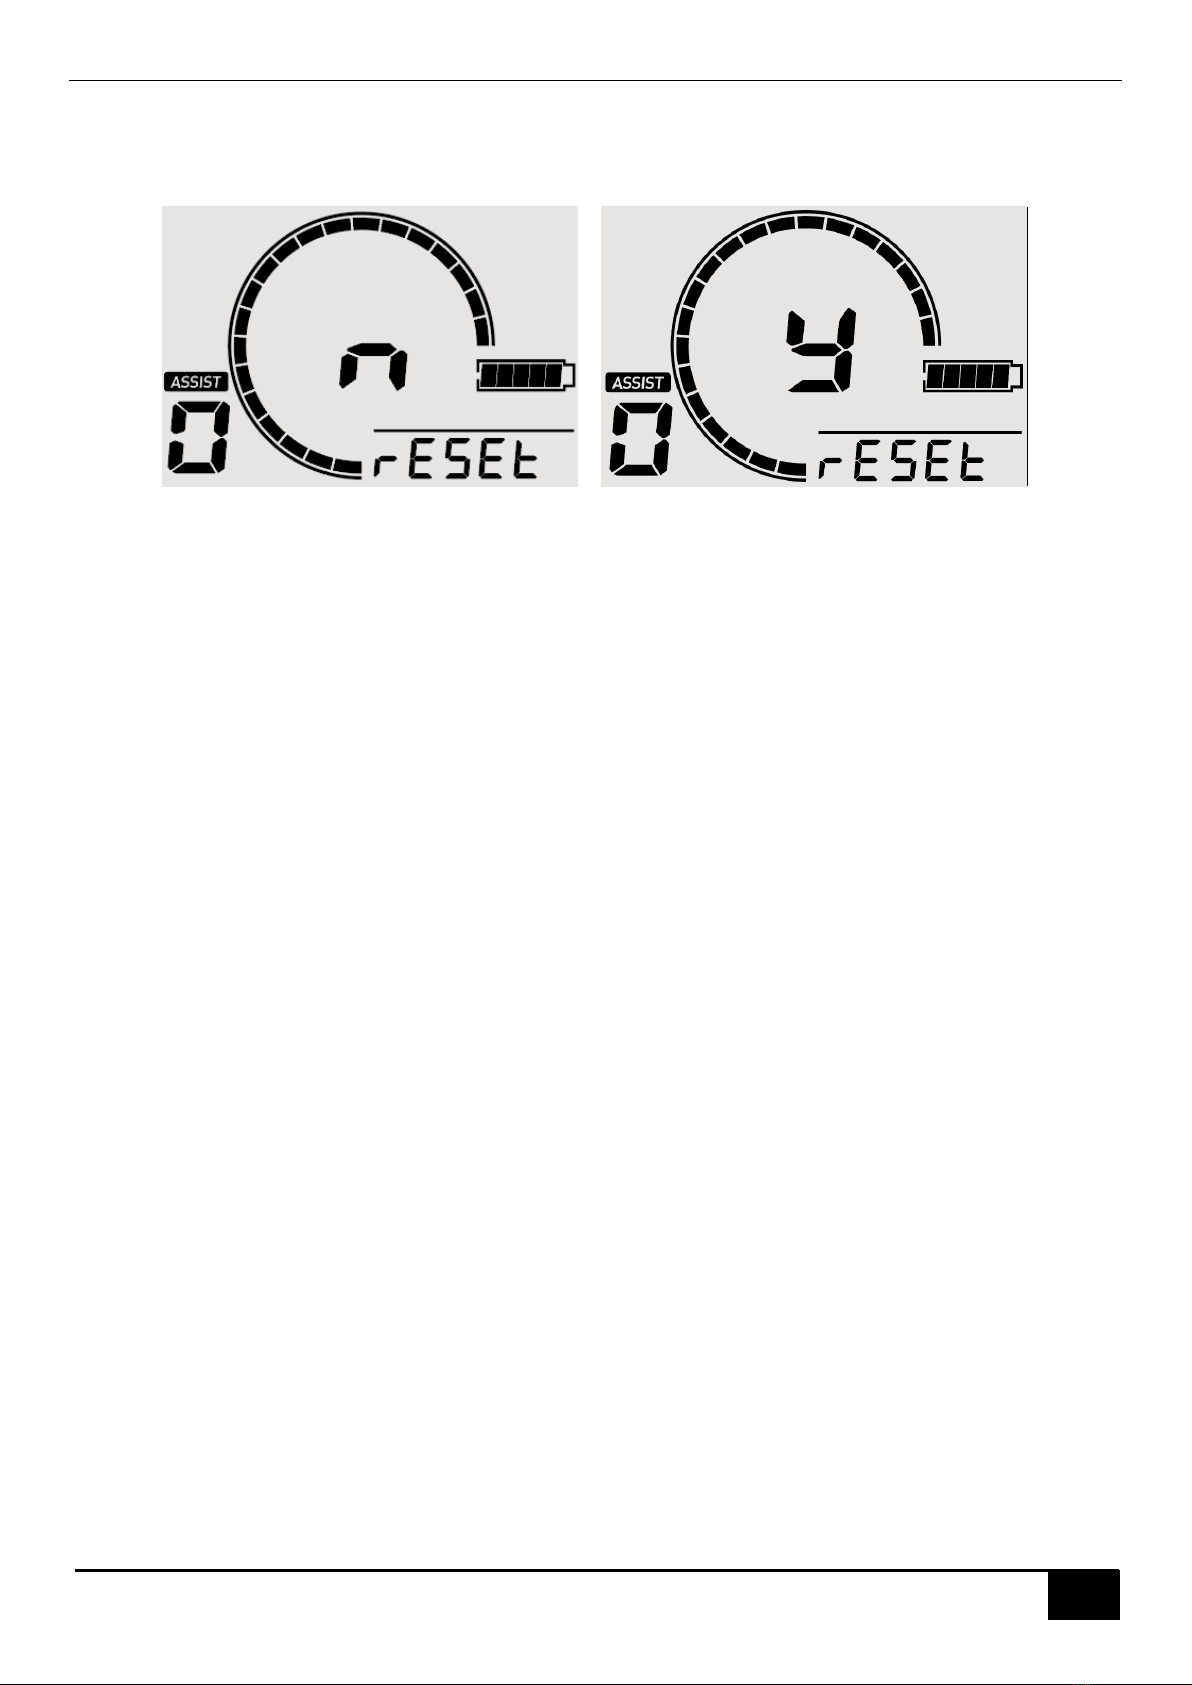
Reset
In this interface, a prompt of "RESET" appears at the bottom right, and the data area flashes to display ‘y‘or
‘n’:
Click the [+] / [-] button to switch ‘y’or ‘n’, click the [Power] button to confirm and go to the next menu
interface.
Eixt Menu
1. When there is no operation for 60s in any interface, it will automatically back to the riding
interface;
2. In any interface, press the [Power] button for 1s to power off.

Shenzhen Digitech Co., Ltd. L401 Manual
14
Shenzhen Digitech Co., Ltd. www.riding-evolved.com
Attentions
1. Be sure to power of first before connecting and disconnecting the cable, or the display will be totally
damaged;
2. When fix the display to the ebike, please ensure that the torque of the screwdriver is about 0.5N.M
(DO NOT EXCEED 0.6N.M), or it will cause damages to the handle;
3. Do not put the display into water;
4. The display can be wiped with wet and soft cloth, but DO NOT use any chemical liquid or spray on
the display;
5. Please abide by local laws and regulations when scrapping, discard or recycle in an environmentally
friendly way, and do not discard the instrument or any accessories as resident waste;
6. The damage and failure of the instrument caused by improper installation or use are not covered by
the after-sale warranty.
7. For more information and support, please contact support@riding-evolved.com.
Table of contents
Other digi-tech Bicycle Accessories manuals


