DIGIBIT aria 2 User manual

aria 2
ANDROID VERSION
User Manual
READ CAREFULLY BEFORE OPERATION


Contents
1. WEEE DIRECTIVE
4
2. SAFETY INSTRUCTIONS
4
3. INTRODUCTION
8
4. INSTALLATION
8
Unpack and install the aria
8
Connecting the aria 2
9
Connecting the aria 2 DAC
10
Connecting the aria LPSU
10
Installing the remote control (iaria)
11
5. HOW TO USE YOUR SYSTEM (BASIC FEATURES)
12
Configuring the initial settings (language)
14
Playing music
16
How to select the music playback zone
16
How to select the music to play
19
Rip your CDs
20
6. SEARCH
22
7. HOW USE YOUR ARIA SERVER (ADVANCED FEATURES)
23
Import music
23
Import from network storage system
25
Import from a USB device
29
How to check that music has been imported
29
Playing music. Selection criteria: A detailed explanation
29
Playing and adding tracks to the queue
30
’Playing Now’ screen: Save and load playlists
31
Editing metadata
34
8. PLAYLIST
35
Automatic playlist
36
Custom Playlist
37
9. DELETE MUSIC AND REMOVE LINKED DEVICES
42
10. BACKUP YOUR MUSIC FILES
45
11. FAQs
46
12. APPENDIX A: How can I play multichannel music with aria
49
13. APPENDIX B: How to automatically add missing covers: PerfectTunes
50
14. APPENDIX C: How to edit the metadata in your library from an external PC
52
15. APPENDIX D: How to see pdf (booklets) in the metadata
54
16. LIMITED WARRANTY
55

DigiBit | www.digibit.es
4
aria | User Manual | EN
1WEEE DIRECTIVE
The aria music server is marked with this
symbol to indicate that, at the end of the
equipment’s life time, you must dispose of it
separately at an appropriate collection point
(local recycling center) and not place it with
normal domestic unsorted waste.
This will benefit the environment for all.
[EU Directive 2002/96/EC and EN50419]
2SAFETY INSTRUCTIONS
There are two categories of Safety Instructions included in this manual:
Product Warnings, (i.e., what must never be done to assure avoiding those hazards that could
cause bodily injury or property damage); and
User Directions (i.e., what must always be done to assure the safe use of your device).

DigiBit | www.digibit.es
5
aria | User Manual | EN
The Safety Instructions contained in this manual have been categorized in accordance with the
seriousness of the potential hazards through the use of Signal Words. Those Signal Words, and their
intended meanings, are as follows:
DANGER: Indicates that a failure to observe the Safety Instructions could result in death or catastrophic
bodily injury.
WARNING: Indicates that a failure to observe the Safety Instructions could result in serious bodily injury.
CAUTION: Indicates that a failure to observe the Safety Instructions could result in minor bodily injury or
property damage.
NOTE: Designates important information that relates to activities and/or conditions that might result in
loss of data and/or damage to your device.
Safe Use and Operation of Your Device
This equipment emits stray RF energy and will interfere with the reception of signals by airborne
electronic navigational devices or medical devices. Do not operate this equipment near any sensitive
medical devices.
WARNING: Use only grounded AC power cords.
DANGER: If DigiBit’s equipment and all other equipment connected to it do not have an AC ground, higher
than usual amount of radio frequency emission could occur.
Always immediately disconnect the power to the equipment in the event the device emits an unusual
odor or sound or generates smoke.
WARNING: Never attempt to disassemble, repair or make any modification to your device. Disassembly,
modification or any attempt at repair could cause bodily injury or property damage, as well as damage to
the device itself. Furthermore, any such attempt at repair without factory authorization may void your
aria warranty. In the unlikely event that warranty repair is ever needed, please contact your retail dealer,
your in-country importer/distributor or DigiBit directly by E-mail at “hello@digibit.es”
WARNING: Your device is not a toy. Never allow children to play with your device. Misuse, rough or
improper handling of your device by children could result in serious bodily injury for any of the
enumerated safety warnings in this manual. In addition, always keep all accessories and components out

DigiBit | www.digibit.es
6
aria | User Manual | EN
of the reach of children as small parts might present a choking hazard. Seek immediate medical attention
if choking occurs or if any small part has been swallowed.
CAUTION: Never raise the sound volume level too high when using your device with earphones. An
excessive sound volume level could cause damage to your hearing.
WARNING: To reduce the risk of fire or electric shock, do not expose the unit to moisture or water.
Do not allow foreign objects to get into the enclosure. If the unit is exposed to moisture or a foreign
object gets into the enclosure, immediately disconnect the power cord from the wall. Take the unit to a
qualified service person for inspection and necessary repairs.
Read all the instructions before connecting or operating the component.
Keep this manual so you can refer to these safety instructions.
Heed all warnings and safety information in these instructions and on the product itself. Follow all
operating instructions.
Do not use this unit near water.
You must allow a minimum 10 cm or 4 inches of unobstructed clearance around the unit. Do not place the
unit on a bed, sofa, rug, or similar surface that could block the ventilation openings. If the unit is placed in
a bookcase or cabinet, there must be ventilation of the cabinet to allow proper cooling. Keep the
component away from radiators, heat registers, stoves, or any other appliance that produces heat.
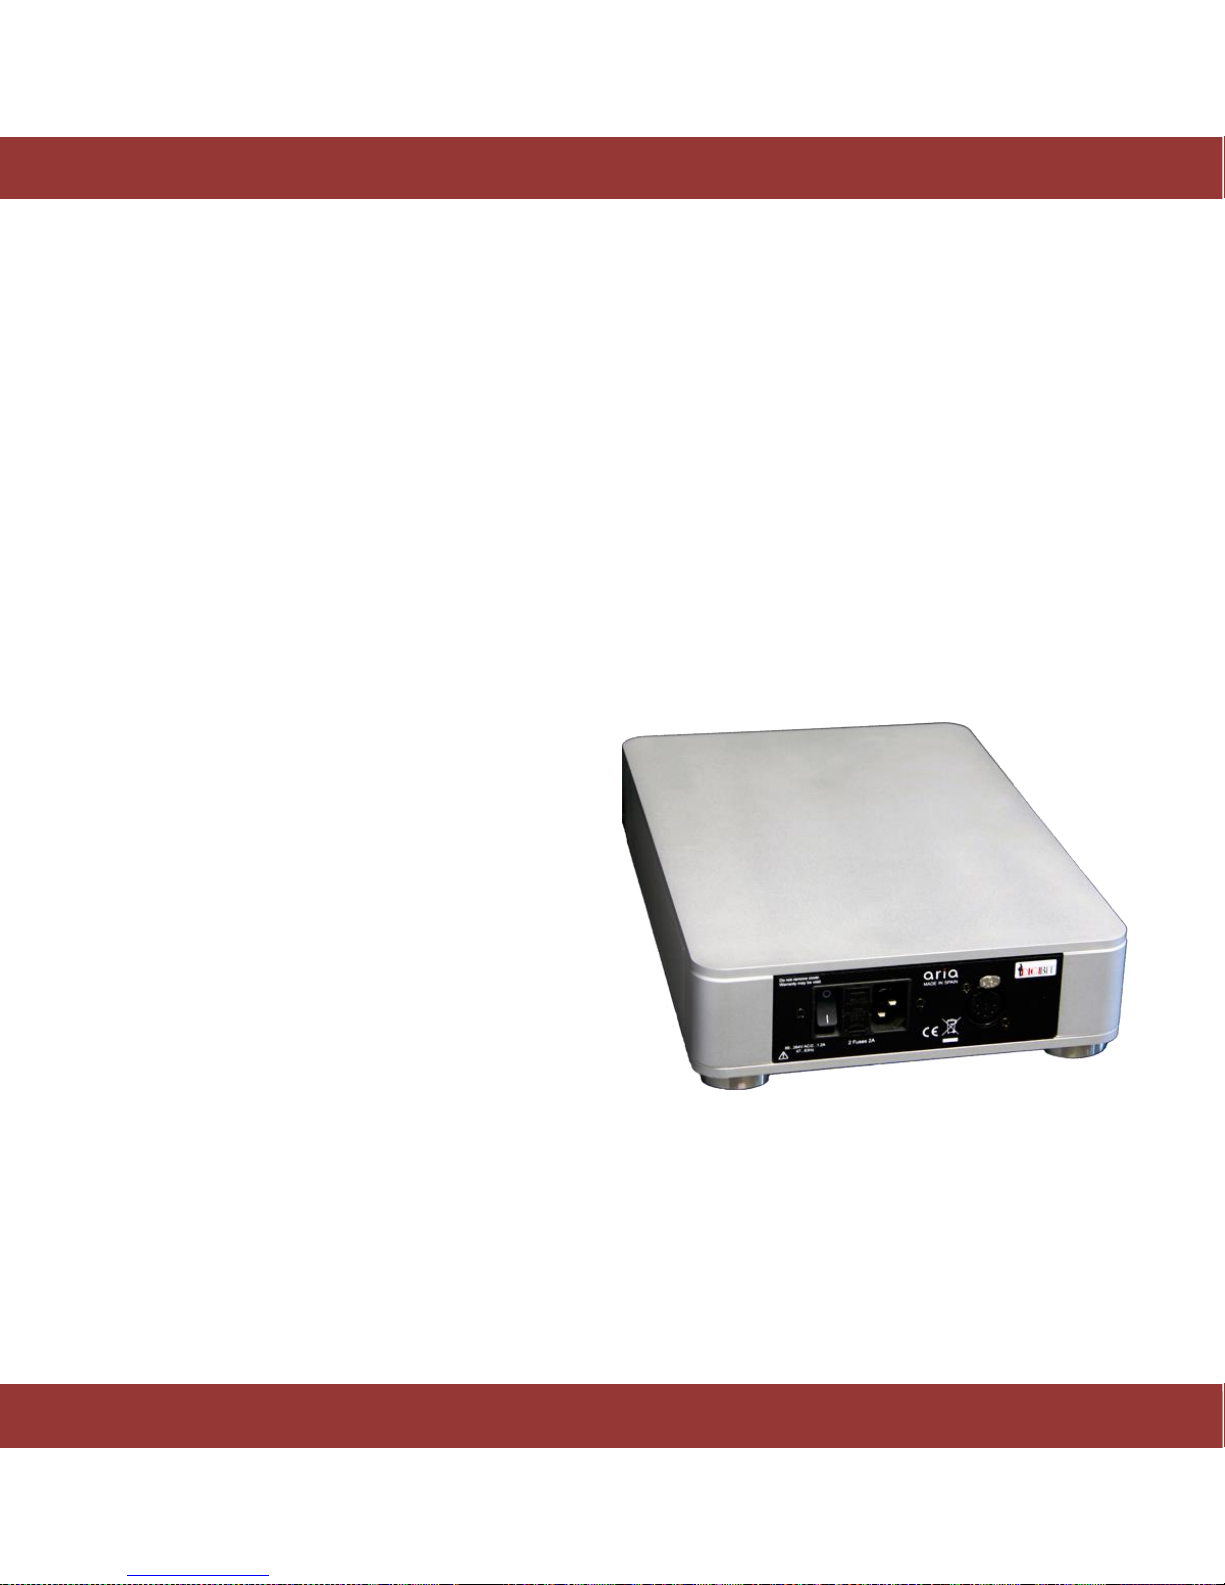
The unit must be connected to a power supply only of the type and voltage specified on the rear panel.
Connect the component to the power outlet only with the supplied power supply cable or an exact
equivalent. Do not modify the supplied cable.
Do not route the power cord where it will be crushed, pinched, bent, exposed to heat, or damaged in any
way. Pay particular attention to the power cord at the plug and where the cord exits the back of the unit.
The power cord should be unplugged from the wall outlet during a lightning storm or if the unit is to be
left unused for a long period of time.
Immediately stop using the component and have it inspected and/or serviced by a qualified service
agency if:

DigiBit | www.digibit.es
7
aria | User Manual | EN
The power supply cord or plug has been damaged.
Objects have fallen or liquid has been spilled into the unit.
The unit has been exposed to rain.
The unit shows signs of improper operation
The unit has been dropped or damaged in any way
Instructions for Use and Security
For your own security and the correct functioning of the system you must follow these instructions:
This device has been exclusively designed to store and reproduce music, do not use it for anything
else.
Place it in a ventilated, dry and secure place, avoiding heat, cold, vibrations, dust, etc.
Do not use this device near water.
Avoid sudden temperature changes that can provoke moisture by condensation.
Do not cover the ventilation slots.
Protect the power wire so it cannot be damaged or stepped on.
Do not force the control buttons or the wires.
Unplug the device if it’s not going to be used for a long period of time.
Unplug the device during electrical storms.
Before moving the system, turn it off and disconnect it.
For cleaning, use dry dusters after you have disconnected the unit from its power connection. Do
not use aerosols or chemical or abrasive products.
Do not try to open the unit and, in case of problems like accidents or malfunction, ask for authorized
specialized help from your retailer or installer.
Any modification done without expressed authorization will cancel the warranty.

DigiBit | www.digibit.es
8
aria | User Manual | EN
3INTRODUCTION
The aria is a music server that uses state-of-the art technology and rich features that will please the most
demanding audiophiles and music lovers. Special attention has been devoted to make it easy-to-use by
non-computer skilled users.
The aria incudes some unique features such as support for unlimited extended metadata fields, (18 fields
by default) compatible with Digibit’s classical music database SonataDB, no moving parts and support for
32bits-384 KHz PCM (DXD) and DSD64/128/256 music files (that ensures the best current audiophile
quality). The aria is compatible with UPnP/DLNA standards that allows streaming to external hi-end and
low-cost streamers enabling multiroom listening experience.
The aria is controlled by a custom free application called iaria running on any device with Android™
operating system. This User Manual is divided in two different sections: Firstly, an introductory section
that explains the first steps to configure the aria server and start playing music. Secondly, an advanced
section that explains how to add music to the server, make a playlist, edit metadata and backup the
stored music.
4INSTALLATION
Unpack and install the aria 2
Unpack the system and keep the box and original packaging, you may need it in the future.
Figure 1. The aria 2

DigiBit | www.digibit.es
9
aria | User Manual | EN
Connecting the aria 2
Figure 2. Rear panel
1. Connect the AC cable, (only for aria2 w/o external linear power supply)
2. Connect a LAN RJ45 cable to the LAN port. An internet connection is required for
ripping and future internet services. The aria is preconfigured for dynamic IP (the most
common). If you have a static IP address, contact your installer.
3. Connect any of the digital audio outputs to your preamplifier or DAC: These are the
available outputs:
a. SPDIF (RCA)
b. AES/EBU (XLR)
c. USB digital audio output: Connect to a DAC using a 2.0 USB cable. You may
need to install some specific drivers for Win 10 on the aria for your DAC
(your dealer can do that for you when installing the aria at home or
remotely)
AC INPUT (110-230 v)

DigiBit | www.digibit.es
10
aria | User Manual | EN
Connecting the aria DAC
1. Connect the AC cable, (only for aria2 w/o external linear power supply)
2. Connect a LAN RJ45 cable to the LAN port. An internet connection is required for
ripping and future internet services. The aria is preconfigured to for dynamic IP (the
most common). If you have a static IP address, contact your installer.
3. Connect an audio output. There are three possibilities:
a. Analog unbalanced output 2 x RCA
b. Analog balanced output 2 x XLR
c. USB digital audio output: Connect to a DAC using a 2.0 USB cable. You may
need to install some specific drivers for Win 10 on the aria for your DAC
(your dealer can do that for you when installing the aria at home or
remotely)
Connecting the aria Linear Power Supply (LPSU)
Installation:
1. Turn off and unplug the aria 2
2. Connect a 5-pole shielded XLR cable (provided)
from the LPSU power supply to the linear power
connector of the aria 2
3. Plug a power supply cable in the power supply
connector of the LPSU
4. Activate LPSU´s switch
5. The aria 2 is ready to use
Figure 3. Rear LPSU
AC INPUT (110-230 v)

DigiBit | www.digibit.es
11
aria | User Manual | EN
Installing the remote control (iaria)
The aria music server is controlled by an Android™app called iaria.
Please, browse to Apple Store. Then search and install iaria. Once installed, you should see this icon in
your Android™desktop:
Figure 4. iaria icon
This manual explains the functionality included in iaria version 1.01. Please, update your iaria app if you
are using a previous version.
Your Android™device must be connected to the same network as your aria music server to be able to
control it. If you connect the aria music server to the same router that is generating your Wi-Fi signal, it
should be enough. If not, please contact your aria music server dealer. He will help you.

DigiBit | www.digibit.es
12
aria | User Manual | EN
On/Off
Eject
5HOW TO USE YOUR SYSTEM (BASIC FEATURES)
In this basic section you will learn how to turn on your system and play back the complimentary tracks
included in the aria.
Once the system is correctly connected, turn on the aria by pushing the power switch on the back to the
‘On’ position and then press the ‘On/Off’ button on the front panel for one second. Please wait around 4
minutes to finish the start process.
Figure 5. The aria ON/OFF button
There are two ways to shut down the aria system:
1. Shutdown the system using the aria´s Android™ application.
2. Press the ‘On/Off’ button for 3 seconds on the front panel and then wait until the blue led turns off
After approximately three minutes, run iaria app in your Android™device. The first screen you see
allows you to select the aria system to control.

DigiBit | www.digibit.es
13
aria | User Manual | EN
Figure 6. iaria server search screen
Please, tap on aria icon and you’ll be connected to your aria system

DigiBit | www.digibit.es
14
aria | User Manual | EN
Configuring the initial settings (language)
The first time you connect to your aria system, you should configue the language to use in the Android™
app. Tap on the ‘menu’ icon and then press the tool wheel in the up left corner to enter the settings
menu. You will see this screen:
Figure 7. iaria settings menu

DigiBit | www.digibit.es
15
aria | User Manual | EN
To change the language, press ‘Language’. This screen shows the available languages
(note: We keep adding more languages).
Figure 8. iaria language menu
The change will take few seconds. The iaria may lose the connection with the aria server. In that case you
should connect to it again. This is a normal behaviour.

DigiBit | www.digibit.es
16
aria | User Manual | EN
Playing music
The aria server is delivered with some complimentary legal tracks from cooperating music labels allowing
you to play music immediately. The music inside the aria server controlled using iaria app is called “the
music library”
Before playing some music, you must select the audio output (we call it ‘zone’). Once you´ve selected the
´zone´ you can choose the music to play:
How to select the music playback zone
Prior to the selection of the music you want to listen to, you need to select the audio output.
The aria server is able to play the music using four different audio outputs called ´zones´
1. SPDIF
2. USB
3. DLNA (Players (renderers) in your network)
4. Your Android™device
5. DAC (in case of aria with DAC)
The ‘zone’can be chosen using the button on the bottom left corner in iaria application:
Figure 9. iaria zones tab

DigiBit | www.digibit.es
17
aria | User Manual | EN
When you tap on this button, you will see three static options as follows:
SPDIF/AES: Plays music through the DAC connected to any of these outputs.
USB: Sends music to your USB DAC or preamp with USB input connected to the aria’s USB audio output
(should you need to install drivers on the aria server, please ask your dealer and/or DAC/Preamp vendor)
This device: This is your Android™device, when you select it, the aria will stream music to your Android™
device and you will be able to listen it using its speakers or headphones.
Figure 10. iaria zones menu
From version 2.15 onwards, aria allows to stream music from the server to your Android™device in
lossless quality. Up to 24 bits-96KHz high resolution streaming.
Pls. go to settings section (nut icon button in the home screen) and make sure that “Transcode streaming
audio function” is switched off. This way music files will be streamed in the same format they were ripped
or imported (lossless or lossy).
If you experience dropouts, your wifi signal may not be strong enough, therefore, you should modify
“Playback and streaming” audio quality function to a lower setting (see next page).

DigiBit | www.digibit.es
18
aria | User Manual | EN
Figure 11. iaria playback and streaming tab
After double checking the transcode function, go back to home page and tap on the “zones” icon on the
bottom left corner and select “This device”. Once selected, you can play any music file and it will
reproduce through your Android™device speakers or through its headphones output (minijack).
In order to listen your hi-res music files through your Android™device you have to install a music player
app that allows that allows hi-res playback connected to an external DAC (pls. ask your dealer about that).

DigiBit | www.digibit.es
19
aria | User Manual | EN
Note: the aria supports AirPlay™ too, so you can stream music from/to any AirPlay compatible device.
Please check the FAQ section to see how to configure it.
Besides these three zones, DLNA renderers in your LAN (local area network) may appear. The aria will
stream music to them just selecting their name in ‘zones’button.
How to select the music to play
The left bar shows the aria’s unique library management tool that sorts the music by our exclusive
extended metadata fields. Classical music is automatically sorted and other genres can have their
extended metadata fields tagged manually.
Figure 12. iaria audio section

DigiBit | www.digibit.es
20
aria | User Manual | EN
Press ‘Album’ button and then select one of the albums that show up on the right side tapping on the
cover art. To play it, just press any track of the album. The aria server will play it immediately.
Rip your CDs
Now that you are able to play the music included in the aria server, it is time to add your own music to it.
There are three ways to do add music to the aria:
-Ripping your CDs.
-Copying music from other devices into the aria.
-Linking music that you have in other devices (NAS, USB HDD, etc...).
The last two options will be explained in the advanced section. Now, we will see how to rip your own CDs
To copy your CDs into the aria’s internal hard drive, make sure the aria is connected to the Internet via
LAN. Then open the tray, place the CD in it and close the tray, aria will read it and will automatically
connect with several supported databases via Internet, to retrieve the available metadata.
Once the CD is inserted and the tray is closed, two things may happen:
The CD-reader starts spinning and the CD remains inside. This means the aria is ripping the CD. After
few minutes the CD is ejected and its music and metadata are successfully stored in the aria’s hard
drive. You can find the ripped CD content in iaria app in: Playlists > Recently imported
(Note: Please allow few minutes to index the library)
The CD is ejected after few seconds: This means the CD has not been ripped.
The reasons for failure in the ripping process can be:
1- The CD is dirty or broken. Clean your CD and try again, BUT before retrying, first rip a different
CD, otherwise aria will rip the faulty CD without metadata.
This manual suits for next models
1
Table of contents
Other DIGIBIT Server manuals