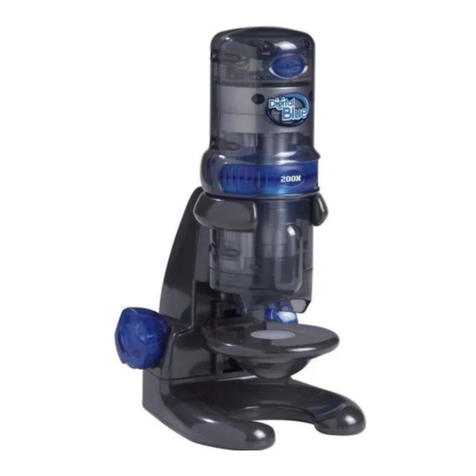
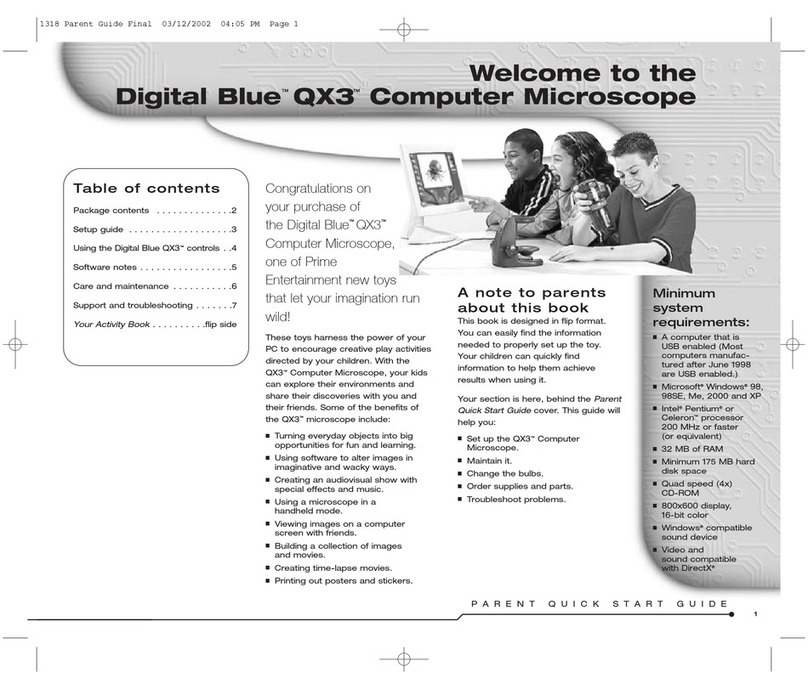
Digital Blue QX3 User manual

1
Welcome to
the microscopic
world. With
your QX3™
microscope, you
are limited only
by your
imagination.
Here are a few
things you can
do to get started.
What you
can do
The QX3™microscope
lets you do many
things you can’t do with
an ordinary microscope:
See tiny things on
your computer.
Take the microscope off its base
stand for magnified viewing.
Combine and create new things
using computer tools.
Build a collection of your
discoveries and creations.
Produce your own movies
and slide shows.
Group
activities
Another great thing about the
QX3™microscope is that you and
your friends can play with it
together. You can even create slide
shows together to amaze your
family and friends.
Fun Stuff To Do
Having fun
What you can do.......................... 1
Group activities ............................ 1
Starting out right, and
seeing the light
Button basics............................... 2
Lighting ........................................ 2
Digital Blue™QX3™controls ......... 3
Getting the goods and
taking a look
Collecting specimens................... 4
Live View ......................................4
Magnifying ................................... 5
Using handheld mode.................. 6
Making movies............................. 7
Making a time lapse movie.......... 8
Hungering for more?
Investigating Main and beyond....10
Using paint tools ..........................11
Adding special effects .................13
Making a slide show....................14
Printing stuff ................................16
Watch out,
Kids!
An adult should set
up and install
hardware and
software. Also,
only an adult
should replace
the light bulbs.
Having fun—letting your imagination soar
Digital Blue™QX3™Computer Microscope
YOUR ACTIVITY BOOK
A50133-001
1318 Activity Guide Final 03/12/2002 04:19 PM Page 1

The QX3™software is easy
and fun to use. Usually, you
just choose an activity from
Main and use the tools.
Button basics
Use the software by clicking on buttons
and using tools. You will see different
buttons on different screens. Audio Help
is always there if you need it.
Getting help
You can get help by clicking
Audio Help. It is in the
upper left-hand corner of the
screen. If you pause over buttons, you
will hear their names and how
to use them.
You may want more information than
Audio Help provides. If so, press F1 for
Online Help.
Quitting the software
To quit, you should click the
Quit button on Main. This
way you can click the
Cancel button to continue playing if you
change your mind about quitting. (The
Cancel button is on the right in the
picture below.)
Lighting
The microscope light turns on
automatically when you enter
Live View, and turns off when you
go to Main.
Lighting controls
You control the lights in Live View with
the Lighting Controls on the screen. Click
the top bulb to use top lighting. Click the
bottom bulb to shine light up through the
sample platform.
Moving the slider up makes your sample
look brighter. Moving it down makes
your sample less bright. Experiment to
find what works best with your samples.
When you remove the microscope
from the base, the top light comes
on automatically.
Using the right light
Use the bottom light to shine up
through transparent and very thin
samples, like feathers, slices of
vegetables, or onion skin.
The light in the detachable
microscope illuminates objects
that are too large or heavy to be
placed on the microscope’s
sample platform.
You can also use the microscope on
the stand to view small solid objects
and living specimens with top lighting.
You can put a bug or a slug in the
containment dish with lid to look at,
take magnified snapshots, or make
short movies.
Adding light
Ordinary household light works fine
with the QX3™microscope. You may
want to place a high-intensity desk
lamp near the microscope to add to
top lighting when using medium or
high magnification.
2
Starting out right, and seeing the light
buttons, lights and controls
Live view
button
Go to Live
View from
Main to view
and add samples to
your collection.
Main
button
Go to
Main, which
lets you choose
fun things to do
with your pictures
and movies.
OK button
Continue your
action. This button
usually appears with
the Cancel button.
Cancel button
Cancel your
action. This button
usually appears
when you enter
special scenes, like
the show editing
window and when
you quit the software.
Quit button
Quit the QX3™
software. You
need to go to Main
to quit.
Basic buttons
Ear’s looking
at you, kid!
1318 Activity Guide Final 03/12/2002 04:19 PM Page 2

3
YOUR ACTIVITY BOOK
Watch out,
Kids!
Before you use
extra light, check
with your parents
to make sure
you’ve got a safe
light. You don’t
want to use a lamp
with a halogen or
other extra-hot bulb
that could cause
bad burns.
buttons, lights and controls — Digital Blue™QX3™controls
1
2
3
HINT: Use low
magnification and top
lighting to look at
things you can’t see
through, like coins, hair
or paper. Medium or
high magnification may
make the image too
big. Or you may need
extra light.
Frunobulax, the fly that
walks on two legs
Digital Blue™QX3™
Controls
Once an adult has
set up the QX3™
microscope,
you can use the
controls to:
Capture pictures
or movies (in
handheld mode).
Change
magnification
level.
Focus.
Capturing
pictures and movies in
handheld mode
In handheld
mode, click the
Capture button to
take a picture.
Click and hold the
button to capture
a movie. If the
Time Lapse
controls are
showing, you can
make a time-
lapse video in
handheld mode, but once you
release the button on the
microscope your time lapse will
stop recording.
Changing magnification
Gemstones at
high magnification
Choose the magnification by rotating the
ring on the microscope until the label for
the desired level faces you. You will hear
a click when the lens is in place. The
levels are approximately 10x, 60x and
200X*. In this activity book, we refer to
magnification as low, medium, or high.
Think of sizes this way:
Low shows an area like the head of
athumbtack.
Medium shows a pinhead.
High shows an area the size of a
pencil tip!
Focusing
Adjust the control knob until the
image is clear. Focusing may take
a little practice. On some
computers, there may be a delay
between your moving the knob
and the image changing on the
screen. Try making small
adjustments and wait for the
screen to catch up.
*These magnification levels are approximate and
have been measured using a 15 in. (38 cm.)
monitor. Actual magnification will vary according
to size of your monitor.
1318 Activity Guide Final 03/12/2002 04:19 PM Page 3

Collecting
specimens
When you’re hunting bugs and
other stuff you want to look at, you
can use the sample jars to hold
them and keep them from getting
away. You can also use film
canisters, small plastic jars with
lids, the plastic boxes nails and
screws come in, and other small
containers you find around the house.
Handling yucky stuff
You can use the tweezers included
with your microscope to pick up bugs
and slugs and worms and muddy junk
and other things you don’t want to
touch with your fingers. What?! You
like to pick up slugs and slimy stuff?
Eeeu-oooo!
Replacing your
accessories
If you lose the tweezers or eyedroppers,
you can find good plastic replacements at a
nearby variety store, toy store, or hobby
shop. Your parents can also order
replacements from Prime Entertainment by
checking in the Parent Quick Start Guide.
Attaching and using the
slide clip
Use the slide clip to make sure your
specimen stays in place on the
microscope stage. Attach the slide clip
to the microscope by placing the slide
clip on
top of the
stage and
snapping
into
place.
Place your
specimen slide on
the stage and slide
it underneath the
clip arm to keep it
still.
Live View
When the QX3™software starts you’re
in Live View. Here you can look at things
you’ve collected and take pictures and
movies to save in your collection.
Above is a picture of some gemstones
at low magnification in Live View.
Live View screen
View samples on the sam-
ple platform or in handheld
mode.
Adjust lighting.
Capture pictures and
movies.
Start a time-lapse movie.
Go to Main.
4
Getting the goods and taking a look
collecting and viewing
Tweezers
1
Sample slide
2
4
Your Digital Blue QX3™Computer Microscope
comes with accessories
to get you started.
Containment dish
5
Eyedropper
3
Sample jar
For more
information
about the controls in
Live View, press F1
for Online Help.
Slide clip 6
1318 Activity Guide Final 03/12/2002 04:19 PM Page 4

Live View buttons
Snapshot button
Click this button to capture
a picture of your sample.
Clicking the Capture button on
the microscope in handheld mode has
the same effect.
Record button
Click this button to record
a movie of your sample.
Holding the Capture button on the
microscope in handheld mode has the
same effect.
Trash can button
Click this button to remove
the last capture, shown in the
preview window, from your collection.
Time lapse button
Click this button to see
the time lapse controls.
5
YOUR ACTIVITY BOOK
Magnifying
collecting and viewing — magnifying
You also have two sample jars with lids
with which to collect live bugs, flowers
and other objects.
Low—quit bugging
me!
At low magnification, you can watch a
bug in the contain-ment dish and see
how it eats and behaves. And when
you’re done watching and recording
the bug, you can release it back where
you found it.
Medium—can you
spare some
change?
Here’s a coin at medium
magnification. Look at
common coins with your
microscope still on the stand
to get a close-up view. Paper
money looks very different
when you see it with your
QX3™microscope.
High—hair ye,
hair ye!
Did you know that various hair colors
and textures look different up close?
There are lots of hair types:
Blond
Brown, brunette, or auburn
Curly
Gray, silver, or white
Red
Processed
or “permed”
Straight
See how many
types of hair
you can get
from your
family and
friends.
Using high
magnification
and bottom lighting, look at the hairs
with your microscope.
You may be
surprised by what you see.
Can you see the differences among the
types of hair? Does dyed hair look
different from natural hair?
Remember
this—
Use top lighting and
low magnification
when looking at
most solid objects.
Use medium and
high magnification
for transparent
things with
bottom lighting.
TIP: We
recommend using
low magnification
when in handheld
mode.
Wrapping paper
Ribbons
Fabric
Dust bunnies
Photographs
Newspaper clippings
Corn silk
Jewelry
Breakfast cereal
That fuzzy stuff
hanging from your
sock!
What else is nearby?
How about:
TIP: Don’t put your specimens directly
on the microscope’s sample platform. Use
one of the containment dishes. If a sample
won’t fit in a containment dish, you can
always look at it in handheld mode.
Your package contains sample slide to help you learn to use
the controls on the Digital Blue QX3™Computer Microscope.
These specimens include bug parts, textile fibers, pollens,
spores and plant sections.
A housefly’s
head
at medium
magnification!
1318 Activity Guide Final 03/12/2002 04:19 PM Page 5

6
Using handheld mode
You can use the
Digital Blue QX3™Computer
Microscope as a handheld
magnifying glass.
Some of the things you can look at are
your nose, toes, and teeth. Your feet.
The hair on your arm. The moon on
your fingernail. The scab on your
knee. Your bellybutton. Your
fingerprints or your ear. Or, a flower.
Use low magnification in handheld
mode. If your hand shakes
too much at medium and high
magnification, the sample won’t
stay in focus, and there may not be
enough light to get a good picture.
If you ever get confused, you can click
the Help button to hear Audio Help.
Can you tell what
this is?
It shows the fins of a Siamese fighting
fish using the microscope in
handheld mode through the
side of a plastic bag.
A computer
component board
Knowing
your limits
The main things to remember when
using your microscope in handheld
mode are:
Know exactly how long the cable is.
If you can reach it, you can capture
it with the microscope.
Lighting automatically shifts to the
top in handheld mode, but you can
still adjust the brightness.
Use low magnification unless you
have plenty of light and can hold
the microscope steady.
Begin with the microscope within
an inch or two of what you are
looking at.
Focus is controlled by moving the
microscope closer to or farther
away from the specimen. Do this
slowly with small movements.
Telling your
left from
your right
In a regular microscope,
images are reversed. The
QX3™microscope uses
the software to flip
the image so
that when you
move a slide on the
sample platform to
the right, the image
on your monitor
will also move to the
right. To have this
software feature work correctly in
handheld mode, remember these
three things:
Hold the microscope with the
magnification number facing you.
Moving the microscope to the right
is the same as moving a slide on
the sample platform to the left.
Moving the microscope toward you
is the same as moving a slide on
the sample platform away from you.
Remember
this—
When using the
microscope in
handheld mode,
don’t pull on the
cord that
connects it to
the computer.
Putting too much
strain on the
cord can lead
to trouble.
Whenever you’re
done using the
microscope in
handheld mode,
put it back in
its cradle.
Always use the
microscope so
that you’ve got
aclear view of
your computer
monitor—so
you can see
what you’re
pointing at.
What big
hairy toes
you have!
collecting and viewing — using handheld mode
1318 Activity Guide Final 03/12/2002 04:19 PM Page 6

7
YOUR ACTIVITY BOOK
Want to look at stuff that
moves? You’ve
come to the right page.
Choosing your
specimens
Your Digital Blue QX3™Computer
Microscope came with two
containment dishes. What can you put
in them? Well, if you’ve got an
aquarium, how about fish food? Live
fish food. You can view and take
movies of tubifex worms and brine
shrimp, which are live fish foods. And,
how about some of that green
stuff growing on the glass? It’s called
algae and is a simple plant.
Even if you don’t have fish to feed, you
can grow brine shrimp just for fun. Or
you can buy some at the pet store.
Once you’ve got some living brine
shrimp, use your eyedropper to suck
up a few of the tiny
shrimp and put
them into a
containment dish
to watch and
record them. Use
low magnification
with bottom light.
TIP: It’s important to prepare your
sample in another room, away from the
computer.
Bring the
sample to the
microscope after it’s
ready. This prevents accidents that
could damage the microscope or
your computer.
Choosing the
magnification
The size of your specimen is important.
To get the most fun out of your QX3™
microscope remember this simple guide:
At low magnification, you’re seeing
an area about the size of a
thumbtack or a pencil eraser.
At medium magnification, you’re
looking at the head of a pin.
At high magnification, you’re viewing
an area the size of a pencil tip.
It takes a lot of patience and a little
good luck to capture a good image of
something that’s moving around.
The higher the magnification, the more
light you need to see clearly and the
more careful you’ll have to be when
focusing and moving your specimen.
This big old fly eye was
captured at medium
magnification with
top light with
brightness set
all the way to
the top.
Beady eyed brine
These brine shrimp were captured
on low magnification with bottom
light. Those black dots are their
beady little eyes!
Recording
indicator
When you’re
capturing a
movie, the bar in the Recording
indicator fills up to show progress, and
a counter under the Record button
shows how long you have been
recording. You can stop recording by
clicking the Stop button. Recording
will stop automatically when the status
bar is full or there is no more available
disk space.
Movie playback
controls
Once you’ve captured a movie,
the Recording indicator changes into
Playback controls. You preview your
movie in the
small window
by clicking the
arrow on the left side of the control. You
can move through your movie one frame
at a time by clicking the forward or
backward arrows on the right side.
To see your movie in a bigger
window, go to Main and use the
Playback controls.
Watch out,
Kids!
Be extra careful
when handling
samples that can
spill on electrical
components. Water
and electricity don’t
mix. Unless you’re
careful, you might
hurt yourself or
others and damage
your microscope
or computer.
Brine shrimp
collecting and viewing — making movies
Making movies
1318 Activity Guide Final 03/12/2002 04:19 PM Page 7

8collecting and viewing — making a time-lapse movie
You set up a time lapse
in Live View. When you click
the Time Lapse button, a
panel opens on the bottom
right side of the screen.
Time lapse
controls
The slider controls the rate
at which snapshots are taken during
time-lapse experiments. As you
move the slider from left to right,
you can see the rate change in the
display under the slider. You can set
it from one picture every second to
one picture every hour.
Once you’ve set your time lapse, you
click on the Record button to start it.
This puts a Minimize button in the
upper right corner of the screen.
A display under the Record button
shows the total time since you
started the time lapse.
The Settings control display now
functions as a countdown timer to
show you the length of time
between snapshots.
The display below the countdown
tracks the total number of
snapshots taken.
Pond scum—
the movie
We made an overnight time lapse of less
than a teaspoon of water from a
garden pond.
We had expected to get a movie of the
little critters zipping around, but we
got an even more interesting surprise!
Here is what our movie looked like
when we began.
2 hours
Condensation clouds
the top cover.
4 hours
Droplets start to form,
but we could still see the
critters in the background.
6 hours
Large droplets make a
pretty and interesting
pattern on the screen.
8 hours
The water drops
continue to grow larger
and the midges cavort!
10 hours
A sparkling waterworld
takes shape with
shadowy blobs behind it.
12 hours
Eventually the screen
looks like giant
glistening blisters!
Handheld
mode
With the Digital
Blue QX3™
Computer
Microscope, you
can even make a
time lapse in
handheld mode!
However, the time
lapse will continue
only while you hold
the Capture button
on the microscope.
When you release
the button, your
time lapse will end,
just as if you
clicked the Stop
Record button on
the screen.
Making a time-lapse movie
1318 Activity Guide Final 03/12/2002 04:19 PM Page 8

Doing it yourself
We’ve shown you what happened
when we made Pond Scum—
The Movie. Now it’s your turn! Follow
these steps to make The Return of
Pond Scum.
While you’re outside playing, look for
standing water with little creatures
swimming and twitching in it.
Put some in your sample jar or other
small container.
Before going to your computer,
put some of the water in a
containment dish.
Carefully place the uncovered
containment dish on the sample
platform.
Set the magnification
to low.
Select bottom lighting.
Focus on the smallest critter
you can see.
Adjust the brightness until the
image is as clear and bright
as possible.
To make the time-lapse movie,
click the Time Lapse button.
Set the timer to take one snapshot
every 30 seconds. Then click Record.
Let it run overnight.
To end the time lapse, click
the Stop button.
Now you’re ready
to watch your movie
Preview your movie in the small
preview window by clicking the
Play button. Or return to Main to
watch it in the larger viewing area.
You can also take the movie
to Special Effects and modify it.
How to do it right
When you’re making movies of things
in water, prevent condensation by
leaving the lid off the
containment dish. This way
you can actually see the
critters moving around.
Other good
subjects
Mix some yeast, sugar and
water and put a few drops in
the containment dish.
A slug or snail. Keep the lid on!
A piece of moldy bread.
A spoiled strawberry or other
piece of rotten fruit.
A sprouting seed.
A worm.
Making the best of
your time
If you do a time-lapse movie that
will record while you’re not at the
computer, make sure nobody
shuts off the computer
during recording.
Use the Paint tools to
make a warning sign.
Print your warning
sign and hang it on
your monitor.
9
YOUR ACTIVITY BOOK
TIP: Record a
short movie in regular
time to see the
difference between this
and Time Lapse mode.
lights.
camera.
action.
Take some
snapshots to
compare to
your time lapse.
collecting and viewing — making a time-lapse movie
1318 Activity Guide Final 03/12/2002 04:20 PM Page 9

Taking a look
at Main
Now that you’ve gathered your
specimens and captured pictures and
movies, let’s explore Main to find out
what else you can do with things
you’ve found in the microscopic world.
From Main you choose the software
features you want to use. You will see
the buttons for Paint, Special Effects,
Show, and Print.
From Main you can:
View the pictures and movies in
your collection.
Go to the Paint screen.
Go to the Special Effects screen.
Go to the Show screen.
Go to the Print screen.
Return to Live View.
Import pictures.
Export pictures and movies.
Delete pictures and movies from
your collection.
Quit the software.
Main buttons
Paint button
Goes to Paint where you can
modify your pictures with cool tools.
Special Effects button
Takes you to a screen where you
can give special effects to pictures
and movies.
Show button
Opens one of the software’s most
popular features where you can
assemble slide shows with music!
Print button
Print your pictures on a single
page, on four pages to make a
poster, or on stickers.
Collection button
View your collection
and choose a picture or movie to
look at or use in one of the main
activity screens.
Trash Can button
Delete pictures and
movies you no longer want. You can
change your mind by clicking the
Cancel button.
Quit button
When you click the Quit
button, you’ll get a chance to change
your mind. You can’t quit from within
Live View. You need to go to Main
to quit.
Collection window
Look through the pictures and movies
in your collection, nine at a time,
by using the forward and back arrows.
Movies have filmstrip borders.
Once you have chosen something to
work on, click OK to return to Main.
You’ll see your selection in the viewing
area. From Main you can:
Go to Paint, Special Effects, Show
or Print with your picture.
Go to Special Effects or Show with
your picture or movie.
IMPORTANT:
Because the Collection window
opens over the top of Main, you
have to click in this window for
Audio Help if you need it.
10
Hungering for more?
TIP: From Main
you can import
still images from
photo CDs and clip art
collections.
You can also
export images
and movies for use
with other programs
on your computer. For
more information
about importing and
exporting, press F1 for
Online Help.
investigating Main and beyond
For more information
about the controls
in Main, press F1
for Online Help.
1318 Activity Guide Final 03/12/2002 04:20 PM Page 10

11
YOUR ACTIVITY BOOK
investigating Main and beyond — using paint tools
Paint lets you change
pictures in your collection
using fun tools.
On Main, click the Paint
button. This brings you to
the Paint screen.
What is a
selection?
A selection is the portion of a picture you
are working with. If you don’t use the
Selection tool to pick an area of
the picture, the entire picture is selected.
What are
paint tools?
Use Paint tools to change your picture.
Click on a tool and its options appear
on the right side of the screen.
Scissors
Select portions of your picture to
work on.
Paint Brush
Control transparency, color, shape
and size of Brush Tip.
Paint Bucket
Fill areas with colors and patterns.
You can control whether the fill is
solid or see-through.
Eyedropper
Grab a color from anywhere on
your picture or the Color Palette
to make it your current color.
Text
Choose the size and style BEFORE
you type your text. Then click the
OK button and move your text
around your picture.
Eraser
The Eraser has four options:
Erase to Original, Erase Area To
Original, Erase to White and Erase
Area to White.
Use Audio Help to hear more
about them.
Stamp
Choose from stamp sets on the
Stamp Palette. Click once on your
picture to place a single random
stamp from the chosen set. Click and
hold while moving the mouse to spray
the stamps everywhere.
What are palettes,
options and other
controls?
Scissors Palette
Select parts of your picture with
the rectangle or free-form Lasso.
When you’ve made your
selection, other tools work only
inside that area. To work
somewhere else, make a new
selection. To work on the whole
picture, click the De-select button.
Brush Tips
Click a Brush Tip shape to use
it with your chosen color and
pattern. Click on the up and
down arrows to see more
shapes and sizes. These tips
can also be used with two of
the erasers.
Color Palette
Click anywhere on one of the
color bars. Your selection is
shown in the Tool Preview. You
can only choose a color or a
pattern, not both. Choose colors
from this palette with the
Eyedropper too.
Patterns
Click a pattern to use it. Click
on the up and down arrows to
see more patterns. Use the
Transparency control to give
your patterns unusual effects.
What can you
do in Paint?
You can:
Combine and
create.
Add words to
your stuff.
Color your
collection.
Stamp fun images.
Distort and terrify.
Have fun!
You can learn
more about
these tools and their
options by using Audio
Help or pressing F1 for
Online Help.
TIP: When you use
the Text tool,
you can modify your
words using the Paint
Brush, Stamp tool,
or Eraser tools.
Using paint tools
1318 Activity Guide Final 03/12/2002 04:20 PM Page 11

Tool Preview
This box appears when
you choose any tool,
except Scissors or Eraser. It shows the
current Color, Pattern, or Stamp set
and how solid each is. The clearer the
checkerboard shows, the more see-
through your tool will be.
Transparency Control
Use this slider to adjust
how solid or see-through
your tool will be. You can
also use this control with
Text and one of the Eraser options.
Stamp Palette
Click the up and down arrows to see
all the stamps you can use. Use the
Transparency slider with stamps to
change how see-through they are. You
can even fill your words with stamps.
Picture Controls
The Flip, Rotate, and Scale controls
work on your current selection. Click
Flip to turn your selection left to right.
Move the green knob around the circle
to rotate your selection. Slide the green
knob on the Scale tool to make your
selection bigger or smaller. If you
don’t have a special area
selected,
these tools
work on
your whole
picture.
Put your friend’s
head on a ladybug
To begin, you need your friend’s
head. From Main, click the
Collection button and find a
picture of your friend. If you
don’t have her picture use
handheld mode to capture a
photograph. Use low
magnification.
Now that her head is in the
large viewing area in Main,
click the Paint button.
Use Scissors with the free-
form Lasso to select your
friend’s face. Click the Copy button
and the face will appear in the
current selection window.
Go to Main and click the
Collection button.
Scroll until you find a ladybug
or other bug you like. Select
it and click the OK button.
Go to Paint. Click the Paste button and
use the mouse to move the face just
where you want it!
12 investigating Main and beyond — using paint tools
Use Handheld
Mode to
get neat
captures from
magazines.
TIP: Use the QX3™
software Import feature to
add photos to your
collection. See Online Help
for details.
1318 Activity Guide Final 03/12/2002 04:20 PM Page 12

13
investigating Main and beyond — adding special effects
You can add cool special
effects to pictures
and movies.
On Main, click Special Effects.
This takes you to a screen
where you can give special effects to
pictures and movies.
What Special
Effects do
Special effects change the way
your picture or movie looks. Here
are some pictures and movie frames
with special effects applied.
Frunobulax,
the make-believe fly
Frunobulax, the fly that walks on two
legs, is pretty interesting…
…but it looks even
more interesting
when you apply the Fly’s
Eye special effect.
And here’s the
same effect
applied
once
again to
the same
picture.
Other
special
effects
There are six other effects, including
Distort, Atomic Glow, and Kaleidoscope.
An eighth button randomly applies two
of the effects to your picture or movie.
Special
Effects
progress
bar
It takes time to apply a
special effect to a
movie. When the first frame is done,
a Progress Bar and Cancel button
appear. If you don’t want to wait, you
can cancel running the effect.
Kaleidoscopic
brine shrimp
Brine shrimp look cool by
themselves but you can make
them even cooler with the
Kaleidoscope special effect.
Here are two frames from our
Kaleidoscopic brine shrimp movie.
You can
hear what
each special effect
does by using
Audio Help.
Select a
picture from your
collection and
try out the
different effects!
YOUR ACTIVITY BOOK
Adding special effects
1318 Activity Guide Final 03/12/2002 04:20 PM Page 13

14 investigating Main and beyond — making a slide show
One of the really fun things
you can do with the Digital
Blue QX3™Computer
Microscope is to make slide
shows for your friends
and family.
On Main, click the Show button.
This brings you to the
Show screen.
Show screen
The viewing area shows the
first slide in the current
show. You can have four
different shows. A black
window means you
have opened a show
with no slides in it
yet. The Play Show
button is also grayed if
there are no slides in
your current show.
Each slide show can include any
combination of up to 50 pictures
and movies. You can even add
music to your shows!
Create show
Click here to bring up the Show
Editing window. The four tabs on the
right side, above the film strip,
represent your four slide shows.
Using the show
editing window
This window acts like the Collection
window. You look through your
collection, nine samples at a time, by
clicking on the forward and back arrows
on the left side of the window.
On the right side is a film strip with
three slides from the current show. The
blank green slide is always the
beginning of the show, and the red
slide is always the end of the show.
This show is currently empty.
The Add button places your
selection in the middle and shifts the
current slide up.
The Remove button always cuts the
middle slide and shifts the slide from
above down.
The Cancel button returns you to
the Show screen without saving any
changes you made to the current
show.
The OK button saves your changes
and returns you to Show with the
first slide in the viewing area.
Making a slide show
1318 Activity Guide Final 03/12/2002 04:20 PM Page 14

15
YOUR ACTIVITY BOOK
investigating Main and beyond — making a slide show
Making your
own slide show
Getting ready to begin
It’s good to have a plan before
putting a slide show together. Plan what
you want to show, and the order you
want to show it in. As you put your show
together, list the pictures, movies and
text you think you need but don’t have in
your collection. You can either make
them first or add them later.
Once you’ve got a plan, click the
Create Show button and choose one of
the tabs. If you don’t have a blank tab,
pick a show you want to get rid of.
Click the Clear All button to empty the
slides out of this show. You will see a
warning, so you can change your mind.
Once you have a blank show,
search through your collection and
add the pictures and movies you
want in your new show.
If you don’t like the order of your
slides, you can:
Start over with a blank show.
Use the Add and Remove buttons
to rearrange your slides.
TIP: When you remove a slide
from a show, you do not delete it
from your collection. But if you
delete a picture or movie from your
collection it will also disappear from
any show it was in.
Making a show:
key steps
Search your collection by clicking
the forward and back arrows below
the Collection window.
Add a slide by clicking the Add
button.
Remove a slide by moving it to the
middle of the film strip and clicking
the Remove button.
Look through the slides in your
show by using the up and down
arrows.
Click the Cancel button to leave the
slide show the way it was.
Click the OK button to return to the
Slide Show window with your
changes.
Click the Clear button to completely
erase the currently selected
slide show.
Playing your show
Once you are satisfied with your
show, click the OK button. You’ll
see the Show screen with
your first slide showing.
Click the Play Show button
and your show will start with
the first picture or movie and play
over and over until you click the
Pause Show button.
Adding music
There are five kinds of music
you can play while watching your
show. To add or change music:
Click the buttons to hear short
examples of the music.
The last button you click before
starting your show picks the music
that will play with your show.
To change the music during your
show, just click another button.
If you don’t want any music, click the
No Music button. It is the top button,
and turns off all music.
You can put
up to 50
items in
your show!
If you have
questions
while making
your slide show,
use Audio Help.
For more detailed
information press F1
for Online Help.
1318 Activity Guide Final 03/12/2002 04:20 PM Page 15

16 investigating Main and beyond — printing stuff
You can print out the pictures
you create in a bunch of
wacky ways! Make a
poster, slap stickers
everywhere, or share your
artwork with friends and
family.
On Main, click the Print button.
This takes you to the Print screen.
Printing options
The Print screen displays a preview of
three ways to print your picture.
Click the button under the upper left
display to print a single page.
You can print a four-page poster by
clicking the button below the biggest
display. You can tape the pages
together and hang them on your door.
To print a sheet of nine stickers, use
special sticker paper and click the
button below the display in the lower
left corner of the screen. (The Parent
Quick Start Guide has information
about how to get this paper. Ask your
parents to order some.)
Fun printing ideas
Here are some suggestions for how to
use your printer to have even more fun
with the pictures you create.
Make your own custom badges and
tee-shirts by using special paper in
your printer.
You can make iron-on shoulder
patches using the sticker format.
Take your print-outs and cut them
up to make collages by pasting
them onto cardboard.
Use the poster option to create
wrapping paper or book covers.
Print a picture to use in découpage,
a craft that uses paper cutouts to
decorate all kinds of surfaces.
Printing stuff
1318 Activity Guide Final 03/12/2002 04:20 PM Page 16
Other manuals for QX3
1
Table of contents
Other Digital Blue Microscope manuals
